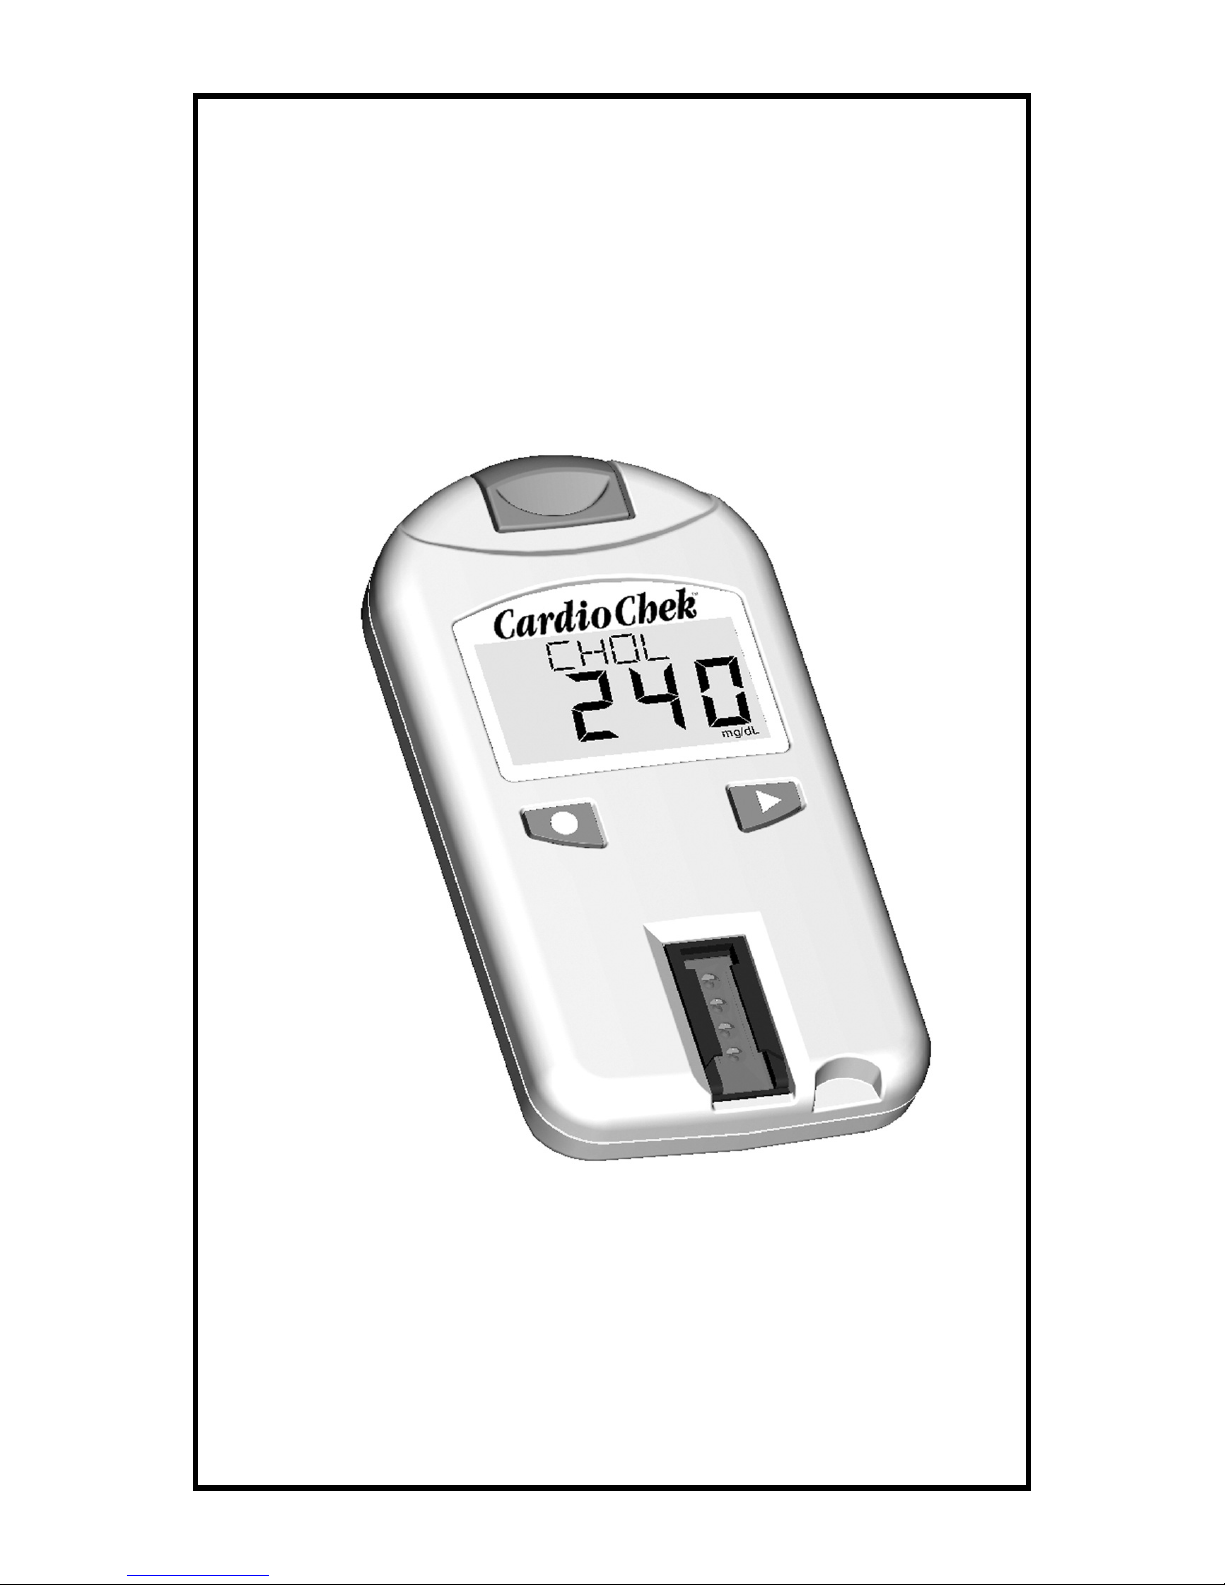
Polymer Technology Systems CardioChek User manual

User Guide
CardioChekTM
Analyzer
Portable Whole Blood Test System
For Professional and Self-Testing Use


3
TABLE OF CONTENTS
The CardioChekTM Analyzer
I. Introduction......................................................................... 5
II. How to Use the User Guide ............................................... 6
III. Introduction to the CardioChek .......................................... 7
Analyzer - CardioChek Test System
MEMo Chip
Test Strip
IV. Set Up................................................................................. 10
Installing Batteries
Setting Language
Setting Time
Setting Date
Setting Units
Setting Sound
V. Checking the System .......................................................... 14
Check Strip
Quality Control
VI. Running a Test .................................................................... 16
Control Testing
Blood Testing
Testing Supplies
Quick Reference
VII. Memory .............................................................................. 22
Recalling Results
Clearing Memory
VIII. Care and Cleaning .............................................................. 23
Storage and Handling
IX. Troubleshooting ................................................................... 24
X. Specifications...................................................................... 26
XI. Contact Information............................................................ 27
Help
Catalog Numbers
XII. Warranty ............................................................................. 28
XIII. Explanation of Symbols ...................................................... 29
XIV. Index ........................................................................... 30


5
I. INTRODUCTION
Thank you for selecting the CardioChekTM Analyzer from Polymer
Technology Systems, Inc. (PTS).
The CardioChek is a fast, portable and accurate whole blood analyzer.
The CardioChek test system includes an analyzer and separately
available PTS PANELS test strips/MEMo Chip. This system is
intended for in vitro diagnostic use to test whole blood. Using this
system, you can quickly measure various blood components from a
small sample size. The CardioChek test system is capable of monitor-
ing for diabetes and other disease states and lipid screening.
The CardioChek uses reflectance photometry for testing. It reads color
changes that occur on a test strip after blood is placed on the test strip.
Before you begin testing, please read this entire User Guide and the test
strip package insert completely. This provides the necessary
information for the use of this system. Please remember to return the
enclosed warranty card to ensure you receive product updates.
Polymer Technology Systems, Inc.
Indianapolis, IN 46268 USA
(317) 870-5610
www.ptspanels.com
For questions or assistance with the CardioChek, call:
Customer Service:
1-877-870-5610 (toll free inside USA)
1-317-870-5610
Fax: 1-317-870-5608
E-mail: [email protected]

6
II. HOW TO USE THE USER GUIDE
This guide includes all the information you need to test properly
using the CardioChekTM Analyzer. For additional information and
specific information for each individual chemistry test, please make
sure you read the test strip package insert included with the test
strips. This guide is arranged in the order a new user would need
the information. Each section can be used separately, after you have
read the entire guide.
If you have questions about this system, please contact our Customer
Service department. Customer Service assistance is available during
the hours of 8:00AM- 5:00 PM Eastern Standard Time, Monday
through Friday. If you need help interpreting your test results, please
make sure that you contact your health care provider.
Customer Service:
Hours: 8:00 AM - 5:00 PM Eastern Standard Time
Monday - Friday
1-877-870-5610 (Toll-free inside USA)
1-317-870-5610
Fax: 1-317-870-5608
E-mail: [email protected]

7
III. INTRODUCTION TO THE
CARDIOCHEK ANALYZER
The CardioChek Test System:
The CardioChek test system consists of three main parts. These
include the analyzer, test strips and a MEMo Chip. When a blood
sample is applied to the test strip, a chemical reaction occurs producing
a color change. The analyzer measures the color reaction and com-
pares the information to the calibration curve stored in the MEMo
Chip. The analyzer converts this color reading into a test result, that
is displayed on the screen.
Display (a)
Display shows test results, messages, time, date, and stored results.
ENTER Button (b)
Press this button to turn the analyzer ON or to accept the current menu
choice.
NEXT Button (c)
Press this button to turn the analyzer ON or to advance to the next menu
option.
Test Strip Insert Opening (d)
The Test Strip Insert Opening is positioned in the lower front of the analyzer.
The strip is inserted here with the raised lines facing up.
MEMo Chip Port (e) For MEMo Chip and connectivity
The MEMo Chip Port is on the top of the analyzer. A lot specific MEMo
Chip is inserted into this port.

8
MEMo Chip (Top and Bottom)
MEMo Chip
The color-coded MEMo
Chip contains the settings for
each test.
The top of the MEMo Chip
has a finger notch. The
bottom has a label with the
test name and lot number.
The MEMo Chip
Each package of test strips contains a color-coded plastic chip with
a connector. This is called the MEMo Chip.
What does the MEMo Chip do?
When inserted with the finger notch facing up in your
CardioChek, the MEMo Chip does the following:
•Tells the analyzer which test(s) to run.
•Contains the calibration curve and the lot number code
for the specific test strip lot.
•Controls test sequences and timing.
•Establishes the measuring range for the test.
The MEMo Chip ensures you have the proper settings for the test strip
you are using.
Guidelines for using the MEMo Chip:
•The MEMo Chip must be in place to run a test.
•Use only the MEMo Chip that is included with each
package of strips. The lot number code on the test strip
vial, MEMo Chip, and analyzer display must match.
•If the expiration date in the MEMo Chip has expired, the
analyzer will display EXPIRED LOT.
•If your MEMo Chip is lost or missing, please call
Customer Service for a replacement.
III. INTRODUCTION TO THE
CARDIOCHEK ANALYZER
Top Bottom

9
III. INTRODUCTION TO THE
CARDIOCHEK ANALYZER
Inserting the MEMo Chip
into the MEMo Chip Port.
The MEMo Chip Port is on the top
center of the analyzer. The MEMo
Chip is inserted into this port with the
finger notch facing up. Push firmly, but
gently, until the MEMo Chip is fully
inserted. Be careful not to bend the
connector.
Test Strip
To test blood on the CardioChek , use test strips specific for each test.
The test strip is inserted into the analyzer, then blood is applied to the
test strip. A chemical reaction occurs producing a color change. The
analyzer measures the color reaction and compares the information to
the calibration curve stored in the MEMo Chip. The analyzer
converts this color reading into a test result, that is displayed on the
screen. Each test strip box contains a package insert that provides
instructions for use. The package insert provides information
specific for each test. Please read the instructions completely
before testing.
Using the MEMo Chip (continued):

10
The CardioChek requires two (2) AAA 1.5 volt alkaline batteries.
Battery Use and Replacement
When to Replace the Batteries:
The analyzer will give you an indication on the display that the batteries
need to be changed. When the display reads CHANGE BATTERY, no
more tests can be run until the batteries are changed. Always replace the
batteries with high quality alkaline batteries. It is recommended to keep a
spare set of batteries on hand. To extend battery life, remove the test strip
as soon as a result is displayed. The time/date and results stored in memory
will not be erased when the batteries are changed.
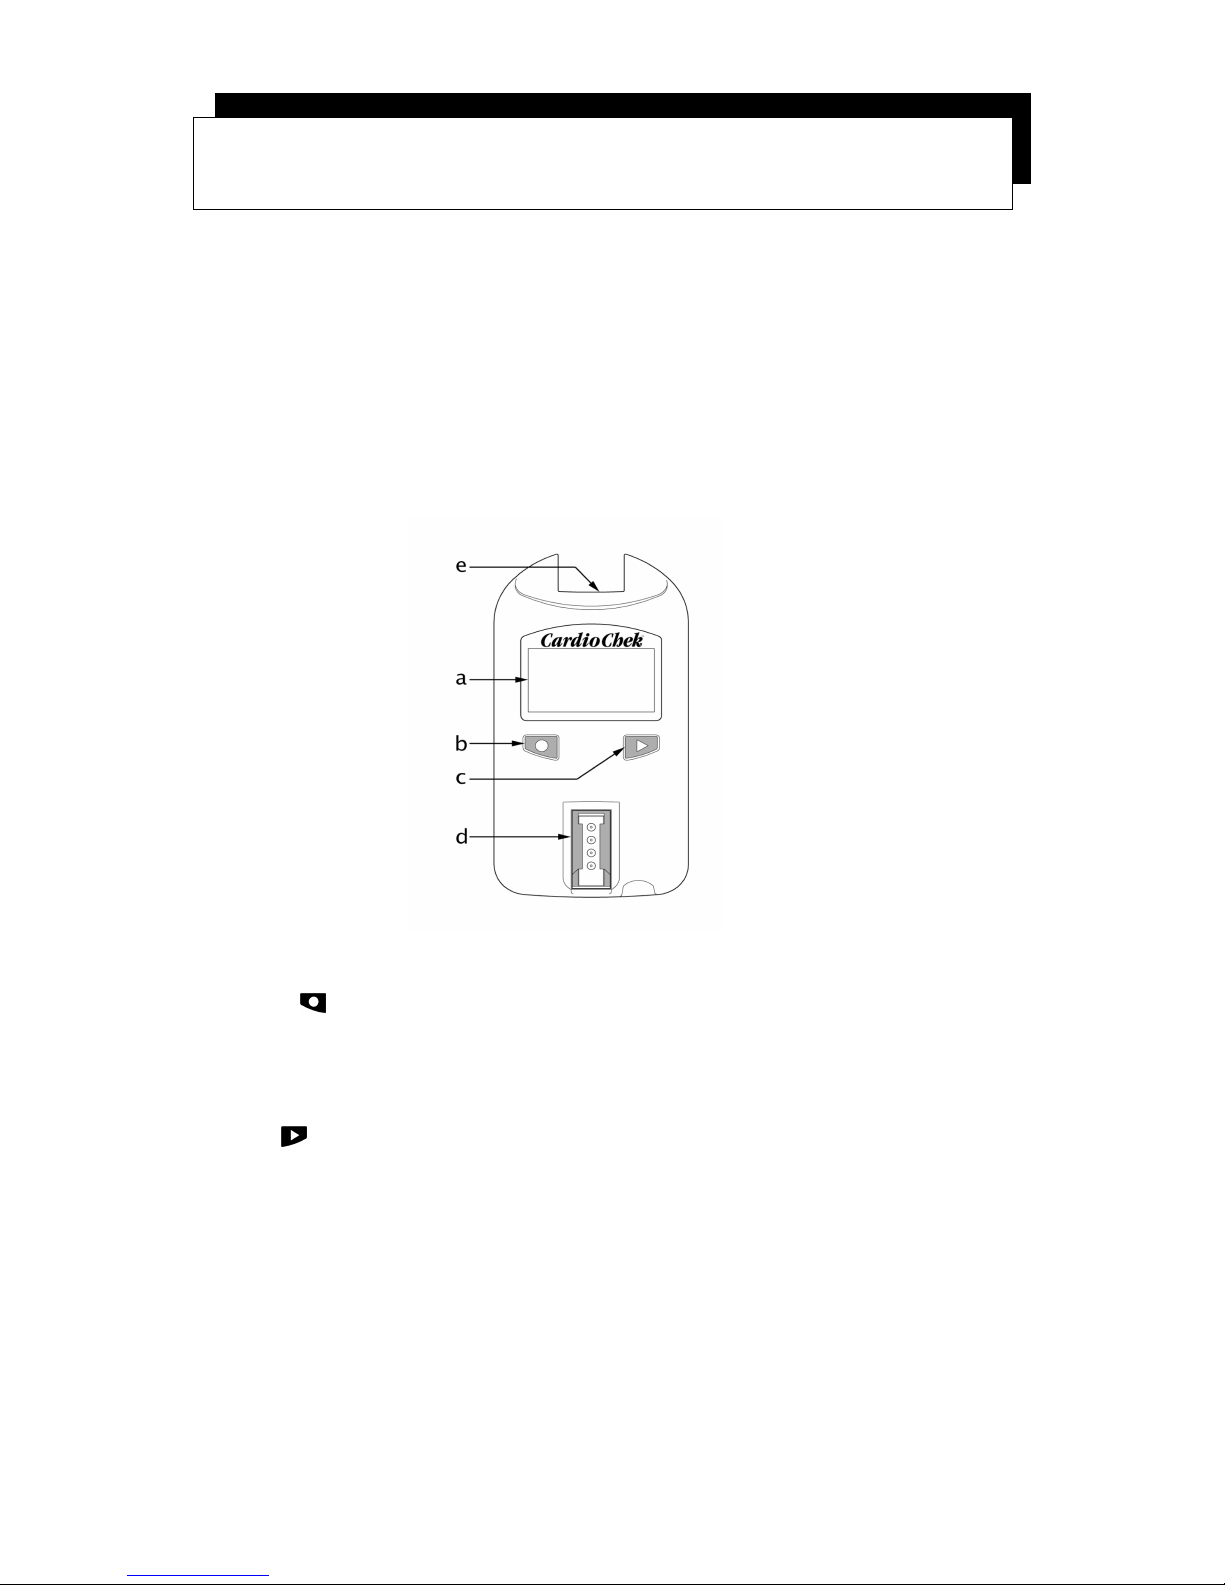
How to Turn theAnalyzer OFF:
The batteries will have a longer life due to the analyzer’s
automatic shut down feature. The analyzer will perform a 10 second
count down and turn OFF after three minutes of idle time (without a test
strip inserted). To stop shut down press either button ( or ). You
can turn the analyzer OFF manually by holding down both buttons
(and )at the same time for three seconds at any of the following
Main Menu headings: RUN TEST, MEMORY, UTILITY, and
USER SET. You can also remove the batteries to turn the analyzer
OFF.
IV. SET UP
WARNING! Dispose of the old batteries properly.
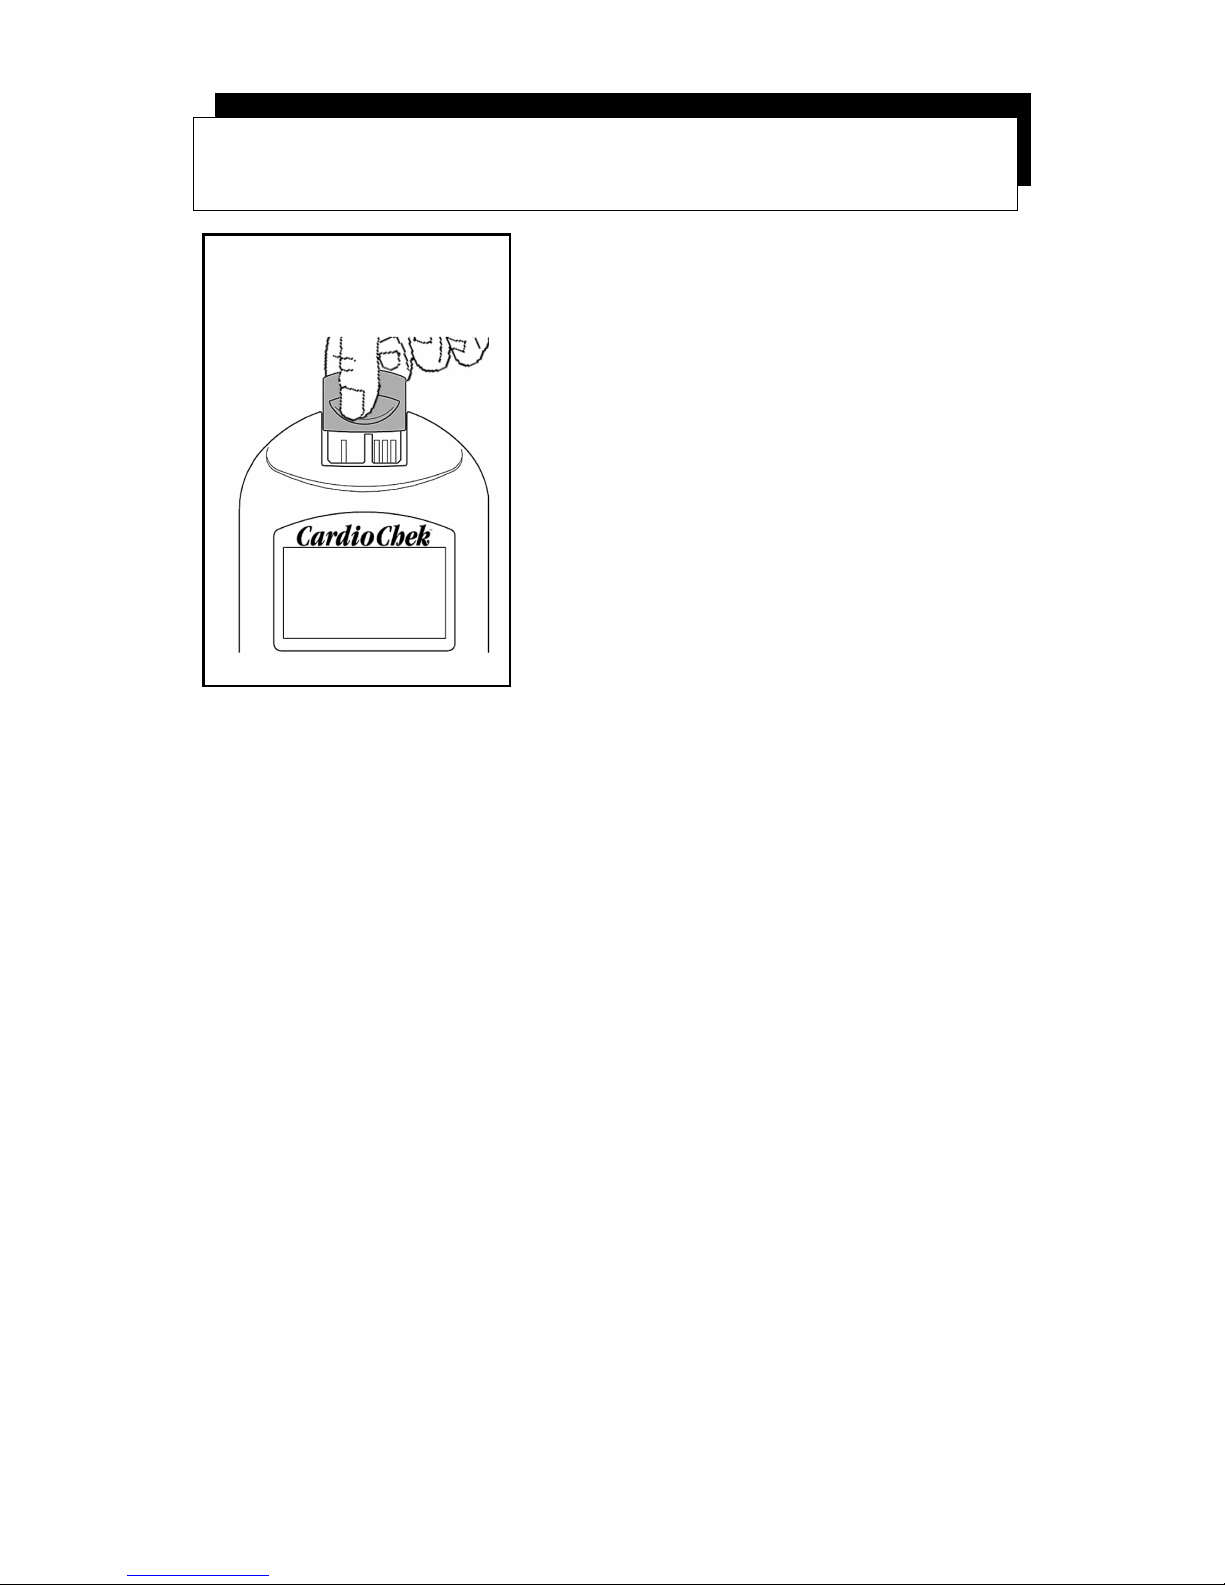
How to Install/Replace the Batteries:
1. Open the battery door on the back of the CardioChek by pressing
and sliding it in the direction of the arrow (toward the MEMo Chip
port).
2. Remove old batteries from the compartment and safely discard.
3. Insert the new batteries into the battery compartment with the
positive (+) terminal facing to the left on the top battery, and to the
right on the bottom battery as marked on the inside compartment.
4. Replace the battery door. To make sure the batteries were installed
correctly, push either one of the two buttons on the front of the
analyzer to turn the CardioChek ON.

11
IV. SET UP
The first time the analyzer is turned on you will be required to set the
language, date, and time.
Setting Language
The language menu consists of the following choices:
English, (ENGLISH, German (DEUTSCH), Italian (ITALIANO),
French (FRANCAIS), Spanish (ESPANOL), and Portuguese
(PORTUGSE).
How to Set the Language:
1. Turn the analyzer ON by pressing either button ( or ).
2. The display will read LANGUAGE. Press . )
3. ENGLISH will be displayed. Press if English is desired.
4. For other languages press until the desired language is displayed,
then press . To set the time proceed to How to Set the Time -
Step 2.
How to Reset the Language:
1. Allow the analyzer to automatically turn OFF or remove the batteries
and replace them.
2. Press and hold down for approximately 5 seconds, during the
analyzer power-up stage until LANGUAGE is displayed.
3. Press . Press to scroll through the language choices.
4. Press to select the language that is displayed. SET TIME will be
displayed.
How to Set the Time:
1. If the analyzer is OFF, press either button ( or ) to turn the
analyzer ON. (If RUN TEST is displayed, go to Step 3.) Wait for
the display to read either INSTALL MEMO CHIP (if a current
MEMo Chip is not installed) or INSERT STRIP (if a current MEMo
Chip is installed). Press . The display will read RUN TEST.
2. Press until USER SET is displayed.
3. Press . Press until SET TIME is displayed.
4. Press and the clock format is displayed: 12/24 HR.

12
IV. SET UP
How to Set the Time continued:
5. Press to alternately display the 12 hour am/pm clock or the 24-
hour clock. Press to accept the displayed clock format. The
display will read HOUR and the numerical hour.
6. Press to increment the hour. NoteAM/PM in the upper right
hand corner of the display.
7. Press to accept the displayed hour. The display will read
MINUTE and the numerical minute.
8. Press to increment the minutes.
9. Press to accept the displayed minute. The display will read SET
TIME. To set the date, proceed to How to Set the Date -
Step 4.
10. To exit, press until EXIT is displayed. Press .
11. Press to return the display to RUN TEST.
How to Set the Date:
1. If RUN TEST is displayed, go to step 3. If the analyzer is OFF,
press either button ( or ) to turn the analyzer ON. Wait for
the display to read INSTALL MEMO CHIP or INSERT STRIP.
2. Press . The display will read RUN TEST.
3. Press until USER SET is displayed. Press .
4. Press until SET DATE is displayed.
5. Press and the numerical month is displayed.
6. Press to increment the month.
7. Press to accept the displayed month. The display will read
DAY and the numerical day of the month.
8. Press to increment the day.
9. Press to accept the displayed day. The display will readYEAR
and the numerical set year.
10. Press to increment the year.
11. Press to accept the displayed year. The display will read SET
DATE. To set the units, proceed to How to Set the Units -
Step 5.
12. Press until EXIT is displayed. Press .
13. Press to return the display to RUN TEST.

13
How to Set the Units:
The CardioChek has been preset to US units (i.e. mg/dL). To change
your units to INTL (International Standard Units) (i.e. mmol/L) follow
the steps listed below:
1. If RUN TEST is displayed, go to step 3. If the analyzer is OFF,
press either button ( or ) to turn the analyzer ON. Wait for
the display to read INSTALL MEMO CHIP or INSERT STRIP.
2. Press . The display will read RUN TEST.
3. Press until USER SET is displayed.
4. Press . The display will read PRINT.
5. Press until UNITS is displayed.
6. Press . The display will read US. If INTL units are desired
press to display INTL.
7. Press to select the units. Display will read UNITS.
8. Press until EXIT is displayed.
9. Press to return display to USER SET.
10. Press to return to RUN TEST.
How to Set the Sound:
The CardioChek P•Asound has been preset to BEEP ON. To turn the
sound on or off please follow the steps listed below:
1. If RUN TEST is displayed, go to step 3. If the analyzer is OFF,
press either button ( or ) to turn the analyzer ON. Wait for the
display to read INSTALL MEMO CHIPor INSERT STRIP.
2. Press . The display will read RUN TEST.
3. Press until USER SET is displayed.
4. Press until SOUND is displayed.
5. Press . The display will read BEEPON or BEEP OFF.
6. Press to select either BEEP OFF or BEEP ON.
7. Press to accept the sound choice displayed.
8. Press until EXIT is displayed.
9. Press to return display to USER SET.
10. Press to return to RUN TEST.
IV. SET UP

14
V. CHECKING THE SYSTEM
Instrument Check Strip
A gray Instrument Check Strip (included in the analyzer carrying case)
can be used to verify proper functioning of the CardioChek’s electronic
and optical systems. The Instrument Check Strip provides a permanent
color standard to be read by the analyzer. When the Check Strip is not
in use, please store it in the analyzer carrying case.
It is recommended that you check your analyzer with the Instrument
Check Strip when:
•You first receive it.
•You drop the analyzer.
•You get a result that is not expected.
How to Use the Instrument Check Strip:
1. Turn the analyzer ON by pressing either button ( or ).
2. When INSTALL MEMO CHIP or RUN TEST is displayed, press
until UTILITY is displayed. Press .
3. Press when CK STRIP is displayed.
4. Insert the Check Strip, ribbed side up, into the Test Strip Insert
Opening when INSERT STRIP is displayed.
5. The analyzer should display PASSED. (If the display reads
FAILED, see the NOTE at end of this section.) Remove the Check
Strip and store it in the analyzer carrying case.
7. Press until EXIT is displayed. Press .
8. Press until RUN TEST is displayed.
9. Press . The analyzer is ready to run tests.
Note: If the analyzer displays FAILED:
1. Clean the CardioChek Test Strip Insert Opening (where the strip is
inserted into the analyzer) with a soft, lint-free, damp cloth. See
the Care and Cleaning section.
2. Inspect the Check Strip to make sure it is not dirty or damaged.
Use the spare Check Strip and repeat.
3. See the Troubleshooting section.

15
Quality Control
Controls (also known as “quality control materials”) are solutions for
which an expected analyte concentration range has been established.
Controls are tested to verify the performance of your entire test system:
CardioChek analyzer, MEMo Chip and test strips. Use quality control
materials provided by PTS.
PTS PANELS HDL Controls REF/Cat. No. 0722
PTS PANELS Multi-Chemistry Controls REF/Cat. No. 0721
Refer to control package insert for control specifications.
Health care professionals testing with this system should follow their
facility’s guidelines and policies regarding the use of quality control
materials.
IMPORTANT: Do not use control solutions that have expired. Check
the expiration date printed on the control bottles and box.
For performing a quality control test, see Section VI. RUNNING A
TEST.
To perform a control test you need:
•CardioChek Analyzer
•PTS PANELSTM Test Strips
•Quality Control Materials
•Quality Control Instructions
•Quality Control Range Card for specific test strip lots.
V. CHECKING THE SYSTEM

16
VI. RUNNING A TEST
Control Testing
Control testing, also known as quality control testing, is used to ensure
all the parts of the test system are working properly together and the
test results are accurate and reliable within the limits of the system.
A quality control material, or control, is a liquid containing an
analyte that is known to be within a certain range. This range is
supplied with the Quality Control Material. Health care
professionals should follow their facility’s policies on when
controls should be tested.
How To Run a Quality Control Test:
1. Install correct MEMo Chip for the lot of strips that you are using.
2. Press either button ( or ) to turn the analyzer ON.
3. Press until the display reads UTILITY. Press .
4. Press until RUN CONTROL is displayed. Press .
5. Insert the test strip into the analyzer. The CardioChek will display
APPLYSAMPLE. This indicates the system is ready for a sample
(control) to be applied.
a. Immediately replace the vial cap, making sure the strip vial
is closed tightly.
6. Remove cap from the Control Material and turn bottle upside
down.
a. CONTROL MUST BE APPLIED TO TEST STRIP
WITHIN 2 MINUTES OF REMOVING THE STRIP
FROM THE VIAL.
7. Hold bottle directly over and perpendicular to the white reaction
area on the test strip.
8. Squeeze bottle, so a small drop of control solution is formed.
9. Allow the drop of control solution to fall onto the test strip. Do not
allow the tip of the bottle to touch the test strip.
10. Replace cap on the Control Material.
11. Results will be displayed within about one to two minutes (for
most tests).
12. Remove and discard test strip.

17
VI. RUNNING A TEST
How To Run a Quality Control Test (continued):
13. Compare control results to the values on the Quality Control
Range Card included with control materials. Make sure to match
the correct test strip lot number(s) and levels depending on the
control material used.
14. The control result will also be stored in the analyzer’s Memory.
15. To exit the control testing menu press twice. RUN CON-
TROL will be displayed.
16. Press until EXIT is displayed. Press .
17. Press until RUN TEST is displayed.
If you have questions or the control range is not listed on the Quality
Control Range Card for the lot of test strips you have, please contact
Customer Service at:
1-877-870-5610 (toll free inside the USA)
1-317-870-5610
Fax:1-317-870-5608
E-mail: [email protected]
If Quality Control Results are not in Range:
1. Make sure you have the correct Quality Control Range Card by
matching the lot numbers and levels with the controls and test strips
you are using.
2. Make sure neither the test strips nor the controls are past the
expiration date printed on the label.
3. Make sure MeMo Chip matches strip lot.
4. Repeat the test again using fresh materials.
5. Call Customer Service for assistance.

18
VI. RUNNING A TEST
Blood Testing
A test strip package insert is included with each box of test strips.
Please read the test strip instructions along with this section of the
User Guide completely and carefully before testing.
Testing Supplies
To perform a blood test you need:
•CardioChek Analyzer
•PTS PANELSTM Test Strips
•Lot specific MEMo Chip
•Lancing device and/or
•Sterile lancet
•Capillary blood collector or pipet
•Gauze or cotton balls
•Alcohol wipe
This analyzer requires whole blood for testing. Do not operate the
analyzer in direct light. See the Care and Cleaning section.
Helpful Hints on Getting a Good Drop of Blood:
1. Warm the fingers to increase blood flow.
2. Let the arm hang down at the person’s side briefly to allow blood
flow to the finger tips.
3. Instruct the patient to wash hands in warm, soapy water. Rinse
well and dry completely. If an alcohol wipe is used, let the finger
air dry before testing.
4. Prepare lancing device according to manufacturer’s instructions.
How to Obtain a Blood Sample:
To perform a fingerstick:
1. Wipe the finger with an alcohol wipe. Be sure the finger is dry.
2. Use a new sterile, disposable lancet to puncture the skin.

19
VI. RUNNING A TEST
3. Stick the finger on the side of the fingertip, instead of the center. See
picture below.
CORRECT WAY TO STICK THE FINGER
4. To get a drop of blood, gently apply pressure to the finger starting at
the end of the finger closest to the hand and moving towards the tip.
Wipe away the first drop of blood with gauze and use the second
blood drop for testing. The blood drop should be hanging down
from the finger to make it easier to collect the sample with a capillary
blood collector or to apply directly to the test strip.
5. Follow the specific instructions found in the test strip package insert
for each test for sample application and volume ranges. Capillary
blood collectors (pipets) ensure the correct volume of blood has
been applied to the test strip.
6. Make sure the test strip is inserted all the way into the Test Strip
Insert Opening.
7. Use the test strip and lancet one time. Discard the used lancet in a
closed puncture resistant container, such as a sharps container. Use
a new lancet every time you test. Do not share or reuse lancets.
Health Care Professionals: If the analyzer is used for testing
several people, be sure to follow the proper infection control
procedures for your facility.
Precaution: Handle and dispose of all materials coming in
contact with blood according to universal precautions and
guidelines.

20
How to Run a Test:
1. Insert correct MEMo Chip for the lot of strips in use.
2. Insert MEMo Chip with finger notch (top) side up, lot number code
facing down.
3. Turn CardioChek ON by pressing either button ( or ).
4. When INSERT STRIPis displayed, insert the strip into the Test
Strip Insert Opening as far as it will go.
5. Obtain a blood drop following the correct technique.
6. WhenAPPLYSAMPLE is displayed, apply blood to the test strip.
Refer to each specific test strip package insert for sample volume
and sample application instructions.
7. Within one to two minutes, the results will be displayed (for most
tests).
8. Remove test strip and discard.
9. The analyzer automatically shuts down after three minutes of idle time
with no test strip inserted.
Note: Do not leave a used test strip in the analyzer Test Strip
Opening. This prevents the analyzer from automatically shutting
down and shortens battery life.
VI. RUNNING A TEST
Other manuals for CardioChek
1
Table of contents
Other Polymer Technology Systems Medical Equipment manuals
Popular Medical Equipment manuals by other brands

Bair Paws
Bair Paws 850 Operator's manual

Zimmer
Zimmer enPulsPro Instructions for use

Otto Bock
Otto Bock 24H1 MyCRO Band Instructions for use

Anthro
Anthro Zido ZGCSSB Assembly instructions

Good Doctors
Good Doctors Dr's Finder NEO user manual

Sunrise Medical
Sunrise Medical Hoyer Installation/User Instructions/Warranty