2. ASSEMBLING
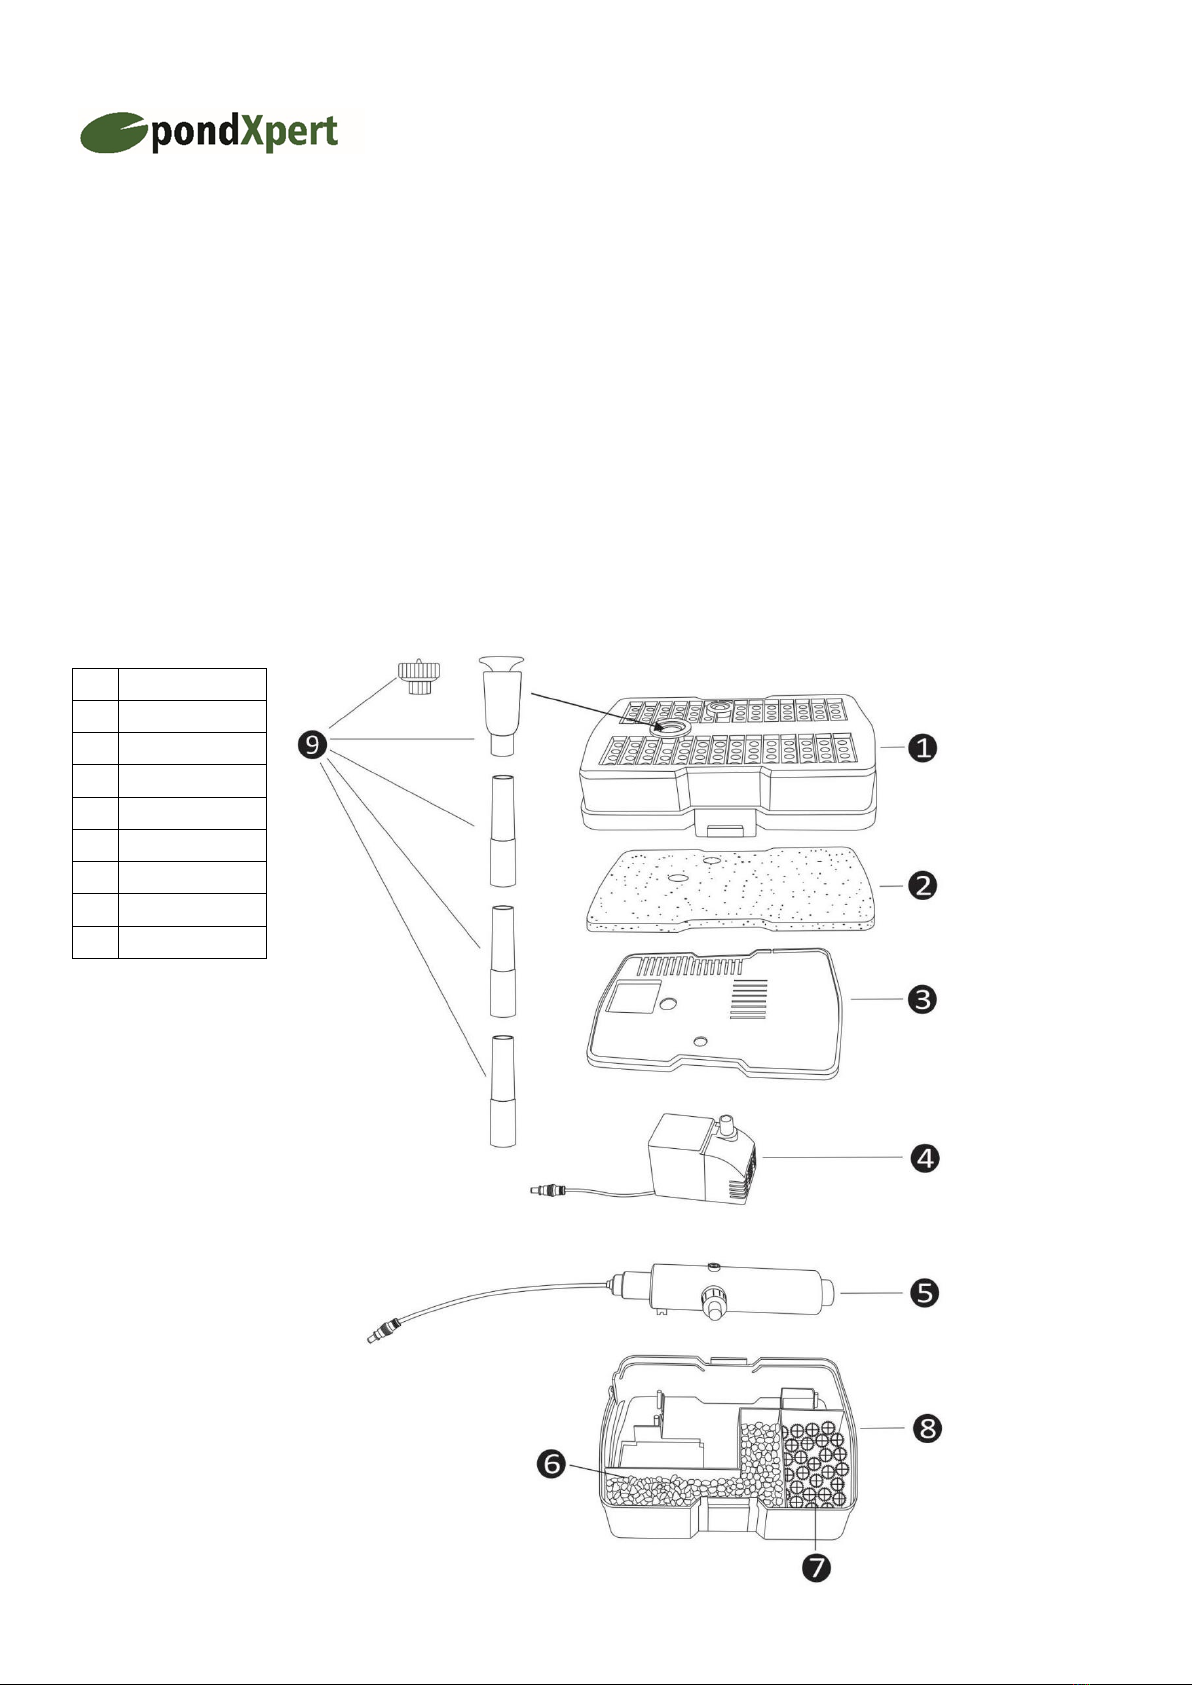
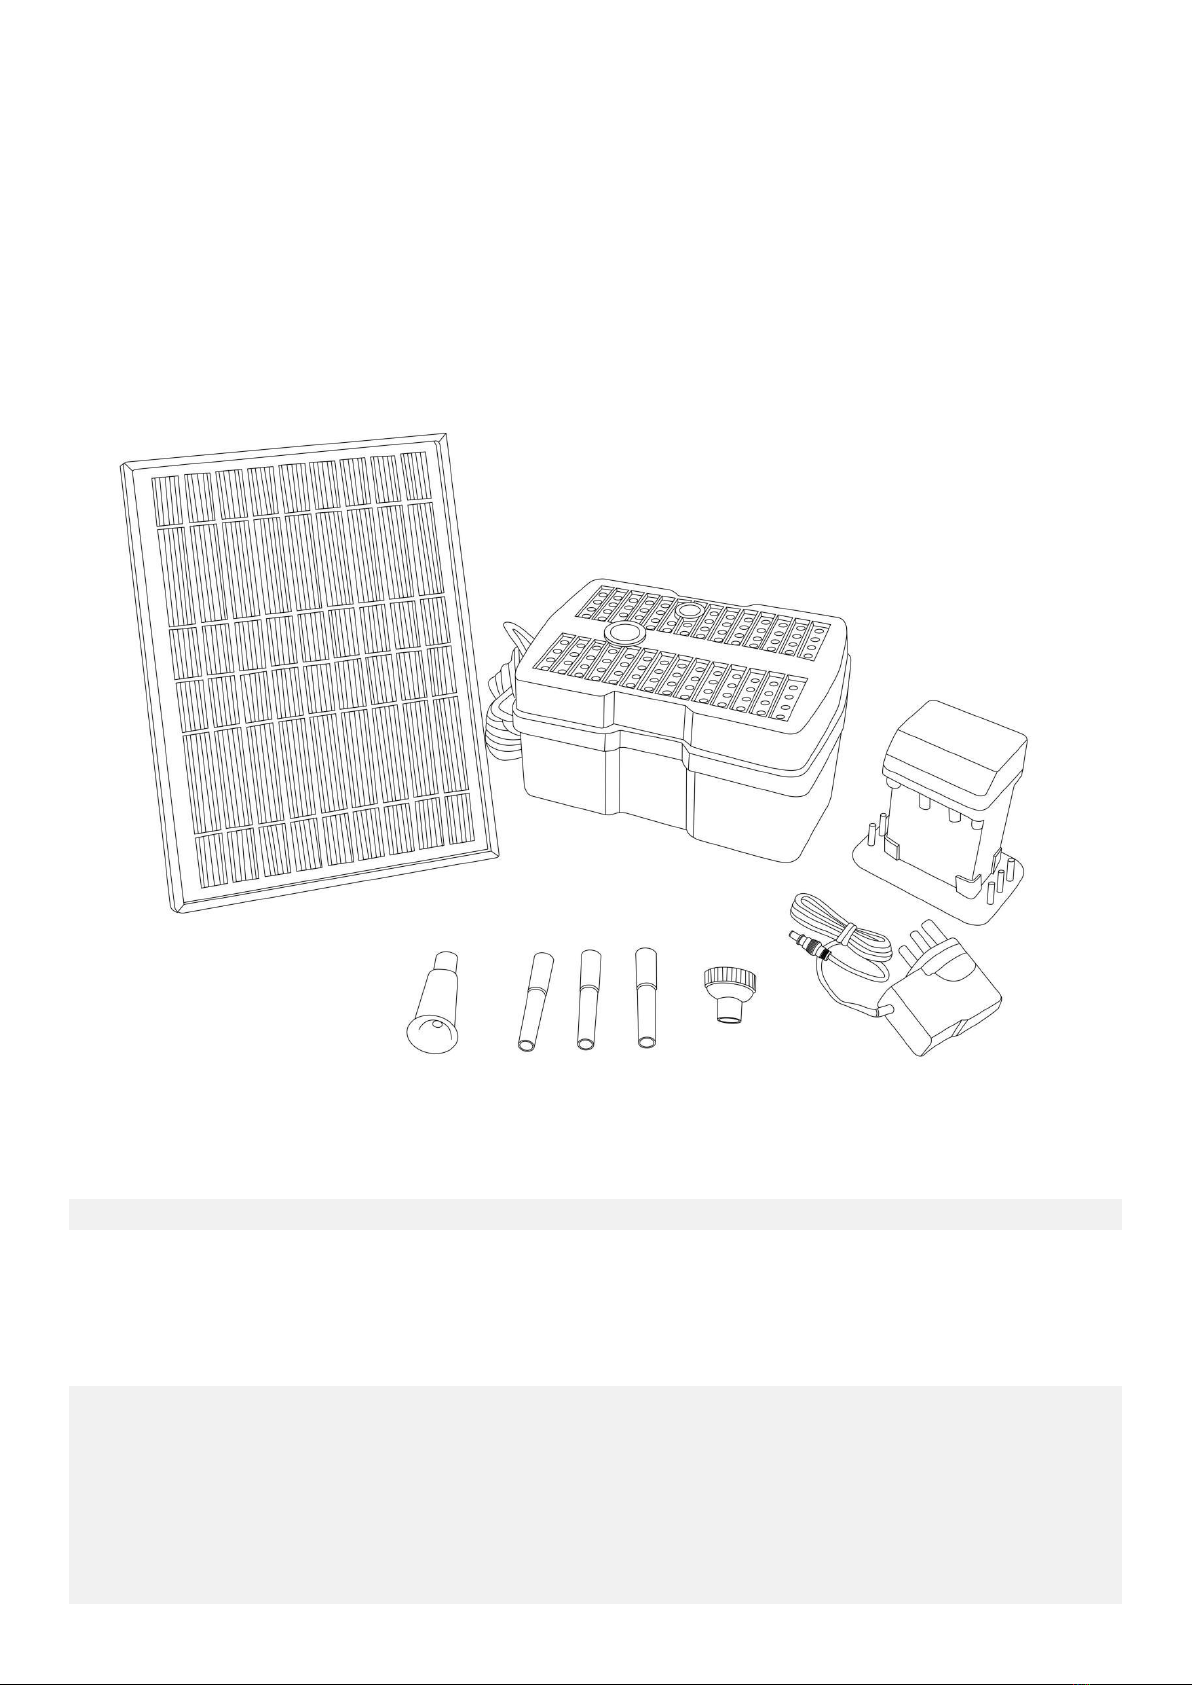
2.1.Unpack all components carefully
2.2.Unroll the pump and UV light cable.
2.3.Connect the solar panel by plug-in the connect cable.
2.4.Connect the pump and UV light to the control hosing.
2.5.Place the filter box underwater and make sure that, it is fully immersed in water.
2.6.Place the control box on the base.
2.7.The charger can use to charge the battery in cloudy day. But make sure to use it indoor.
2.8.The solar pump is now ready to operate.
3. OPERATING INSTRUCTIONS
Once installed, allow the control box to charge at least eight hours in direct sunlight or 8 hours by use of mains
adapter in order to fully charge the battery.
3.1 Press the “on/off” button, turn on/off the system. The “L4” indicator light is on.
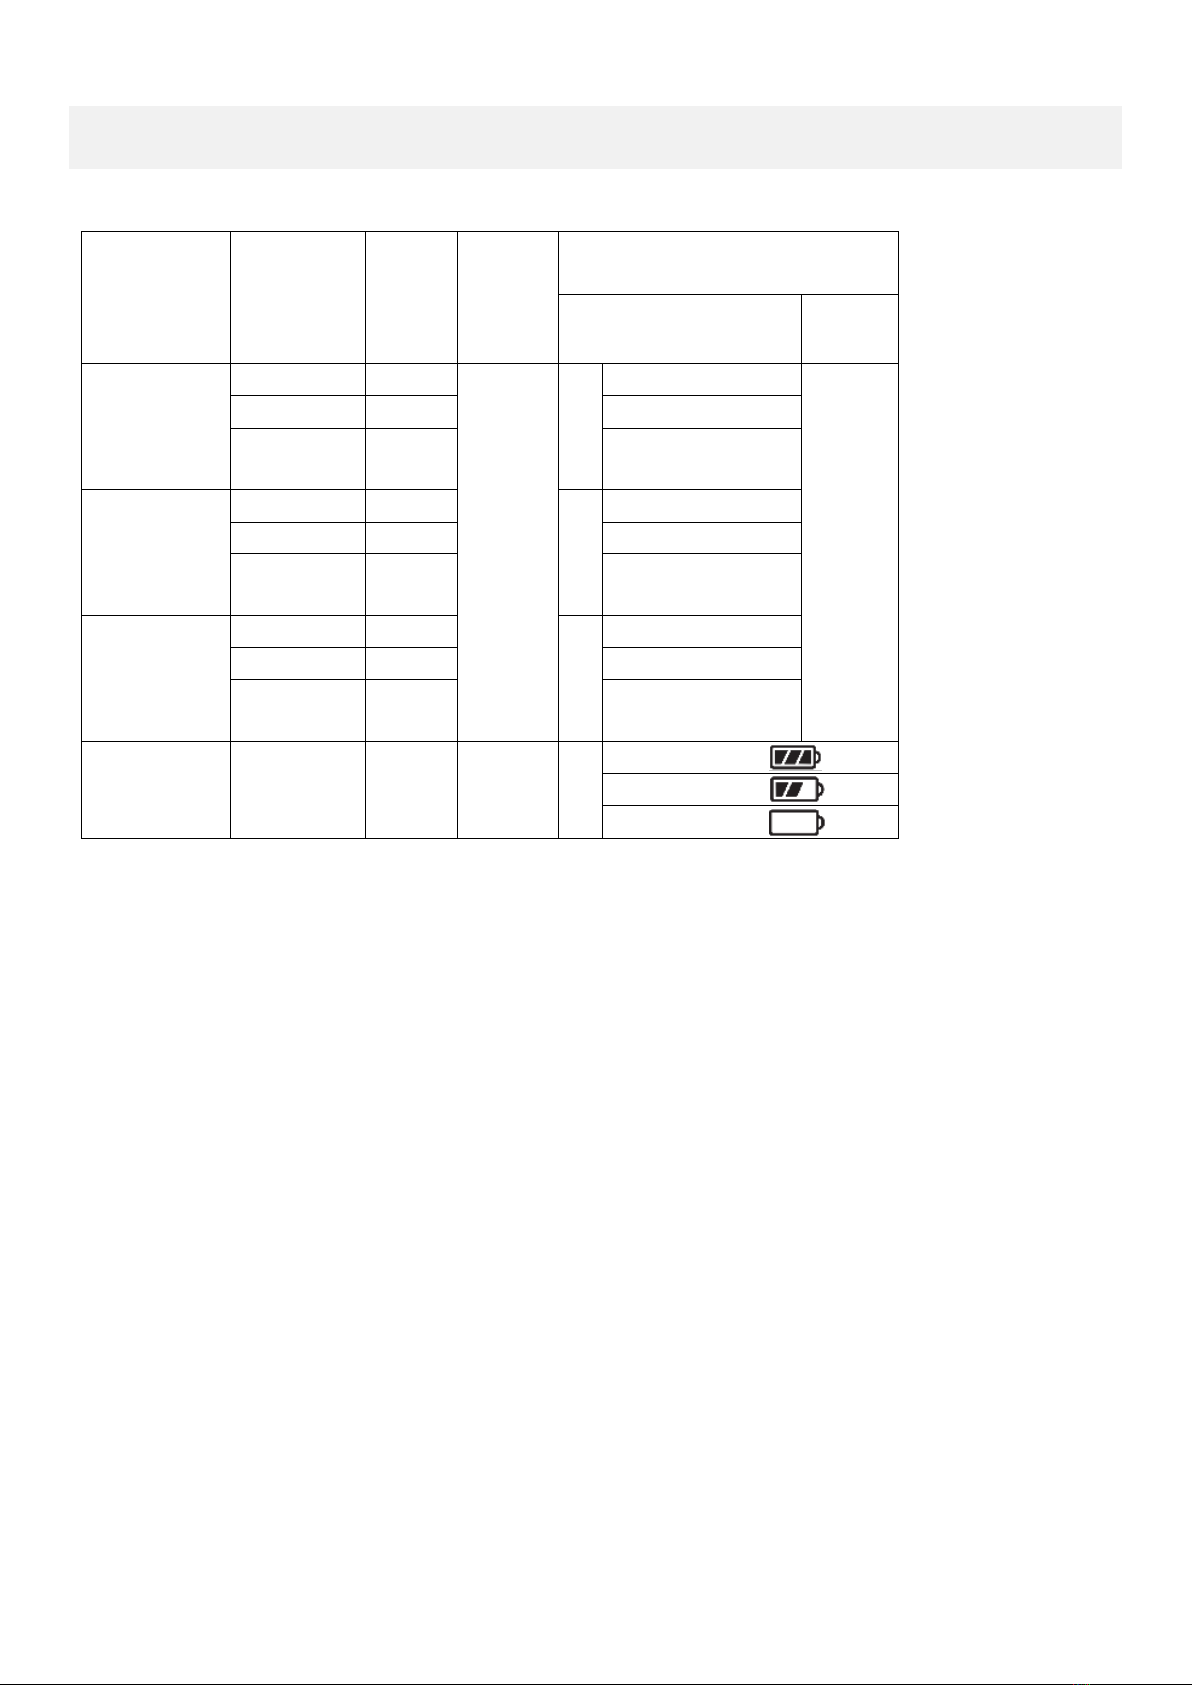
L4 light will show battery four different status as below:
Green blink, means the battery is full, pump can operate around 4 hours max.
Yellow blink, means the battery is half, pump can operate around 1.5-3 hours max.
Red blink. means the battery is almost running out, pump can operate around 0.5-1.5 hours max.
Red blink, means the battery is dying, pump doesn’t operate, need to charge it at once.
3.2 Press the “UV&Pump” button, the “L1” Green indicator light is blinking, pump and UV light will operate
in 2/3/4 hours by pressing 1/2/3 times of this button, then the pump and UV light will shut down, “L1” Green
indicator light turn to solid, the system will store this time in its memory and will turn on every day at set time.
3.3 Press the “UV” button, the “L2” Green indicator light is blinking, UV light will operate in 2/3/4 hours by
pressing 1/2/3 times of this button, then UV light will shut down, “L2” Green indicator light turn to solid, the
system will store this time in its memory and will turn on every day at set time.
3.4 Press the “PUMP” button, the “L3” Green indicator light is blinking, pump will operate in 2/3/4 hours by