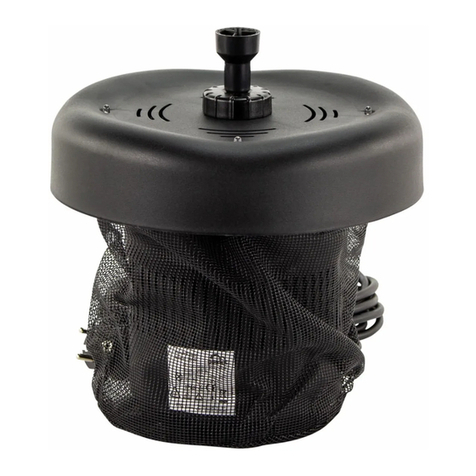
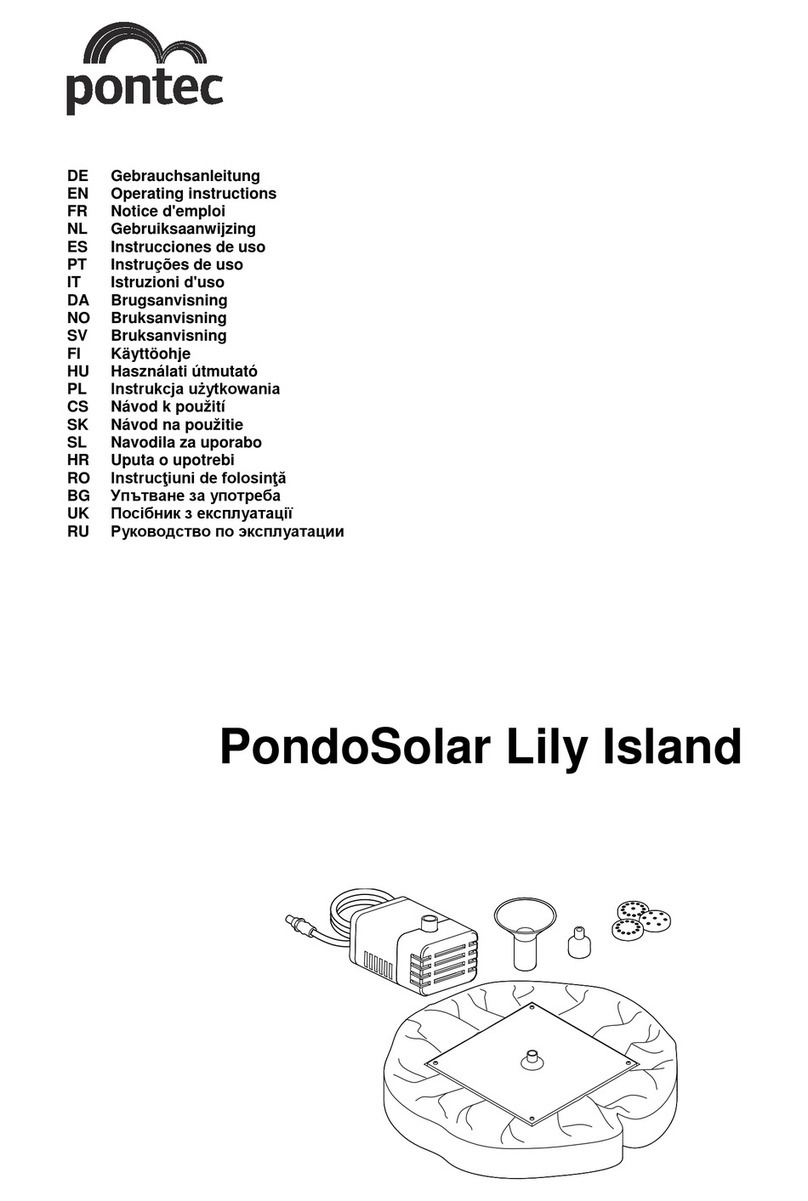
Pontec PondoSolar 250 Plus User manual

DE Gebrauchsanleitung
EN Operating instructions
FR Notice d'emploi
NL Gebruiksaanwijzing
ES Instrucciones de uso
PT Instruções de uso
IT Istruzioni d'uso
DA Brugsanvisning
NO Bruksanvisning
SV Bruksanvisning
FI Käyttöohje
HU Használati útmutató
PL Instrukcja użytkowania
CS Návod k použití
SK Návod na použitie
SL Navodila za uporabo
HR Uputa o upotrebi
RO Instrucţiuni de folosinţă
BG
UK
RU
PondoSolar 250 Plus

- -
2
A
PSO0006
B
PSO0007

- -
3
C
PSO0008
D
PSO0009

- EN -
10
- EN -
Translation of the original Operating Instructions
Information about these operating instructions
You made a good choice with the purchase of this product PondoSolar 250 Plus.
Prior to commissioning the unit, please read the instructions of use carefully and fully familiarise yourself with the unit.
Ensure that all work on and with this unit is only carried out in accordance with these instructions.
Adhere to the safety information for the correct and safe use of the unit.
Keep these instructions in a safe place! Please also hand over the instructions when passing the unit on to a new
owner.
Symbols used in these instructions
GB
The symbols used in this operating manual have the following meanings:
Risk of injury to persons due to dangerous electrical voltage
This symbol indicates an imminent danger, which can lead to death or severe injuries if the appropriate
measures are not taken.
Risk of personal injury caused by a general source of danger
This symbol indicates an imminent danger, which can lead to death or severe injuries if the appropriate
measures are not taken.
Important information for trouble-free operation.
A Reference to one or more figures. In this example: Reference to Fig. A.
→Reference to another section.
Scope of delivery
A
Quantity Description
1 1 Filter housing
2 1 Pump with outlet and 5 m connection cable
3 4 Nozzle extension, max. length 200 mm
4 1 Nozzle holder
5 4 Nozzle attachment
6 1 LED lighting with 5 m connection cable
7 1 Ground stake set
8 1 Solar module with 2 m connection cable
9 1 Battery house with control system
Intended use
PondoSolar 250 Plus, referred to in the following as "unit", may only be used as specified in the following:
•For creating a water fountain in a pond.
•For operation with clean water.
•Operation under observance of the technical data.
The following restrictions apply to the unit:
•Never use the unit to convey fluids other than water.
•Never run the unit without water.
•Do not use for commercial or industrial purposes.
•Do not use in conjunction with chemicals, foodstuff, easily flammable or explosive substances.
•Do not connect to the domestic water supply.

- EN -
11
Safety information
This unit can be used by children from the age of 8 and by persons
with physical, sensory or mental impairments or lack of experience
and knowledge, as long as they are supervised or instructed on how
to use the unit safely and are able to understand the potential haz-
ards. Do not allow children to play with the unit. Do not allow children
to clean or maintain the unit without close supervision.
Safe operation
•Do not carry or pull the unit by its electrical cable.
•Route cables/hoses such that they are protected from damage and do not present a tripping hazard.
•Only use original spare parts and accessories for the unit.
•In the case of electrical units and installations with a rated voltage of U > 12 V AC or U >30 V DC located in the wa-
ter: Isolate the units and installations (switch off and disconnect from the power supply) before reaching into the wa-
ter.
•Only operate the pump together with the supplied solar module and rechargeable battery house.
•Only charge the battery with the supplied solar module.
•Do not allow the pump to run dry.
•Protect the unit from knocks or vibration.
•Clean the unit at least twice a year.
•Keep the connection plugs dry.
Installation and connection
How to proceed:
B
1. Fit the nozzle extension, LED lighting and nozzle attachment together.
2. Fit the nozzle unit onto the pump.
3. Connect the connection cables of the LED lighting and the pump to the battery house.
– Push the plugs completely into the sockets (up to the stop) to ensure that the connection is watertight.
4. Connect the connection cables from the solar module and the battery house together.
– Push the plug completely into the socket (up to the stop) to ensure that the connection is watertight.
5. Assemble the ground stake set and attach it to the solar module.
– Ensure that the connection cable is routed downwards.
6. Fix the pump underwater to a smooth, clean surface using the suction cups.
7. Install the solar module so that it is exposed to direct sunlight.
– Recommendation: Align the solar module to the sun to ensure maximum energy yield.
8. Install the battery house in an upright, elevated position to prevent the ingress of rainwater.

- EN -
12
Start-up
Operation
HILO
water flow
ON
OFF
Mode
Solar
powered
Battery
powered
Charging
Low battery
PSO0010
Description Function
Water flow Control knob for setting the pump flow rate.
– Setting is only possible in the mode “Battery powered“.
To reduce: Turn the control knob towards “LO“.
To increase: Turn the control knob towards “HI“ .
ON For switching on the unit The unit starts in the mode “Solar powered“.
OFF For switching off the unit The unit is deactivated.
Mode For selecting the operating mode Solar powered:
– The pump is powered by the solar module.
– Any surplus power is used for charging the rechargeable
battery.
– The LED lighting is deactivated.
Battery powered:
– The pump and LED lighting are powered by the battery.
– The LED lighting switches on automatically when it is suffi-
ciently dark.
– The unit switches off automatically after approx. 4 hours.
Solar powered Operating mode display LED is lit: Operating mode active.
Battery powered Operating mode display LED is lit: Operating mode active.
Charging Charging process display LED flashing: Battery is being charged.
LED off: Battery is not being charged.
Low battery Battery storage capacity display. LED flashing: Low battery: the battery is discharged beyond
the limit.
– The pump and LED lighting switch off.
– Charge the battery for at least 3 hours.
LED off: The battery is no longer discharged beyond the limit.
– The pump and LED lighting switch on.

- EN -
13
Mode "Battery powered“
In the mode "Battery powered", the pump is immediately activated and the LED lighting switches on when it is suffi-
ciently dark. The switch-on time is programmable.
Programming the switch-on time:
•Switch on the unit and switch from "Solar powered" to "Battery powered".
– The switch-on time is programmed. The unit will now switch to the mode "Battery powered" at the programmed
time every day. The unit switches off after approx. 4 hours. The operating time of the pump and LED lighting de-
pends on the battery capacity.
•To switch on the pump and LED lighting again, deactivate the mode "Battery powered" and activate it again.
Mode "Solar powered"
In the mode "Solar powered", the pump is powered by the solar module. Any surplus power is used for charging the
rechargeable battery. The mode can only be activated manually.
•Activating the mode "Solar powered": Switch on the unit.
– Activate the mode during sunny weather to charge the rechargeable battery.
Remedy of faults
Malfunction Cause Remedy
The pump does not start. No connection to the battery house. – Connect the pump to the battery house.
– Push the plug completely into the socket (up
to the stop).
The solar module is soiled. Clean
The impeller unit is blocked. Clean
The battery capacity is exhausted. Charge the battery for at least 3 hours.
The rechargeable battery is defective. Replace
The solar module is not connected. Connect
The mode "Solar powered" is activated but there is insuf-
ficient sunlight.
Direct sunlight
The mode "Battery powered" is activated but the battery
capacity is exhausted.
Charge the battery for at least 3 hours.
Insufficient or no pump delivery. The filter is clogged. Remove the filter housing, remove and clean
the filter.
The nozzle unit is clogged. Remove and clean the nozzle unit.
The impeller unit is worn. Replace
No connection to the battery house. – Connect the pump to the battery house.
– Push the plug completely into the socket (up
to the stop).
The mode "Solar powered" is activated but there is insuf-
ficient sunlight.
– Align the solar module to the sun.
– Activate the mode "Battery powered".
The mode "Battery powered" is activated but the battery
capacity is exhausted.
Charge the battery for at least 3 hours.
The LED lighting is not on. No connection to the battery house. – Connect the LED lighting to the battery
house.
– Push the plug completely into the socket (up
to the stop).
The LED lighting is soiled. Clean
The LED lighting is defective. Dispose of the LED lighting.
The mode "Battery powered" is not activated. Activate
The mode "Battery powered" is activated but it is not suf-
ficiently dark.
Cover the solar module.
The unit cannot be switched on. The rechargeable battery is defective. Replace
The rechargeable battery is not connected. Correctly fit the cable shoes.
(→Replacing the rechargeable battery)

- EN -
14
Maintenance and cleaning
The unit has to be taken out of the water for cleaning or maintenance.
Cleaning the unit
•Never use aggressive cleaning agents or chemical solutions. These could attack the housing surface or impair the
function.
•Recommended cleaning agent for removing stubborn limescale deposits:
– Vinegar- and chlorine-free household cleaning agent.
How to proceed:
1. Disassemble the unit.
2. Clean the filter housing and impeller unit. (→Replacing the impeller unit)
3. Pull the nozzle unit and LED lighting apart.
4. Clean all parts.
– Use a soft brush as an aid.
– Rinse parts in clean water.
5. Clean the solar module and battery house with a damp cloth and wipe dry.
6. Reassemble the unit in the reverse order.
Replacing impeller unit
How to proceed:
C
1. Pull the filter housing from the pump.
2. Pull the cover off the impeller unit and pull out the impeller unit.
3. Reassemble the unit in the reverse order.
Replacing the rechargeable battery
Avoid short circuits!
Possible consequence: The battery or electronics will be destroyed.
Protective measures:
•Prevent direct contact between the battery connections.
•It is important to ensure that the electronics do not come into contact with the battery connections.
How to proceed:
D
1. Undo the screws, hinge open the front and remove the battery.
2. Remove the cable shoes with rubber sheaths from the battery.
3. Fit the cable shoes to the new rechargeable battery.
– Ensure correct polarity (red = "+", black = "–").
– Push rubber sheaths over the cable shoes.
4. Reassemble the unit in the reverse order.
– Ensure that the connection cable is correctly located in the recess of the housing.
Wear parts
The rechargeable battery and the impeller unit are wear parts and are excluded from the warranty.

- EN -
15
Storage/Over-wintering
Observe the permissible operating temperature range. (→Technical data)
•If the limit values are exceeded or gone below, it is necessary to remove the unit. Clean the unit thoroughly and
check it for damage.
•Store the unit in a dry and frost-free place.
•Store the pump submerged and in a frost-free environment.
Disposal
Do not dispose of this unit with domestic waste! For disposal purposes, please use the return system provided.
Disable the unit beforehand by cutting off the cables.
Disposal of batteries
Do not dispose of batteries with the household waste. Only dispose of dead batteries by using the return system provi-
ded for this purpose.
Disposal of batteries within the European Union
As a user, you are obligated by law to return used batteries. Return is free of charge.
Either dispose of batteries through the public return and recycling systems of your municipality or community, or return
the batteries to the place where they were bought.
Batteries containing harmful substances bear the following signs:
Pb = Battery contains lead
Cd = Battery contains cadmium
Hg = Battery contains mercury
Li = Battery contains lithium
Guarantee conditions
PfG grants a 2 year guarantee from the date of sale on proven material and manufacturing faults. Prerequisite for our
guarantee is the presentation of the purchase receipt. Our guarantee will become null and void if the unit is misused,
electrically or mechanically damaged by inappropriate use and improper repair by non-authorised workshops. Repairs
are reserved for workshops authorised by PfG or by PfG itself. In the case of warranty claims, please return the defec-
tive unit or part freight paid to PfG together with a description of the fault and the purchase receipt. PfG reserves the
right to invoice repair costs. PfG is not liable for transport damage. Any damage must be claimed against the carrier.
Further claims of whatever type, especially consequential damage, are excluded. This guarantee does not affect the
final customer’s claims against the dealer.

130
DE Abmessungen Bemessungsspannung Max. Leistung Förderleistung Wassersäule Tauchtiefe Wassertemperatur Umgebungstemperatur
EN Dimensions Rated voltage Max. power Max. flow rate Max. head
height
Immersion depth Water tempera-ture Ambient temperature
FR Dimensions Tension de mesure Rendement max. Capacité de refou-le-
ment
Colonne d'eau Profondeur d'immer-
sion
Température de l’eau Température am-biante
NL Afmetingen Dimensioneringsspanning Max. capaciteit Pompcapaciteit Water-kolom Dompeldiepte Watertemperatuur Omgevingstempera-tuur
ES Dimensiones Tensión asignad Potencia máxima Capacidad de ele-va-
ción
Columna de
agua
Profundidad dein-
mersión
Temperatura del agua Temperatura ambiente
PT Dimensões Voltagem considerada Potência máx. Débito Coluna de água Profundidade de
imersão
Temperatura da água Temperatura ambi-ente
IT Dimensioni Tensione di taratura Potenza max. Portata Colonna d'ac-
qua
Profondità d'im-mer-
sione
Temperatura dell'acqua Temperatura ambiente
D
A
Dimensioner Nominel spænding Maks. effekt Pumpekapacitet Vandsøjle Neddyknings-dybde Vandtemperaturen Omgivelsestemperatur
NO Mål Merkespenning Maks. effekt Kapasitet Vannsøyle Nedsenknings-dybde Vanntemperatur Omgivelsestemperatur
S
V
Mått övre märkspänning Max. effekt Matningsprestanda Vatten-pelare Doppningsdjup Vattentemperatur Omgivnings-temperatur
FI Mitat mitoitusjännite Maksimiteho Pumpun teho Vesipatsas Upotussyvyys Veden lämpötila Ympäristön lämpötila
HU Méretek mért feszültség Max. teljesítmény Szállítási teljesítmény Vízoszlop Merülési mélység VízhĪmérséklet Környezeti hĪmérséklet
PL Wymiary napięcie znamionowe Moc maks. Wydajnoİć pompo-wa-
nia
Słup wody Głębokoİć za-nurze-
nia
Temperatura wody Temperatura otoczenia
CS Rozměry domezovací napětí Max. výkon Dopravní výkon Vodní sloupec Hloubka ponoĮení Teplota vody Teplota prostĮedí
S
K
Rozmery dimenzačné napätie Max. výkon Dopravný výkon Vodný stĺpec Hĺbka ponorenia Teplota vody Teplota okolitého prostredia
SL Dimenzije dimenzionirana nape-tost Maks. zmogljivost Črpalna zmogljivost Vodni ste-ber Globina potap-ljanja Temperatura vode emperatura okolice
HR Dimenzije gornji nazivni napon Maks. snaga Protočni kapacitet Vodeni stup Dubina uranjanja Temperatura vode Temperatura okoline
RO Dimensiuni tensiunea măsuratăPuterea max. Debit de pompare Coloanăde apăAdâncimea de imersie Temperatura apei Temperatura ambiantă
BG .
U
K
.
RU .
45 × 47 × 47 mm 6 - 9 V DC ≤250 l/h ≤1.2 m ≤0.6 m + 4 … + 35 °C
206 × 305 × 2 mm 6 V 3 W
+ 4 … + 35 °C
105 × 155 × 102
mm 6 V DC / 4 Ah

131
DE Staubdicht. Wasserdicht bis 0.6 m Tiefe Nicht mit normalem Hausmüll entsorgen! Achtung!
Lesen Sie die Gebrauchsanleitung
EN Dust tight. Submersible to 0.6 m depth. Do not dispose of together with household
waste!
Attention!
Read the operating instructions
FR Imperméable aux poussières. Etanche à
l'eau jusqu'à une profondeur de 0.6 m
Ne pas recycler dans les ordures ména-
gères !
Attention !
Lire la notice d'emploi
NL Stofdicht. Waterdicht tot een diepte van 0.6
m
Niet bij het normale huisvuil doen! Let op!
Lees de gebruiksaanwijzing
ES A prueba de polvo. Impermeable al agua
hasta 0.6 m de profundidad
¡No deseche el equipo en la basura
doméstica!
¡Atención!
Lea las instrucciones de uso
PT À prova de pó. À prova de água até 0.6 m
de profundidade.
Não deitar ao lixo doméstico! Atenção!
Leia as instruções de utilização
IT A tenuta di polvere. Impermeabile all'acqua
fino a 0.6 m di profondità.
Non smaltire con normali rifiuti domestici! Attenzione!
Leggete le istruzioni d'uso!
D
A
Støvtæt. Vandtæt ned til 0.6 m dybde Må ikke bortskaffes med det almindelige
husholdningsaffald
OBS!
Læs brugsanvisningen
NO Støvtett. Vanntett ned til 0.6 m dyp Ikke kast i alminnelig husholdningsavfall! NB!
Les bruksanvisningen
S
V
Dammtät. Vattentät till 0.6 m djup Får inte kastas i hushållssoporna! Varning!
Läs igenom bruksanvisningen
FI Pölytiivis. Vesitiivis 0.6 m syvyyteen asti. Älä hävitä laitetta tavallisen talousjätteen
kanssa!
Huomio!
Lue käyttöohje
HU Portömített. Vízálló 0.6 m-es mélységig A készüléket nem a normál háztartási
szeméttel együtt kell megsemmisíteni!
Figyelem!
Olvassa el a használati útmutatót
PL Pyłoszczelny. Wodoszczelny do 0.6 m
głębokoİci.
Nie wyrzucaćwraz ze İmieciami
domowymi!
Uwaga!
Przeczytaćinstrukcjęużytkowania!
CS Prachotěsný. Vodotěsný do hloubky 0.6 m Nelikvidovat v normálním komunálním
odpadu!
Pozor!
PĮečtěte Návod k použití!
S
K
Prachotesný. Vodotesný do hĺbky 0.6 m Nelikvidovaťv normálnom komunálnom
odpade!
Pozor!
Prečítajte si Návod na použitie
SL Ne prepušča prahu. Vodotesno do globine
0.6 m.
Ne zavrzite skupaj z gospodinjskimi
odpadki!
Pozor!
Preberite navodila za uporabo!
HR Ne propušta prašinu. Ne propušta vodu do
0.6 m dubine.
Nemojte ga bacati u običan kućni otpad! Pažnja!
Pročitajte upute za upotrebu!
RO Etanşla praf. Etanşla apăpânăla o
adâncime de 0.6 m.
Nu aruncaţi în gunoiul menajer ! Atenţie !
Citiţi instrucţiunile de utilizare !
BG .
0.6
!
Виаие!
Пчеее ъвае
U
K
.
0.6
!
!
.
RU ,
0.6
!
!
0.6 m
IP 68

PSO0011
PfG GmbH
Tecklenburger Straße 161
D - 48469 Hörstel
Germany
www.pontec.com
40685/12-14
Table of contents
Other Pontec Outdoor Fountain manuals
Popular Outdoor Fountain manuals by other brands

LuxenHome
LuxenHome WHF610 instruction manual

Best Choice Products
Best Choice Products SKY1908 instruction manual

LuxenHome
LuxenHome WHF827 instruction manual

LuxenHome
LuxenHome WHF553 instruction manual

LuxenHome
LuxenHome WHF1759 instruction manual

Aqua Control
Aqua Control FUSION Series instruction manual

PEAKTOP
PEAKTOP RJ-19048 Use & care guide

PEAKTOP
PEAKTOP FA0394EC quick start guide

Blumfeldt
Blumfeldt Murach manual

Kelkay
Kelkay easyfountain Tuscan Vase 45022L instructions

Kenroy Home
Kenroy Home LINCOLN 51017WDG Care and instructions manual

Kenroy Home
Kenroy Home REFLECTION Care and instructions manual