Porsche 911 CARRERA - 1999 User manual
Other Porsche Automobile manuals

Porsche
Porsche 911 CARRERA 4 - User manual
 User manual")
Porsche
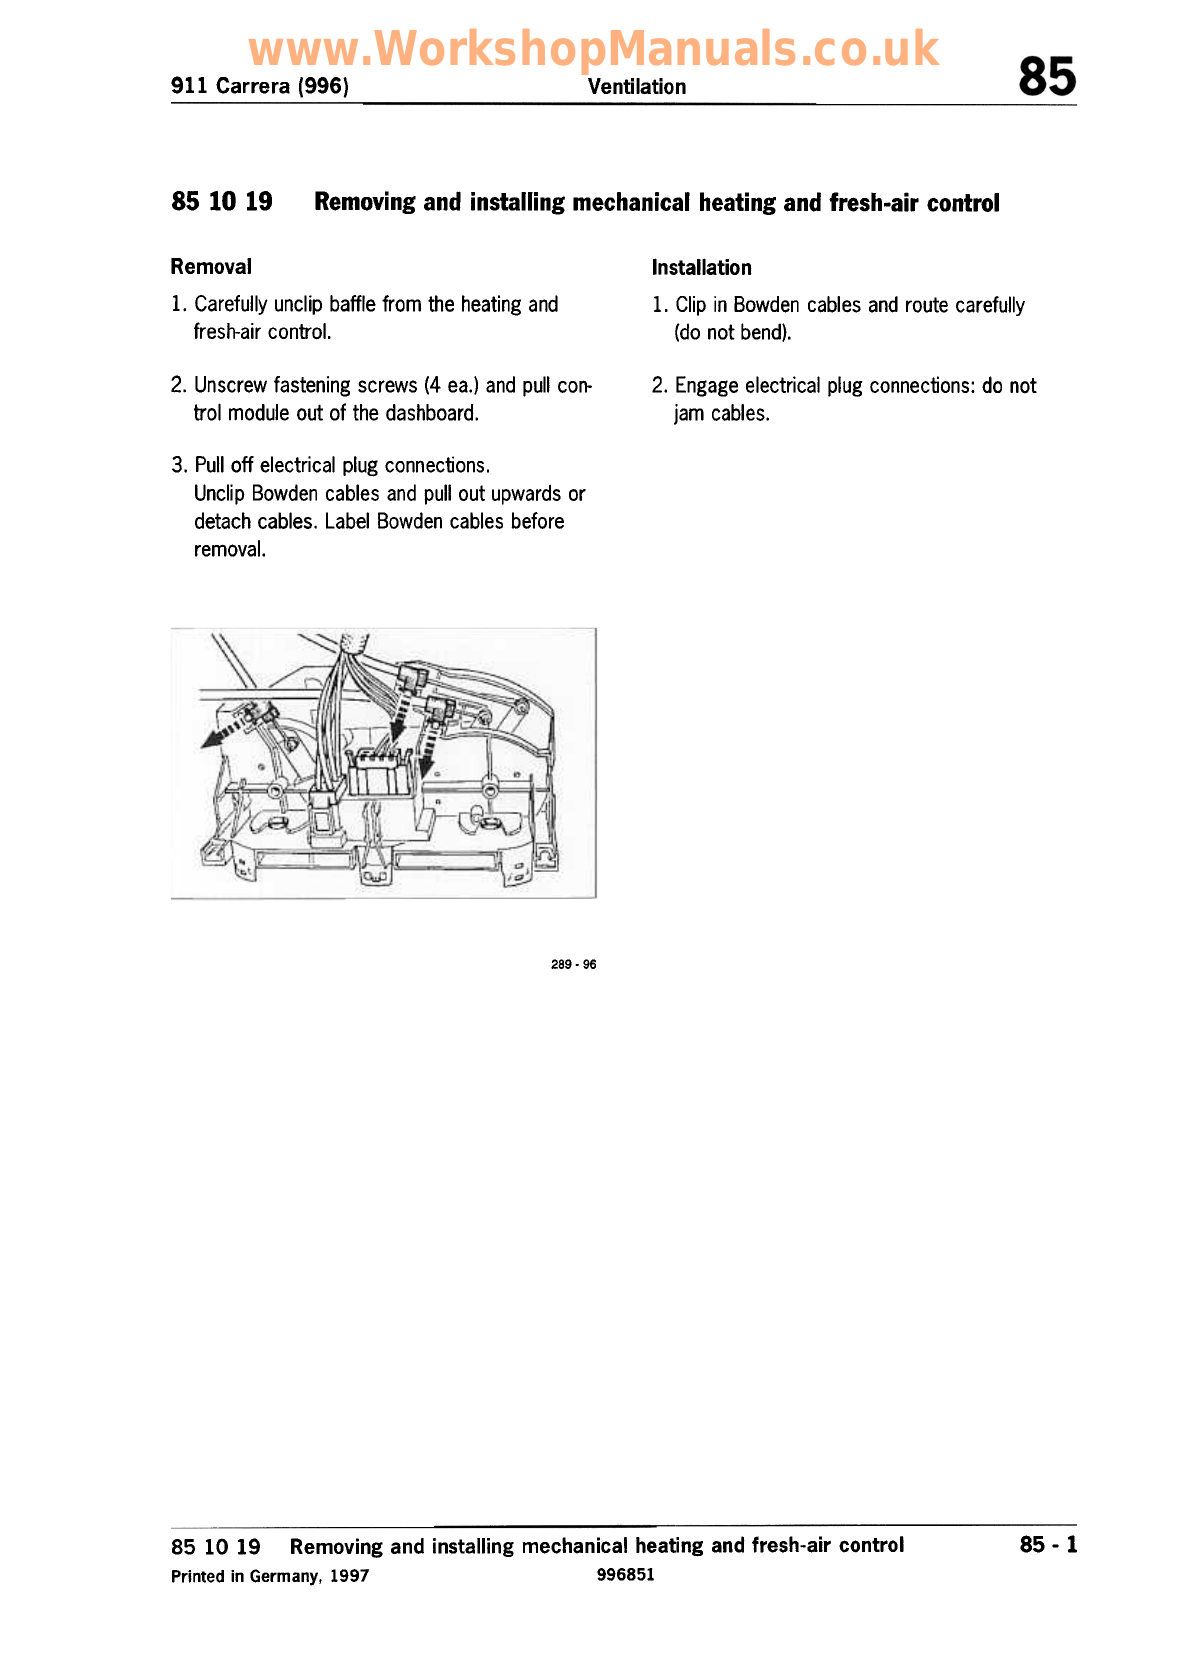
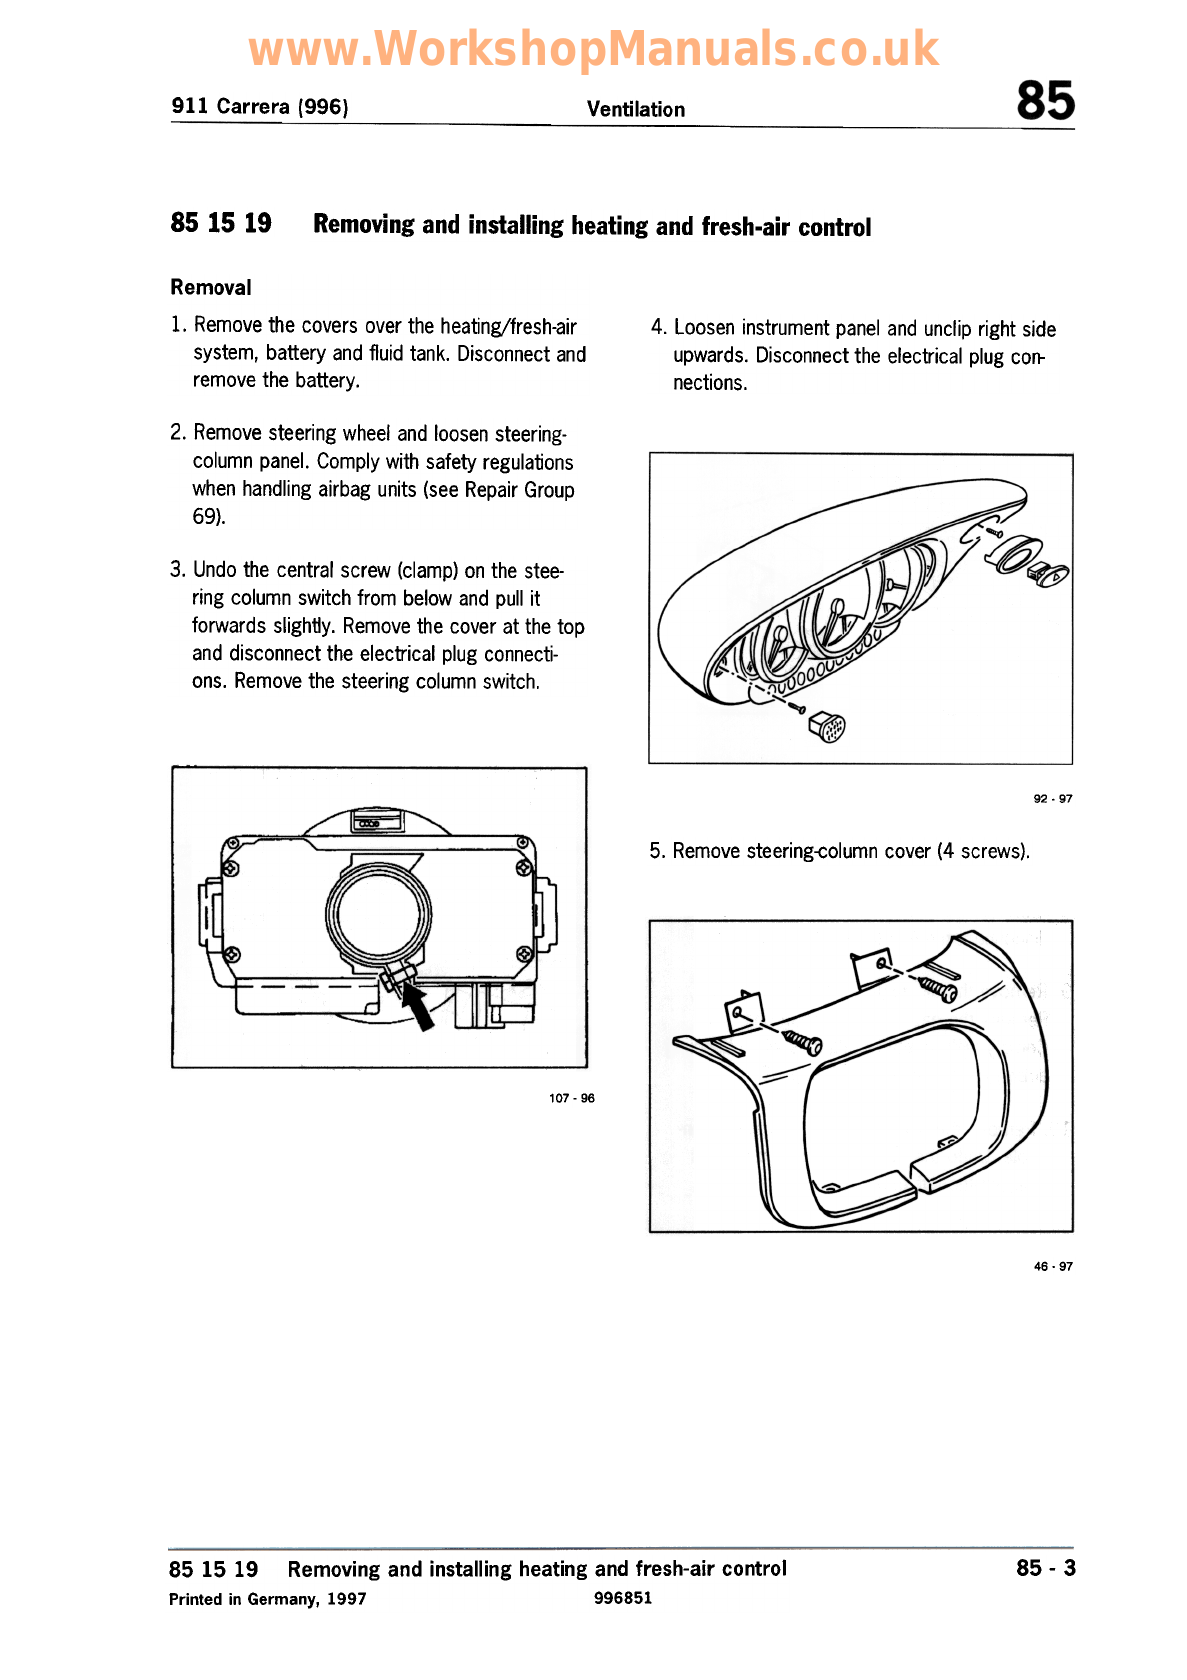
Porsche 911 Carrera (996) User manual

Porsche
Porsche 928 S 1984 User manual

Porsche
Porsche 944 S2 User manual

Porsche
Porsche 911 GT3 Cup MR Gen. II User manual

Porsche
Porsche CAYENNE 2011 Technical manual

Porsche
Porsche 911 CARRERA 4 - Guide
 User manual")
Porsche
Porsche 911 Carrera (996) User manual

Porsche
Porsche 911 TURBO - 1975 WORSHOP Release note

Porsche
Porsche 928 USA - 1980 CURRENT FLOW DIAGRAM User manual

Porsche
Porsche CAYMAN - Instruction Manual

Porsche
Porsche 911 CARRERA 4 - User manual

Porsche
Porsche 944 - WORKSHOP 1991 Instruction manual

Porsche
Porsche CARRERA GT-2004 User manual

Porsche
Porsche PANAMERA S - User manual

Porsche
Porsche Cayenne 2020 User manual

Porsche
Porsche 911 CARRERA - 2001 User manual

Porsche
Porsche 944 Instruction manual

Porsche
Porsche 911 GT3R 2010 User manual

Porsche
Porsche 911 TURBO - 2003 User manual