5511 –192 Street, Unit 207
Surrey, BC, Canada V3S 8E5
P: 604.946.3811
sales@pothierenterprises.com
MODEL #VHC24 SEGMENTED
USED FOR CUTTING VERY HARD CORE, SUCH AS CHERT, JASPERITE, QUARTZITE, HARD
GRANITES, ETC. IF YOU USE THIS BLADE FOR CUTTING SOFTER CORE, IT MAY WEAR OUT
PREMATURELY.
MODEL #HC44 SEGMENTED OR #CCRB14P CONTINUOUS RIM
USED FOR CUTTING HARD CORE, SUCH AS RHYOLITE, GRANITE, SILICIFIED VOLCANICS,
ETC. IF YOU USE THIS BLADE FOR CUTTING SOFTER / ABRASIVE CORE, IT MAY WEAR OUT
PREMATURELY.
MODEL #CC34 SEGMENTED (#SCQ14) OR #CCRB14 CONTINUOUS RIM
USED FOR CUTTING REGULAR CORE SUCH AS BASALT, DIORITE, DIABASE, GABRO,
DOLOMITE, WEATHERED GRANITE, SERPENTINE, AND PERIDOTITE. IF YOU USE THIS
BLADE FOR CUTTING SOFTER/ABRASIVE CORE, IT MAY WEAR OUT PREMATURELY. IF YOU
USE THIS BLADE FOR HARDER CORE, IT MAY GO DULL AND NOT WANT TO CUT.
MODEL SC54 SEGMENTED
USED FOR CUTTING SOFT/ABRASIVE CORE SUCH AS CONGLOMERATES, SHALES,
LIMESTONE, SILICA AND SULPHIDES. IF YOU USE THIS BLADE FOR CUTTING HARDER
CORE, IT MAY GO DULL AND NOT WANT TO CUT.
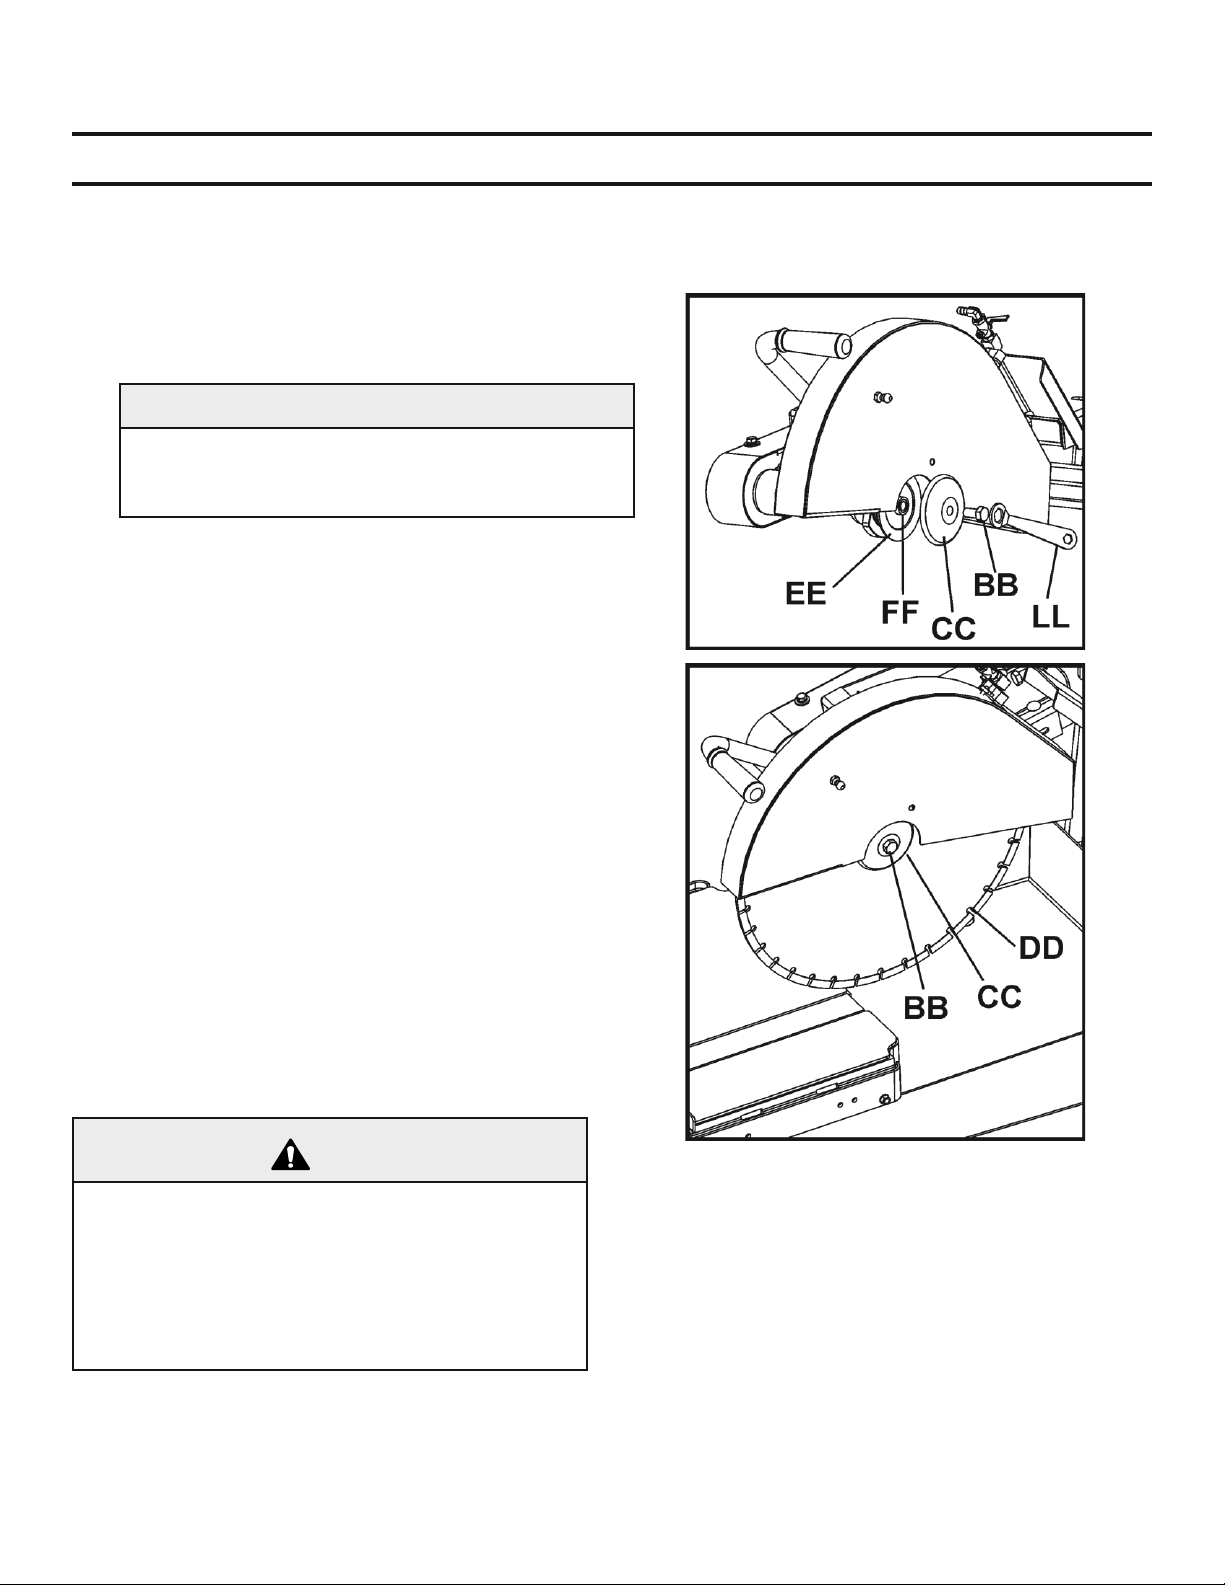
NOTE :
ENSURE BLADES ARE MOUNTED ON SAW SO THEY TURN IN THE CORRECT DIRECTION.
CAUTION :
WHEN SAWING, EASE CORE INTO BLADE, AFTER CONTACT HAS BEEN MADE, THEN APPLY
PRESSURE.
ENSURE THAT CORE IS SECURED SO AS NOT TO MOVE WHILE BEING CUT. IF CORE
MOVES AND BLADE IS BENT SIDEWAYS, LOSS OF SEGMENTS COULD OCCUR.