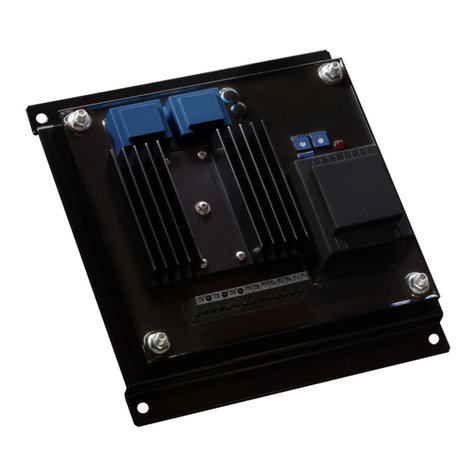
Power Electronics VS65 Series Mounting instructions

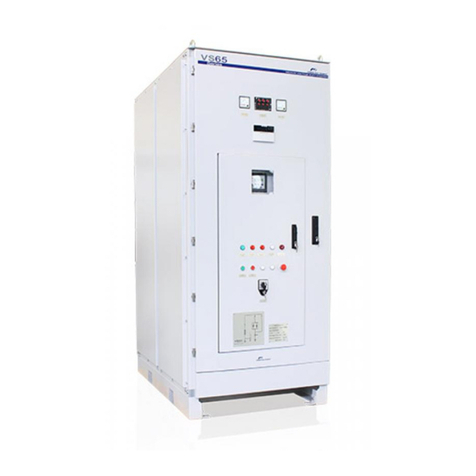
Medium Voltage Soft Starter
Programming and Software Manual


Medium Voltage Soft Starter
Programming and Software Manual
Edition: July 2012
VS65MTSW01AI Rev. A

VS65 SERIES MV SOFT STARTER
POWER ELECTRONICS
2
SAFETY SYMBOLS
In order to reduce the risk of personal injury, electric shock, fire and damage to equipment, please read
carefully and pay attention to the precautions found in this manual.
July 2012 Edition
This publication could show technical imprecision or misprints. The information here included would be
periodically modified and updated, included in later editions. To consult or download the latest information
related to this product, please contact our website www.power-electronics.com.
ALARM
SAFETY
WARNING
This symbol indicates the presence of potential hazard, which may
result in serious personal injury when instructions are omitted or not
followed properly.
CAUTION
Identifies shock hazards under certain conditions. Particular
attention should be given due to the presence of dangerous voltage.
Maintenance operations should be carried out by qualified
personnel.
Identifies potential hazards under certain conditions. Read the
message and follow the instructions carefully.
Identifies electric shock hazards under certain conditions. Particular
attention should be given due to the presence of dangerous voltage.

POWER ELECTRONICS
VS65 SERIES MV SOFT STARTER
3
E
N
G
L
I
S
H
REVISION CONTROL
DATE
REVISION
DESCRIPTION
12 July 2012
A
First Edition
The equipment and technical documentation is periodically updated. Power electronics reserves the right to modify all or part of the
contents within the manual without previous notice.

VS65 SERIES MV SOFT STARTER
POWER ELECTRONICS
4

POWER ELECTRONICS
VS65 SERIES MV SOFT STARTER
INDEX
5
E
N
G
L
I
S
H
INDEX
SAFETY INSTRUCTIONS........................................................................................................... 7
1. DISPLAY UNIT AND CONTROL KEYPAD.......................................................................... 11
1.1. LCD Screen ............................................................................................................... 11
1.2. Control Keypad .......................................................................................................... 11
1.3. Start and Stop Reset Buttons..................................................................................... 12
2. STATUS MESSAGES.......................................................................................................... 13
3. GENERAL INFORMATION SCREENS…………………………………………………………. 14
4. PARAMETER DESCRIPTION.............................................................................................. 15
4.1. Group 1 –G1: MENU OPTIONS ............................................................................... 15
4.2. Group 2 –G2: NAMEPLATE DATA........................................................................... 15
4.3. Group 3 –G3: PROTECTIONS ................................................................................. 16
4.4. Group 4 –G4: ACCELERATION ............................................................................... 18
4.5. Group 5 –G5: DECELERATIÓN ............................................................................... 19
4.6. Group 6 –G6: INPUTS.............................................................................................. 20
4.7. Group 7 –G7: OUTPUTS.......................................................................................... 22
4.8. Group 8 –G8: DUAL SETTING ................................................................................. 23
4.9. Group 10 –G10: FAULT HISTORY........................................................................... 26
4.10. Group 11 –G11: STATISTICS................................................................................... 26
4.11. Group 14 –G14: COMUNICATION SERIES............................................................. 27
4.12. Group 15 –G15: AUTOMATIC RESET .................................................................... 27
4.13. Group 16 –G16: PUMP CONTROL........................................................................... 28
5. MODBUS COMMUNICATION.............................................................................................. 29
5.1. Modbus Protocol.………………………………………………………….……………… . . 29
5.2. Modbus Series Communication Installation Ref:E0004 VS65 Series......................... 29
5.3. Supported Modbus Function Codes........................................................................... 29
6. FAULT MESSAGES……………………………………………………………………………….. 35
7. TYPICAL CONFIGURATION............................................................................................... 39
7.1. Start ........................................................................................................................... 39
7.2. Stop............................................................................................................................ 39
8. CONFIGURATION REGISTER............................................................................................ 40
9. DECLARATION OF CONFORMITY..................................................................................... 44
VS65 SERIES MV SOFT STARTER
POWER ELECTRONICS
6

POWER ELECTRONICS
VS65 SERIES MV SOFT STARTER
SAFETY INSTRUCTIONS
7
E
N
G
L
I
S
H
SAFETY INSTRUCTIONS
¡IMPORTANT!
The safety measures shown in the manual are intended to teach the user to use the product properly and
as safely as possible to prevent any personal injury or material damage.
DANGER
CAUTION
ALARM
DANGEROUS VOLTAGE
The medium voltage soft starters
have dangerous voltages when
connected to line voltage. Install
and maintenance operations
should be carried out by qualified
personnel only.
An improper motor or soft starter
installation may cause faults in the
equipment, serious injuries
including death. Follow carefully
the instructions given in the
manual, the national electric
codes and updated local codes.
SHORT CIRCUIT
Medium Voltage soft starters are
not tested against short circuits.
In case of a severe overload or
short circuit, the soft starter should
be completely tested to keep the
equipment in working order.
GENERAL PROTECTIONS
AND EARTH GOUNDING.
The installer or user is
responsible to provide a proper
soft starter earthing system and
a complete protections system in
accordance with the national
electric codes and updated local
codes.
ALARM –SAFETY –CAUTION
Read carefully this manual and follow the instructions before proceeding.
All of the safety instructions would not cover every single potential equipment cause. However, the most
common and important ones have been pointed out. The installer should follow the instructions described
within the manual, provide quality electric work and localise all of the recommendations and warnings
provided before starting the equipment.
Make sure the soft starter is completely disconnected from the power supply and earth grounded
before any use or maintenance operation is carried out.
Check the maintenance section before proceeding. In order to prevent electric risks, disconnect the power
supply input, earth ground the equipment and remove the control voltages before working in the
equipment. Warning and safety labels should be properly placed in terminals, covers and control panels
in accordance with local codes. Otherwise, electric shock hazard exists.
Do not connect any kind of power supply to the equipment while the doors are opened.
Totally prohibited to run the soft starter with the doors opened.
Once doors are properly closed, the power supply may be connected to the equipments power supply
line. Otherwise, electric shock hazard exists.
Do not open the soft starter doors except for periodic inspections, wiring the unit even when the
input voltage is not connected.
Otherwise, you may suffer an electric shock.

VS65 SERIES MV SOFT STARTER
POWER ELECTRONICS
8
SAFETY INSTRUCTIONS
ALARM –SAFETY –CAUTION
Power factor compensation capacitors.
The reactive compensation capacitors used to increase the power factor should be connected to the soft
starter input terminals and not to the output ones. These capacitors should be connected with an
additional contactor as shown in the electric connections section. The connection will be done only when
the soft starter is running and it will be disconnected during the acceleration and deceleration ramp.
Otherwise, the soft starter can be damaged.
When working in electric installations always remember to apply the 5 golden rules:
1. Visible cut of all the voltage sources.
2. Mechanic lock of every single cut elements.
3. Verify no voltage is present.
4. Earth ground and short circuit any possible voltage source.
5. Define and post sign the working area.
CAUTION
Handle the equipment with dry hands.
Otherwise, electric shock hazard existence.
Do not use cables with damaged insulation. Do not summit cables to abrasions, excessive stress,
heavy loads or pinching.
Otherwise, electric shock hazard existence.
Keep clean the equipment, not allowing lint, paper, wooden chips, dust, metallic chips or other
foreign matter (screws, pressure washers…) into the soft starter. Verify this point after the
installation.
Otherwise, accident and fire risk existence.
Place the soft starter over non-flammable surface. Keep away from flammable materials.
Otherwise, fire risk existence.
Disconnect and earth ground the soft starter power input when the soft starter is damaged.
Otherwise, fire and secondary accident risk existence.
After applying input voltage or after removing it, the soft starter will remain warm for a couple of
minutes.
Otherwise, body injury or skin burn risk existence.
Do not apply voltage to a damaged or soft starter with parts missing even if the installation is
complete.
Otherwise, electric shock hazard existence.
Do not exchange the soft starter input and output power connections.
Otherwise, excessive voltage could be found in the logic control circuit.

POWER ELECTRONICS
VS65 SERIES MV SOFT STARTER
SAFETY INSTRUCTIONS
9
E
N
G
L
I
S
H
SAFETY
COMMISSIONING
Before commissioning the soft starter, the user must read carefully this manual and pay particular
attention to the connection and start sections.
Verify all of the parameters and make the necessary settings before starting the equipment.
Depending on load and applications, the parameter values can be changed.
Voltage and current levels applied in terminals as external signs should be in accordance with the
manual data. Otherwise, the soft starter could be damaged.
GROUND CONNECTIONS
Electric shock prevention:
The soft starter locker chassis must be properly earth ground connected to prevent a possible electric
shock even when a leakage current flows through the locker. Disconnect all of the voltage supplies
before proceeding with maintenance operations within the soft starter or motor. Due to the existence
of capacitors in the power section, the equipment will keep dangerous voltage even when the input
voltage is disconnected. Use a cable to earth-ground it and discharge the existing voltage.
Only connect the earth grounding to the soft starter earth plate. Do not use the case or the chassis
screw for grounding.
The earth protection cable must be connected first and disconnected last.
The motor earth grounding will be connected to the soft starters’ one and not to the installations one.
The installations earth grounding will be connected to the soft starters’ one.
Equipment input cables are medium voltage cables. As shown in the figure, they are coaxial cables,
each one including earth. To carry out with a correct connection it is necessary to join every phase’s
earth and connect it to the soft starters’ earth plate.
The output cables to the motor have the same characteristics. Their earths should also be joined and
connected to the soft starters earth plate IN THE SAME TERMINAL than the input cables.

VS65 SERIES MV SOFT STARTER
POWER ELECTRONICS
10
SAFETY INSTRUCTIONS
WARNINGS
RECEPTION
The VS65 Series soft starters are handled carefully tested and perfectly packed.
In the even of transport damage, please ensure that you notify the transport agency and Power
Electronics: 902 40 20 70 (International + 34 96 136 65 57).
UNPACKING
Verify model and serial number of the soft starter is the same on the box, delivery note and unit.
Each soft starter is supplied with an installation manual.
RECICLYING
Packing of the equipments should be recycled. Therefore, it is necessary to separate materials included
(plastic, paper, cardboard, Wood….) and deposit them on proper recycling banks.
Waste products of electric and electronic devices should be selectively collected for their correct
environmental management.
SAFETY
Before starting the soft starter, read this manual completely to gain an understanding of the unit. In case
of doubt, please contact Power Electronics (902 40 20 70 / +34 96 136 65 57) or your nearest agent.
Wear safety goggles when operating the soft starter with voltage.
Handle the equipment in accordance with the soft starters’ weight.
Proceed with the installation according to the instructions found in this manual.
Do not stack the soft starter or place heavy objects on the soft starter.
Ensure that the soft starter is correctly installated considering the recommendations within this manual.
Do not drop the soft starter or to impact exposure.
The VS65 Series soft starters contain static-sensitive printed circuit boards. Use static safety procedures
when handling boards.
Avoid installing the soft starter in different conditions form those described in the Technical
Characteristics section.

POWER ELECTRONICS
VS65 SERIES MV SOFT STARTER
DISPLAY UNIT AND CONTROL KEYPAD
11
E
N
G
L
I
S
H
1. DISPLAY UNIT AND CONTROL KEYPAD
Figure 6.1 Display Unit
1.1. LCD Screen
The soft starters display has a two lined Display screen with sixteen characters per line (16 x2). Each line
has different functions.
STATUS LINE (Upper):
Always present and shows the soft starter status (COMMS/SLOW.S), the phase current and the
voltage in the Medium Voltage line.
CONTROL LINE (Lower):
Set the different soft starter parameters.
1.2. Control Keypad
and To scroll between screen groups.
Press to unfold the screen groups.
and Inside the group, to scroll to reach the parameter.
and or Press simultaneously to set the screen.
Used to exit screen groups until the group name is reached.

VS65 SERIES MV SOFT STARTER
POWER ELECTRONICS
12
DISPLAY UNIT AND CONTROL KEYPAD
Figure 6.2 Programming example
1.3. Start and Stop-Reset Buttons
The VS65 soft starter has two Start, Stop-Reset / Jog Slow Speed buttons available with which the
following operations can be carried out:.
Start and Slow Speed.
Soft starter Stop and Rearm and Slow Speed operation.

POWER ELECTRONICS
VS65 SERIES MV SOFT STARTER
STATUS MESSAGES
13
E
N
G
L
I
S
H
2. STATUS MESSAGES
Figure 7.1 Display Status Messages
Visualisation
Name
Description
RDY
READY
Equipment ready to run.
ITQ
INITIAL TORQUE
The soft starter is applying the initial torque shown in [G4.4] during the
specified time given in [G4.5].
ACL
ACCELERATING
Motor accelerating phase.
RUN
RUNNING
The soft starter runs at nominal speed, after completing the accelerating
ramp. (Input voltage = Output Voltage).
DEC
DECELERATING
Motor decelerating phase.
HAM
HAMMER
The hammer hit decelerating algorithm is running.
UNV
UNDER VOLTAGE
Under power voltage warning.
OVV
OVER VOLTAGE
Over power voltage warning.
OVL
OVERLOAD
Overload warning.
UDL
UNDERLOAD
Underload warning.
OVT
TEMPERATURE FAULT
Excessive temperature in the soft starter.
SHP
SHEARPIN
Shearpin current.
ASY
ASYMMETRIC CURRENT
Motor asymmetric current.
FLT
FAULT
Fault in soft starter produced.
STD
START DELAY
The soft starter is waiting the time given in the parameter [G4.1]. Start
delay.
EXT
EXTERNAL FAULT
Fault status due to an external fault caused by a digital input.
P/T
TORQUE PULSE
The soft starter applies torque pulse configured in the parameter [G4.2]
Torque pulse during the time given in parameter [G4.3] Torque pulse time.
ILT
CURRENT LIMIT
The soft starter has reached the maximum current consumption in
accordance with the parameter [G4.7] Limit acceleration current.
HIP
OVER PRESSURE
Overpressure warning during the time settled in parameter [G16.4]
LOP
UNDER PRESSURE
Under pressure warning during the time settled in parameters [G16.5] and
[G16.6].
NOF
NO FLOW
Cavitations warning during the time settled on screens [G16.7] and [G16.8].
LWA
LOW LEVEL
Water low level warning during the time settled on screen [G16.9].
1. Indicates the soft starters run order control mode (L) Local, (R) Remote,
(C) series Communication, (G) Slow Speed, (P) Pump control.
2. Equipment status. See the status message list. RUN = RUNNING.
3. Motor mean current consumption.
4. VS65 input Medium Voltage.

VS65 SERIES MV SOFT STARTER
POWER ELECTRONICS
14
GENERAL INFORMATION SCREENS
3. GENERAL INFORMATION SCREENS
On the display lower line it is possible to visualise the general programming information screens (G1 to
G16), which include all the information related to the motor and the equipment.
Screen
Description
Range
Units
Attribute
Function
800A 800A 800A
L1, L2 and L3 phase
current
0 to 9999
Phase current. Shows the input three phases instantaneous
current
6000V6000V6000V
L1-L2, L2-L3, L1-L3
Line voltage
0 to 999
-
-
Line voltage. Show the input soft starter voltage between phases
50Hz Cos=0.85
Supply frequency
0 to 99Hz
-
-
Supply frequency / Motor phi cosine. Show the supply frequency
and the motor phi cosine.
Note: This screen can only be visualised after the soft starter has
completed the start.
Motor Phi cosine
0 to 1
7200kW Pr=99%
Power consumption
1 to 900kW
-
-
Shows the power consumption and the axis torque.
Note: This screen can be only visualised when the motor is
running.
Axis torque
0 to 999%
RELAYS 0 0 0
1, 2 and 3 Relay
Status
0 –Open
X –Closed
-
-
Shows the 1, 2 and 3 relay status.
DIG INPUT= 0 0 0 0 0
F
Digital Inputs status
and Motor PTC
status
0 –Open
X –Closed
K –Correct
F –Fault
-
-
The first five digits refer to the digital input and the sixth one to the
PTC temperature probe input.
Input
Terminal
Range
Digital Input 1
T11
0: Open
X: Closed
Digital Input 2
T12
Digital Input 3
T13
Digital Input 4
T14
Digital Input 5
T15
Not used
T16-T17
K: Correct
F: Fault
O/L STATUS=0%
Motor Overload
status
0 to 100%
-
Read only
When the motor current is smaller than the overload value
introduced on screen [G3.2], the Overload Status is 1%. However,
when the current increases over the overload value, the Overload
Status factor increases, faster as the difference between values
increases. When the Overload Status factor reaches 100%, the
soft starter will “trip” due to F4.
AI1=0.00mA = 0%
Analogue Input 1
status
0-10V
4-20mA
0-20mA
V or mA
Read only
When shown in mA the user has selected 0 or 1 on the [G6.8]
screen. When shown in V, the user has selected option 2 on the
[G6.8] screen. The following value will have BAR, ºC, m, % units
depending on the selection made on [G6.10] Screen.
User Units
AI2=0.00mA = 0%
Analogue Input 2
status
0-10V
4-20mA
0-20mA
V or mA
Read Only
This screen shows the analogue input 2 in V or mA, depending on
the configuration chosen on screen [G6.11] and the units the user
has configured on screen G6.13 and the scale selected on screen
[G6.12].
User Units
AO1=0.00mA =0%
Analogue Output 1
status
0-20mA
4-20mA
mA and %
Read Only
Show the output analogue 1 value, in real values and percentage
over the analogue output range.
S/W 2.62 H/W 2.1
Software y Hardware
revision
-
-
-
Shows the soft starter’s Software (S/W) and Hardware (H/W)
revision.

POWER ELECTRONICS
VS65 SERIES MV SOFT STARTER
PARAMETERS DESCRIPTION
15
E
N
G
L
I
S
H
4. PARAMETERS DESCRIPTION
The different VS65 parameters are grouped due to functionality in groups (G1 to G16). To access these
screens we will press the [*] key. Once the parameter has been selected, it may have a numeric value or a
list of possible functions.
4.1. Group 1 –G1: MENU OPTIONS
Screen &
Default Value
Name /
Description
Range
Function
1 LOCK PARAM=NO
G1.1 / Soft
starter lock
parameters
Yes
No
Enables to lock the soft starter parameters. This lockage is effective introducing on screen
[G1.2] a password. Activating the parameter lock we would not be able to modify any screen
group
[G1-G16]. However, we would be able to visualise any group screen.
2 PASSWORD= 0
G1.2 /
Programming
mode
password.
OFF,
0000 to 9999
Enables the user to introduce a password to prevent non authorised programming parameter
modifications.
To proceed with the setting, once [1 LOCK PARAM=YES] selected, this screen will appear
automatically requesting the password:
PASSWORD=XXXX
To unlock the soft starter programming, follow the instructions:
Access group [1 LOCK PARAM=YES] and press (+).
[2 PASSWORD=XXXX] will appear on screen, where the previous password should be entered.
3 WRONG P/W=XXXX
G1.3 /
Password
recovery
000 to 9999
Provides information for the lock password recovery according to the expression:
PASSWORD = ( WRONG PW/2)-3
4 LANGUE=ENGLISH
G1.4 /
Operating
language
selection
ENGLISH
ESPANOL
DEUTSCH
Establish display language.
5 INITIALISE=NO
G1.5 /
Initialisation
YES
NO
Initialise the VS65 parameter default values.
6 COMMISSION=YES
G1.6 /
Commissioning
YES
NO
Screen groups deactivation.
OPTION
FUNCTION
YES
Enables parameter setting
NO
Disables parameter setting but enables
visualisation
4.2. Group 2 –G2: NAMEPLATE
Screen &
Default Value
Name /
Description
Range
Function
1 I STARTER = InA[*]
G2.1 / Soft
starters rated
current
1 to 1600A
Shows the soft starter rated current. It is necessary for the equipment to know this value when
calibrating the different protections found in the VS65 device.
The soft starters are handled with default settings. To modify the rated current press the [*]
button during 5 seconds. Once the letter “I” has changed into “I” the current value can be
modified.
2 I MOTOR=XXX[*]A
G2.2 / Motor
plate current
1 to 1600A
States the motor rated current.
To set the motor nameplate current, introduce this parameter in accordance with the motor
nameplate.
Value that depends on the soft starter rated current

VS65 SERIES MV SOFT STARTER
POWER ELECTRONICS
16
PARAMETERS DESCRIPTION
Screen &
Default Value
Name /
Description
Range
Function
3 V MOTOR=4
G2.3 / VS65
input line
voltage
1 to 4
Set the work rated voltage
Depending on the line voltage, there are two versions of this parameter, one for voltages from
2300V to 6000V and another from 6600V to 13800V.
From 2300 to 6000V:
OPT.
DESCRIPTIÓN
1
2300V
2
3300V
3
4160V
4
6000V
From 6600 to 13800V:
OPT.
DESCRIPTIÓN
1
6600V
2
7200V
3
10000V
4
13800V
Introduce this parameter in accordance with the VS65 input line voltage. Make sure the motor
plate voltage is within the related voltage range.
4 P MOTOR =XXXkW[*]
G2.4 / Motor
Power Plate
4 to 999kW
Set the motor power.
5 COS PHI M =85%
G2.5 / Motor
Phi cosine
40 to 99%
Set the Motor Phi cosine.
6 FREQ= 50Hz
G2.6 / Supply
frequency
50Hz
50/60Hz
States the motor supply frequency.
Set this parameter to 50Hz where the frequency supply is 50Hz. Within the installations where
this value is unknown or 60Hz, set to 50/60Hz.
Note: When 50/60Hz is selected, the soft starter starts an algorithm to detect the line frequency.
When 50Hz selected, it remains inactive.
Value that depends on the soft starter rated current.
4.3. Group 3 –G3: PROTECTIONS
Screen &
Default Value
Name /
Description
Range
Function
1 PHASE SEQUEN=2
G3.1 / Phase
sequence at
the soft starter
input
1 to 3
This parameter establishes which input phase sequence is considered valid. In case a start
order is received, the equipment will trig due to F2 WRONG PH/SQ.
OPT.
DESCRIPTION
1
NO SEQ PROTEC
2
L1 L2 L3 SEQ
3
INVERT SEQUE
To set the soft starter input phase sequences. Set depending on the sequence.
Note: When operating at Slow Speed, or DC-Brake, an operating sequence must be chosen, it
is not possible to work WITHOUT A PROTECTION SEQUENCE [1 NO PROTEC SEQ].
2 OV LOAD=InA
G3.2 / Motor
overload
current
(0.6 to 1.5)·In
of the VS65
States the current value at which the equipments overload protections should activate. The
trigger time will depend on the exceeding current level set on this screen and the value set on
the screen [G3.3]
Before setting, look for the motor plate current reference and introduce the value on screen.
Note: See figure in parameter [G3.3].

POWER ELECTRONICS
VS65 SERIES MV SOFT STARTER
PARAMETERS DESCRIPTION
17
E
N
G
L
I
S
H
Screen &
Default Value
Name /
Description
Range
Function
3 OV/LOAD T=5
G3.3 / Overload
curve
1 to 10
The overload curve determines the response time under overload conditions. There is a non-
linear relation between the overload parameter [G3 OV LOAD] and this parameter, in order to
set the time required for tripping on F4 OVERLOAD. If [3 OV/LOAD T =1] is selected then the
response time for an overload condition is almost immediate, but if [OV/LOAD T=10] then takes
the soft starter trips on F4 OVERLOAD after a time delay.
Setting when a fast response is needed under overload conditions, please select
[OV/LOAD T =1]. When a slow response is needed, select [OV/LOAD T =10]. For normal
operation leave this value as default [OV/LOAD T =5].
The response time for the overload protection can be calculated from the following curve:
4 OVL FAC=100%
G3.4 / Starting
Overload
Factor
100 to 500%
The parameter function is to increase the overload curve during acceleration. Recommended to
start loads with elevated torque momentum. Once the nominal rate is reached, this parameter
deactivates and the overload protection will function as it has been explained in [G3.2] and
[G3.3]. Adjust the default (100%) value for low inertia applications like pumps, fans (Torque = K
x Speed²). Mills, crushers and centrifuges (high inertia moment) will normally require a start with
low starting overload factor (150%) and increase this value until the load accelerates without
tripping on F4 OVERLOAD.
This parameter is set in % [G3.3] Overload Curve.
5 MOTOR PTC=-
G3.5 /
Enable/Disable
PTC motor
option
-
Not used for this soft starter model.
6 UNLOAD=0.0A
G3.6 / Under
load current
(0 a 0.9)·In of
VS65
Underload current determines the current level the motor must not operate below.
Leave the adjustment to 50% of the nominal current of the motor.
Applications: This protection helps to detect mechanical problems such as broken shafts, belts,
when this occurs, the motor will run under no load conditions.
When working with pumps, this protection helps to detect no load pump operation, due to a lack
of water or pump input pipe water position.
7 UNLOAD T=OFF
G3.7 / Under
load delay
0 to 99s,
OFF
This parameter sets the maximum allowable operation time under load conditions before
tripping.
The setting depends on the application, but should be set to trip as soon as a condition occurs.
Applications: Pumps, fans.
8 SHEARPIN=OFF
G3.8 / Shearpin
current
(0.6 to 1.2)·In
of VS65,
OFF
The soft starter will stop immediately when the current drawn by the motor reaches this value
during normal operation. This parameter is off during acceleration or deceleration. The stop
should be done in a controlled way.
Set the current value to stop the VS65.
Application: Oversized electrical motors used for starting, but working under nominal conditions
at running, may only reach the Shearpin current because of mechanical problems locked rotors,
etc.
DT0026B
1.51 3.5 4.5 5 5.5 642.5 32
101
100
102
103
104
In x
Overload curve = 10
Overload curve= 5
Overload curve= 1

VS65 SERIES MV SOFT STARTER
POWER ELECTRONICS
18
PARAMETERS DESCRIPTION
Screen &
Default Value
Name /
Description
Range
Function
9 ASYM I ENB=Y
G3.9 /
Asymmetrical
current
Y
N
Enable/Disable the asymmetric current protection at the soft starter
OPTION
FUNCTION
Y=YES
When enabled, the soft starter will trip on F3
ASYM CURR if there is a current imbalance
greater than 40%.
N=NO
Protection disabled.
10 UNDER V=5052V
G3.10 / Under
voltage
1694 to
2178V
@2300V
To protect the motor or other equipment from low mains voltage. Low voltage will usually
increase the motor current.
Set the minimum tolerable level in conjunction with [11 Under voltage Delay].
2431 to
3126V
@3300V
3065 to
3941V
@4160V
4421 to
5684V
@6000V
U/V DELAY=5s
G3.11 / Under
voltage delay
0 to 10s,
OFF
This parameter sets the maximum operation time for under voltage conditions before tripping.
Set to maximum under voltage operation time allowed
12 OVERVOLT=6947V
G3.12 / Over
voltage
2421 to
2784V
@2300V
To protect the motor from high input voltage.
Set the maximum level tolerable in conjunction with the [G3.13].
3473 to
3944V
@3300V
4378 to
5035V
@4160V
6315 to
7263V
@6000V
13 O/V DELAY=5s
G3.13 / Over
voltage delay
0 to 10s,
OFF
This parameter sets the maximum operation time during over voltage conditions before tripping.
Set to maximum over voltage operation time allowed
14 START LIMIT=3
G3.14 /
Maximum
number of
starts
1 to 10
Establish the maximum number of starts allowed before tripping on F12 EXCESIV STR.
Set maximum number of starts allowed for the specified time at [15 START INTERVAL].
15 STR/INT=15Min
G3.15 / Start
interval
0 to 60Min,
OFF
Establish the time allowed between the first and the last start in [14: START LIMIT] before
tripping on F12 EXCESIV STR.
Set the time limit for the maximum number of starts to occur.
Applications: Mills, crushers, and applications where an excessive number of starts could
damage the motor due to very high current during acceleration.
4.4. Group 4 –G4: ACCELERATION
Screen &
Default Value
Name /
Description
Range
Function
1 STR DELAY=0s
G4.1 / Starting
Delay
0 to 600s
Sets the time the VS65 will wait after a start command has been provided and acceleration will
start.
Adjust this value in accordance with the application.
2 PULS TORQ =50%
G4.2 / Torque
Pulse
50 to 100%
Choose the torque pulse level applied to the motor for the time specified at [G4.3].
This value’s setting must be done in conjunction with [G4.3] to initiate a first move of the motor.
3 PULS TQ T=OFF
G4.3 / Torque
Pulse Time
OFF,
0.1 to 0.9s
Sets the time for the [2 PULS TORQ] to be applied.
INIT TORQ=35%
G4.4 / Initial
Torque
30 to 99%
Establish the initial torque to be applied to the motor at the beginning of the ramp up.
When adjusting, it is recommended to begin with a low initial torque value, normally default.
Observe motor rotation immediately after start command. If the motor doesn’t spin, machine
torque requirement may be higher, and it may be necessary to increase this until the motor
starts to turn normal after a start command has been applied. If a very high current is noticed at
the very beginning of starting process, this could be due to an initial torque setting that is too
high - this must be decreased until a proper value is achieved.
Applications: For submerged pumps, generally a torque between 40% and 45% is required. For
applications such as mills or crushers, the required torque is normally between 40% and 50%.
Note: These values are typical adjustments. Each application requires individual settings to
achieve the best performance.
Other manuals for VS65 Series
2
Table of contents
Other Power Electronics Controllers manuals

Power Electronics
Power Electronics SE-1L08 User manual

Power Electronics
Power Electronics NISHISHIBA VZRAB-1S User manual

Power Electronics
Power Electronics NISHISHIBA VZKUP-4B COMPATIBLE User manual

Power Electronics
Power Electronics SIEMENS 6GA-2491 User manual

Power Electronics
Power Electronics SE-4E15 User manual

Power Electronics
Power Electronics VS65 Series User manual

Power Electronics
Power Electronics SE-4E110 User manual

Power Electronics
Power Electronics TAIYO ASC 12-4Z3 User manual

Power Electronics
Power Electronics TAIYO EXU-61A User manual

Power Electronics
Power Electronics V5 Series Parts list manual