Power Fist 8467466 User manual

1
Visit www.princessauto.com for more information
8467466 V 3.02
12V Trailer
Light Kit
SPECIFICATIONS
Wiring Harness Trailer 23 ft Split Y
Trunk 4 ft Colour Coded
Lamp Style Automotive
Voltage 12V
Weight 3 lb
INTRODUCTION
The Trailer Light Kit is designed for trailers less than 80 in. wide. Use only with 12V electrical systems.
SAFETY
WARNING! Read and understand all instructions before using this tool. The operator must follow basic precautions
to reduce the risk of personal injury and/or damage to the equipment.
Keep this manual for safety warnings, precautions, operating or inspection and maintenance instructions.
HAZARD DEFINITIONS
Please familiarize yourself with the hazard notices found in this manual. A notice is an alert that there is a possibility of
property damage, injury or death if certain instructions are not followed.
DANGER! This notice indicates an immediate and specific hazard that will result in severe personal injury or death if
the proper precautions are not taken.
WARNING! This notice indicates a specific hazard or unsafe practice that could result in severe personal injury or death
if the proper precautions are not taken.
CAUTION! This notice indicates a potentially hazardous situation that may result in minor or moderate injury if proper
practices are not taken.
NOTICE! This notice indicates that a specific hazard or unsafe practice will result in equipment or property damage, but
not personal injury.
WORK AREA
1. Operate in a safe work environment. Keep your work area clean, well lit and free of distractions.
2. Keep anyone not wearing the appropriate safety equipment away from the work area.
3. Store tools properly in a safe and dry location. Keep tools out of the reach of children.
4. Do not install or use in the presence of flammable gases or liquids.
PERSONAL SAFETY
WARNING! Wear personal protective equipment approved by the Canadian Standards Association (CSA) or
American National Standards Institute (ANSI).
1. Wear personal protection equipment such as safety goggles, gloves, steel toe footwear or a hard hat as
warranted by the work environment.

12V Trailer Light Kit
2For technical questions call: 1-800-665-8685
8467466V 3.02
2. Control the device, personal movement and the work environment to avoid personal injury or damage
to the device.
ELECTRICAL SAFETY
WARNING! All wiring should be performed by a qualified electrician. Wiring errors may result in a shock hazard.
1. Make certain that power source conforms to requirements of your equipment.
2. Disconnect power source before cleaning or servicing.
3. Protect yourself against electric shocks when working on electrical equipment. Avoid body contact with
grounded surfaces. There is an increased chance of electrical shock if your body is grounded.
4. When wiring an electric driven device or circuit, follow all electrical and safety codes, as well as the most
recent Canadian Electrical Code (CE) and Canadian Centre for Occupational Health and Safety (CCOHS).
DEVICE USE AND CARE
Use the correct device for the job. This device was designed for a specific function. Do not modify or alter this device
or use it for an unintended purpose.
PARTS IDENTIFICATION
WARNING! Do not operate the tool if any part is missing. Replace the missing part before operating. Failure to do
so could result in a malfunction and personal injury.
Remove the parts and accessories from the packaging and inspect for damage. Make sure that all items in the parts list
are included.
Contents:
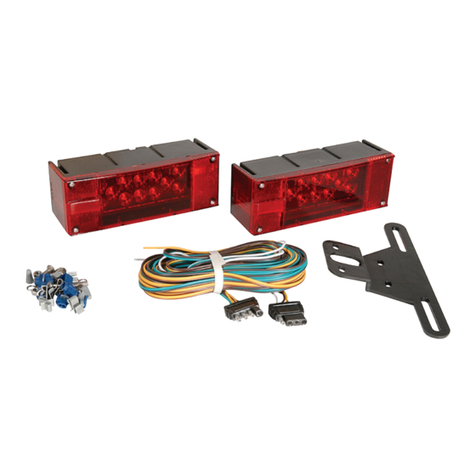
• Combination stop-tail-turn light x 2
• Side marker light x 2
• Licence plate bracket
• 23 ft wiring harness, Y-style
• 4 ft trunk harness
• Splitter wire connector x 5
• Wire nut connector x 4
• Assorted hardware
INSTALLATION
WARNING! All wiring should be performed by a qualified electrician. Wiring errors may result in a shock hazard.
The wiring colours described in this manual are for this trailer light kit. Wiring colour is not standardized throughout
the industry. Identify wiring function/colours for your vehicle by referring to the original manufacturer’s manual.
Refer to the Parts Breakdown diagram when following installation instructions.
INSTALLING THE VEHICLE’S CONNECTOR WIRING
WARNING! Before installing the wiring, disconnect the cable from the positive battery terminal to avoid an electric
shock hazard.
Parts Required:
• 4-Way Flat Connector (Vehicle End) with 4 ft Wire Harness Set
• Splitter Wire Connector x 3
Optional materials (available at Princess Auto Ltd.)
• Electrical tape
• Shrink tubing
1. Disconnect the vehicle battery to avoid short circuits/electrical shock. See Vehicle Owner’s manual
for instructions.
2. Connect the yellow, green and brown wires of the 4 ft wire harness connector to the vehicle wiring as
shown using the blue wire splitter connectors. Optional methods to connecting the wires are:

12V Trailer Light Kit
3
Visit www.princessauto.com for more information
8467466 V 3.02
a. Wire nut.
b. Electrical tape. Wrap the connection between vehicle and connector wiring.
c. Shrink tubing. Place shrink tubing on the wire before connecting. Slide over connection and
heat to shrink.
3. Attach the white wire of the 4-Way Flat Connector to a grounded location on the towing vehicle.
4. Connect the brown wire to the tail light circuit.
5. Connect the yellow wire to the driver’s side (left hand) stop and turn signal circuit.
6. Connect the green wire to the passenger’s side (right hand) stop and turn signal circuit.
If your towing vehicle has turn signals separate from the brake lights, install an electronic turn signal converter.
INSTALLING THE TRAILER’S CONNECTOR WIRING
Take the trailer’s design into account when wiring. A trailer with moving parts, such as a pop-up tent trailer or a folding
bed trailer, can damage harness wires placed in the wrong location.
Parts Required:
• 4-Way Flat Connector (Trailer End) with 23 ft Wire Harness Set
• Splitter Wire Connector x 2
• Wire Nut Connector x 4
Optional materials (available at Princess Auto Ltd.)
• Electrical tape
• Shrink tubing
• Putty/Sealant
1. Select mounting locations at the rear of the trailer for the tail lights so that they are to the extreme left and
right edges of the trailer 15 to 60 in. (38 to 152 cm) above the road surface.
When installed, the lens surface must be visible a minimum of 45 degrees to the right and left and 20
degrees from above or below the trailer.
2. The left rear light (driver side) has a clear window for the licence plate illuminator with the window
facing down.
Push the bolts through the slots on the narrow end of licence plate bracket. Insure that the angled portion
of the licence bracket faces the clear window. Attach this light and bracket to the driver’s side of the trailer
using the lock washer and nut.
3. Attach the right rear light (passenger side) to the passenger’s side of the trailer in the same manner.
4. Position the 4-way trailer end connector at the tongue of the trailer. Provide enough slack to allow for
vehicle maneuvering. Attach the white wire to a grounded location on the trailer. Ensure the end of the white
wire is stripped to permit a metal-to-metal connection. Secure the stripped wire to the trailer frame with the
included metal screw.
5. Run the yellow wire and one brown wire along driver’s side of the trailer frame and connect to the left rear
light. Secure the wires along the frame using metal frame clips.
6. Run the green wire and one brown wire along passenger’s side of the trailer frame and connect to the right
rear light. Secure the wires along the frame using metal frame clips.
7. Mount the front side marker lights in the areas shown on the Parts Breakdown diagram. Connect the marker
light wire to the brown harness wire with a blue wire splitter connector. Repeat on the other side off the
trailer, connecting to the brown wire harness.
8. Connect the male and female 4-way connectors.
9. Reconnect the vehicle battery.
10. Test the brakes and turn signals to confirm the wiring is correct.
11. Seal any holes drilled for installation with putty or a sealant.
Trailers over 80 in. (203 cm) wide will also need three red markers that are not included in this kit.
Mount the three red marker lights to rear of trailer making sure that the lamps are between 6 in. to 12 in.
from the lamp center to lamp center. After lamps are mounted, use wire nut connectors to connected all
three leads together and then connect to the brown harness wire in the back of the tail light on either side.

12V Trailer Light Kit
4For technical questions call: 1-800-665-8685
8467466V 3.02
OPERATION
1. Join the vehicle and trailer 4-way flat connectors. Leave enough slack to accommodate turning a corner.
2. Check that all lights work on the trailer before putting the vehicle in gear.
TROUBLESHOOTING
Contact Princess Auto Ltd. for a solution if the device does not function properly or parts are missing. If unable to do
so, have a qualified technician service the device
Problem(s) Possible Cause(s) Suggested Solution(s)
Lights do not come on. Car key is not in the ignition switch. Insert car key into ignition and turn
on while testing.
Ground wires not properly installed. Check that each ground wire
is connected.
Check ground wire contact is metal
to metal.
Turn signals do not operate while
rear lights do. Connections loose or separated. Check all connections and reconnect
if necessary.
PARTS BREAKDOWN

1
Visitez www.princessauto.com pour plus d'informations
8467466 V 3,02
Trousse de feux de
remorque de 12 V
SPECIFICATIONS
Faisceau de câblage Remorque Câble fendu en Y de 23 pi
Compartiment à bagages Chromacodé de 4 pi
Style de lampe Automobile
Tension 12 V
Poids 3 lb
INTRODUCTION
La trousse de feux de remorque a été conçue pour les remorques dont la largeur est inférieure à 80 po. Utilisez
uniquement avec les systèmes électriques de 12 V.
SÉCURITÉ
AVERTISSEMENT ! Veuillez lire et comprendre toutes les instructions avant d’utiliser cet outil. L’utilisateur doit
respecter les précautions de base lorsqu’il utilise cet outil afin de réduire le risque de blessure ou de dommage à
l’équipement.
Conservez ce manuel qui contient les avertissements de sécurité, les précautions, les instructions de fonctionnement
ou d’inspection et d’entretien.
DÉFINITIONS DE DANGER
Veuillez-vous familiariser avec les avis de danger qui sont présentés dans ce manuel. Un avis est une alerte indiquant
qu’il existe un risque de dommage à la propriété, de blessure ou de décès si on ne respecte pas certaines instructions.
DANGER ! Cet avis indique un risque immédiat et particulier qui entraînera des blessures corporelles graves ou même
la mort si on omet de prendre les précautions nécessaires.
AVERTISSEMENT ! Cet avis indique un risque particulier ou une pratique non sécuritaire qui pourrait entraîner des
blessures corporelles graves ou même la mort si on omet de prendre les précautions nécessaires.
ATTENTION ! Cet avis indique une situation possiblement dangereuse qui peut entraîner des blessures mineures ou
modérées si on ne procède pas de la façon recommandée.
AVIS ! Cet avis indique un risque particulier ou une pratique non sécuritaire qui entraînera des dommages au niveau de
l’équipement ou des biens, mais non des blessures corporelles.
1. Travaillez dans un environnement de travail sécuritaire. Gardez votre aire de travail propre, bien éclairée et
exempte de toute distraction.
2. Assurez-vous que les personnes qui ne portent pas l’équipement de sécurité approprié ne se trouvent pas à
proximité de l’aire de travail.
3. Rangez les outils correctement dans un lieu sécurisé et sec. Gardez les outils hors de la portée des enfants.
4. N’installez pas et n’utilisez pas d’outils électriques en présence de gaz ou de liquides inflammables.
Table of contents
Languages:
Other Power Fist Lighting Equipment manuals
