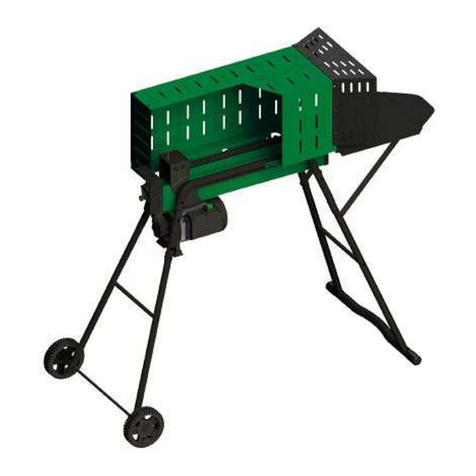
Power Fist 8142606 User manual

5 TON LOG SPLITTER
USER MANUAL
FOR YOUR SAFETY
READ AND UNDERSTAND THE ENTIRE MANUAL
BEFORE OPERATING MACHINE
MODEL NUMBER : 8142606
SERIAL NUMBER : _______________
Both model number and serial number may be found on the main label.
You should record both of them in a safe place for future use.
Save This Manual for Future Reference

SAFETY WARNINGS & CAUTIONS
Read and understand the owner’s manual and labels affixed to the
log splitter. Learn its application and limitations as well as the specific
potential hazards peculiar to it.
Do not operate the log splitter while under the influence of drugs,
alcohol, or any medication that could affect your ability to use it properly.
Put the log splitter on a 60 - 75 cm high, stable, flat, and level work
bench where there is plenty of room for handling, and help the operator
stay alert. Bolt the log splitter to the work surface if it tends to slip,
walk, or slide.
Keep your work area clean and well lighted. Cluttered areas invite injuries.
Do not use the log spliiet in wet or damp areas or expose it to rain.
Do not use it in areas where fumes from paint, solvents or flammable
liquids pose a potential hazard.
Check your log splitter before turning it on. Keep guards in place and
in working order. Form a habit of checking to see that keys and adjusting
wrenches are removed from tool area before turning it on. Replace
damaged, missing or failed parts before using it.
Do not wear loose clothing, gloves, neckties or jewelry (rings,
wrist watches). They can be caught in moving parts.
Protecive electrically non-conductive gloves and non-skid footwear are
recommended when working. wear protective hair covering to contain
long hair, preventing it from getting caught in machinery.
Any log splitter may throw foreign objects into the eyes. This can
cause permanent eye damage. Always wear safety goggles.
Everyday eyeglasses have only impact-resistant lenses. They are not
safety glasses.
Do not put the log splitter on the ground for operations. This is an
awkward operating position that the operator has to bring his face close
to the machine, and thus the risks being struck by wood chips or debris.
SAFETY WARNINGS & INSTRUCTIONS SYMBOL AFFIXED
TO THE MACHINE
• UNDERSTAND YOUR LOG SPLITTER
• DRUGS, ALCOHOL AND MEDICATION
• AVOID DANGEROUS CONDITIONS
• INSPECT YOUR LOG SPLITTER
• DRESS PROPERLY
• PROTECT YOUR EYES AND FACE
2

Improper use of extension cords may cause inefficient operation of the
log splitter, which can result in overheating. Be sure the extension cord
is no longer than 10m and its section is no less than 2.5mm2to allow
sufficient current flow to the motor.
Avoid use of free and inadequately insulated connections. Connections
must be made with protected material suitable for outdoor use.
Check that the electric circuit is adequately protected and that it
corresponds with the power, voltage and frequency of the motor.
Check that there is a ground connections, and a regulation
differential switch upstream.
Ground the log splitter. Prevent body contact with grounded surfaces :
pipes, radiators, ranges, and refrigerator enclosures.
Never open the pushbutton box on the motor. Should this be necessary,
contact a qualified electrician.
Make sure your fingers do not touch the plug’s metal prongs when
plugging or unplugging the log splitter.
The log splitter must always be operated by one person only. Other
people should keep a safe distance from the work area, especially
when the log splitter in under operation. Never use another person
to help you with freeing a jammed log.
Make sure there are no nails or foreign objects in the log to be split.
The ends of the logs must be cut square. Branches must be cut off
flush with the trunk.
Floor must not be slippery. Keep proper footing and balance at all times.
Never stand on the log splitter. Serious injury could occur if the tool is
tipped or if the cutting tools is unintentionally contacted. Do not store
anything above or near the log splitter where anyone might stand on the
tool to reach them.
Always pay full attention to the movement of the log pusher.
Do not attempt to load the log on until the log pusher has stopped.
Keep hands out of the way of all moving parts.
3
• EXTENSION CORDS
• AVOID ELECTRIAL SHOCK
• KEEP VISITORS AND CHILDREN AWAY
• INSPECT YOUR LOG
• DON’T OVERREACH
• AVOID INJURY FROM UNEXPECTED ACCIDENT

Keep your hands away from splits and cracks which open in the log.
They may close suddenly and crush or amputate your hands.
Do not remove jammed logs with your hands.
It will do a better and safer job at its design rate. Never try to split logs
larger than those indicated in the specifications table. This could be
dangerous and may damage the machine.
Don’t use the log splitter for a purpose for which it was not intended.
Don’t leave the log splitter until it has come to a complete stop.
Unplug when not in use, before making adjustments, changing parts,
cleaning, or working on the log splitter. Consult the technical manual
before servicing.
Take used oil to an authorized collection point, or follow the stipulations
in the country where the log splitter is used.
Do not discharge used oil into drains, soil or water.
Keep the log splitter clean for best and safest performance.
Lock the shop. Disconnect master switches. Store the log splitter
away from children and others not qualified to use it.
• PROTECT YOUR HANDS
• DON’T FORCE TOOL
• NEVER LEAVE TOOL RUNNING UNATTENDED
• DISCONNECT POWER
• PROTECT THE ENVIRONMENT
• MAINTAIN YOUR LOG SPLITTER WITH CARE
• MAKE THE WORKSHOP CHILDPROOF
4

APPLICATION CONDITIONS
This log splitter is a home use model. It is designed for operation under ambient temperatures
between +5°C and 40°C and for installation at altitudes no more than 1000m above M.S.L. The
surrounding humidity should be less than 50% at 40°C. It can be stored or transported under
ambient temperstures between -25°C and 55°C.
SPECIFICATIONS
* The diameter of the log is indicative - a small log can be difficult to split when it has knots or a
particularly tough fiber. On the other hand, it may not be difficult to split logs with regular fibers
even if its diameter exceeds the maximum figure indicated above.
Model number 8142606
Motor 120V 60Hz
Log
Capacity
Diameter* 5 - 25cm
Length 52cm
Splitting Force 5t
Hydraulic Pressure 20 Mpa
Hydraulic Oil Capacity 2.4 L
Overall Size
Length 1200 mm
Width 260 mm
Height 485 mm
Weight 50 kg
5

ELECTRICAL REQUIREMENTS
Connect the main leads to a standard 120V±10% (60Hz±1Hz) electrical supply which has protection
devices of under-voltage, over-voltage, over-current as well as a residual current device (RCD)
which the maximum residual current is rated at 0.03A.
CONTENTS OF THE SHIPPING CONTAINER
Note: Hardware to mount this log splitter to
a work bench is NOT supplied.
6
A. Log Splitter..................................1 set
B. Support Leg ................................1 pc
C. Owner’s Manual ..........................1 pc
D. Loose Part Bag (containing)
M8 Bolts & Nuts ......................5 sets
A
BCD

SET UP AND PREPARATION FOR OPERATION
1. Bolt the Supprt Leg to the Log Splitter, lift the log splitter by the handles at both ends and place it
on a 60 - 75cm high, stable, flat and level work surface.
2. Familiarize yourself with the controls and features of this log splitter in the illustrations.
1. Oil Tank
2. Log Pusher
3. Work Table
4. Wedge
5. Lift Handle
6. Support Leg
7. Work Table Extension
w/Log Retaining Plates
8. Switch
9. Motor
10. Pushbutton Box
11. Wheels for Minor Moving ONLY
12. Lift Handle
13. Hydraulic Control Lever
14. Control Lever Guard
15. Bleed Screw
16. Oil Drain Bolt w/Dipstick
Before operating the log splitter, the Bleed Screw should be loosened by some rotations until
air can go in and out of the oil tank smoothly.
Air flow through the Bleed Screw hole should be detectable during operation of the log split-
ter.
Before moving the log splitter, make sure the Bleed Screw is tightened to avoid oil leaking
from this point.
FAILURE TO LOOSEN THE BLEED SCREW WILL KEEP THE SEALED
AIR IN THE HYDRAULIC SYSTEM COMPRESSED AFTER BEING
DECOMPRESSED. SUCH CONTINUOUS AIR COMPRESSION AND
DECOMPRESSION WILL BLOW OUT THE SEALS OF THE HYDRAULIC
SYSTEM AND CAUSE PERMANENT DAMAGE TO THE LOG SPLITTER.
7

17. max. pressure Limiting Screw
DO NOT ADJUST THE
MAX PRESSURE LIMITING SCREW!
Max pressure was pre-set and the
Max Pressure Limiting Screw was
sealed with glue to ensure that the
log splitter works under pressure
of no more than 5 tons. The setting
was done by qualified mechanics
with professional instruments.
Unauthorized resetting will cause
the hydraulic pump to fail to output
enough splitting pressure or
RESULT IN SERIOUS INJURY AS
WELL AS DAMAGE TO THE MACHINE
.
8
WIRING DIAGRAM PLUMBING DIAGRAM

LOG SPLITTER OPERATION
This log splitter is equipped with a "ZHB" control system that requires operation by both of the user’s
hands - the left hand controls the hydraulic control lever, while the right hand controls the pushbutton
switch. The log splitter will freeze upon absence of either hand. Only after both hands release the
controls will the log pusher retract to the starting position.
Never force the log splitter for more than 5 seconds by keeping
pressure on it to split excessively hard wood.
After this time interval, the oil under pressure will be overheated and the machine could be dam-
aged. For splitting an extremely hard log, rotate it by 90° to see whether it can be split in a different
direction. In any case, if you are not able to split this log, this means that its hardiness exceeds the
capacity of the machine and thus that log should be discarded to protect the log splitter.
9

Always set logs firmly on the log
retaining plates and work table.
Make sure logs will not twist, rock
or slip while being split. Do not
force the blade by splitting the log
on the upper part. This will break
the blade or damage the machine.
Break log in the direction of its growing grain. Do not place log across the log splitter for splitting. It
may be dangerous and may seriously damage the machine.
Do not attempt to split 2 logs at the same time. One of them may fly up and hit you.
FREEING A JAMMED LOG
• Release both controls.
• After the log pusher moves back and
completly stops at its starting position,
insert a wedge of wood under the
jammed log.
• Start the log splitter in order to push
the wedge of wood completely under
the jammed one.
• Repeat the above procedure with
sharper sloped wedges until the
log is completely freed.
Do not try to knock the jammed log off.
Knocking about will damage the machine
or may launch the log and cause an accident.

REPLACING HYDRAULIC OIL
Replace the Hydraulic Oil in the log splitter after
every 150 hours of use. Take the following steps
to replace it.
• Make sure all moving parts stop and the log
splitter is unplugged.
• Unscrew the Oil Drain Bolt with Dipstick to remove it.
• Turn the log splitter on the Support Leg side over
a 4L capacity container to drain off the hydraulic oil.
• Turn the log splitter on the motor side.
• Refill with fresh hydraulic oil at the volume as per
model capacity (indicated in the specifications table).
• Clean the surface of the Dipstick on the Oil Drain Bolt,
and put it back into the oil tank while keeping the log
splitter vertical.
• Make sure the level of the refilled oil is just between
the 2 grooves around the Dipstick.
• Clean the Oil Drain Bolt before you thread it back.
Make sure it’s adequately tightened to avoid leakage
before placing the log splitter horizontally.
Periodically check the oil level to ensure it is
between the 2 grooves around the Dipstick.
If oil level is low, refill to proper level as required.
The following hydraulic oils or equivalent are recommended
for the log splitter’s hydraulic transmission system:
For winter use an ISO 22 hydraulic oil is recommended. For spring, summer and fall, use an IS0 32
hydraulic oil.
SHARPENING WEDGE
After using the log splitter for some time, sharpen the wedge by using a fine-toothed file and smooth
any burrs or crushed area along the cutting edge.
11

TROUBLE SHOOTING
PROBLEM PROBABLE CAUSE REMEDY SUGGESTED
Fails to split logs.
Log is improperly positioned. Refer to “Log Splitter Operation”
section for perfect log loading.
Size or hardiness of log exceeds the
capacity of the machine. Reduce the log size before splitting
it on the log splitter.
Wedge cutting edge is blunt. Refer to “Sharpening Wedge” section
to sharpen the cutting edge.
Oil leaks. Locate leak(s) and contact the dealer.
Unauthorized adjustment was made
on Max. Pressure Limiting Screw.
Lower max pressure rating was set. Contact the dealer.
Log pusher moves
jerkily, making
unfamiliar noise or
vibrating a lot.
Lack of hydraulic oil and excessive
air in the hydraulic system. Check oil level for possible refilling.
Contact the dealer.
Oil leaks around
cylinder ram or from
other points.
Air sealed in hydraulic system while
operating. Loosen Bleed Screw by 3-4 rotations
before operating the log splitter.
Bleed Screw is not tightened before
moving the log splitter. Tighten the Bleed Screw before
moving the log splitter.
Oil Drain Bolt with Dipstick is not
tight. Tighten the Oil Drain Bolt with
Dipstick.
Hydraulic Control Valve Assembly
and / or seal(s) worn. Contact the dealer.
12

PARTS SCHEMATIC
13


FENDEUSE DE BÛCHES
À PUISSANCE DE 5 TONNES
GUIDE DE L'UTILISATEUR
POUR VOTRE SÉCURITÉ
AVANT DE VOUS SERVIR DE LA MACHINE, VOUS DEVEZ LIRE ATTEN-
TIVEMENT ET BIEN COMPRENDRE TOUT LE MANUEL
NUMÉRO DU MODÈLE : 8142606
NUMÉRO DE SÉRIE : __________________
Vous trouverez le numéro du modèle et le numéro de série sur l'étiquette princi-
pale. Vous devriez prendre note de ces deux numéros et les garder dans un
endroit sûr au cas où vous en auriez besoin ultérieurement.
Conservez ce manuel pour pouvoir le consulter plus tard

AVERTISSEMENTS ET MISES EN GARDE
Vous devez lire attentivement et bien comprendre ce guide de l'utilisateur et les
étiquettes qui sont apposées sur la fendeuse elle-même.
On ne doit jamais se servir de la fendeuse si on est sous l'influence d'une drogue, d'une boisson
alcoolique ou d'un médicament qui pourrait affecter la capacité de l'utiliser correctement.
Placez la fendeuse de bûches sur une surface de travail ou un établi qui est de niveau, plat, stable
et à une hauteur de 60 à 75 centimètres. Il doit y avoir amplement d'espace et l'endroit choisi doit
aider l'utilisateur à rester sur ses gardes. Si la fendeuse a tendance à glisser ou à se déplacer,
boulonnez-la sur la surface de travail.
Votre aire de travail doit toujours être propre et bien éclairée. Les endroits encombrés invitent les
accidents et les blessures.
Ne vous servez pas de la fendeuse dans un endroit mouillé ou humide et ne l'exposez jamais à la
pluie.
Ne l'utilisez pas dans des endroits où des émanations provenant de peintures, de solvants ou de
liquides inflammables pourraient présenter un danger.
Vérifiez bien votre fendeuse avant de la mettre en marche. Ses dispositifs protecteurs
doivent être bien en place et en bon état. Prenez l'habitude de toujours vous assurer que
les clavettes et les clés de réglage ont été retirées avant la mise en service de la
machine. Avant de vous en servir, vous devez remplacer les pièces endommagées,
manquantes ou défectueuses.
Ne portez pas de vêtements trop amples, ni des gants inappropriés, une cravate
ou des bijoux (bagues, montres-bracelets). Ils pourraient se prendre dans les
pièces mobiles.
Quand vous travaillez, on vous conseille de porter des gants protecteurs qui
ne conduisent pas l'électricité, ainsi que des chaussures non dérapantes. Si
vos cheveux sont longs, portez un couvre-chef protecteur, pour les empêcher
de se prendre dans la machinerie.
Toute fendeuse de bûches peut parfois projeter des objets étrangers dans les yeux.
Un tel accident peut causer une lésion oculaire permanente. Portez toujours des
lunettes de sécurité. Vos lunettes habituelles n'ont que des lentilles résistantes aux
chocs. Ce ne sont pas des lunettes de protection.
Ne mettez pas la fendeuse de bûches sur le sol pour vous en servir. À ce moment-là, l'utilisateur
serait dans une position incommode et devrait approcher son visage trop près de la machine. Il ris-
querait alors d'être frappé par des débris ou des copeaux de bois.
CONSIGNES DE SÉCURITÉ ET AVERTISSEMENTS SYMBOLE APPOSÉ
SUR LA MACHINE
FAMILIARISEZ-VOUS AVEC VOTRE FENDEUSE DE BÛCHES
DROGUES, BOISSONS ALCOOLIQUES ET MÉDICAMENTS
ÉVITEZ LES SITUATIONS DANGEREUSES
INSPECTEZ VOTRE FENDEUSE DE BÛCHES
HABILLEZ-VOUS CORRECTEMENT
PROTÉGEZ VOS YEUX ET VOTRE VISAGE
2

L'emploi incorrect d'une rallonge électrique pourrait affecter le bon fonctionnement de la fendeuse de
bûches, qui pourrait alors surchauffer. Veillez à ce que le cordon prolongateur choisi ne mesure pas
plus de 10 mètres de longueur et que sa grosseur soit d'au moins 2,5 millimètres carrés, pour qu'un
courant suffisant puisse atteindre le moteur.
Évitez d'utiliser des connexions ouvertes et insuffisamment isolées. Les connexions requises doivent
être faites avec des matériaux protégés qui conviennent à une utilisation au grand air.
Assurez-vous que le circuit électrique est bien protégé et que le courant correspond à la puissance,
à la tension et à la fréquence du moteur. Assurez-vous aussi qu'il y a une mise à la terre efficace,
ainsi qu'un interrupteur différentiel approuvé en amont.
La fendeuse de bûches doit être mise à la terre. Prévenez tout contact du corps avec les surfaces
mises à la masse, comme les tuyaux, les radiateurs, les cuisinières et les réfrigérateurs.
N'ouvrez jamais le coffret à bouton-poussoir sur le moteur. Si cela s'avérait nécessaire, commu-
niquez avec un électricien compétent.
Lorsque vous branchez ou que vous débranchez la fendeuse, veillez à ce que vos doigts ne vien-
nent pas en contact avec les broches métalliques de la fiche.
La fendeuse de bûches ne doit être utilisée que par une seule personne à la fois. Il faut garder les
autres individus à une distance prudente de la zone de travail, particulièrement pendant qu'on se
sert de la fendeuse. Ne permettez jamais à une autre personne de vous aider à dégager une bûche
coincée.
Assurez-vous qu'il n'y a aucun clou, ni aucun autre corps étranger dans
chaque bûche que vous allez fendre. Les extrémités des bûches doivent avoir
été sciées à angle droit. Les branches doivent être coupées à l'égalité du tronc.
Le plancher ne doit pas être glissant. Vous devez avoir les pieds bien plantés sur le sol et toujours
garder votre équilibre.
Ne vous tenez jamais sur la fendeuse. Une blessure grave pourrait résulter si la machine est renver-
sée ou si vous entrez en contact avec la lame. Ne rangez jamais d'objets au-dessus ou à proximité
de la fendeuse, pour que personne n'ait à grimper sur la machine pour les atteindre.
Surveillez toujours le mouvement du pousse-bûche.
Attendez que le pousse-bûche se soit arrêté avant de mettre la bûche en place.
Tenez vos mains à une distance prudente de toutes les pièces mobiles de la machine.
3
CORDONS PROLONGATEURS
ÉVITEZ LES CHOCS ÉLECTRIQUES
TENEZ LES VISITEURS ET LES ENFANTS À L'ÉCART
EXAMINEZ CHAQUE BÛCHE
NE VOUS ÉTIREZ PAS TROP
ÉVITER LES BLESSURES CAUSÉES PAR DES ACCIDENTS IMPRÉVUS

Gardez vos mains à l'écart de n'importe quelle fissure ou crevasse qui s'ouvre
dans une bûche. Elle pourrait se refermer soudainement et écraser ou même
couper une main.
Quand une bûche est coincée, ne tentez pas de la dégager avec vos mains.
La machine effectuera un meilleur travail, et d'une façon plus sécuritaire,
si on l'utilise à la cadence prévue. Ne tentez jamais de fendre une bûche
plus grosse que ce qui est stipulé sur la fiche technique.
Cela pourrait être dangereux et vous pourriez endommager la fendeuse.
N'utilisez jamais la fendeuse de bûches à des fins pour lesquelles cette
machine n'a pas été conçue.
Attendez que la fendeuse se soit arrêtée complètement avant de vous en
éloigner.
Débranchez la fendeuse quand vous ne vous en servez pas, avant
d'effectuer un réglage, de changer une pièce, de nettoyer la machine
ou de la réparer. Consultez le manuel technique avant de l'entretenir.
Apportez l'huile usagée à un lieu de collecte approuvé ou bien
conformez-vous aux exigences stipulées par les lois en vigueur là où la
fendeuse est utilisée. Ne jetez jamais l'huile usagée dans un égout,
sur le sol ou dans un cours d'eau.
Gardez la fendeuse bien propre pour profiter d'un rendement optimal
et très sécuritaire.
Fermez l'atelier à clé. Débranchez les circuits principaux. Rangez ou
entreposez la fendeuse de bûches hors de la portée des enfants et
des autres personnes qui n'ont pas le droit de s'en servir.
PROTÉGEZ VOS MAINS
NE FORCEZ PAS L'OUTIL
NE LAISSEZ JAMAIS L'OUTIL EN MARCHE SANS SURVEILLANCE
DÉCONNECTEZ LE COURANT ÉLECTRIQUE
PROTÉGEZ L'ENVIRONNEMENT
ENTRETENEZ VOTRE FENDEUSE DE BÛCHES AVEC SOIN
RENDEZ L'ATELIER À L'ÉPREUVE DES ENFANTS
4

CONDITIONS D’UTILISATION
Cette fendeuse de bûches est un modèle résidentiel. On devrait s'en servir à des températures
ambiantes entre 5°C et 40°C et à des altitudes ne dépassant pas 1000 mètres au-dessus du niveau
moyen de la mer. L'humidité ambiante à 40°C devrait être inférieure à 50 %. On peut toutefois l'en-
treposer ou la transporter à des températures ambiantes variant entre -25°C et 55°C.
FICHE TECHNIQUE
* Le diamètre d'une bûche est important. En effet, une petite bûche peut s'avérer difficile à fendre si
elle contient des noeuds ou une fibre particulièrement résistante. Par contre, il pourrait être plus
facile de fendre une bûche dont la fibre est plus normale, même si son diamètre dépasse le maxi-
mum indiqué ci-dessus.
Numéro du modèle 8142606
Alimentation du moteur 120 volts 60 hertz
Bûches
acceptées
Diamètre* 5 à 25 centimètres
Longueur 52 centimètres
Puissance de fendage 5 tonnes
Pression hydraulique 20 mégapascals
Quantité d'huile hydraulique 2,4 litres
Dimensions hors-tout
Longueur 1200 millimètres
Largeur 260 millimètres
Hauteur 485 millimètres
Poids 50 kilogrammes
5

ALIMENTATION ÉLECTRIQUE
Raccordez les conducteurs principaux à une source de courant ordinaire de 120 volts (±10 %) à 60
hertz (±1 hertz) qui est munie de dispositifs protecteurs contre les baisses de tension, la surtension
et la surintensité, ainsi que d'un dispositif de courant résiduel (DCR) dont l'intensité résiduelle maxi-
male est de 0,03 ampère.
CONTENU DE LA CAISSE D’EXPÉDITION
N.B. : La quincaillerie requise pour monter
cette fendeuse de bûches sur un
établi n'est PAS fournie.
6
A. Fendeuse de bûches : 1 ensemble
B. Patte de soutien : 1 unité
C. Manuel du propriétaire : 1 unité
D. Sac de pièces contenant
des écrous et des boulons M8 :
5 jeux
A
BCD
Table of contents
Languages:
Other Power Fist Log Splitter manuals
Popular Log Splitter manuals by other brands

Yukon
Yukon HLS1500P Assembly, testing, operation, servicing & storage instruction

Boss Industrial
Boss Industrial ED8T20 owner's manual

Ribimex
Ribimex Rubiland PREHLS6SR User and maintenance manual

Portek
Portek CHARGER Operator's handbook

Mr.Paldu
Mr.Paldu Horizontalspalter 550 operating instructions

MTD
MTD 244-642-000 owner's manual