FUNCTIONAL
DESCRIPTION
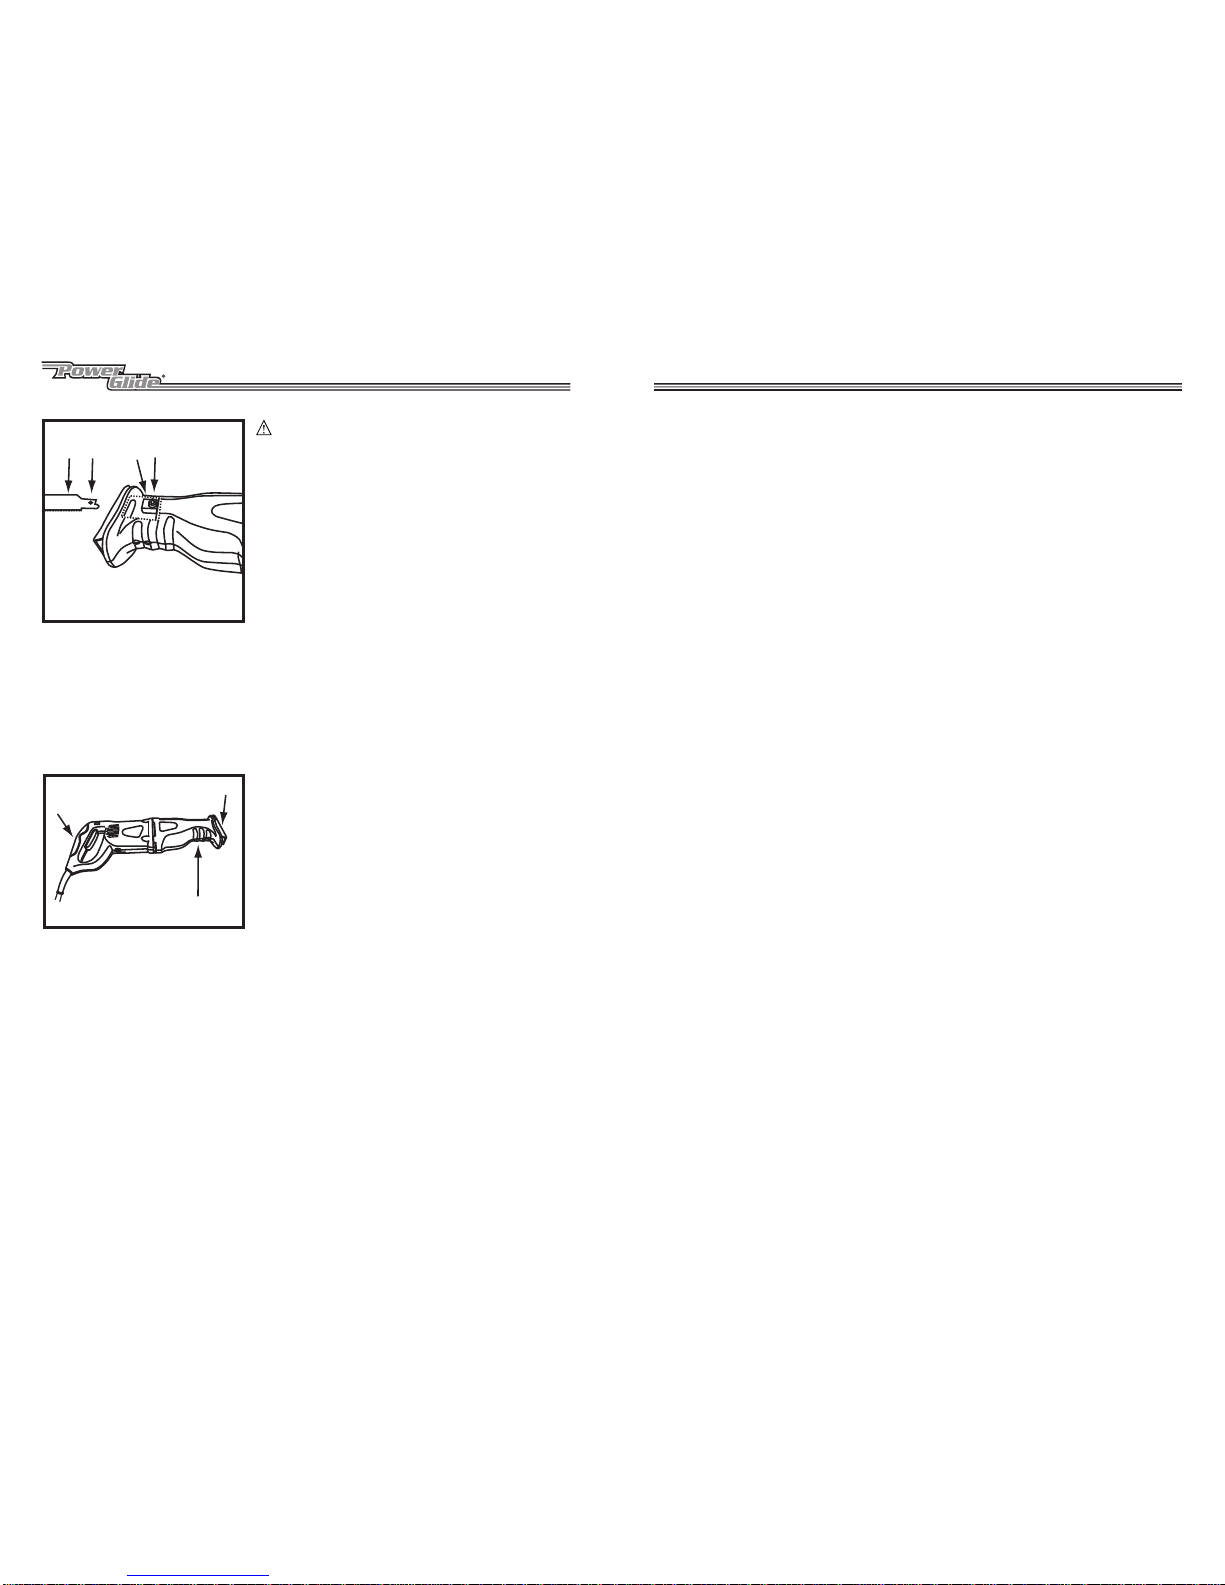
AReciprocating Saw
BMetal Blade
CWood Blade
DSpeedAdjustment
E On / Off Switch
F Locking Switch
1
2
1
Hex Key
1.
Use the speed control wheel (1) to vary the saws speed from
300 to 3,000 strokes per minute. Rotate the wheel forward,
toward the number "1" for slower speed and backward
toward the number "6" for higher speeds. Full speed is
obtained when the switch is in "MAX" position.
Caution:
• Do not force the speed adjustment knob beyond its minimum
and maximum range "1" or "MAX". Damage to the tool could
result.
• Do not operate the saw at low speed 1 or 2 for prolonged
periods. Low speed can produce high loads on the motor and
can cause overheating or damage.
Note:
• Optimum blade speed is determined by the work piece,type
and condition of saw blade. Generally:slow speeds are
used for hard materials like iron or steel and precision work
in delicate materials, while higher speeds are best in soft
materials like wood or sheet rock and will produce rapid
material removal and lower blade life.
1. Speed Control Wheel
1. Screws
2. Shoe
1. Loosen the two socket head screws (1) with the hex key
provided.
2. Position the shoe (2) in the desired location and tighten the
hex screws to secure.
Note:
• Position the shoe fore or aft to vary the depth of cut or as the
blade looses its cutting ability in a particular spot.
Extension Cords
1. Make sure your extension cord is in good condition. When using an extension cord,be sure to
use one heavy enough to carry the current your product will draw.An undersized cord will
cause a drop in line voltage resulting in loss of power and overheating.Table 1 shows the
Correct size to use depending on cord length and nameplateAmpere rating. If in doubt,use the
next heaver gage.The smaller the gage number, the heaver the cord.
2. Outdoor Use Extension Cords. When tool is used outdoors,use only extension cords intended
for use outdoors and so marked.
3. Use only UL listed extension cords. Inspect extension cord before use and never use damaged
or altered extension cords. Follow extension cord manufacturer safety instruction.
DANGER:
Double insulated tools are equipped with a polarized plug (one blade is wider than the other).This
plug will fit in a polarized outlet only one way. If the plug does not fit fully in the outlet, reverse the
plug. If it still does not fit,contact a qualified electrician to install a polarized outlet. Do not change
the plug in any way. Double insulation eliminates the need for the three wire grounded power cord
and grounded power supply system.
SPECIFIC SAFETY RULES
1.Hold tool by insulated gripping surfaces when performing an operation where the cutting tool
may contact hidden wiring. Contact with a "live" wire will also make exposed metal parts of the
tool "live" and shock the operator.
2. Always keep hands and body away from saw blade at all times during operation. Never reach
underneath or behind the work piece while cutting. Never hold the work piece being cut in your
hands,on your legs or feet.
3. Keep the shoe plate of saw firmly in contact with the cutting material at all times.
4. Never cut material thicker than the retracted length of the blade
5. Inspect for and remove any screws,staples, nails or other foreign objects before cutting.
6. Check that there is enough space under and behind the work piece for the reciprocating blade.
Be sure you will not be cutting through any electrical wires,plumbing, nails or your workbench.
SYMBOLS
The following symbols are used for the tool:
V ............Volts
Amp........Amperes
~...........Alternating Current
.........Double Insulted
HZ...........Hertz
SPM........Strokes per minute
Minimum Recommended Extension Cord Gauge (AWG) Chart (Table 1)
AMP Load Volts Extension Cord Length
120V 25' 50' 100' 150'
AWG
1-5 18 16 16 14
6-10 18 16 14 12
10-12 14 14 14 12
12-16 14 12
Not recommend
Table 1
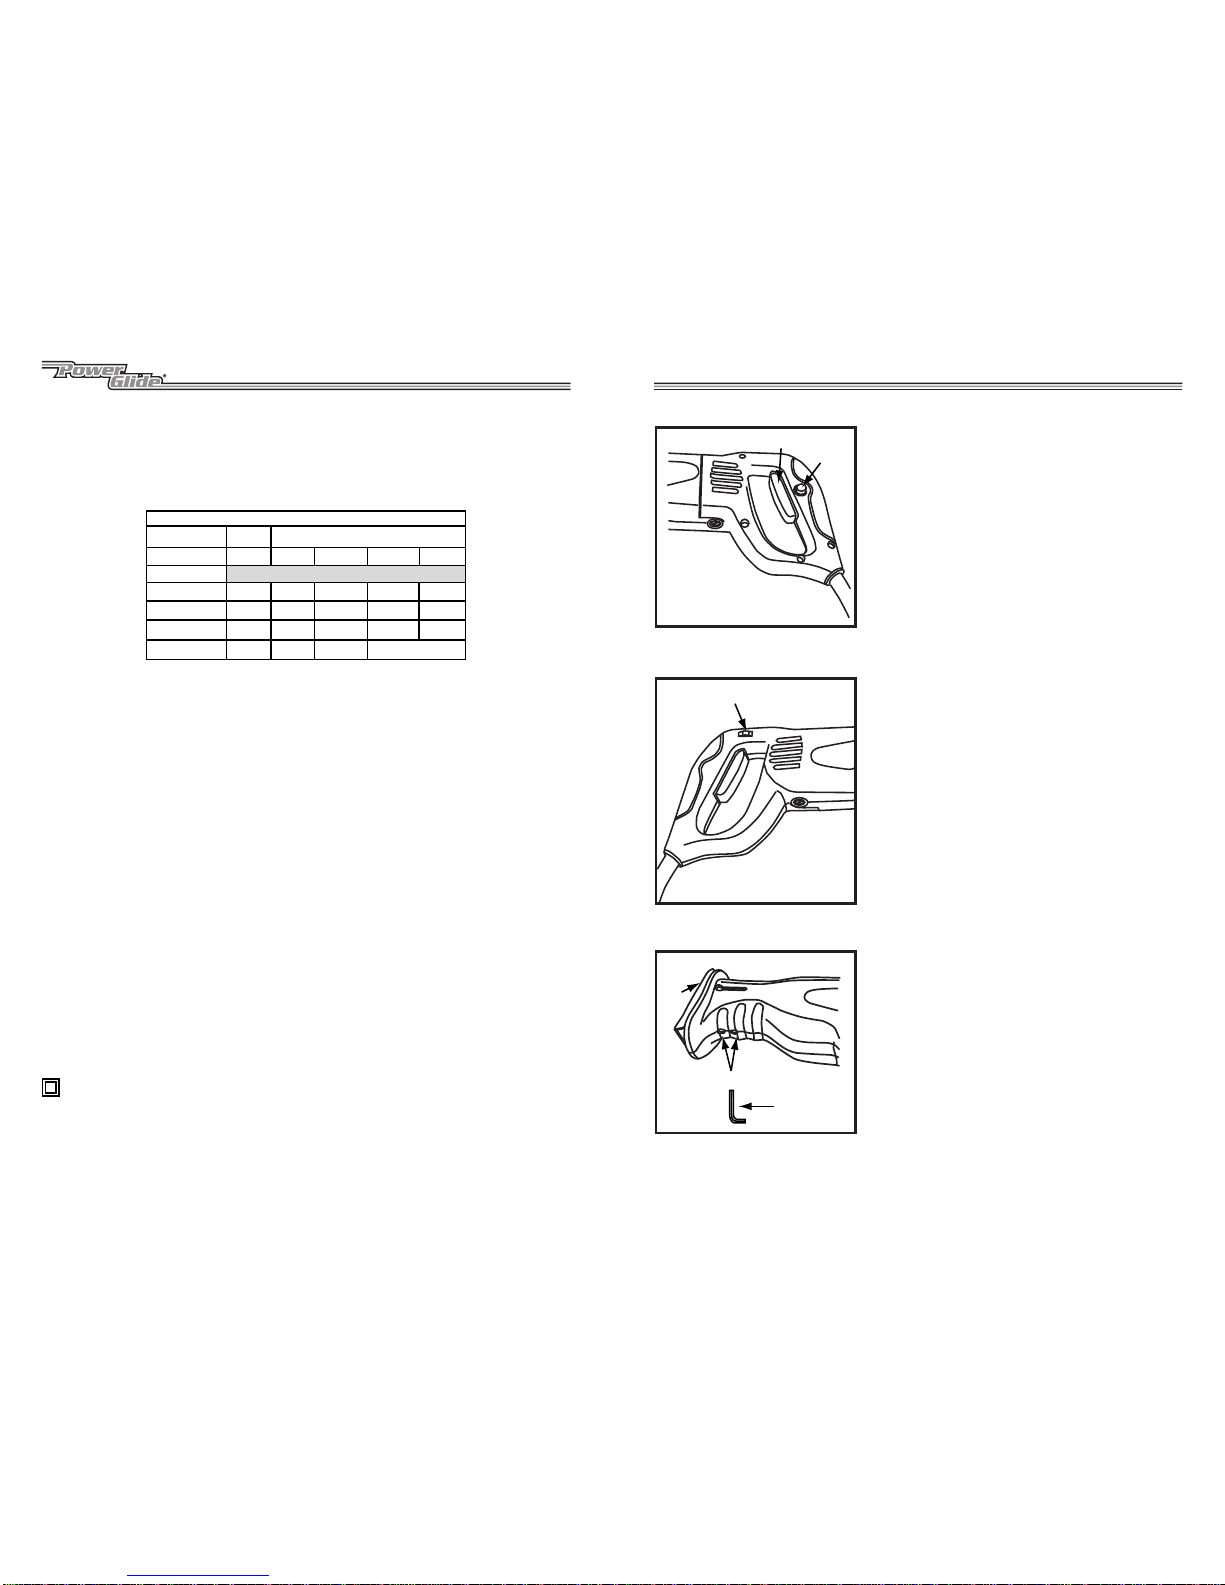
Fig. 1
1. Safety Button
2. On/Off Trigger Switch
On / Off Switch (Fig. 1)
1. To start the saw,depress the safety switch (1) and pull the On-Off trigger switch (2). To stop,release the trigger switch.
Fig. 2
1. Speed Control Wheel
Speed adjustment (Fig. 2)
1. Use the speed control wheel (1) to vary the saws speed from 300 to 3,000 strokes per minute. Rotate the wheel forward,toward the number "1" for slower speed and backward toward the number "6" for higher speeds. Full speed is obtained when the switch is in "MAX" position.
Caution:
* Do not force the speed adjustment knob beyond its minimum and maximum range "1" or "MAX". Damage to the tool could result.
* Do not operate the saw at low speed 1 or 2 for prolonged periods. Low speed can produce high loads on the motor and can cause overheating or damage.
Note:
* Optimum blade speed with is determined by the work piece, type and condition of saw blade. Generally:slow speeds are used for hard materials like iron or steel and precision work in delicate materials, while higher speeds are best in soft materials like wood or sheet rock and will produce rapid material removal and lower blade life.
Fig. 3
1. Screws
2. Shoe
Adjusting the shoe (Fig. 3)
1. Loosen the two socket head screws (1) with the hex key provided.
2. Position the shoe (2) in the desired location and tighten the hex screws to secure.
Note:
* Position the shoe fore or aft to vary the depth of cut or as the blade looses its cutting ability in a particular spot.
1. To start the saw, depress the safety switch (1) and pull the
On-Off trigger switch (2).To stop,release the trigger switch.
On / Off Switch (Figure 1)
1. Safety Button
2. On/Off Trigger Switch
FIGURE 1
FIGURE 2
FIGURE 3
Speed Adjustment (Figure 2)
Adjusting The Shoe (Figure 3)
WARNING:
•Dust and debris created during sawing,drilling,grinding or sanding on some materials may
contain chemicals known to the State of California to cause cancer or birth defects or other
reproductive harm.To reduce exposure to these chemicals,always use approved safety
equipment,work in a well-ventilated area and wear dusk mask that filters out microscopic
particles.
1
2