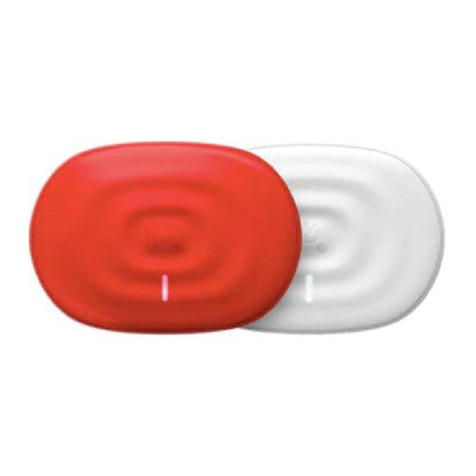
PowerDot PD-02 Specifications

1
PowerDot PD-02 Muscle Stimulator
Operator’s Instructions For Use

2
INTENDED USE
PowerDot PD-02 uses electrical muscle stimulation (EMS) (also known as neuromuscular electrical
stimulation or NMES) and transcutaneous electrical nerve stimulation (TENS) technologies to stimulate your
muscles and nerves for therapeutic purposes.
For your convenience, you can operate PowerDot PD-02 wirelessly using PowerDot Doctor mobile
application running from your iPad. Additionally, you can also prescribe/schedule certain stimulation
programs for your patients to be executed by them in their home environment using PowerDot Patient mobile
application from their iOS or Android mobile devices.
Indications for Use
PowerDot PD-02 stimulator is a prescription device which is intended to be used following the directions of a
healthcare provider. The device can be either used by the therapist in healthcare facility setting (when
operated from PowerDot Doctor mobile application) or by patient/lay operator in a home environment (when
operated from PowerDot Patient mobile application).
PowerDot PD-02 has the following indications for use:
NMES
-Retarding or preventing disuse atrophy
-Maintaining or increasing range of motion
-Re-educating muscles
-Relaxation of muscle spasms
-Increasing local blood circulation
-Prevention of venous thrombosis of the calf muscles immediately after surgery
-Stimulation of healthy muscles in order to improve or facilitate muscle performance
TENS
-Symptomatic relief and management of chronic, intractable pain
-Post-surgical and post-trauma acute pain
-Temporary relief of pain associated with sore and aching muscles due to strain from exercise or
normal household and work activities
Caution: Federal law restricts this device to sale by or on the order of a practitioner licensed
by the law of the State in which he/she practices to use or order the use of the device.

3
Safety Guidelines
1. Counter-indications
Do NOT use PowerDot PD-02 for the patients with the following conditions:
Cardiac stimulator (pacemaker), implanted defibrillator or other implanted electronic device. Such use
could cause electric shock, burns, electrical interference or death.
Body-worn electro mechanical medical devices, i.e. insulin pump.
Serious arterial circulation problems in lower limbs.
Abdominal or inguinal hernia
Symptomatic local pain relief unless etiology is established or pain syndrome has been diagnosed
Cardiac arrhythmia (do not use on chest)
2. Additional Precautions
Use caution for patients with suspected or diagnosed heart problems
Use caution for patients with suspected or diagnosed epilepsy
Use caution in the presence of the following:
-when there is a tendency to hemorrhage following acute trauma or fracture
-following recent surgical procedure when muscle contraction may disrupt the healing process
-over a menstruating or pregnant uterus
-over the skin areas which lack normal sensation
Depending on the judgement of the responsible physician, the device may only be applied under supervision and with
the parameters defined by the responsible physician. Otherwise the exercise may be too strenuous for the patients with:
-hypertension (> stage 2), ischemic heart disease and cerebrovascular diseases
-cardiovascular diseases
-pregnancy. Safety of powered muscle stimulators for use during pregnancy has not been established.
-under 16 years of age
Proceed with caution after recent surgery
Some patients may experience skin irritation or hypersensitivity due to the electrical
stimulation or electrical conductive medium. The irritation can usually be reduced by
using an alternate conductive medium, or alternate electrode placement
3. Adverse Effects
- Skin irritation and burns beneath the electrodes have been reported with the use of powered muscle stimulators.
- Potential adverse effects with TENS are skin irritation and electrode burns.
4. General Safety Measures
Read all instructions for operation before treating a patient.
The long-term effects of chronic electrical stimulation are unknown.
TENS is not effective for pain of central origin (including headache).

4
TENS waveforms have no curative value.
TENS is a symptomatic treatment, and as such, suppresses the sensation of pain which would otherwise serve as a
protective mechanism.
Stop treatment immediately if patient experiences discomfort or pain.
The choice of the therapy parameters to program, of the stimulation programs and electrode placement is restricted to
the responsible physician or therapist. It is the physician’s or therapist’s decision whether or not to use the device on a
specific patient.
Do not apply stimulation if you patient has progressive cancer or near any cancerous tumour. The increased metabolism,
caused by certain modes of stimulation, is likely to encourage cancer cells to spread.
Proceed with caution if stimulation is applied to areas of the skin whose level of sensation is lower than normal.
Do not apply stimulation to a person who cannot express themselves.
Stimulators should be kept out of the reach of children
5. Device Operating Safety Measures
Do not charge PowerDot PD-02 device while the device remains placed on/attached to any part of the patient’s body.
The patient must be familiar with the ways to terminate their stimulation session, if needed. Patients unable to operate
the emergency stop function (either by pressing button on the device or by unplugging lead cables from the device), e.g.
paralytic patients, must never be left unattended during therapy.
During the muscular contraction phase it is recommended to hold the extremities of the stimulated limbs to avoid any
shortening of the muscle during contraction, which could cause cramps.
Never begin an initial stimulation session on a person who is standing. The first five minutes of stimulation must
always be performed on a person who is sitting or lying down. In rare instances, people of a nervous disposition may
experience a vasovagal reaction. This is of psychological origin and is connected with a fear of the muscle stimulation
as well as surprise at seeing one of their muscles contract without having intentionally contracted it themselves. A
vasovagal reaction causes heart to slow down and blood pressure to drop, which produces a feeling weakness and a
tendency towards fainting. If this does occur, all that is required is to stop the stimulation and for the person to lie down
with the legs raised until the feeling of weakness disappears (5 to 10 minutes).
Do not wind cables around the neck. Tangled cables can cause strangulation.
Do not apply stimulation during sleep.
Do not use PowerDot PD-02 while driving, operating machinery, or during any activity in which involuntary muscle
contractions may put the patient at undue risk of injury.
6. Co-existence and Environmental Safety Measures
Do not use PowerDot PD-02 in the areas where an explosion hazard may occur. An explosion hazard may result from
the use of flammable anesthetics, skin cleansing agents and disinfectants as well as in the oxygen-rich environments.
Do not use device in water or in a humid atmosphere (sauna, bath, shower etc.) that would cause electrical failure.
Do not use PowerDot PD-02 at altitudes of over 9,800 feet.

5
Do not use PowerDot PD-02 if patient is connected to a high-frequency surgical instrument as this could cause skin
irritations or burns under the electrodes.
Do not use PowerDot PD-02 in the close proximity of medical devices such as MRI, CT, diathermy, X-Ray as well as
RFID equipment (e.g. electromagnetic security systems) as those could alter the current generated by PowerDot PD-02,
cause tissue damage, and can result in severe injury or death. If you have any doubts when using PowerDot PD-02
device in close proximity to another medical device, please contact the device manufacturer.
Do not use the PowerDot PD-02 within 3 feet of short wave or microwave devices as this could alter the currents
generated by the stimulator. If you are in any doubt as to the use of the stimulator in close proximity to another medical
device, seek advice from the manufacturer.
Do not apply stimulation with PowerDot PD-02 near the area of an implant, such as cochlear implants, pacemakers,
skeletal anchorage or electric implants. This could cause an electrical shock, burns, electrical interference or death.
Do not apply stimulation with PowerDot PD-02 close to metal. Remove jewelry, piercings, belt buckles or any other
metallic product or device in the area of stimulation.
•Disconnect the electrode pads from the device before using electrosurgical equipment, or a defibrillator, to avoid
cutaneous burns from the electrodes and destroying the device.
•Apply caution when using PowerDot PD-02 near electronic surveillance equipment (e.g. cardiac monitors, ECG
alarms), as there is a risk they may not work properly whilst the electrical stimulation device is being used.
•Do not use PowerDot PD-02 in areas in which unprotected devices are used to emit electromagnetic radiation. Portable
communications equipment can interfere with the device.
7. Electrode Pads Placements Safety
NEVER attach electrodes:
•Transcerebrally, or on the eyes
•On the front and sides of the patient’s neck or mouth because this could cause severe muscle spasms resulting in closure
of your airway, difficulty in breathing, or adverse effects on heart rhythm or blood pressure
•Stimulation should not be applied over the carotid sinus nerve particularly in patients with a known sensitivity to the
carotid sinus reflex.
•Counter-laterally, i.e. one stimulator should not be applied on opposite sides of the body.
•Transthoratically, to the patient’s front torso (i.e. chest or abs) and back torso (i.e. upper back, lower back)
simultaneously. Introduction of electrical current into the heart may cause cardiac arrhythmia.
•Over open wounds or rashes, or over swollen, red, infected, or inflamed areas or skin eruptions (e.g., phlebitis,
thrombophlebitis, varicose veins)
•Over, or in proximity to, cancerous lesions
8. General Electrode Pads Safety Measures
Always use electrode pads supplied by the manufacturer. Other electrodes may have electrical properties that are
unsuitable for or may cause damage.
For best results, wash and clean the skin of any oil and dry it before attaching the electrode pads.

6
For reasons of hygiene, each patient must have their own set of electrode pads. Do not use the same electrodes on
different patients.
Contaminated electrode pads or hydrogel can lead to infection.
•Use of electrode pads with degraded hydrogel can result in burns to the skin.
•Do not place the electrode pads in water.
•Do not apply solvents of any kind to the electrode pads.
Always stop the stimulation before moving or removing any electrode pads during a session, to avoid electrical shock to
the patient.
Attach the electrode pads in such a way that their entire surface is in contact with the skin.
•Some patients may experience skin irritation or hypersensitivity due to the electrical stimulation or electrical conductive
medium. The irritation can usually be reduced by using an alternate conductive medium, or alternate electrode pad
placement. If redness of the skin is observed under the electrode pad, do not start another stimulation session on the same
area if the redness is still visible.
•Electrode pads usage and storage instructions are provided on the mylar bag with electrodes.

7
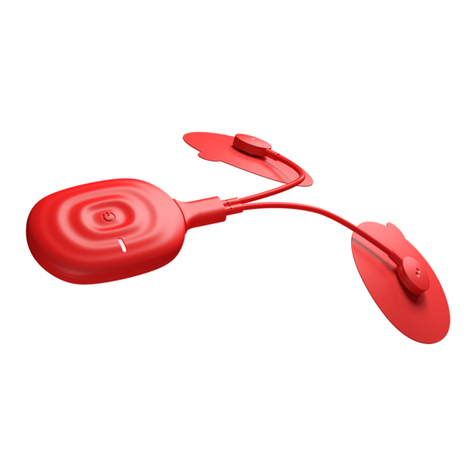
PowerDot PD-02 Device & Accessories
1) Power/Stimulation indicator
2) Multifunction button
3) Micro USB connector (dual function: connects either leads or charging cable)
4) Charging indicator
5) Female magnetic pad connector
6) Lead cable with two female magnetic connectors

8
Power/Stimulation Indicator (1):
Can be either WHITE (when the PowerDot is on or on standby mode) or ORANGE (when it’s being used for
stimulation).
Multifunction Button (2) Modes:
Multifunction Button carries out these PowerDot functions:
Multi-function Button
Action PowerDot Initial State PowerDot Resulting State
Hold for ~1 second PowerDot is OFF (no lights) PowerDot is now ON (white light
is on)
Hold for ~1 second PowerDot is ON (white light is
on) PowerDot is now OFF (no lights)
Quick Click PowerDot is in Stimulation
(orange light is on) Stimulation stops (orange light is
ON )
Hold for 5 seconds Device is ON Full Factory Reset: activation lock
is released, , Power LED turns
OFF, after few seconds turns ON
again, blinks several times and the
PowerDot becomes OFF
Hold for 3 seconds Device is OFF Soft Reset: Activation lock is
released, Power LED blinks
several times
Micro-USB Connector (3):
PowerDot uses the same high voltage micro-USB connector (3) for lead cable connection and for charging.
If the device is being used for stimulation, it will immediately stop once the lead cables are disconnected
from the micro-USB connector.
Charging Indicator (4):
While the device is still charging, you will see the ORANGE Charging Indicator (4) next to the micro-USB
charging connector. Refer to the Recharging PowerDot section below for more information on PowerDot
charging.
Snap Connector (5):
Used to attach and hold the PowerDot device in place on the rectangular pad.
Lead Cable (6):
For an easier, more comfortable PowerDot stimulation, two lead cables of different lengths (10 cm and 30 cm)
(6) are provided with each PowerDot. These give you the option to choose the right cable to reach the muscle
group you’re targeting, depending on your physical measurements.

9
Electrode Pads (7,8):
PowerDot supports 3 types of electrode pads – 5.5 cm (2.2”) diameter round pads, 4.5 cm (1.8”) diameter
round pads and 9x5 cm (3.5”x2”) rectangular pads.
PowerDot pads use unique skin biocompatible hydrogel with superb conductive qualities and adhesiveness.
The lifetime of PowerDot pads depends a lot on your individual skin properties, level of hairlessness and the
quality of maintenance. On average, each pad lasts for around 20 stimulation sessions. After that,
adhesiveness and conductive properties of the pads may start deteriorating.
Store the pads on the safety film, in a dry environment (either in the original zipper
plastic bag or inside the PowerDot carry case). Make sure you attach the pads to clean
and dry skin!

1) Mak
e
2) Lau
n
it.
3) Lau
n
to locate and a
c
To turn on yo
u
see the power
Multifunction
B
When a stimul
the Multifunct
i
Before Power
D
Doctor App.
When Power
D
will be able to
Follow the A
p
PowerDots) is
Use the Devic
PowerDot dev
i
from your Po
w
1)
Plug
device.
2)
Deta
c
your body, ac
c
manual. Base
d
1.
e
sure you iPa
d
n
ch Apple App
n
ch the installe
d
c
tivate your Po
w
u
r PowerDot P
D
light turn on.
B
utton again f
o
ation is ongoi
n
i
on Button to t
u
D
ot PD-02 can
b
D
ot is activated
,
connect and us
p
p’s onscreen a
turned on befo
r
es screen (ava
i
i
ces or to deac
t
w
erDot Doctor
a
the lead cabl
e
ch both round
p
c
ording to the
p
d
on your expe
r
D
I
nstall
in
d
runs iOS 9.0
o
Store applicati
o
d
PowerDot D
o
w
erDot (or Po
w
2.
D
-02 unit, hol
d
When Powe
r
o
r approximatel
n
g, click on the
u
rn off the Pow
e
3.
b
e used for mu
,
it gets paired
e your Power
D
dvice to scan
f
r
e you start sca
n
i
lable from the
t
ivate previous
l
a
pp.
4.
Pr
e
you intend to
p
ads, rectangul
a
p
ad placement
r
ience and und
D
irections F
o
in
g/Launching
o
r later.
o
n, search for
“
o
cto
r
applicatio
w
erDots) for th
e
Turning Pow
e
d
the Multifunc
t
r
Dot is not in
y 1 second.
Multifunction
e
rDot.
Activatin
g
scle stimulatio
n
with your mo
b
D
ot from any ot
h
f
or and activat
e
n
ning.
PowerDot D
o
l
y activated on
e
r
eparing and
P
use into the
U
a
r pad from th
e
visual guideli
n
erstanding of t
h
o
r Use
P
owerDot Do
c
“
PowerDot Do
c
n, create your
p
e
first use.
e
rDot ON/OF
F
t
ion Button fo
r
stimulation,
y
Button once t
o
g
PowerDot
n
, it must
b
e ac
b
ile phone sec
u
h
er mobile dev
i
e
your PowerD
o
ctor App men
u
e
s. You can a
c
P
lacing
P
ower
D
U
SB Type C c
o
e
ir safety film a
n
n
es provided b
y
h
e principles o
f
c
to
r
App
c
to
r
” Mobile A
p
p
rofile and the
n
F
r
approximatel
y
y
ou can turn it
o
stop the stim
u
tivated from w
i
u
rely. Neither
y
i
ce.
ots. Make sur
e
u
) to activate
a
c
tivate and use
D
ot
o
nnector on yo
u
n
d stick them t
o
y
PowerDot D
o
f
electrical mu
s
p
plication and
i
n
follow instru
c
y
1 second, unt
i
off by holdi
n
u
lation and the
n
i
thin your Pow
y
ou nor anyon
e
e
your PowerD
o
a
nother or addi
t
up to 32 Powe
u
r PowerDot
P
o
the targeted
p
o
cto
r
App or i
n
s
cle stimulatio
n
1
0
i
nstall
c
tions
i
l you
n
g the
n
hold
erDot
e
else
o
t (or
t
ional
rDots
P
D-02
p
art of
n
this
n
, you
0

may try to int
r
you create an
d
with the functi
o
3)
Atta
c
Attach Power
D
4)
Mak
e
attached to yo
u
5)
It’s
a
PowerDot Do
c
1) Initiate a
d
You will
stimulati
o
launchin
g
We gener
a
2) Initiate a
d
oFirst
,
oSeco
areas an
d
oThir
d
engage i
n
oOnc
e
patient’s
We gene
r
tolerance
3) Initiate sc
h
oFirst
,
r
oduce some v
a
d
store photos
o
o
nality to store
c
h female mag
n
D
ot PD-02 devi
c
e
sure that th
e
ur
body;
a
good time to t
u
Always tho
r
damage B
E
devicesFor
c
tor App offers
d
hoc stimulati
o
be asked first
t
o
n parameters
a
g
your session.
a
lly recommen
d
d
hoc stimulati
o
,
the relevant p
a
ndly,
y
ou will
d
optionally adj
u
d
ly, if relevant
,
n
the current se
s
e
this stimulat
i
Sessions Histo
r
r
ally recomme
n
and/or reactio
n
heduled stimul
a
,
you look up a
n
a
riations to th
e
o
f the new setu
p
and display cu
n
etic round pad
c
e female mag
n
e
entire surfac
e
u
rn on your Po
w
r
oughly inspe
c
E
FORE every
your safety, y
o
5.
multiple ways
t
o
n session, whi
c
t
o select stimu
l
a
nd optionally
d
using this op
t
o
n session for s
e
a
tient is looke
d
be asked first
u
st stimulation
,
you will be a
s
sion (one or t
w
i
on session is
r
y screen.
n
d using this o
p
n
to electrical
s
a
tion session f
o
n
d select relev
a
e
offered pad p
l
p
s once they p
r
stom pad place
connectors on
n
etic connector
e
of the round
w
erDot (or Po
w
c
t the lead cab
stimulation s
e
o
u are strongly
Starting a
S
t
o initiate a sti
m
c
h is not attrib
u
l
ation program
,
select numbe
r
t
ion for testing
o
e
lected patient.
d
up and selecte
d
to select stim
u
parameters be
f
sked to select
n
w
o).
completed, re
l
p
tion
f
or casu
a
s
timulation.
o
r the selected
p
a
nt patient fro
m
l
acement set u
p
r
ove efficient.
P
ment photos f
o
the lead cable
t
to the male sn
a
and rectangle
w
erDots), if yo
u
le and Power
D
e
ssion. Do no
t
advised to rep
l
S
timulation
m
ulation sessio
n
u
te
d
to any spec
,
relevant mus
c
r
of PowerDot
o
r demo purpo
s
d
on the Patien
t
u
lation progra
m
f
ore launching
y
n
umber of Po
w
l
evant session
a
l/one off sessi
o
p
atient.
m
the Patients s
c
p
s for better e
f
P
owerDot Doc
t
o
r your patients
.
t
o the male sna
p
a
p on the recta
n
pads are com
p
u
haven’t done
D
ot unit itself
f
t
use damage
d
l
ace them befo
r
n
:
ific patient.
c
le groups or b
o
PD-02 device
s
es.
t
s screen.
m
, relevant mu
s
y
our session.
w
erDot PD-02
d
statistics will
o
ns or when te
c
reen.
f
ficiency. Mak
e
t
or app provid
e
.
p
s on the roun
d
n
gular pad;
p
letely and se
c
it yet.
f
or any signs
d
accessories
o
r
e using again
.
o
dy areas and
a
s to be used
b
scle groups or
d
evices you w
a
be recorded
o
e
sting patient f
o
1
1
e
sure
e
s you
d
pads.
c
urely
of
o
r
.
a
djust
b
efore
body
a
nt to
o
n the
o
r the
1

12
oSecondly, you will be asked to look up and select stimulation program, up to 3 relevant muscle
groups or body areas and optionally select number of PowerDot devices to be used.
oThirdly, you will be asked to select scheduling parameters, such as total duration of the program (in
days), periodization of the sessions, starting date, notifications settings (about missing or late
stimulation sessions).
oFourthly, you can optionally mark stimulation sessions to be accessible for the Remote (home use)
stimulation from Patient Mobile App.
Be careful when confirming stimulation sessions for remote execution by the patient!
First, you have to make sure that your patients or their caregivers are prepared for and
capable of running unsupervised electrical stimulation sessions.
Specifically, they should be aware on to assemble, apply and control PowerDot PD-02,
are able to follow stimulation pad placements and stimulation positions
recommendations and are able to adjust their stimulation intensities in the controlled
manner.
They should be also aware of the product counter-indications, basic troubleshooting
and maintenance guidelines. Remote stimulation sessions are not for everyone!
oFinally, you will be asked to adjust stimulation parameters for the session (in the relevant ranges
only).
Use scheduled sessions functionality whenever a stimulation course is required for the specific patient.
Scheduled sessions’ parameters, listed above, can be always changed/re-adjusted if required.
Before commencing the stimulation, PowerDot Doctor App will be asking to turn on PowerDot PD-02 device
(or devices) which you are planning to use for the current stimulation session (please make sure the device
has been previously activated via Devices screen). Doctor App will automatically detect turned on devices,
connect to them, check for activation, display serial numbers and blink Power LED to confirm that right
PowerDot PD-02 device has been selected and associated with the session.
In addition, PowerDot Doctor App will automatically check for remaining battery level and lead cable
connection status for all the PowerDot PD-02 devices associated with the current session.
After the checks, Get Started button will appear, which means you can already launch the stimulation session.
6. Controlling A Stimulation
Using the PowerDot Doctor App, you can control your stimulation session from the Stimulation Dashboard,
which has the following controls available:

13
Header Indicator (1) displays the remaining time for the total stimulation session, current stimulation phase
(if applicable), name of the stimulation program and stimulation phase (if applicable), and name of the patient
(if applicable).
Contraction/Rest Indicator (2) – for the stimulation programs (and individual phases) involving muscle
contractions, helps to understand time between and during contraction and rest intervals.
Intensity Adjustment controls – Tap on Intensity Increase (or “+”) (3) and Intensity Decrease (or “-“) (4)
buttons an accurate adjustment, or hold either button down for a faster adjustment.
Device-level Intensities Lock (6) and Channel-level Intensities Lock controls (5) synchronize intensity
changes either a) between PowerDot PD-02 devices (this applies only to the two-device Duo stimulation
mode) or (b) between two stimulation channels of individual PowerDot PD-02 device.
Both controls are enabled by default and can be used to fine-tune the intensity of your current stimulation
session. However, it’s best to use them only when you really need them (e.g. to address muscle imbalance).
Use Stop, Pause, Resume, Skip Phase controls to control the flow of the stimulation session. Skip Phase
control is only applicable to stimulation programs which are comprised of multiple and skippable stimulation
phases (e.g. such as Performance Strength program).
Switch Session Control (7) - allows you to switch between actively running stimulation sessions (on a
different patients). When switching between sessions, your iPad will be disconnecting from PowerDot PD-
02(s) used in currently active session and re-connecting to PowerDot(s) being used in the newly selected
session.
Home Screen Control (8) – helps you to navigate back to PowerDot Doctor App Main Menu screen, so you
could select another patient and initiate a new stimulation session.

14
When applying Switch Session and Home Screen Controls, you will be leaving current
stimulation session and disconnecting from currently used PowerDot PD-02 devices.
Although the devices will be continuing maintaining your stimulation session
parameters, you won’t be able to control them programmatically (e.g. adjust intensities or
stop/resume session using App controls) until your select your original stimulation
session and re-connect to your devices again. Re-connection is not immediate and it can
take up to 10 seconds, therefore, in all emergency situations, we strongly advice to get
yourself familiar and follow manual Terminating Stimulation protocols 2 and 3, as
provided below.
I
f your patient experiences major discomfort or pain – PAUSE your stimulation session
and/or DECREASE intensities. For your patient’s safety, after a PAUSE, your
s
timulation session will resume at only 80% of the previous intensity values.
7. Terminating Stimulation
It’s important to know the quick ways to stop the stimulation session when something unexpected happens
(e.g. pads get detached or partially detached; patient starts feeling pain; the stimulation area gets wet, etc.).
There are 3 main ways to immediately terminate stimulation:
1) The recommended/most commonly used option: Tap Pause or Stop on the Stimulation Dashboard
2) Alternatively press the Multifunctional Button on the PowerDot device
3) Or: quickly unplug the lead cable from PowerDot device
8. Carrying & Storing PowerDot
PowerDot PD-02 carry case is specifically designed for carrying and storing up to 2 PowerDot devices, their
lead cables and electrode pads.
To keep electrode pads clean and make them last longer, always re-attach them to the safety film in between
use, then store them in your carrying case pocket. You can use both sides of a single safety film to attach one
set of PowerDot electrode pads (one side for the rectangular pad and the other for the two round pads).
In multi-patient environment, it is always a good idea to mark patient pads with the patient name or initials on
the top surface or on the pads film, e.g. using resistant marker pen.
9. Deactivating PowerDot
PowerDots can be deactivated from your Doctor App either from within the Patient or or by manually
resetting the PowerDot device.
For manual deactivation: when PowerDot is OFF, press and hold Multi-function button for 3 seconds until
you see the power indicator blinking. Now you can activate your PowerDot.
Deactivation from the PowerDot Doctor App is performed from the Devices screen as per on-screen
instructions.
Upon successful deactivation, the power indicator will blink several times.

15
Intensity Adjustment Guidelines
For TENS programs or less demanding NMES programs, you are generally required to progressively increase the
stimulation intensities until you see muscle twitches or feel comfortable sensation.
For the majority of NMES stimulation programs, that use powerful muscle contractions, the efficacy of the treatment
can be proportional to the maximum number of fibers being recruited, and, therefore, it is often required to adjust your
stimulation intensity to the maximum levels the patient can comfortably endure.
Keep in mind that the maximum intensity levels may vary, not only from one stimulation session to another, but also
within the course of a single stimulation session. It’s possible that patient’s muscles will adapt to stimulation at a
certain intensity level reasonably quickly. Various conditions, such as differences in skin’s dampness or sweat level, or
the rate of the electrode pad deterioration, may affect the intensity of stimulation.
During stimulation, it is important to maintain feedback with the patient to make sure that his/her
stimulation intensity settings are always in balance with the level of comfort on one side and efficiency of
stimulation on the other.
For efficiency in NMES and Performance sessions, based on patient feedback and feelings, try increasing
slowly intensities during the course of the session.

16
Charging PowerDot
PowerDot PD-02 device can be recharged from any reliable USB connection (e.g. laptop, mobile phone charger, wall
USB charger, etc.). It takes around 60 minutes for the device to go from zero level to full charge.
NEVER charge PowerDot when it is attached to the patient’s body.
Always use an original charging cable provided with PowerDot.
NEVER charge PowerDot from unreliable or problematic sources.
When using 3rd party party USB AC chargers, we recommend unplugging the AC plug from the wall
before contacting PowerDot device.
PowerDot PD-02 uses UL 1642 and UN 38.3 certified built-in Lithium Polymer battery, which requires recharging
after approximately 5-6 hours of continuous usage. The battery will last for at least 500 charging cycles.
If you plan to store PowerDot PD-02, unused, for longer than six months, charge it to at least 50% every six months.
In the PowerDot Doctor App, the current battery charge level is displayed at the Stimulation and is also available on the
Devices screen.
When you see the ORANGE charging light next to micro-USB connector, this means PowerDot is currently charging.
Once PowerDot is fully charged, the ORANGE light will turn off.

17
Stimulation Protocols
Stimulation protocols, accessible to doctors from PowerDot Doctor App, based on their intended use, can be divided into 3 main
groups:
1. NMES Rehabilitation Protocols
Disuse Atrophy
Protocol Name Indication For Use
Disuse Atrophy* Retarding disuse atrophy
Description
Targeting slow twitch (Type I) muscle fibers to facilitate increases in muscle volume after long periods of immobilization or
diminished movement.
Contraction, sec
(allowed range)
Contraction, Hz
(allowed range)
Rest, sec
(allowed range)
Rest, Hz
(allowed range)
Ramp Up/Down, sec
(allowed range)
Pulse Width, uS
(allowed range)
Duration, min
(allowed range)
5
(3-8) 40
(30-50) 5
(3-8) 4
(0-6) 2/0.5
(0.5-3) 208
(160-320) 25
(15-30)
Reinforcement Post Disuse Atrophy* Stimulation of healthy muscles in order to improve
or facilitate muscle performance
To be used on previously atrophied muscles that have gained the volume. Increases strength and stability by targeting fast twitch
(type II) muscle fibers.
4
(3-6) 80
(60-100) 8
(5-12) 4
(0-6) 1.5/0.75
(0.5-3) 320
(208-432) 20
(15-30)
Reinforcement Post Disuse Atrophy (Agonist/Antagonist) Stimulation of healthy muscles in order to improve
or facilitate muscle performance
To be used on previously atrophied muscles that have gained the volume. Increases strength and stability by targeting fast twitch
(type II) muscle fibers. Agonist/Antagonist sequencing.
4
(3-6) 70
(60-100) 4
(3-6) 4
(0-6) 1.5/0.75
(0.5-3) 320
(208-432) 15
(10-20)
Prevention of Disuse Atrophy* Preventing disuse atrophy
Reproduces a series of slow twitch (Type I) targeted contractions comparable to the normal level of activity during a day.
To be used on the immobilized limb after surgery or bone fracture.
5
(3-8) 35
(30-50) 12
(9-18) 4
(0-6) 2/0.5
(0.5-3) 320
(208-432) 45
(30-60)
Prevention of Disuse Atrophy (Agonist/Antagonist) Preventing disuse atrophy
Reproduces a series of slow twitch (type I) targeted contractions comparable to the normal level of activity during a day.
To be used on the immobilized limb after surgery or bone fracture. Agonist/Antagonist sequencing.
6
(4-8) 35
(30-50) 6
(4-8) 4
(0-6) 2/0.5
(0.5-3) 320
(208-432) 20
(15-30)
Muscle Re-education and Increasing Range of Motion
Protocol Name Indication For Use
Muscle Re-education, Level 1 (Slow Twitch)* Muscle re-education
Description
Targets re-education and muscle function improvements of slow twitch (Type I) muscle fibers.
Contraction, sec
(allowed range)
Contraction, Hz
(allowed range)
Rest, sec
(allowed range)
Rest, Hz
(allowed range)
Ramp Up/Down, sec
(allowed range)
Pulse Width, uS
(allowed range)
Duration, min
(allowed range)
5
(3-8) 40
(30-50) 5
(3-8) 4
(0-6) 2/0.5
(0.5-3) 208
(160-320) 25
(15-30)
Muscle Re-education, Level 2 (Fast Twitch)* Muscle re-education
Targets re-education and muscle function improvements of fast twitch (Type II) muscle fibers. Apply/schedule after at least 2 weeks
of usage of Level 1 program.
4
(3-6) 80
(50-100) 8
(5-12) 4
(0-6) 1.5/0.75
(0.5-3) 320
(208-432) 20
(15-30)
Neuro Rehab* Muscle re-education
Targets facilitation and re-learning of motor skills for stroke patients.

18
5
(3-8) 40
(30-50) 15
(9-24) 0 4/2
(1.5-6) 208
(160-320) 20
(15-30)
Increase Range of Motion* Maintaining or increasing range of motion
Targets increase in range of motion by creating contraction and movement in the antagonist muscle, thus causing maximum stretch
of the problematic muscle.
5
(3-8) 40
(30-50) 10
(6-16) 4
(0-6) 2/0.5
(0.5-3) 208
(160-320) 20
(15-30)
Spasticity Treatment* Maintaining or increasing range of motion
Targets reduction of spasticity by inhibition of motor neurons of the spastic muscle via the reciprocal inhibition reflex. To be used
on the antagonist of the spastic muscle with the intensity sufficient to create movement to the maximum range of motion.
5
(3-8) 40
(30-50) 10
(6-16) 4
(0-6) 2/0.5
(0.5-3) 208
(160-320) 20
(15-30)
Specific Rehabilitation
Protocol Name Indication For Use
Hip Prosthesis, Level 1 Retarding disuse atrophy
Description
Targets improving stability and strength of Gluteus Maximus and Medius muscles following the orthopedic surgery of hip. Level 1 is
targeting slow twitch (Type I) muscle fibers.
Contraction, sec
(allowed range)
Contraction, Hz
(allowed range)
Rest, sec
(allowed range)
Rest, Hz
(allowed range)
Ramp Up/Down, sec
(allowed range)
Pulse Width, uS
(allowed range)
Duration, min
(allowed range)
6
(4-8) 40
(30-50) 6
(4-8) 0 1.5/0.75
(0.5-3) 208
(160-320) 30
(20-40)
Hip Prosthesis, Level 2 Retarding disuse atrophy
Targets improving stability and strength of Gluteus Maximus and Medius muscles following the orthopedic surgery of hip. Level 1
is targeting fast twitch (Type II) muscle fibers. Use/schedule Level 2 at least 2 weeks after using Level 1 program.
4
(3-6) 80
(60-100) 10
(7-15) 0 1.5/0.75
(0.5-3) 208
(160-320) 15
(10-20)
Patellar Syndrome, Level 1 Retarding disuse atrophy
Targets increase of the stability of the knee and retardation of the disuse atrophy in Medial Vastus and larger Quadriceps muscle.
Level 1 is targeting slow twitch (Type I) muscle fibers.
6
(4-8) 40
(30-50) 6
(4-8) 0 1.5/0.75
(0.5-3) 208
(160-320) 30
(20-40)
Patellar Syndrome, Level 2 Retarding disuse atrophy
Targets increase of the stability of the knee and retardation of the disuse atrophy in Medial Vastus and larger Quadriceps muscle.
Level 2 is targeting fast twitch (Type II) muscle fibers. Use/schedule Level 2 at least 2 weeks after using Level 1 program.
4
(3-6) 80
(60-100) 10
(7-15) 0 1.5/0.75
(0.5-3) 208
(160-320) 15
(10-20)
Hemiplegia* Maintaining or increasing range of motion
Targets re-learning of motor skills and reduction of spasticity. Features long ramp up time o the contraction and a long rest phase.
Can be used to complement traditional physiotherapy after a stroke.
10
(6-15) 45
(30-50) 20
(12-30) 0 4/2
(1.5-6) 208
(160-320) 20
(15-30)
Rotator Cuff, Level 1 Muscle re-education
Targets increase of the muscular function and neuro motor re-education of the rotator cuff. Use to treat disturbed range of motion,
shoulder tendopathies and pain around the shoulder. Training can be combined with active movements.
6
(6-15) 40
(30-50) 6
(4-8) 4
(0-6) 1.5/0.75
(0.5-3) 208
(160-320) 20
(15-30)
Rotator Cuff, Level 2 Muscle re-education
Targets increase of the muscular function and neuro motor re-education of the rotator cuff. Use to treat disturbed range of motion,
shoulder tendopathies and pain around the shoulder. Training can be combined with active movements. Apply/schedule after at least
2 weeks of using Level 1 program.
4
(3-6) 80
(60-100) 10
(7-15) 4
(0-6) 1.5/0.75
(0.5-3) 208
(160-320) 15
(10-20)
Post-ACL Treatment (Agonist/Antagonist) Muscle re-education
Targeting improving active stability of the knee joint after rupture of the ACL. This is a contraction offset session: stimulation starts
on Hamstrings and then continues on the Quadriceps, preventing the risk of the anterior drawer.
3+6 40 8 4 1.5+3/0+0.75 320 25

19
(30-50) (240-432)
Shoulder Subluxation Prevention and retardation of atrophy
Targets stimulation of Deltoid and Supraspinatus muscles as prevention and treatment for atrophy of the sub-dislocated shoulder.
8
(6-10) 40
(30-50) 8
(6-10) 0 3/1.5
(1-5) 208
(160-320) 25
(20-30)
Back-Trunk Stabilization* Muscle re-education
Targets stabilization of trunk and back muscles by stimulating abdominal or lumbar muscle groups. Suits patients with insufficiency
in the bank and trunk due to long term pain or neurological disorder. This program can be also combined with active movements.
6
(3-8) 40
(30-50) 12
(6-16) 4
(0-6) 2/1
(0.5-3) 208
(160-320) 30
(20-40)
Circulation, Relaxation of Muscle Spasms, Vascular
Protocol Name Indication For Use
Heavy Legs Increasing local blood circulation
Relaxation of muscle spasms
Description
For use when swelling of the feet and ankle occurs together with a feeling of the legs being very heavy. Muscle contractions will
compress the deep veins of the legs and eject venous blood upwards. The stimulation will also help to overcome the tension and
tendency to cramp. To be used on calf muscles (Gastrocnemius).
Contraction, sec
(allowed range)
Contraction, Hz
(allowed range)
Rest, sec
(allowed range)
Rest, Hz
(allowed range)
Ramp Up/Down, sec
(allowed range)
Pulse Width, uS
(allowed range)
Duration, min
(allowed range)
continuous 7/5/3
(7/7/7 min)
0 0 1/0.5 208
(160-320) 21
(15-30)
Capillarization Increasing local blood circulation
Helps to make muscle fibers more resistant to fatigue. Capillarization decreases the amount of lactic acid being produced and creates
a larger area of exchange and distribution of oxygen and metabolites.
continuous 8
(5-10) 0 0 1/0.5
208
(160-320) 25
(20-30)
De-contraction Relaxation of muscle spasms
Post-surgical and post-trauma acute pain
Targets reduction of muscular tension by using very low stimulation frequency.
continuous 1
0 0 1/0.5
208
(160-320) 20
(10-40)
Arterial Insufficiency Increasing local blood circulation
Targets arterial insufficiency of the lower limbs. Low frequency stimulation increases the capacity of the fibers to use the oxygen,
improves the tolerance while avoiding the tetanization and considerable fatigue. Electrodes are placed on the calf muscles
(Gastrocnemius) and popliteal nerve.
15
(10-20) 10
(7-12) 15
(10-20) 3
(0-6) 1/1
(0.5-1.5) 208
(160-320) 15
(10-20)
Prevention of Venous Thrombosis Prevention of venous thrombosis
Targets achieving maximum drainage of the veins and combats the stasis. Uses short tetanic contractions separated by long active
pauses to increase the blood flow. Electrodes are placed on the calf muscles (Gastrocnemius) and popliteal nerve.
4
(3-5) 50
(40-60) 20
(15-25) 8
(6-10) 1.5/1.5
(1-2) 208
(160-320) 20
(15-30)
Cramp Prevention Increasing local blood circulation
Relaxation of muscle spasms
Targeting cramps at calves. First sequence increases local blood circulation, second sequence provides relaxation to muscle tone.
Each sequence repeats 4 times.
continuous 8/3 x 4 (8
min/2 min)
(2-10)
0 0 1/0.5
208
(160-320) 40

20
2. TENS Pain Management Protocols
By Type of Pain
Protocol Name Indication For Use
Acute Pain Post-surgical and post-trauma acute pain
Description
High frequency TENS is a popular choice for the management of acute pains. Adjust pulse width to patient pain sensitivity level.
Frequency, Hz
(allowed range)
Burst Parameters
(allowed range)
Pulse Width, uS
(allowed range)
Duration, min
(allowed range)
100
(80-150) N/A 208
(32-320) 30
(15-60)
Fracture Pain Post-surgical and post-trauma acute pain
Medium frequency/medium pulse width TENS is a good choice for treating sensitive fracture pains. Pain management helps to
prevent various complications such as pulmonary complications or thrombosis.
75
(60-80) N/A 160
(128-240) 30
(15-60)
Chronic Pain Symptomatic relief and management of chronic,
intractable pain
Temporary relief of pain associated with sore and aching
muscles due to strain from exercise or normal household
and work activities
Chronic pains are handled well with low frequency Endorphinic TENS stimulation. Low frequency stimulation alleviates pain by
stimulating muscles to release the endorphins. In addition, muscle twitches also increase local blood circulation.
5
(1-8) N/A 240
(160-320) 30
(15-60)
Radiating Pain
Projected Pain
Symptomatic relief and management of chronic,
intractable pain
Burst TENS is effective in managing various kinds of radiating (projected) pains such as mononeuropathy, central pain as well as for
deep muscular pains. High frequency pulses packaged into low frequency bursts alleviate pain by stimulating muscles to release the
endorphins. In addition, muscle twitches also increase local blood circulation.
80
(80-150) 5 pulses per burst, 2 bursts/sec
(5-10 ppb, 2-4 bursts/sec) 208
(160-320) 20
(10-40)
By Body Part
Protocol Name Indication For Use
Cervical Pain
Neck Pain Symptomatic relief and management of chronic,
intractable pain
Temporary relief of pain associated with sore and aching
muscles due to strain from exercise or normal household
and work activities
Description
For treating neck pain resulting from chronically contracted of Levator scapulae and/or superior Trapezius muscles. Low frequency
stimulation alleviates pain by stimulating muscles to release the endorphins. In addition, muscle twitches also increase local blood
circulation.
Frequency, Hz
(allowed range)
Burst Parameters
(allowed range)
Pulse Width, uS
(allowed range)
Duration, min
(allowed range)
5
(1-8) N/A 240
(160-320) 30
(15-60)
Lower Back Pain Symptomatic relief and management of chronic,
intractable pain
Temporary relief of pain associated with sore and aching
muscles due to strain from exercise or normal household
and work activities
Table of contents
Other PowerDot Fitness Equipment manuals