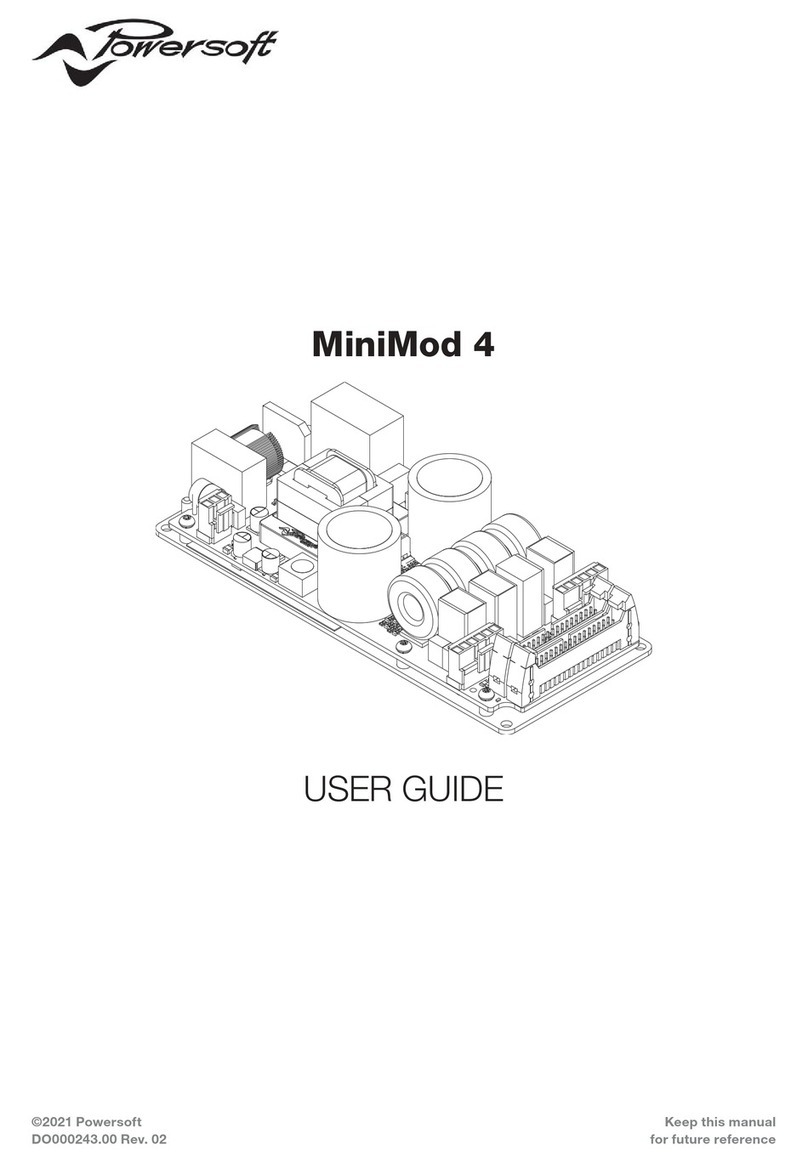
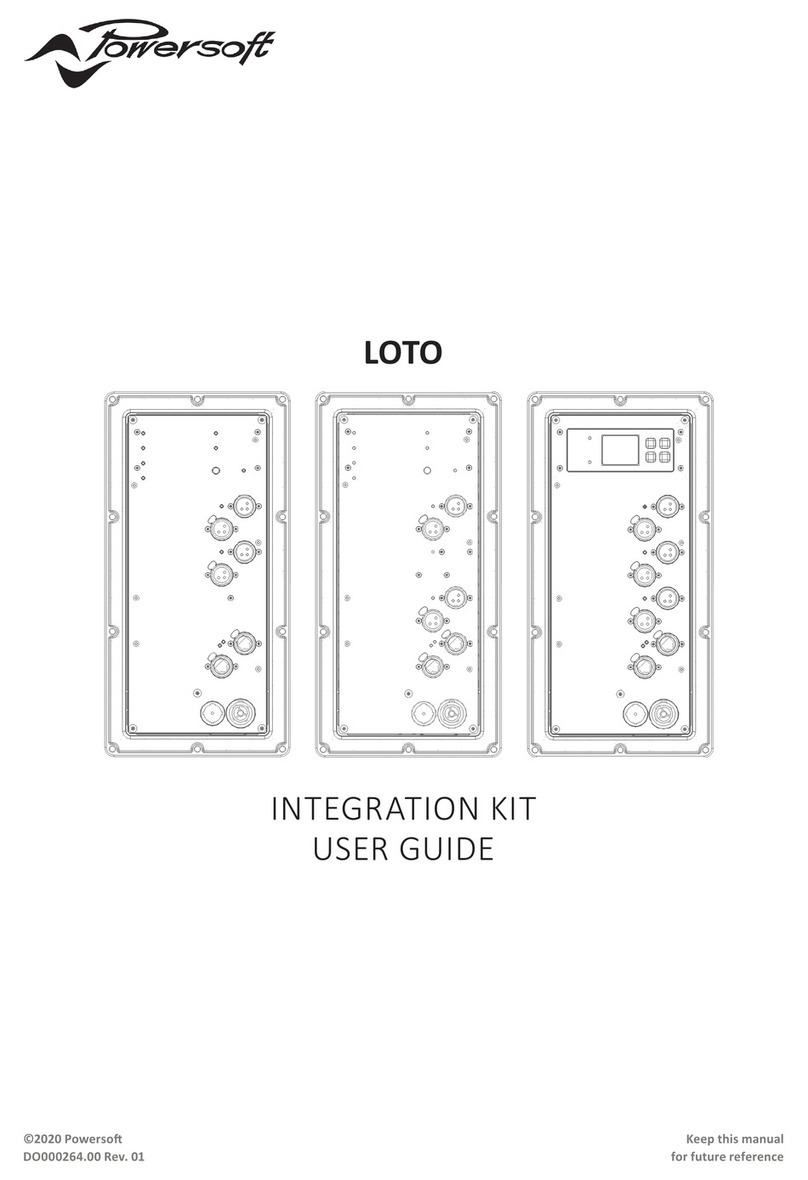
powersoft LOTO User manual

Keep this manual
for future reference
©2021 Powerso
USER GUIDE
LOTO
DO000265.00 Rev. 02

DO000265.00_powerso_LOTO_uguide_en
Data are subject to change without noce.
For latest update please refer to the
online version available on www.powerso-audio.com.

Table of contents
1. Important safety instrucons iii
2. Importantes instrucons de sécurité iv
3. Instrucciones de seguridad importantes v
4. Importan istruzioni di sicurezza vi
5. Regulatory informaon vii
6. Electrostac Discharge (ESD) viii
7. LOTO 1
7 : 1.LOTO – DSP CORE 1
7 : 2.LOTO – INTERFACE 1
7 : 3.LOTO – HEATSINK 1
7 : 4.LOTO – IK SOLUTIONS 1
7 : 5.Available conguraons 2
7 : 5.1. LOTO Basic2 2
7 : 5.2. LOTO Advanced 1D 2
7 : 4.1. LOTO Advanced 2D 2
8. Processing architecture 3
8 : 1.Source Selecon 4
8 : 2.Matrix 4
8 : 3.Advanced EQ 5
8 : 4.Speaker EQ 5
8 : 5.Way block 5
8 : 5.1. Way Eq 5
8 : 5.2. Limiters 6
8 : 5.3. Damping 6
8 : 5.4. Live Impedance 6
8 : 5.5. Diagnoscs 7
9. Memory 8
9 : 1.Memory structure 8
9 : 2.Preset-le types 8
9 : 2.1. Snapshots 8
9 : 2.2. Applicaons 9
10. User interacon 10
10 : 1.LEDs + Pushbuons 10
10 : 1.1. Status LED 10
10 : 1.2. Remote LED 11
10 : 1.3. Preset LEDs 11
10 : 1.4. Preset pushbuon 11
10 : 1.5. Reset Pushbuon 11
10 : 2.Display 12
10 : 2.1. Startup splash 12
10 : 2.2. Color palee 12
10 : 3.Display Operang instrucons 13
10 : 3.1. Pushbuons 13
10 : 3.2. LEDs 13
10 : 3.3. Display orientaon 13
10 : 3.4. Menu navigaon 13
10 : 4.Display GUI descripon 14
10 : 4.1. Home 14
10 : 4.2. Node info 15
10 : 4.3. Main Menu 15
10 : 4.4. Source select 15
10 : 4.5. Input Patch 16
10 : 4.6. Speaker gain 16
10 : 4.7. Speaker delay 17
10 : 4.8. Preset select 17
10 : 4.9. Snapshot select 17
10 : 4.10. Network cong 18
10 : 4.11. Sengs 18
10 : 4.12. Factory reset 19
10 : 5.ArmoníaPlus 19
10 : 5.1. Virtual Devices 19
10 : 5.2. Match 19
10 : 5.3. Call 19
10 : 5.5. Preset Recall 20
10 : 5.6. Snapshot Save 20
10 : 5.7. Remote OFF/STANDBY 20
10 : 5.4. So Reset 20
10 : 5.8. Firmware Updater 21
11. Dante/AES67 22
11 : 1.Audinate Chipset 22
11 : 2.Dante sengs 22
11 : 3.Stream injecon/pick points 22
12. Extra features 24
12 : 1.External LED 24
12 : 2.External volume pots 24
| i

ii | LOTO | User guide
12 : 3.Spare pushbuon 24
12 : 4.Line level output 25
13. Prototyping 26
13 : 1.Powerso Model 26
13 : 1.1. DSP discovery 26
13 : 1.2. DSP conguraon - general 26
13 : 1.3. DSP conguraon - OUT cong 27
13 : 1.4. DSP inializaon 29
13 : 2.Preset making 30
13 : 2.1. DSP Discovery 30
13 : 2.2. Speaker conguraon 31
13 : 2.3. Dening DSP processing 31
13 : 2.4. Locking a preset 31
13 : 2.5. Saving a preset 32
13 : 2.6. Validang a preset 32
13 : 2.7. Advanced features 32
13 : 2.8. Factory default snapshot 33
13 : 3.Custom Models 34
13 : 3.1. Creang new model 34
13 : 3.2. Custom model - general 35
13 : 3.3. Custom model - memory 35
13 : 3.4. Custom model - out cong 35
13 : 3.5. Custom model - misc 36
13 : 3.6. Custom model - display 36
13 : 3.7. Prototype validaon 36
13 : 3.8. Custom Model Inializaon 37
13 : 3.9. Private Publish 38
13 : 3.10. Check virtual model 39
13 : 3.11. Check online model 40
14. Producon/Distribuon 41
14 : 1.Custom Model Inializaon 41
14 : 2.Public Publish 42
15. Revising Exisng Products 43
15 : 1.Preset List Revision 43
15 : 2.Miscellaneous 44
15 : 3.Display 44
16. Appendix 45
16 : 1.DSP Core Pinout 45
17. Specicaons: 52

Important safety instrucons 1
CAUTION
RISK OF ELECTRIC
SHOCK DO NOT OPEN
This unit has been engineered and manufactured to ensure your
personal safety. But IMPROPER USE CAN RESULT IN POTENTIAL ELECTRICAL
SHOCK OR FIRE HAZARD.
In order not to defeat the safeguards incorporated into this product,
observe the following basic rules for its installaon, use and service. Please
read these “Important Safeguards” carefully before use.
• Read these instrucons.
• Keep these instrucons.
• Heed all warnings.
• Follow all instrucons.
• Do not use this equipment near water.
• Clean only with a dry cloth.
• Do not block any venlaon openings. Install in accordance with the
manufacturer’s instrucons.
• Do not install near any heat sources such as radiators, heat registers,
stoves, or other apparatus that produce heat.
• Do not defeat the safety purpose of the polarized or grounding-type
plug. A polarized plug has two blades with one wider than the other.
A grounding-type plug has two blades and a third grounding prong.
The wide blade or the third prong are provided for your safety. If
the provided plug does not t into your outlet, consult an electrician
for replacement of the obsolete outlet.
• Protect the power cord from being walked on or pinched parcularly
at plugs, convenience receptacles, and the point where they exit
from the apparatus.
• Only use aachments/accessories specied by the manufacturer.
• Use only with the cart, stand, tripod, bracket, or
table specied by the manufacturer, or sold with the
apparatus. When a cart is used, use cauon when
moving the cart/apparatus combinaon to avoid injury
from p-over.
• Unplug this apparatus during lightning storms or when unused for
long periods of me.
• Refer all servicing to qualied service personnel. Servicing is
required when the apparatus has been damaged in any way, such
as power-supply cord or plug is damaged, liquid has been spilled
or objects have fallen into the apparatus, the apparatus has been
exposed to rain or moisture, does not operate normally, or has
been dropped.
• The apparatus shall be connected to a MAINS socket outlet with a
protecve earthing connecon
• Where the MAINS plug or an appropriate coupler is used as the
disconnect device, the disconnect device shall remain readily
operable.
CLASS3
WIRING
THE TRIANGLE WITH THE LIGHTNING BOLT IS USED TO ALERT THE USER TO
THE RISK OF ELECTRIC SHOCK.
CLASS3
WIRING
THE TRIANGLE WITH THE EXCLAMATION POINT IS USED TO ALERT THE USER
TO IMPORTANT OPERATING OR MAINTENANCE INSTRUCTIONS.
THE CE-MARK INDICATES THE COMPLIANCE OF THE PRODUCT TO ALL THE
APPLICABLE EUROPEAN DIRECTIVES
SYMBOL FOR EARTH/GROUND CONNECTION.
SYMBOL INDICATING THAT THE EQUIPMENT IS FOR INDOOR USE ONLY.
SYMBOL FOR CONFORMITY WITH DIRECTIVE 2012/19/EC OF THE EUROPEAN
PARLIAMENT ON WASTE ELECTRICAL AND ELECTRONIC EQUIPMENT (WEEE).
DO NOT USE THE UNIT AT ALTITUDES ABOVE 2000 M.
DO NOT USE THE UNIT IN TROPICAL ENVIRONMENT.
CLASS3
WIRING
WARNING: TO REDUCE THE RISK OF ELECTRIC SHOCK, DO NOT ATTEMPT TO
OPEN ANY PART OF THE UNIT. NO USER-SERVICEABLE PARTS INSIDE. REFER
SERVICING TO QUALIFIED SERVICE PERSONNEL.
CLASS3
WIRING
CONNECTION TO THE MAINS AND TO THE AUDIO OUTPUT SHALL BE DONE
ONLY BY A ELECTROTECHNICAL SKILLED PERSON ACCORDING THE NATIONAL
REQUIREMENTS OF THE COUNTRIES WHERE THE UNIT IS SOLD.
CLASS3
WIRING
DO NOT USE THIS AMPLIFIER IF THE ELECTRICAL POWER CORD IS FRAYED
OR BROKEN.
CLASS3
WIRING
TO AVOID ELECTRICAL SHOCK, DO NOT TOUCH ANY EXPOSED SPEAKER
WIRING WHILE THE AMPLIFIER IS OPERATING.
CLASS3
WIRING
DO NOT SPILL WATER OR OTHER LIQUIDS INTO OR ON THE AMPLIFIER.
CLASS3
WIRING
NO NAKED FLAME SOURCES SUCH AS LIGHTED CANDLES SHOULD BE
PLACED ON THE AMPLIFIER.
CLASS3
WIRING
WARNING TO PREVENT INJURY, THIS APPARATUS MUST BE SECURELY
ATTACHED TO THE FLOOR/WALL IN ACCORDANCE WITH THE INSTALLATION
INSTRUCTIONS.
CLASS3
WIRING
THIS DEVICE MUST BE POWERED EXCLUSIVELY BY
EARTH CONNECTED MAINS SOCKETS IN ELECTRICAL NETWORKS COMPLIANT
TO THE IEC 364 OR SIMILAR RULES
CLASS3
WIRING
DISCONNECT THE AC MAINS SOURCE BEFORE ATTEMPTING TO CLEAN ANY
PART OF THE AMPLIFIER
CLASS3
WIRING
POWERSOFT SUGGESTS TO PLUG THE LOTO DSP TO A 16 A RATING,
C OR D CURVE, 10 KA SECTIONING BREAKER.
CLASS3
WIRING
IT IS HIGHLY RECOMMENDED TO UNPLUG THE OUTPUT CONNECTORS
BEFORE PROCEEDING WITH THE SELF CHECK PROCEDURE
CLASS3
WIRING
THE TESTING SIGNALS MIGHT CAUSE LOUDSPEAKER IMPAIRMENTS.
CLASS3
WIRING
OUTPUT TERMINALS ARE HAZARDOUS: WIRING CONNECTION TO THESE
TERMINALS REQUIRES INSTALLATION BY AN INSTRUCTED PERSON AND THE
USE OF READY MADE LEADS.
CLASS3
WIRING
PROPERLY FIT THE AC MAINS PLUG TO THE AMPLIFIER INLET.
BEFORE POWERING THIS AMPLIFIER, VERIFY THAT THE CORRECT VOLTAGE
RATING IS BEING USED.
CLASS3
WIRING
VERIFY THAT YOUR MAINS CONNECTION IS CAPABLE OF SATISFYING THE
POWER RATINGS OF THE DEVICE.
CLASS3
WIRING
TAKE CARE TO LOCK THE OUTPUT TERMINAL BEFORE SWITCHING THE
DEVICE ON.
THE MANUFACTURER CANNOT BE HELD RESPONSIBLE FOR
DAMAGES CAUSED TO PERSONS, THINGS OR DATA DUE TO AN
IMPROPER OR MISSING GROUND CONNECTION.
CONTACT THE AUTHORIZED SERVICE CENTER FOR ORDINARY
AND EXTRAORDINARY MAINTENANCE.
IT IS ABSOLUTELY NECESSARY TO VERIFY THESE FUNDAMENTAL
REQUIREMENTS OF SAFETY AND, IN CASE OF DOUBT, REQUIRE
AN ACCURATE CHECK BY QUALIFIED PERSONNEL.
Important safety instrucons | iii

Importantes instrucons de sécurité 2
ATTENTION
RISQUE DE CHOC
ÉLECTRIQUE NE PAS OUVRIR
Cet appareil a été conçu et fabriqué pour assurer votre sécurité
personnelle. Mais UNE UTILISATION INCORRECTE PEUT ENTRAÎNER UN
RISQUE D’ÉLECTROCUTION OU D’INCENDIE.
Respecter les règles de base suivantes pour son installaon, ulisaon
et entreen, an de ne pas compromere les mesures de sécurité
incorporées dans ce produit. Veuillez lire aenvement ces « Consignes de
sécurité importantes » avant ulisaon.
• Lire ces instrucons.
• Conserver ces instrucons.
• Tenir compte de tous les averssements.
• Suivre toutes les instrucons.
• Ne pas uliser cet équipement près de l’eau.
• Neoyer uniquement à l'aide d'un chion sec.
• Ne bloquer aucune bouche d’aéraon. Installer conformément aux
instrucons du fabricant.
• Ne pas installer à proximité de sources de chaleur telles que radiateurs,
bouches de chaleur, poêles ou autres appareils produisant de la chaleur.
• Ne pas déjouer l’objecf de sécurité de la che polarisée ou mise à la terre.
Une che polarisée possède deux lames dont l’une est plus large que l’autre.
Une prise de terre a deux lames et une troisième broche de mise à la terre.
La lame large ou la troisième broche sont fournies pour votre sécurité. Si la
che fournie ne rentre pas dans votre prise, consulter un électricien pour le
remplacement de la prise obsolète.
• Protéger le cordon d’alimentaon contre tout piénement ou pincement, en
parculier au niveau des ches, des prises de courant et du point de sore
de l’appareil.
• Uliser uniquement les xaons/accessoires spéciés par le fabricant.
• Uliser uniquement avec le chariot, le support, le trépied,
l’étrier ou la table spéciée par le fabricant ou vendus avec
l’appareil. Lorsqu’un chariot est ulisé, faire aenon pendant le
déplacement du bloc chariot/appareil pour éviter les blessures
causées par un renversement.
• Débrancher cet appareil pendant les orages ou lorsqu'il n'est pas ulisé
pendant de longues périodes.
• Coner toute réparaon à un technicien qualié. Un entreen est requis
lorsque l’appareil a été endommagé de quelque façon que ce soit, par
exemple un cordon d’alimentaon ou une prise endommagée, du liquide qui
a été renversé ou des objets qui sont tombés dans l’appareil, si l’appareil a été
exposé à la pluie ou à l’humidité ou s’il est tombé.
• L’appareil doit être connecté à une prise SECTEUR dotée d’une mise à la terre
de protecon
• Lorsque la prise SECTEUR ou un coupleur approprié est ulisé comme
disposif de déconnexion, le disposif de déconnexion doit rester facilement
accessible.
CLASS3
WIRING
LE TRIANGLE AVEC LE SYMBOLE D’UN ÉCLAIR EST UTILISÉ POUR ALERTER
L’UTILISATEUR DU RISQUE DE CHOC ÉLECTRIQUE.
CLASS3
WIRING
LE TRIANGLE AVEC LE POINT D’EXCLAMATION EST UTILISÉ POUR ALERTER
L’UTILISATEUR SUR DES INSTRUCTIONS DE FONCTIONNEMENT OU
D’ENTRETIEN IMPORTANTES.
LA MARQUE CE INDIQUE LA CONFORMITÉ DU PRODUIT À TOUTES LES
DIRECTIVES EUROPÉENNES EN VIGUEUR
SYMBOLE POUR LA CONNEXION TERRE / MASSE.
SYMBOLE INDIQUANT QUE L’ÉQUIPEMENT EST DESTINÉ À UN USAGE
INTÉRIEUR UNIQUEMENT.
SYMBOLE DE CONFORMITÉ AVEC LA DIRECTIVE 2012/19/CE DU PARLEMENT
EUROPÉEN RELATIVE AUX DÉCHETS D’ÉQUIPEMENTS ÉLECTRIQUES ET
ÉLECTRONIQUES (DEEE).
NE PAS UTILISER PAS L’APPAREIL À DES ALTITUDES AU-DESSUS DE 2 000 M.
NE PAS UTILISER L’APPAREIL DANS UN ENVIRONNEMENT TROPICAL.
CLASS3
WIRING
AVERTISSEMENT : POUR RÉDUIRE LE RISQUE DE CHOC ÉLECTRIQUE, NE PAS
ESSAYER D’OUVRIR TOUTE PARTIE DE L’APPAREIL. AUCUNE PIÈCE RÉPARABLE
PAR L’UTILISATEUR À L’INTÉRIEUR. RENVOYER L’ENTRETIEN AU PERSONNEL
DE SERVICE QUALIFIÉ.
CLASS3
WIRING
LE BRANCHEMENT AU SECTEUR ET AUX AUDIO SORTIE NE SERA EFFECTUE
QUE PAR UNE PERSONNE QUALIFIÉE DANS LE DOMAINE ÉLECTRO-TECHNIQUE
SELON LES EXIGENCES NATIONALES DES PAYS OU L’APPAREIL EST VENDU.
CLASS3
WIRING
NE PAS UTILISER CET AMPLIFICATEUR SI LE CORDON D’ALIMENTATION
ÉLECTRIQUE EST EFFILOCHÉ OU BRISÉ.
CLASS3
WIRING
POUR ÉVITER LES CHOCS ÉLECTRIQUES, NE TOUCHER AUCUN CÂBLAGE
D’ENCEINTE EXPOSÉ LORSQUE L’AMPLIFICATEUR FONCTIONNE.
CLASS3
WIRING
NE PAS RENVERSER D’EAU OU D’AUTRES LIQUIDES DANS OU SUR
L’AMPLIFICATEUR.
CLASS3
WIRING
AUCUNE SOURCE DE FLAMME NUE COMME DES BOUGIES ALLUMÉES NE
DOIT ÊTRE PLACÉE SUR L’AMPLIFICATEUR.
CLASS3
WIRING
AVERTISSEMENT POUR PRÉVENIR LES BLESSURES, CET APPAREIL DOIT ÊTRE
SOLIDEMENT FIXÉ AU SOL / MUR EN CONFORMITÉ AVEC LES INSTRUCTIONS
D’INSTALLATION.
CLASS3
WIRING
CET APPAREIL DOIT ÊTRE ALIMENTÉ EXCLUSIVEMENT PAR RACCORDS
DE SECTEUR CONNECTÉS À LA TERRE DANS DES RÉSEAUX ÉLECTRIQUES
CONFORMES AUX NORMES CEI 364 OU AUX RÈGLES SIMILAIRES
CLASS3
WIRING
DÉCONNECTER LA SOURCE SECTEUR AV AVANT DE TENTER TOUT NETTOYAGE
DE L’AMPLIFICATEUR
CLASS3
WIRING
POWERSOFT RECOMMANDE DE BRANCHER LA SÉRIE T À UNE VALEUR DE
16 A, UNE COURBE C OR D, UN DISJONCTEUR SECTIONNEUR DE 10 KA.
CLASS3
WIRING
IL EST FORTEMENT RECOMMANDÉ DE DÉBRANCHER LES CONNECTEURS DE
SORTIE AVANT DE PROCÉDER À LA PROCÉDURE D’AUTO-VÉRIFICATION
CLASS3
WIRING
LES SIGNAUX D'ESSAI PEUVENT CAUSER DES DÉFAILLANCES AUX HAUT-
PARLEURS.
CLASS3
WIRING
LES TERMINAUX DE SORTIE SONT DANGEREUX : LA CONNEXION DU
CÂBLAGE À CES BORNES REQUIERT L’INSTALLATION PAR UNE PERSONNE
FORMÉE ET L’UTILISATION DE FILS PRÊTS À L’EMPLOI.
CLASS3
WIRING
BRANCHER CORRECTEMENT LA FICHE SECTEUR CA À L’ENTRÉE DE
L’AMPLIFICATEUR.
AVANT D’ALIMENTER CET AMPLIFICATEUR, VÉRIFIER QUE LA TENSION
UTILISÉE EST CORRECTE.
CLASS3
WIRING
VÉRIFIER QUE VOTRE CONNEXION SECTEUR EST CAPABLE DE SATISFAIRE LES
VALEURS DE PUISSANCE DE L’APPAREIL.
CLASS3
WIRING
VEILLER À VERROUILLER LA BORNE DE SORTIE AVANT D’ALLUMER L’APPAREIL.
LE FABRICANT NE PEUT ÊTRE TENU RESPONSABLE DES
DOMMAGES CAUSÉS AUX PERSONNES, AUX CHOSES OU
AUX DONNÉES EN RAISON D'UNE CONNEXION À LA TERRE
INCORRECTE OU MANQUANTE.
CONTACTER LE CENTRE DE SERVICE AUTORISE POUR UN
ENTRETIEN ORDINAIRE ET EXTRAORDINAIRE.
IL EST ABSOLUMENT NÉCESSAIRE DE VÉRIFIER CES CONDITIONS
FONDAMENTALES DE SÉCURITÉ ET, EN CAS DE DOUTE, D'OBTENIR
UNE VÉRIFICATION PRÉCISE PAR DU PERSONNEL QUALIFIÉ.
iv | LOTO | User guide

Instrucciones de seguridad importantes 3
PRECAUCIÓN
RIESGO DE DESCARGA ELÉCTRICA
NO ABRA
Esta unidad ha sido diseñada y fabricada para garanzar su seguridad
personal. Pero SU USO INADECUADO PUEDE RESULTAR EN UNA POTENCIAL
DESCARGA ELÉCTRICA O RIESGO DE FUEGO.
Con el n de no anular las garanas incorporadas en este producto, siga
las siguientes reglas básicas para su instalación, uso y servicio. Por favor lea
cuidadosamente estas “Garanas Importantes” antes de su uso.
• Lea estas instrucciones.
• Mantenga estas instrucciones.
• Tenga en cuenta todas las advertencias.
• Siga todas las instrucciones.
• No use este equipo cerca del agua.
• Limpie solamente con un paño seco.
• No bloquee las aberturas de venlación. Instale en conformidad con las
instrucciones del fabricante.
• No instale cerca de ninguna fuente de calor tales como radiadores,
registradores de calor, cocinas u otros aparatos que produzcan calor.
• No anule el propósito de seguridad del enchufe polarizado o con conexión a
erra. Un enchufe polarizado ene dos clavijas, una más ancha que la otra.
Un enchufe con conexión a erra ene dos clavijas y un tercer diente para
su conexión a erra. La clavija ancha o el tercer diente se proporcionan para
su seguridad. Si el enchufe proporcionado no encaja en su tomacorriente,
consulte a un electricista para que reemplace el que ya no sirve.
• Proteja el cable de electricidad para que no sea pisoteado o pinchado
parcularmente en los enchufes, los receptáculos de conveniencia y el punto
donde estos salen del aparato.
• Use solo complementos/accesorios especicados por el fabricante.
• Use solo con el carrito, estante, trípode, anaquel o mesa
especicados por el fabricante o vendidos con el aparato.
Cuando se usa un carrito, tenga cuidado al mover la combinación
de carrito/aparato y así evitar daños en caso de que se caiga.
• Desenchufe este aparato durante una tormenta eléctrica o
cuando no se use por largos períodos de empo.
• Reera todo el mantenimiento a personal calicado. Se requiere de servicio
cuando el aparato ha sido dañado en cualquier forma, tales como enchufes
o cables de suministro de energía eléctrica dañados, que se haya derramado
líquido u objetos hayan caído dentro del aparato, que el aparato haya sido
expuesto a la lluvia o humedad, que no funcione normalmente o que este
se haya caído.
• Este aparato deberá ser conectado a un enchufe de salida de red eléctrica
con una protectora conexión a erra
• En el lugar donde sea usado un enchufe de salida de red eléctrica o un
acoplador apropiado como el disposivo de desconexión, este deberá poder
accionarse fácilmente.
CLASS3
WIRING
EL TRIÁNGULO CON EL RAYO ES USADO PARA ALERTAR AL USUARIO DEL
RIESGO DE DESCARGA ELÉCTRICA.
CLASS3
WIRING
EL TRIÁNGULO CON EL SIGNO DE EXCLAMACIÓN ES USADO PARA ALERTAR
AL USUARIO DE INSTRUCCIONES DE OPERACIÓN Y MANTENIMIENTO
IMPORTANTES.
LA MARCA CE INDICA LA CONFORMIDAD DEL PRODUCTO CON TODAS LAS
DIRECTIVAS EUROPEAS APLICABLES
SÍMBOLO PARA TIERRA/CONEXIÓN A TIERRA.
SÍMBOLO INDICANDO QUE EL EQUIPO ES SOLO PARA USO INTERIOR.
SÍMBOLO PARA LA CONFORMIDAD CON LA DIRECTIVA 2012/19/EC DEL
PARLAMENTO EUROPEO SOBRE EL DESECHO DE EQUIPOS ELÉCTRICOS Y
ELECTRÓNICOS (WEEE por sus siglas en Inglés).
NO USE LA UNIDAD EN ALTITUDES SOBRE LOS 2000 METROS.
NO USE LA UNIDAD EN AMBIENTES TROPICALES.
CLASS3
WIRING
ADVERTENCIA: PARA REDUCIR EL RIESGO DE DESCARGA ELÉCTRICA, NO
INTENTE ABRIR NINGUNA PARTE DE LA UNIDAD. NO EXISTEN PARTES
INTERNAS REPARABLES PARA EL USUARIO. REFIERA LA REVISIÓN A
PERSONAL DE MANTENIMIENTO CALIFICADO.
CLASS3
WIRING
LA CONEXIÓN A LA RED ELÉCTRICA Y A LAS AUDIO SALIDA DEBERÁ SER
EFECTUADA SOLAMENTE POR UNA PERSONA QUE ESTÉ CAPACITADA EN
EL ÁREA DE ELECTROTÉCNICA DE ACUERDO A LOS REQUERIMIENTOS
NACIONALES DE LOS PAÍSES DONDE LA UNIDAD SEA VENDIDA.
CLASS3
WIRING
NO USE ESTE AMPLIFICADOR SI EL CABLE DE LA ENERGÍA ELÉCTRICA ESTÁ
RASGADO O CORTADO.
CLASS3
WIRING
CON EL FIN DE EVITAR DESCARGAS ELÉCTRICAS, NO TOQUE NINGÚN
CABLEADO DEL ALTOPARLANTE QUE SE ENCUENTRE AL DESCUBIERTO
MIENTRAS EL AMPLIFICADOR ESTÉ FUNCIONANDO.
CLASS3
WIRING
NO DERRAME AGUA U OTROS LÍQUIDOS DENTRO O SOBRE EL
AMPLIFICADOR.
CLASS3
WIRING
NO DEBEN COLOCARSE FUENTES DE LLAMAS DESCUBIERTAS TALES COMO
VELAS ENCENDIDAS SOBRE EL AMPLIFICADOR.
CLASS3
WIRING
ADVERTENCIA: PARA EVITAR DAÑOS, ESTE APARATO DEBE ESTAR ADHERIDO
DE FORMA SEGURA AL SUELO/PARED CONFORME A LAS INSTRUCCIONES
PARA SU INSTALACIÓN.
CLASS3
WIRING
ESTE DISPOSITIVO DEBE SER ENCENDIDO EXCLUSIVAMENTE DESDE
LOS TOMACORRIENTES DE LA RED ELÉCTRICA CONECTADOS A TIERRA
EN REDES ELÉCTRICAS QUE CUMPLEN CON LAS REGLAS IEC 364 O AFINES
CLASS3
WIRING
DESCONECTE LA FUENTE DE LA RED ELÉCTRICA AC ANTES DE INTENTAR
LIMPIAR CUALQUIER PARTE DEL AMPLIFICADOR
CLASS3
WIRING
POWERSOFT SUGIERE CONECTAR LA SERIE T A UNA CURVA C O D DE 16 A O
A UN INTERRUPTOR DE SECCIONAMIENTO 10 KA.
CLASS3
WIRING
SE RECOMIENDA ALTAMENTE DESENCHUFAR LOS CONECTORES DE SALIDA
ANTES DE CONTINUAR CON EL PROCEDIMIENTO DE AUTO CHEQUEO
CLASS3
WIRING
LAS SEÑALES DE PRUEBA PODRÍAN CAUSAR DETERIOROS EN EL ALTAVOZ.
CLASS3
WIRING
LOS TERMINALES DE SALIDA SON PELIGROSOS: LA CONEXIÓN DE CABLES
A ESTOS TERMINALES REQUIERE DE INSTALACIÓN EFECTUADA POR
UNA PERSONA CON LA FORMACIÓN ADECUADA Y EL USO DE CABLES YA
ENSAMBLADOS.
CLASS3
WIRING
INSTALE APROPIADAMENTE LOS ENCHUFES DE LA RED ELÉCTRICA AC EN LA
ENTRADA DEL AMPLIFICADOR.
ANTES DE ENCENDER ESTE AMPLIFICADOR, VERIFIQUE QUE ESTÉ SIENDO
USADO EL ÍNDICE DE VOLTAJE CORRECTO.
CLASS3
WIRING
VERIFIQUE QUE SU CONEXIÓN A LA RED ELÉCTRICA ES CAPAZ DE SATISFACER
LOS ÍNDICES DE ENERGÍA DE ESTE DISPOSITIVO.
CLASS3
WIRING
ASEGÚRESE DE CERRAR EL TERMINAL DE SALIDA ANTES DE ENCENDER EL
DISPOSITIVO.
EL FABRICANTE NO SE HACE RESPONSABLE POR DAÑOS
CAUSADOS A PERSONAS, OBJETOS O DATOS DEBIDO A UNA
CONEXIÓN A TIERRA INAPROPIADA O FALTANTE.
CONTACTE AL CENTRO DE SERVICIO AUTORIZADO PARA
MANTENIMIENTO DE RUTINA O EXTRAORDINARIO.
ES ABSOLUTAMENTE NECESARIO VERIFICAR ESTOS
REQUERIMIENTOS FUNDAMENTALES DE SEGURIDAD Y, EN CASO
DE DUDA, EXIJA UN CORRECTO CHEQUEO POR PARTE DE UN
PERSONAL CALIFICADO.
Instrucciones de seguridad importantes | v

Importan istruzioni di sicurezza 4
ATTENZIONE
RISCHIO DI SCOSSE
ELETTRICHE NON APRIRE
Il disposivo è stato progeato e fabbricato per garanre la vostra
sicurezza personale. TUTTAVIA UN UTILIZZO NON CORRETTO PUO’
PROVOCARE RISCHI DI SCOSSE ELETTRICHE E DI INCENDI.
Per non compromeere le protezioni incorporate nel prodoo,
rispeare le seguen regole di base relave all’installazione, all'ulizzo e
alla manutenzione. Si prega di leggere queste "Istruzioni sulla sicurezza"
accuratamente prima dell'ulizzo.
• Leggere queste istruzioni.
• Conservare queste istruzioni.
• Prestare aenzione a tu gli avvermen.
• Seguire tue le istruzioni.
• Non ulizzare il disposivo vicino all’acqua.
• Pulire esclusivamente con un panno asciuo.
• Non ostruire le aperture per la venlazione. Installare il disposivo
aenendosi alle istruzioni del produore.
• Non installare vicino a fon di calore quali radiatori, termoregolatori, stufe o
altri apparecchi che producono calore.
• Non manomeere la funzione di sicurezza presa polarizzata o con messa a
terra. Una spina polarizzata è dotata di due lamelle, una è più grande dell’altra.
Una spina con messa a terra è dotata di due lamelle e di una terza punta per
la messa a terra. La lamella più grande o la terza punta sono installa per
garanre la vostra sicurezza. Se la spina in dotazione non si adaa alla vostra
presa, contaare un elericista per sostuire la presa obsoleta.
• Proteggere il cavo di alimentazione per evitare che possa essere calpestato
o schiacciato prestando parcolare aenzione alle spine, alle prese di
derivazione e al punto in cui fuoriescono dal disposivo.
• Ulizzare esclusivamente gli aacchi/accessori specica dal produore.
• Ulizzare solo il carrello, il supporto, il cavalleo, la staa o il
tavolino specica dal produore, o vendu con il disposivo.
Se si ulizza un carrello, prestare aenzione quando si sposta
la combinazione carrello/apparecchio per evitare danni alle
persone causa dal ribaltamento.
• Scollegare il disposivo durante i temporali o quando rimane inulizzato per
lunghi periodi del tempo.
• Per la manutenzione e l'assistenza rivolgersi a personale tecnico qualicato.
Gli interven di manutenzione e di riparazione sono necessari quando il
disposivo è stato danneggiato in qualsiasi modo, come ad esempio se il
cavo di alimentazione o la spina sono sta danneggia, se è stato versato del
liquido o sono cadu ogge sul disposivo, se il disposivo è stato esposto a
pioggia o a umidità, se non funziona in modo normale o se caduto.
• Il disposivo deve essere collegato a una presa di corrente con collegamento
proteo da messa a terra
• Nel caso in cui presa elerica o un idoneo accoppiatore viene ulizzato come
disposivo di scollegamento, il disposivo di scollegamento deve rimanere
sempre facilmente accessibile.
CLASS3
WIRING
IL TRIANGOLO CON IL SIMBOLO DEL FULMINE VIENE UTILIZZATO PER
AVVISARE L’UTENTE SUL RISCHIO DI SCOSSE ELETTRICHE.
CLASS3
WIRING
IL TRIANGOLO CON IL PUNTO ESCLAMATIVO VIENE UTILIZZATO PER
AVVISARE L’UTENTE SU IMPORTANTI ISTRUZIONI DI FUNZIONAMENTO O DI
MANUTENZIONE.
IL MARCHIO CE INDICA CHE IL PRODOTTO È CONFORME A TUTTE LE
DIRETTIVE EUROPEE APPLICABILI
SIMBOLO PER IL COLLEGAMENTO DELLA MESSA A TERRA.
SIMBOLO CHE INDICA CHE IL DISPOSITIVO PUO’ ESSERE UTILIZZATO SOLO
ALL’INTERNO.
SIMBOLO INDICANTE LA CONFIORMITA’ ALLA DIRETTIVA 2012/19/CE DEL
PARLAMENTO EUROPEO SUI RIFIUTI DI APPARECCHIATURE ELETTRICHE ED
ELETTRONICHE (RAEE).
NON UTILIZZARE IL DISPOSITIVO AD ALTITUDINI SUPERIORI A 2000 M.
NON UTILIZZARE IL DISPOSITIVO IN UN AMBIENTE TROPICALE.
CLASS3
WIRING
ATTENZIONE: PER RIDURRE IL RISCHIO DI SCOSSE ELETTRICHE NON TENTARE
DI APRIRE ALCUNA PARTE DEL DISPOSITIVO. ALL’INTERNO NON E’ PRESENTE
ALCUN COMPONENTE RIPARABILE DALL’UTENTE. PER L’ASSISTENZA
RIVOLGERSI A PERSONALE TECNICO QUALIFICATO.
CLASS3
WIRING
IL COLLEGAMENTO ALLA RETE ELETTRICA E ALLE USCITE AUDIO DEVE
ESSERE ESEGUITO DA UN ELETTROTECNICO QUALIFICATO ATTENENDOSI AI
REQUISITI DEL PAESE IN CUI IL DISPOSITIVO VIENE VENDUTO.
CLASS3
WIRING
NON UTILIZZARE L’AMPLIFICATORE SE IL CAVO DELL’ALIMENTAZIONE
ELETTRICA E’ SFILACCIATO O ROTTO.
CLASS3
WIRING
PER EVITARE SCOSSE ELETTRICHE, NON TOCCARE IL CABLAGGIO DELLE
CASSE ESTERNE QUANDO L’AMPLIFICATORE E’ IN FUNZIONE.
CLASS3
WIRING
NON VERSARE ACQUA NE’ ALTRI LIQUIDI ALL’INTERNO O SOPRA
L’AMPLIFICATORE.
CLASS3
WIRING
NON SI DEVONO POSIZIONARE FIAMME LIBERE QUALI CANDELE ACCESE
SULL’AMPLIFICATORE.
CLASS3
WIRING
ATTENZIONE PER EVITARE LESIONI IL DISPOSITIVO DEVE ESSERE FISSATO
IN MODO SICURO AL PAVIMENTO/ALLA PARETE ATTENENDOSI ALLE
ISTRUZIONI DI INSTALLAZIONE.
CLASS3
WIRING
IL DISPOSITIVO DEVE ESSERE ALIMENTATO ESCLUSIVAMENTE DA PRESE
ELETTRICHE CON COLLEGAMENTO A TERRA SU RETI ELETTRICHE CONFORMI
ALLO IEC 364 O A NORME SIMILI
CLASS3
WIRING
SCOLLEGARE L’ALIMENTAZIONE CA PRIMA DI PULIRE QUALSIASI PARTE
DELL’AMPLIFICATORE
CLASS3
WIRING
POWERSOFT CONSIGLIA DI COLLEGARE LA SERIE T A UN INTERRUTTORE DI
SEZIONAMENTO DA 16 A, CURVE C O D, 10 KA.
CLASS3
WIRING
SI CONSIGLIA VIVAMENTE DI SCOLLEGARE I CONNETTORI DI USCITA PRIMA
DI PROCEDER CON LA PROCEDURA DI AUTOCONTROLLO
CLASS3
WIRING
I SEGNALI DEL TEST PROTREBBERO PROVOCARE DANNI AGLI ALTOPARLANTI.
CLASS3
WIRING
I MORSETTI DI USCITA SONO PERICOLOSI: IL COLLEGAMENTO DEI CAVI A
QUESTI MORSETTI DEVE ESSERE ESEGUITO DA UNA PERSONA QUALIFICATA
UTILIZZANDO CAVI PREPARATI.
CLASS3
WIRING
COLLEGARE LA PRESA DELL’ALIMENTAZIONE CA ALL’ENTRATA
DELL’AMPLIFICATORE IN MODO CORRETTO.
PRIMA DI ALIMENTARE L’AMPLIFICATORE CONTROLLARE CHE SI STIA
UTILIZZANDO LA TENSIONE NOMINALE CORRETTA.
CLASS3
WIRING
CONTROLLARE CHE LA CONNESSIONE DI RETE SIA IN GRADO DI SODDISFARE
LA POTENZA NOMINALE DEL DISPOSITIVO.
CLASS3
WIRING
FARE ATTENZIONE A BLOCCARE IL MORSETTO DI USCITA PRIMA DI
ACCENDERE IL DISPOSITIVO.
IL PRODUTTORE DECLINA OGNI RESPONSABILITA’ PER
DANNI PROVOCATI A PERSONE, COSE O DATI A CAUSA DI UN
COLLEGAMENTO NON CORRETTO O MANCANTE DELLA MESSA A
TERRA.
CONTATTARE IL CENTRO DI ASSISTENZA AUTORIZZATO PER
ESEGUIRE LA MANUTENZIONE ORDINARIA E STRAORDINARIA.
E’ ASSOLUTAMENTE NECESSARIO CONTROLLARE QUESTI
REQUISITI FONDAMENTALI SULLA SICUREZZA E, IN CASO DI
DUBBI, RICHIEDERE UN CONTROLLO ACCURATO DA PERSONALE
QUALIFICATO.
vi | LOTO | User guide

Regulatory informaon 5 4
If the me arises to throw away your product, please recycle all
possible component.
This symbol indicates that when the end-user wishes
to discard this product, it must be sent to separate
collecon facilies for recovery and recycling. By
separang this product from other household-type
waste, the volume of waste sent to incinerators or
land-lls will be reduced and natural resources will
thus be conserved.
The Waste Electrical and Electronic Equipment Direcve (WEEE
Direcve) aims to minimise the impact of electrical and electronic
goods on the environment. Powerso S.p.A. comply with the
Direcve 2012/19/EU of the European Parliament on waste
electrical nance the cost of treatment and recovery of electronic
equipment (WEEE) in order to reduce the amount of WEEE that is
being disposed of in land-ll site.
All of our products are marked with the WEEE symbol; this
indicates that this product must NOT be disposed of with other
waste. Instead it is the user’s responsibility to dispose of their
waste electrical and electronic equipment by handing it over to
an approved reprocessor, or by returning it to Powerso S.p.A.
for reprocessing. For more informaon about where you can send
your waste equipment for recycling, please contact Powerso
S.p.A. or one of your local distributors.
Manufacturer:
Powerso S.p.A.
via E. Con 5
50018 Scandicci (Fi)
Italy
We declare that under our sole responsibility the products:
Model Names: LOTO
Intended use: DSP Module
Are in conformity with the provisions of the following EC
Direcves, including all amendments, and with naonal legislaon
implemenng these direcves:
2014/35/EU Low Voltage Direcve
2014/30/EU Electromagnec Compability Direcve
2011/65/EU RoHs Direcve
The following harmonized standards are applied:
EN 55032: 2012
EN 55035: 2017
EN 62368-1: 2014
Scandicci,
April 2019
Luca Lastrucci
Managing Director
For compliance quesons only: compliance@powerso.it
Regulatory informaon | vii

Electrostac Discharge (ESD) 6
Electrostac discharge (ESD) is one of the most signicant
factors leading to damage and failure of a wide variety of
electronic components.
Poor handling can cause internal damage, which is invisible.
This internal damage can then cause electrical failure or reliability
problems.
It is recommended that all workstaons where
Electrostac Discharge Sensive devices (ESDS) and
assemblies are handled outside of full stac protecon packaging
(i.e. within stac control areas) should be provided with some
form of ground conducve or dissipave ooring.
viii | LOTO | User guide

6 LOTO User Guide 7
Introducon
LOTO is a 4OUT processing plaorm specically designed to
provide advanced DSP funcons to any powered loudspeaker.
LOTO shares the same processing capabilies of Powerso
high-end X-Series rack ampliers plaorm, delivering up to 2 sec
of input delay, mul-layer input EQ, raised cosine lters, custom
FIR and IIR equalizers, as well as TruePowerTM, RMS and Peak
limiters, Acve DampingControlTM, and Live Impedance readout.
7 : 1.LOTO – DSP CORE
The core of the system is the DSP board, available in two
dierent hardware versions:
LOTO – ADVANCED
2x Digital inputs-capable blocks, includes fail-safe backup
strategy across three dierent input sources:
- Dante/AES67 (2x Channels)
- AES3 (1x Stream)
- Analog (2x Balanced Inputs)
LOTO – BASIC
Up to 2x Balanced Analog inputs.
One input can be disabled if not required.
7 : 2.LOTO – INTERFACE
Powerso provides o-the-shelf soluons for LOTO
interfacing, for both the Basic/Advanced CORE versions.
The interface assemblies houses the DSP core-board and
includes dierent set of input connectors, addressing the main
target applicaons for LOTO DSP.
The Interfaces comes pre-assembled with DSP CORE and are
meant for LOTO – Heatsink as well as custom-built mechanical
soluons.
All interface-boards provides user interacon via Pushbuons
or oponal TFT Display:
LOTO – ADVANCED 2D
Houses Advanced DSP CORE and includes:
- 2x Analog Input XLRs (with link OUT)
- 1x AES3 Input XLR (with link OUT)
- 2x Switched Ethernet ports (Neutrik etherCON)
LOTO – ADVANCED 1D
Houses Advanced DSP CORE and includes:
- 1x Analog Input XLRs (with link OUT)
- 1x AES3 Input XLR (with link OUT)
- 2x Switched Ethernet ports for Dante + Remote Control
(Neutrik etherCON)
LOTO – BASIC 2
Houses Basic DSP CORE and includes:
- 2x Analog Input XLRs (with link OUT)
- 2x Switched Ethernet ports for Remote Control (Neutrik
etherCON)
LOTO | 1

7 : 3.LOTO – HEATSINK
Cast-aluminum heatsink specically designed to house LOTO
DSP core+interface along with a power amplier module from the
following range:
-LiteMod4HC
-MiniMod4
-LiteMod std.
-LiteMod HV
The heatsink comes with Neutrik PowerCon TRUE1 mains input
w/link OUT, mains lter, fan and amplier outputs connectors.
The back poron of the heatsink is completely airght, for
ease of design and assembly of loudspeakers, since the electronics
do not require a dedicated volume separated from the acousc
volume of the cabinet.
7 : 4.LOTO – IK SOLUTIONS
Powerso oers three integrated-soluons-kits based on
LOTO DSP and Heatsink.
The kits includes all required components and require
assembly by the OEM manufacturer.
Please refer to the LOTO IK User Guide
LOTO | 2

7 : 4.1. LOTO Advanced 2D
7 : 4.2. LOTO Basic2
Code Qty Descripon Descripon Details
SMC01056.R 1 LOTOPX BASIC2 DSP-ASY Assembly including input interface
HS000010.R 1 LOTO HEATSINK Preassembled Heatsink
ME001271.R 1 Front Panel BASIC2 metal plate
KTV00602.R 1 LOTO KIT SCREWS Kit Screws
KTA00602.R 1 LOTO KIT LIGHTPIPE BTN CAP Kit Accessories
PFXXXXXX 1AMPLIFIER MODULE Chosen one among the allowed
modules listed above.
SM001172.R 1LOTOPX/STD/SPKOUT4 4 ways speaker connector adaptor
For Minimod4 and Litemod4HC
SM001173.R 1LOTOPX/STD/SPKOUT2 2 ways speaker connector adaptor
For Litemod and Litemod HV
7 : 4.3. LOTO Advanced 1D
Code Qty Descripon Descripon Details
SMC01057.R 1 LOTOPX ADV1 DSP-ASY Assembly including input
interface
HS000010.R 1 LOTO HEATSINK Preassembled Heatsink
ME001337.R 1 Front Panel ADV1 metal plate
KTV00602.R 1 LOTO KIT SCREWS Kit Screws
KTA00602.R 1 LOTO KIT LIGHTPIPE BTN CAP Kit Accessories
PFXXXXXX 1AMPLIFIER MODULE Chosen one among the allowed
modules listed above.
SM001172.R 1LOTOPX/STD/SPKOUT4 4 ways speaker connector adaptor
For Minimod4 and Litemod4HC
SM001173.R 1LOTOPX/STD/SPKOUT2 2 ways speaker connector adaptor
For Litemod and Litemod HV
Code Qty Descripon Descripon Details
SMC01058.R 1 LOTOPX ADV2D DSP-ASY Assembly including input
interface
HS000010.R 1 LOTO HEATSINK Preassembled Heatsink
ME001338.R 1 Front Panel ADV2D metal plate
KTV00602.R 1 LOTO KIT SCREWS Kit Screws
KTD00602.R 1LOTO KIT DISPLAY kit for Display assembly
FR000004.R LOTOPX KEYBOARD DISPLAY Display
PFXXXXXX 1AMPLIFIER MODULE Chosen one among the allowed
modules listed above.
SM001172.R 1LOTOPX/STD/SPKOUT4 4 ways speaker connector adaptor
For Minimod4 and Litemod4HC
SM001173.R 1LOTOPX/STD/SPKOUT2 2 ways speaker connector adaptor
For Litemod and Litemod HV
LOTO | 3

8
Processing architecture
Overview
The following diagram highlights the processing architecture of LOTO DSP:
The signals ows from le to right through:
- Source Selecon
The Source Selecon blocks receive up to three sources (inputs) handling the backup strategy and gain/delay trim. End-users will
congure the Source Selecon according to each specic use-case in the eld
- Matrix
The Matrix connects the Source Selecon blocks to the loudspeakers. End-users will congure the Matrix according to each specic
use-case in the eld
- Advanced EQ
The Advanced EQ (Adv EQ) blocks provides Gain, Shading, Delay and Raised-Cosine EQ reserved to end-users for system tuning and
alignment in the eld. Addive processing through Groups also applies to the Adv EQ
- Speaker EQ
The Speaker EQ (Spk EQ) blocks provides Crossovers, BiQuads and FIR lters for mulway loudspeaker tuning, as a single Spk EQ block
can drive up to four Ways (see Speaker Conguraon). The loudspeaker manufacturer will use the Spk EQ blocks as part of the Powered
Speaker Preset (Applicaon)
- Ways
Each Way block provides Crossovers, BiQuads, FIRs and Limiters on top of Live Impedance measurement and Diagnosc tools. The
loudspeaker manufacturer will use Way blocks for preset making as part of Powered Loudspeaker Preset (Applicaon)
- SOA
The Safe Operang Area blocks provides interfacing to match the DSP to the connected Amplier Module(s). This includes matching
sensivity and scaling readouts as well as addional SOA limiters (for specic amplier modules). SOA is reserved to Powerso and hidden
from GUI
4 | LOTO | User guide

Processing architecture | 5
8
8 : 1.Source Selecon
Each Source Selecon block provides independent control
over input priority and backup strategy mode:
The output of each Source Selecon block will feed the
Matrix, according to Source Selecon conguraon:
- Source Selecon Strategy: Force
Source forced to FIRST slot
The following picture shows the processing scheme GUI
within ArmoniaPlus:
Please refer to the following paragraphs for an in-depth
descripon of all processing blocks.
- Source Selecon Strategy: Auto
Provides failover backup across up-to three dierent sources
according to priories:
The supported Backup mode is Signal Presence-based, according
to the following thresholds:
o Dante > 120dB FS (-120dBu ref.)
o AES3 > 120dB FS (-120dBu ref.)
o Analog > -57dBu
All thresholds referred post Amplier-Input-Referencing trim.
i.e. in the example above, the output to Matrix will be:
Backup is based solely on signal presence. Valid signals are:
Digital > -120dB FS (-120dBu ref.)
Analog > -57dBu
All thresholds referred post Amplier-Input-Referencing trim.
i.e. in the example above, the output to Matrix will be:
- Dante if > -120dB FS
- AES3 if > -120dB FS & Dante < -120dB FS
- Analog if > -57dBu & Dante & AES3 < -120dB FS
The Amplier Inputs Referencing
provides Gain trim for level-matching
and input delay for me alignment of
digital vs analog sources.
Note!
The Inputs Referencing sengs
applies to all sources of the same
type!
i.e. Analog Trim and Delay applies to
both Analog IN1 & IN2, etc.
8 : 2.Matrix
The Matrix block interfaces the Source Select to the Speaker
blocks, feeding Speakers with the current source for each Source
Select block according to Matrix gains, where:
Columns= inputs (Source Select outputs)
Rows= output (to Speakers)
The Matrix GUI will show up to four rows (speakers) according
to Speaker Conguraon.
Each I/O crossing provides connuous gain control from
0dB to –inf., for mixing two inputs with custom levels or feeding
Speakers with classic L+R mono mix (-6dB).

6 | LOTO | User guide
8 : 3.Advanced EQ
LOTO DSP provides 1x Adv EQ block for each speaker (single/
mulway), supporng:
- Gain (+15 ~ -60dB)
- Shading (0 ~ -15dB)
- Polarity
- Delay (up to 2sec)
- EQ (raised cosine), up to 96 lters (32x layer, 3x layers)
- Up to 8x Groups
End-users will tune and align loudspeaker systems using the
Advanced EQ block along with Groups.
Each Advanced/Array Group provides:
f Gain (+15 ~ -40dB)
f P o l a r i t y
f Delay (up to 2sec)
f EQ (raised cosine), up to 96 lters (32x layer, 3x layers)
All Groups assigned to an
Adv EQ block provides addive
processing, meaning that:
- Resulng Gain will be
the arithmec sum (in dB) of
all Gain adjustment applied by
assigned Groups and/or on the
Advanced EQ block itself (up to
+135dB MAX)
- Resulng Delay will be the sum of all delay applied by
Groups and/or on the Advanced EQ block itself (up to 2sec MAX)
- Resulng Polarity will be the result of all ips applied by
Groups and/or the Advanced EQ itself
- Resulng EQ curve will be “sum” of all lters applied by
Groups or the Advanced EQ itself
8 : 4.Speaker EQ
LOTO DSP provides 1x Speaker EQ block for each speaker
(single/mulway), supporng:
f Custom FIR lter
2048 taps-equivalent @48kHz
Supported le types (*.txt) (*.csv)
f Hi-Pass lter
Bessel/Buerworth/Linkwitz-Riley up to 48dB/oct
f Low-Pass lter
Bessel/Buerworth/Linkwitz-Riley up to 48dB/oct
f BiQuad lters (8x)
Peaking/ Band-Pass/ Band-Stop/ Low-Shelving/ Hi-
Shelving/ All-Pass/ Low-Pass/ Hi-Pass
The loudspeaker manufacturer will use this tools to shape the
overall response of a mulway speaker
8 : 5.Way block
LOTO DSP provides up to four Way blocks each featuring EQ,
Limiters, Damping Control, Live Impedance measurement and
Diagnosc.
8 : 5.1. Way Eq
Independent output EQ for each transducer, featuring:
f Gain (+15 ~ -60dB)
f P o l a r i t y
f Delay (up to 100msec)
f Custom FIR lter
2048 taps-equivalent @48kHz
Supported le types (*.txt) (*.csv)
f Hi-Pass lter
Bessel/Buerworth/Linkwitz-Riley up to 48dB/oct
f Low-Pass lter
Bessel/Buerworth/Linkwitz-Riley up to 48dB/oct
f BiQuad lters (16x)
Peaking/ Band-Pass/ Band-Stop/ Low-Shelving/ Hi-
Shelving/ All-Pass/ Low-Pass/ Hi-Pass
Shading vs Gain
Shading is an advanced tool for gain tapering of arrays. While
aenuang a loudspeaker, the Shading feature also automacally
lowers the limiter threshold by the same amount (in dB), ensuring
uniform dynamic response of the system

Processing architecture | 7
8 : 5.2. Limiters
Provides individual liming and protecon for each
transducer, featuring:
- RMS limiter
Feed-forward limiter including so-knee and frequency-
shaping capability
- Peak limiter
Feed-forward limiter including so-knee and frequency-
shaping capability
- Clip limiter
Feed-forward limiter w/ look-ahead
- True Power limiter
Feedback limiter. Threshold based on average product of RMS
voltage and current (measured)
- Current limiter
Feedback limiter. Threshold based on RMS current (measured)
8 : 5.3. Damping
Damping factor control is a unique feature of Powerso
Amplier and DSP plaorms.
Damping control nd its typical applicaon in cable-loss
compensaon for rack amplier-powered subwoofers, while in
Powered-Loudspeaker applicaons the Damping control mainly
provides an extra degree of freedom over the Mid/Sub transient
response.
Simulang a posive/negave output-series resistor in the
range of +2Ω ~ -2Ω, Damping control can acvely contribute to
tailoring a loudspeaker response for a wider range of Applicaons
and use cases.
Damping control can be used to shape the response of a
loudspeaker and then locked to prevent changes, OR can be le
accessible to the end-user to play with during system tuning/
toning.
8 : 5.4. Live Impedance
LOTO provides real-me loudspeaker impedance
measurement.
LOTO also provides the loudspeaker manufacturer with the
opon of saving reference impedance-curves on-board the DSP
within preset (Applicaons).
The end-user will then compare the on-board “Preset” curves
with the real-me curve for fault-nding and troubleshoong.
FIGURE 1: Live Impedance page on LOTO Prototypes
FIGURE 2: Live Impedance page on nished products

8 | LOTO | User guide
8 : 5.5. Diagnoscs
LOTO provides extensive loudspeaker/amplier diagnosc
tools reserved to the end-user for loudspeaker troubleshoong
and fault-nding.
Pilot Tone Generator
Generate a pure sine-tone at a specic frequency and
amplitude, injecng it at the very end of the processing chain
Pilot Tone Voltage Monitor
Pilot-tone voltage monitor is used along with pilot-tone
generator to trigger alarms in case of amplier fault.
Auto-detect the amplitude of the pre-generated pilot-tone, if
the tone is out of range, alarms are triggered.
Pilot Tone Load Monitor
Pilot-tone load monitor is used along with pilot-tone
generator and line-terminaon loads to trigger alarms in case of
faulty wirings.
Detect the load impedance at the dened frequency, if the
impedance is out of range, alarms are triggered.
Nominal Impedance Detecon
Nominal impedance detecon calculates the average
impedance of the load (broadband) and trigger alarms if the
impedance is out of the dened range.
Note!
Although the Diagnosc page conguraon is saved within
the Applicaon preset le, the Preset locking password DO NOT
lock the Diagnosc page.
The end-user will be able to customise and enable/disable
alarms.

Memory | 9
9
Memory
9 : 1.Memory structure
LOTO on-board memory is organised per banks (A to F) of four
slots (1 to 24), as shown in the following table.
Bank Slot File Type Notes
A
1 PAM (+ PSPK) Factory-default Snapshot +
Applicaon#1 (mandatory)
2PSPK
Applicaons 2 to 4 (mandatory)3 PSPK
4PSPK
B
5PSPK
Applicaons 5 to 8 (oponal)
6PSPK
7PSPK
8PSPK
C
9PSPK
Applicaons 9 to 12 (oponal)
10 PSPK
11 PSPK
12 PSPK
D
13 PSPK
Applicaons 13 to 16 (oponal)
14 PSPK
15 PSPK
16 PSPK
E
17 PSPK
Applicaons 17 to 20 (oponal)
18 PSPK
19 PSPK
20 PSPK
F
21 PAM / PSPK (Oponal) Congurable for:
Applicaons (21 to 24)
OR
User-memory (Snapshots 1 to 4)
22 PAM / PSPK
23 PAM / PSPK
24 PAM / PSPK
To best suit dierent projects, the memory banks are
independently congurable by the loudspeaker manufacturer as
follow:
- Without user memory
Up to 6x banks for up to 24x dierent Applicaons.
Minimum is 1x bank (A) for 4x dierent Applicaons.
Noce!
All acve banks must be lled with Applicaons!
- With user memory
Up to 5x banks for up to 20x dierent Applicaons plus user-
memory bank.
Minimum is 1x bank for 4x dierent Applicaon.
Noce!
All acve banks must be lled with Applicaons!
For memory navigaon and preset recall, please refer to the
relevant user-interacon secon:
- LEDs + Pushbuons
- Display
- ArmoníaPlus
9 : 2.Preset-le types
LOTO handles two dierent preset-le types, Applicaons
(*.pspk) and Snapshots (*.pam):
9 : 2.1. Snapshots
Snapshots contains:
f Source selecon (including backup strategy and sengs)
f Matrix sengs
f Applicaon
f Advanced EQ
f DSP opons (General, Network cong, Dante sengs,
Energy-save)
End-users will use Snapshots to recall a specic use-case for
a loudspeaker, including a factory-dened Applicaon on top of
Input, Matrix, Adv EQ and global sengs.
The end-user can save a Snapshot on a local PC via ArmoníaPlus
soware.
ArmoníaPlus is also required to recall a pre-saved Snapshot.
Oponally, the loudspeaker manufacturer can reserve a
memory bank to the end-user to save Snapshots.
In this case, the end-user will be able to store Snapshots also
on-board the DSP memory via ArmoníaPlus.
Snapshots stored on-board the DSP can be recalled locally
(via pushbuon/display) or remotely via ArmoníaPlus.
Factory-default snapshot
The factory-default Snapshot is dedicated to the loudspeaker
manufacturer.
The scope of the Factory-default Snapshot is providing the
Loudspeaker manufacturer with the freedom of selecng the
“factory-default” parameters for a specic product.
To achieve this, the loudspeaker manufacturer will create
this Snapshot during Prototyping, dening the enre set of
conguraons (including Applicaon) that the end-user will recall
with a factory-reset command.
Note!
The Factory-default Snapshot (*.pam) must always contain a
valid Applicaon:

10 | LOTO | User guide
9 : 2.2. Applicaons
Applicaons (Powered Speaker Preset) are a subset of
Snapshots, containing:
Speaker conguraon
- Speaker EQ
- Ways block (EQ, Limiters, Damping, Live Imp, Diagnoscs)
- Preset locking
Applicaons are factory-dened by the loudspeaker
manufacturer.
The loudspeaker manufacturer will ll LOTO memory with a
set of pre-made Applicaons, covering dierent use-cases for the
same loudspeaker (or set of loudspeakers for 2.1/1.1 systems).
Applicaons can be recalled locally (via pushbuon/display)
or remotely via ArmoníaPlus.
The end-user cannot override the factory-dened
Applicaons.
Note!
A single LOTO-based loudspeaker is compable with
Applicaons including any combinaon of Speaker conguraon,
I.E. A powered subwoofer with satellites outputs can seamlessly
drive full range or bi-amp speakers.
- The Applicaon-poron of the factory-default Snapshot is
recalled by simply navigang the on-board memory
- The enre Factory-default Snapshot (including Applicaon)
is recalled via dedicated pushbuons combinaon/display
sub-menu
The factory-default Snapshot is stored in memory Slot#1 (see
Memory Structure for more details).
A Bundle of Speaker Preset
If you are familiar with Speaker Preset les for Powerso’s
rack ampliers plaorm, imagine Powered Speaker Preset as a
bundle of dierent Speaker Preset!
PSPK le format is well suited for 2.1/1.1 systems, where a
bundle of Speaker Preset must change simultaneously with the
push of a buon
This manual suits for next models
3
Table of contents
Other powersoft Computer Hardware manuals