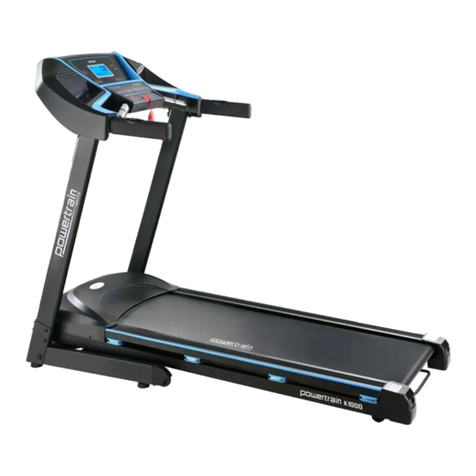
Powertrain V1100 User manual

1
MOTORIZED TREADMILL –MODEL V1100
INSTRUCTION MANUAL
Please read these instructions carefully before use and keep for future reference
FOR DOMESTIC INDOOR USE ONLY
WARNING: Keep young children away from this machine at all times. Contact with
the moving surface may result in severe friction burns.
(Instructions cover multiple versions of the product and some features detailed herein may not be relevant to your model

2
1. CAUTION
To avoid injuries please read this manual carefully before using the treadmill.
Before starting any exercise program you should consult your doctor to determine if you
have any physical or health conditions which could create a risk to your health and
safety, or prevent you from using the equipment properly. Your doctor’s advice is
essential if you are taking medication that affects your heart rate, blood pressure or
cholesterol level.
Ensure you have tightened all the bolts and nuts on this machine before commencing
any exercise.
For safety reasons do not stand on running belt whilst starting the unit.
Please stop immediately if you feel unwell or nauseous.
Please adjust speed slowly.
Adjustment of belt is prohibited during use.
It is recommended that you wear sports shoes and appropriate clothing when using the
treadmill
Children, elderly, pregnant women and people with medical conditions should not use
the treadmill unless authorized by their doctor and in the presence of an adult who may
assist.
Clip the safety key on your clothing during use.
Firmly hold the handle bars during use.
Keep the safety key away from children when the treadmill is not in use, as it may
present a choking hazard.
Keep silicone oil away from children’s reach. If accidentally swallowed or comes into
contact with eyes, use water to wash out and immediately seek medical assistance.
2. SAFETY NOTICE
Please place the machine on flat ground. It is unsuitable to use the machine in the
following situations:
oOutdoors. (The machine is specially designed for indoor use only)
oSlant ground or slant places on balcony.
oSunlit area or near heater.
oBig noisy places.
Machine requires a constant a.c 220-240V power connection
Error may be displayed if power is not stable. Please do not share points with integral
equipment such as computers, air conditioners etc.

3
Be careful of children or other objects while folding and unfolding the machine.
Do not put machine near wet objects to avoid slippery surfaces and damage to machine
3. CAUTION PRIOR TO USE
Do not use the machine if you are unwell and immediately stop using the machine if you
start feeling unwell whilst using it.
Disconnect the machine from power when not in use.
Prior to relocating or folding the machine, disconnect it from power.
Machine is to be used on a flat surface only.
Ensure a 2m clearance around the machine is available prior to using it.
Do not start the machine when it is folded.
Keep all liquids away from the machine as they will damage the unit and void all
warranty.
Machine is not to be used in poorly ventilated spaces or locations with flammable
objects in its vicinity.
Do not put any objects on the machine.
Switch off all functions and disconnect from power when not in use.
Please do not stand directly on the belt while starting the machine.
Do not disassemble the machine without a written authorization from the manufacturer
Please make sure the running belt is fastened before use
4. PRODUCT SPECIFICATIONS

4
Main Specifications and Parts List
Main Specifications
No.
Parameters Names
Description
1
Input power voltage
AC220-240V(50/60Hz)
2
Motor power
3.0HP
3
Speed
1-20Km/h
Packing list
No.
Name
Units
Qty
1
Treadmill Unit
set
1
3
Accessory Bag
pc
1
Screws bag list
NO.
Name
QTY
NO.
Name
QTY
1
Inner hexagon spanner 6mm
1
7
MP3 cable
1
2
Inner hexagon spanner 5mm
1
8
Base Corner Cover
1 Set
3
Combination wrench
1
9
Screw M8*22
4
4
Silicone Oil
1
10
Screw M8*25
4
5
User Manual
1
11
Screw M15*14
4
6
Safety Key
1
12
Screw M8*52
2
5. ASSEMBLY INSTRUCTIONS
During assembly, first insert and moderately tighten screws and when the frame has
been fully assembled, inspect all the screws and tighten them completely.
Lay unit flat on the ground. Cut the nylon cable ties (where supplied) on the base. Lift
the upright columns and console in the direction shown in the diagram below.
WARNING: THIS PRODUCT IS HEAVY. ENSURE TWO PEOPLE ARE ASSEMBLING
IT AT ALL TIMES

5
Use the inner hexagon spanner (#5) and insert screws M8*52 and screws M8*22 to
attach the columns to the base of the treadmill (as shown in the diagram below.
Use an inner hexagon spanner (#5) and screw M8*25 to fix the console to the columns.
Use a screwdriver and insert M5*14 to fix the base corner covers to the columns, as
shown in the below diagram.

6
Remove the console and connect the cables as shown in Diagram A.
CAUTION: Ensure cables are not pinched or jammed as it will damage the unit and
void warranty.
Place the exposed surplus cabling inside the case and mount the console on to the
console slot. Adjust the position/angle. Insert screws M8*25 and tighten them as shown
in Diagram B.
Position the safety key in the correct position as shown below.

7
Safety Key Function
oDisconnecting the safety key will immediately stop the running track and the
screen will display “E7”, and the treadmill will emit a beep.
oPlacing the safety key back on the designated area on the console will clear all
data in 2 seconds.
CAUTION: Please confirm that all screws are correctly tightened according to the
requirements after installation, and check no part has been left out prior to
connecting to power.
6. USING THE TREADMILL
Power on –Connect the power adapter to a power point and turn on the unit by
using the red switch. The LED will illuminate and the treadmill will emit a beeping sound.
The screen on the control panel will switch on.
Start - starts after 3 second countdown.
Stop –Pressing the Stop key will gradually stop the treadmill and clear all data.
Program

8
oIn standby mode, pressing the Program key will cycle through the options,
ranging from P1 to P12 (automatic programs) –FAT - P0 (Standby).
oIn standby mode, holding down this button will set the parameter values (refer
below)
Mode
oIn standby mode pressing the Mode key will cycle through Countdown Running
modes: Time Countdown, Distance Countdown and Calorie Countdown.
oIn FAT mode, pressing the Mode key will allow the user to set the values for
gender, height and weight (see below)
Speed 3km/h, 5km/h, 7km/h, 9km/h and 12km/h Shortcuts –In running mode using
these shortcuts will change the running speed accordingly.
Speed &
oIn running mode these keys are used to adjust the speed.
oIn standby mode these keys are used to set the values for the programs and
modes.
Incline & - In running mode these keys are used to set the incline level.
Incline 2%, 4%, 6%, 8% and 10% Shortcuts –In running mode these keys are used as
shortcuts to set incline levels.
Volume &
oUse these keys to adjust volume when playing music in USB mode.
oHolding down will mute the sound.
Time Display
oIn running mode or set value: the display will show the time value (i.e., countdown
time)
oIn standby mode: entering the FAT function will display Gender –Age –Height –
Weight.
Distance/Calorie Display
oRunning Mode –Displays the distance and calorie values;
oMode Setting –Displays the countdowns for distance and calorie
Pulse Function
The heart rate function is to be used as an exercise reference feature only and is not to
be relied on for accurate heart rate assessment and is not to be used for medical
purposes. Should you feel unwell, stop exercising immediately and contact your doctor.

9
FAT Function
In standby mode, press program button to enter the FAT test.
oF1--Gender, screen displays 01 stand for male, 02 stand for female. Press
SPEED+ or Speed- to select gender. Press MODE to confirm.
oF2--Age, the value range for age is 10-99 years, Press SPEED+ or Speed- to
select age. Press MODE to confirm.
oF3--Height, height value range is 100-220cm. Press SPEED+ or Speed- to select
height. Press MODE to confirm.
oF4--Weight, weight value range is 20-150kg. Press SPEED+ or Speed- to select
weight. Press MODE to confirm.
oF5--FAT Index, the screen will display ----Hold the heart rate sensor with your
hands for 5 seconds, and then the FAT index will show on the screen.
Programs tabled below.
Time
Program
Set time/10=Running time of each segment
1
2
3
4
5
6
7
8
9
10
P1
Speed
3
3
6
5
5
4
4
4
4
3
Incline
0
3
3
3
4
4
4
1
1
0
P2
Speed
3
3
4
4
5
5
5
6
6
4
Incline
2
2
2
3
3
3
3
4
4
2
P3
Speed
2
4
6
8
7
8
6
2
3
2
Incline
3
5
4
4
3
4
4
3
4
2
P4
Speed
3
3
5
6
7
6
5
4
3
3
Incline
0
3
3
2
2
5
5
3
3
2
P5
Speed
3
6
6
6
8
7
7
5
5
4
Incline
3
5
3
4
2
3
4
2
3
2
P6
Speed
2
6
5
4
8
7
5
3
3
2
Incline
3
4
5
6
3
5
5
6
4
3
P7
Speed
2
9
9
7
7
6
5
3
2
2
Incline
0
3
3
3
4
4
4
1
1
0
P8
Speed
3
4
4
4
5
6
8
8
6
2
Incline
1
1
4
4
4
5
5
4
3
2
P9
Speed
2
4
5
5
6
5
6
3
3
2
Incline
3
5
3
4
2
3
4
2
3
2
P10
Speed
2
5
7
5
8
6
5
2
4
3
Incline
1
5
6
8
12
9
10
9
5
3
P11
Speed
2
5
6
7
8
9
10
5
3
2
Incline
3
5
6
8
6
5
8
7
5
2
P12
Speed
2
3
5
6
8
6
9
6
5
3
Incline
5
7
5
8
6
5
9
10
6
2

10
Display Function
Main Interface
(Due to constant improvements, not all features may be present and some settings may differ)
As shown in the image above, interface options are Smart Run, Multimedia, Users,
Scene, Apps and Settings - six functions in total.
All functions will be detailed in the sections below.
Status bar is located at the top of the interface, including profile picture, time, date, WIFI
icon, and back icon (not an active feature on the startup page).
Data bar displaying all operating data is located on the lower part of the main interface.
Pressing START, will start the treadmill in manual mode.
Icons located on the bottom are Volume -, Back, Homepage, Tasks and Volume +.
Pressing Time and Date will set the values. The time and date will automatically match

11
the time and date on the internet. However, when is treadmill is not connected to WIFI,
users can manually enter the time and date setting.
Start Functionality
After the treadmill has been started, SMART RUN will show the current running mode,
and users cannot enter SMART RUN until the treadmill stops.
START button will change to STOP.
Pressing STOP will gradually stop the running belt.
Press INCLINE or SPEED to change the incline and speed values.
Note: If your treadmill is not equipped with an incline function, the incline functionality
will not be displayed/work.
Speed Functionality
Pressing the corresponding numbers on the left will change the speed.
You can also press the up and down buttons to change the speed by 0.1 km/h intervals.

12
Incline Functionality
Operating instructions are the same as the speed functionality above.
Intelligent Running Interface –Calorie Mode
Calories default value is 50 kilocalories.
To manually select the required value –press the + or –keys.
Alternatively, use the preset values on the right side of the screen to select the
appropriate calorie settings.
Once selected, press the START key to start the treadmill.

13
Post Exercise
After concluding the run in any mode, users can share the running data with other users
via QQ, WeChat or Weibo (applications need to be installed prior to use).
Smart Run-Time Mode
Press to enter smart run setting.
This setting contains 6 running modes:
oTime mode, distance mode, Calorie mode, Preset programs mode, Customized
mode and Heart rate control mode.
oDefault mode is Time countdown mode, with default setting of 30 minutes.
oPress +/ - to select the time.
Pressing the back button will return the user to homepage.
Pressing Start will start the treadmill.

14
SMART RUN-DISTANCE MODE
Default setting is 1km.
User can use -/+ buttons to set the target distance.
Alternatively, the shortcut buttons on the right can be used to select pre-set distances.
Pressing the Back button will return the user to the homepage.
Pressing Start will start the treadmill.
SMART RUN-PRESET PROGRAMS MODE
Treadmill is equipped with 6 running modes, each featuring 6 intensities, equating to 36
programs.
Press icons on the left to choose running modes, and press shortcut icons on the right
to choose the intensity of each running mode.
Press Back to return to the homepage.
Press Start to start the treadmill.

15
SMART RUN-CUSTOMIZED MODE
Equipped with 5 preset customized programs, with each program divided into 10
segments.
Users can set the speed and incline value with the use of the corresponding column.
Once selected please press Save to save the data and then Start to start the treadmill
with the saved values.Alternatively, the treadmill will start with the last running values
used.
Note: If your treadmill is not equipped with an incline function, the incline functionality
will not be displayed/work.
SMART RUN-HEART RATE CONTROL (HRC) MODE
In HRC mode, the age and time can be set by pressing +/- icons.
Please input your actual age to obtain better reading.
Note: The HRC feature is not to be used for medical purposes and will not provide an
accurate reading. It is intended to be used purely to enhance the user experience with
this product.
HRC mode can be triggered by setting the last value in the sequence.
Age setting range: 15-80, default value is 25.

16
Default target heart rate (THR): (220-AGE)*0.6
Target heart rate value can be selected, the range is 80-180
Set time - Default setting is 30 minutes. Range: 5 - 99 minutes.
Speed change information
oChange frequency: HRC detects heart at 30 second intervals (heart rate is
displayed).
When the user’s heart rate is slower than the target heart rate by 30 beats/minute, the
speed will increase by 2 km/h.
When the user’s heart rate is slower than the target heart rate by 1-29 beats/minute, the
speed increases by 1 km/h.
When the user’s heart rate is faster than the target heart rate by 30 beats/minute, the
speed decreases by 2 km/h.
When the user’s heart rate is faster than the target heart rate by 1-29 beats/minute, the
speed decreases by 1 km/h.
When the following occurs, the treadmill’s speed will decrease to the slowest speed
possible within 20 seconds, and then the treadmill will stop after it runs with the slowest
speed for 15 seconds thereafter (emitting a beep every second).
oDetect heart rate every 30 seconds but no signal of heart rate for continuous 2
times.
o1 km/h (0.6 mile/h), heart rate results decrease of the speed.
oHeart rate exceeds (220-AGE).
Incline is not controlled with heart rate, users can adjust the speed manually.
Media Play Options
Use the multimedia option to enter the above mode:

17
Selecting Music, Video or Picture, will display the respective files in storage and external
drive.
The system will play the files with android system’s music player, video player and
gallery.
Music
Status bar positioned at the bottom of the screen will display the running data.
User can conceal the data by pressing the red dot icon located on the right of the
screen.
Video
Note: DO NOT DELETE the factory installed video scenes, as it will disable the real
scene running mode and void the warranty.

18
Gallery
User Center
Press to enter the user center (must first login)
User’s information is displayed in the left column, and user’s history is displayed on the
right section of the screen.

19
Editing User Information
Press Edit to update the information.
Press Save to save the updated information. Ensure the unit is connected to the internet,
for the updated information to be stored.
Scenes
To access the included 3 HD exercise scenes, users need to select
Users can select one of the scenes and press Start to start the treadmill.

20
Scenes after Start
If the user starts with another mode, when entering the scene option, the displayed
scene will default to the scene which played previously. User can press the Back button,
to change the scene.
Applications
Touch to enter the above mode. Preinstalled and downloaded apk will be
shown on this screen.
Should the user want to install other apk, they will need enter the apk in file manager,
press the APK on the right side, then press the apk that they want to install to finish the
installation.
Press the corresponding icons to enter the application. If you wish to delete an
application, hold down the icon for longer than 3 seconds. Factory installed applications
cannot be deleted.
Table of contents
Other Powertrain Treadmill manuals
