SECTION II
HOW TO USE YOUR WINCH
NOW USE YOUR WINCH
TrI-Matlc Control Knob and Cable
The Tri-Matic Control Knob on the side of the winch
controls the braking of the winch. Turn the knob all
the way counterclockwise .._3. This releases the
clutch and brake so the cable can be pulled out.
To Pull The Cable Out By Hand
t. Turn the Td-Matic Control Knob counterclock-
wise,LF) as far as it will go.
2. Pull the cable out by the hook to the length you
wanL
Always Leave The Last Three [3) Turns Of
Cable On The Drum. This Prevents The
Cable Fastener From Pulling Out Under
Heavy Load.
Winch A Load Under Power
1. Turn the Tri-Matic Control Knob clockwise r'_
until fingertip tight only! DO NOT overtighten or
the clutch will be damaged•
2. Press the button on the remote control to winch
in the load.
Never Winch ALoad With Your Vehicle's
Automatic Transmission in "Park." This
Could Damage Your Transmission. Put
Your Vehicle In "Neutral" With Your Emer-
gency Brake On, And Block The Wheels.
Winch Objects To Your Vehicle
1. Do not jerk any object free using vehicle power.
This will cause severe shock damage to the
winch.
2. Keep the vehicle standing still with the engine
running and the transmission in Fig. 8. Use your
emergency brake and block the wheels.
"_..J=cl
FIG. 8
Keep Vehicle Engine Running Full Power
Your winch will run" at its best if it gets full power
from your battery and alternator. To be sure of this
keep the vehicle engine running.
When To Use Your Emergency Hand Crank
The Emergency Hand Crank should ONLY be used
when there is NO electric power--for example: a
dead batlery. It should NEVER be used to help out a
|
running motor. This could damage the winch and/or
hurt the user.
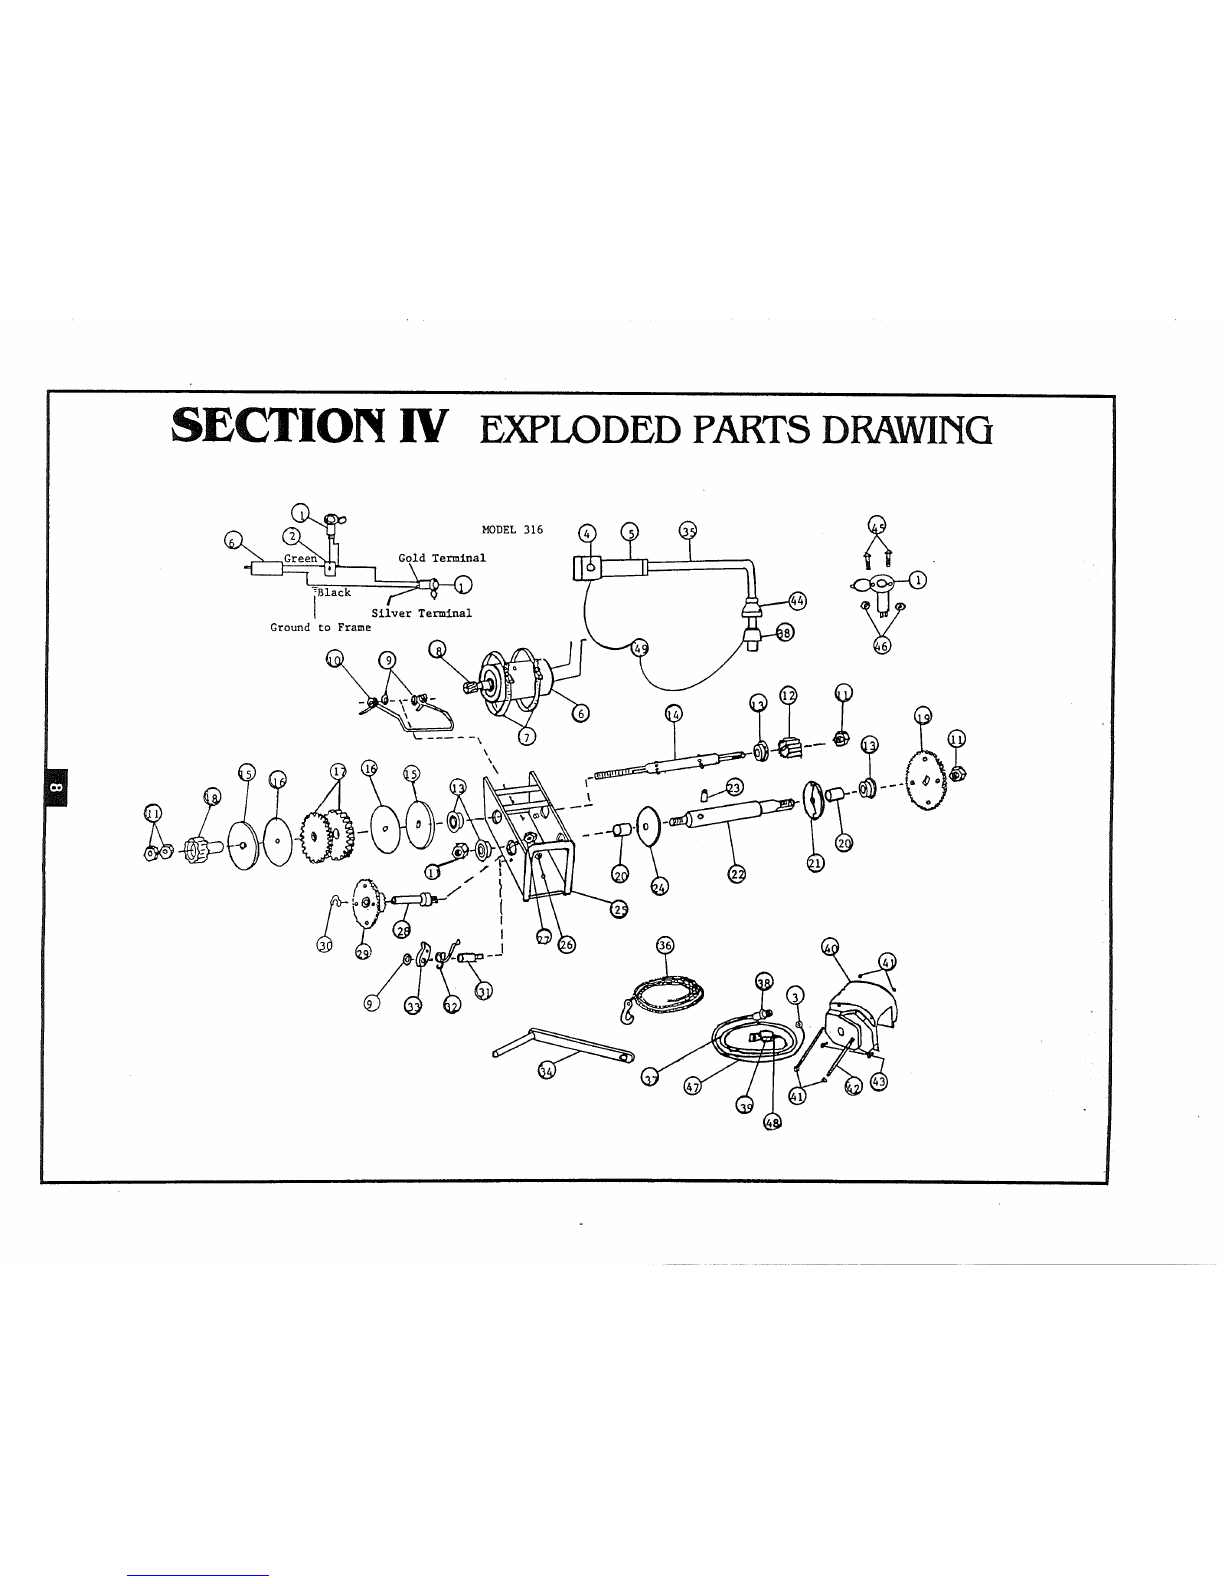
"HandCrank is optionalon Model 316.
How To Use Your Emergency Hand Crank
(See Fig. 10)
1. Tighten the Td-Matic Control Knob all the way
clockwise("_or there isno braking action.
2. Remove the outernut.
3. Put the Emergency Hand Crank on the shaft.
4. Replace the outernut.
When you have finished using the Emergency Hand
Crank:
1. Remove the outernut.
2. Remove theEmergency Hand Crank.
3. Replace the outernutfor locking.
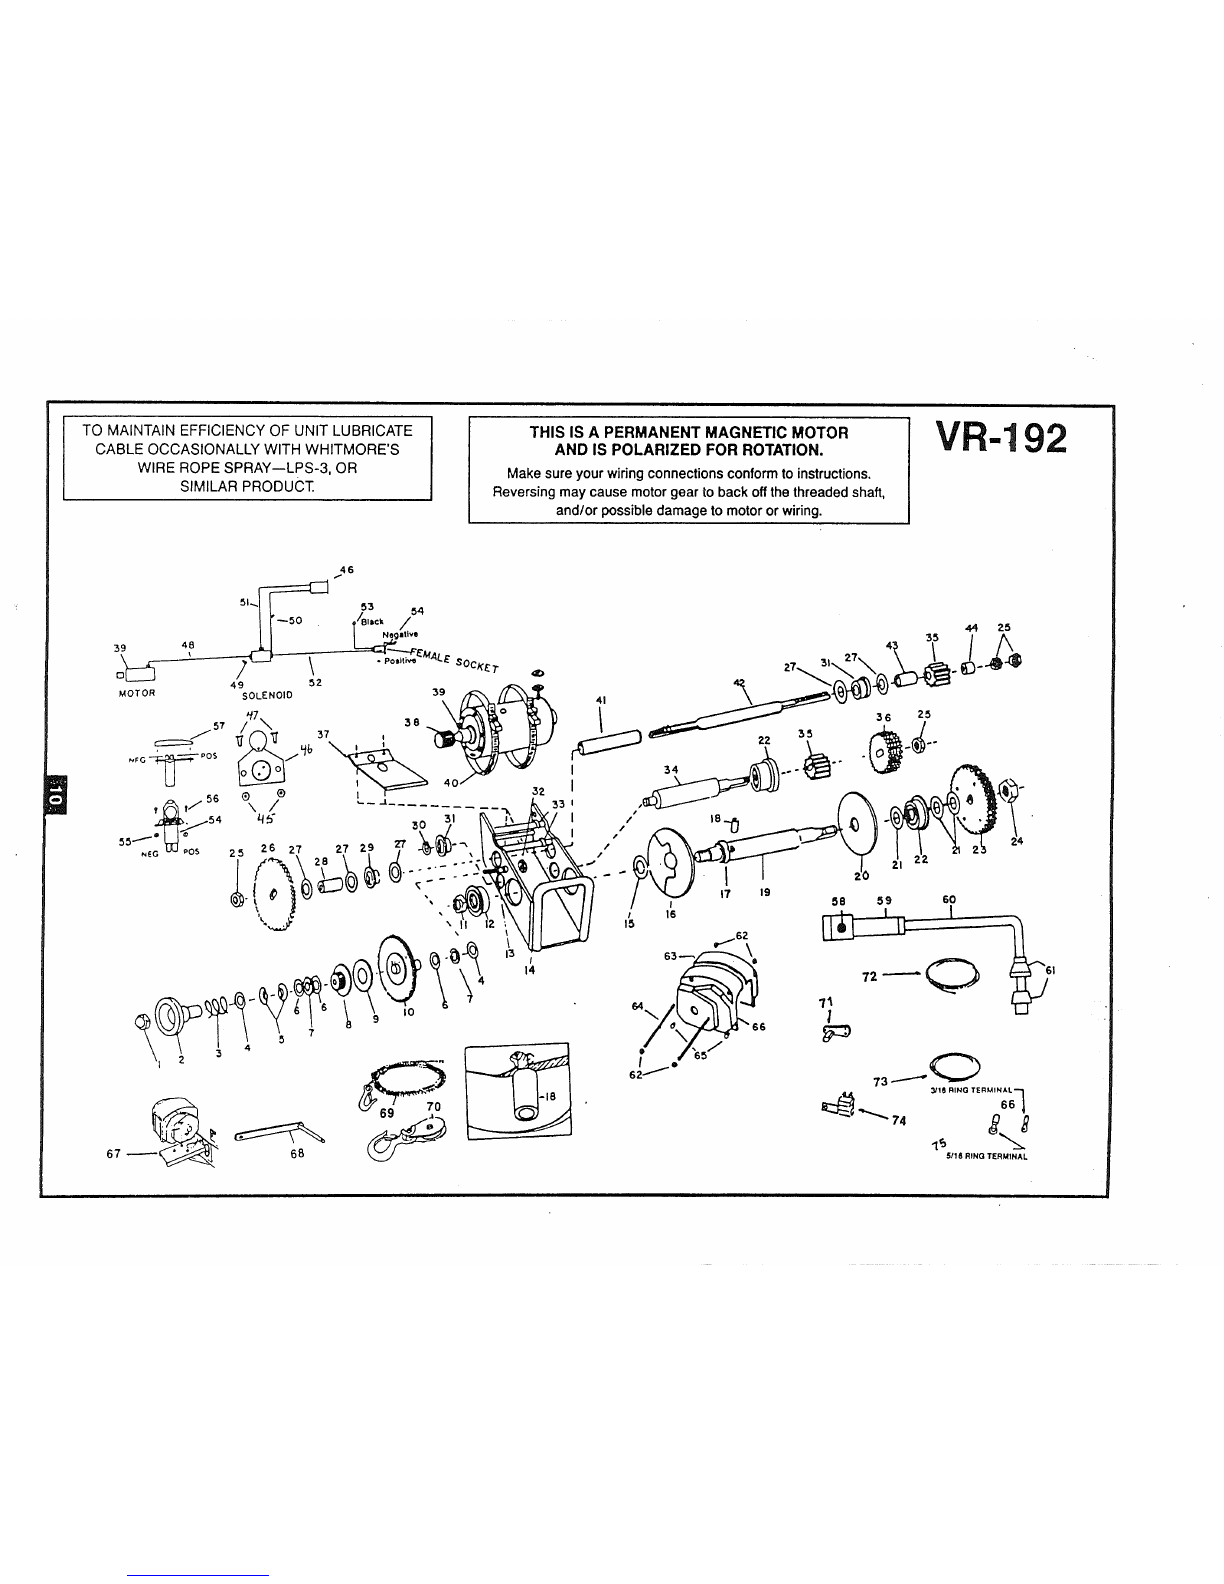
VR-192 Shown. On Model 316 attach hand crank
on tri-knob shaft.
RG. 10
A Caution: Be Careful Wlth The Cable Hook
DO NOT let the cable hock go into the drum area of
the winch. (The drum area is where the cable
winds.) The hook will bend the levelwind plate or the
levelwind spring if it goes too far into the winch.
Your motor will Idle for •second or two after
the winch Is released and about 1foot of cable
will unwind. Be sure to allow for thisl
Remove The Plug When Winch Is Not fn Use
Inspect the cable often and spray with a light oil or
LPS-3. We recommend spraying the cable once a
week if in regular use.
Gears - Every 6 Months
To grease the gears:
1. Remove the Td-Mafic Control Knob
(Part =79402}.
2. The right and left Side Covers.
3. Use any marine type grease.
SECTION. III
MAINTENANCE/SERVICE
A. CABLE--Lu_icate the cable occasionallywith
Whitmore's Wire Rope Spray, WD40 or a similar
product.Spray the drumand the cable as it is
being wound.
B. IMPROPERLY WOUND CABLE--If for some
reason yourcable is notpropedy wound
(either wound loosely or wound on one side)
unwind the cable and rewind under power,
keeping tensionon it.This should wind the
cable tightlyand evenly. Otherwise the wrap
of the cable may squeeze down to a lower
layer--causing stlckin_ loss of power, and risk
damage to the levelwlnd spdngs.
C. REPLACING THE CABLE--Cut end remove
the old cable from the drum.Insert the new
cable Intothe drum shafthole at theend
opposite thecounterborod end. Draw the cable
through the hole and outthe counterbored side
of the shaft. Push the cable through the fastener'
until It ISflush withthe shoulder end, and soit-
[,.'t:1;t,vj[_JI_[._ll I;i PiiYj!';_/ [oil ;[o1li J
MODEL VR-lg2 ONLY
A. The Tri-matic Roll-n-Gage Control isthe heart
of your Powerwtnch uniL it controls loading,
unloading and braking.
B. Since this isa highlyengineered assembly, care
should be taken on its maintenarice.
C. To lubricate, remove nut(79720} and unscrew
Tri-matic Control Knob =79402. Remove case
on control side, putcontrol knob back on so
thatparts of the Roll-n-Gage Control will notslip
off.
Using a good grade grease° lubricate the stud,
=71101, thrust beadngs =71609, roller clutch bear-
Ing Inside =71716 compound ddve gear and needle
beadng Inside =71755 compound pinion clutch gear
assembly and needle thrust beadng =71609.
i
solderthe end of the cable to the fastener.
Insert thecable fastener intothecounterbored
hole In thedrum shaft, tapping lightlyuntil the
topof thefastener is flushwiththe drumshaf'L
Bend the cable sharply around the firstgrooveof
the drumshaft.Rewind the cable ontothe drum
under power, keeping tensionon the cable.
WARNING: When replacing thecable, use anexact
replacement cable. The winch rating and cable
strength are carefully matched. Your warrantyis
void if any other cable is used.
D. CARE OF THE LEVELWIND SPRINGS ON
DRUM--Your motorwill continue torun for a
secondor twoafter the spdng loaded switch
Isreleased, especially withouta load. Be sure
to allow for this. Don'tlet thehook go intothe
winch and bend the levelwind springs. When
winding cable onto the drum wIthno load, keep
the cable tautgoing intothe drum.
NOTE: Extreme care should be taken to avoid
getting any grease on clutch lining,1t73602, as this
may cause slippage.
CAUTION: Do not tryto remove bearings from
insidecompound drive gear or compound pinion
gear.
\.,//,_ _# :;)s