Pretorian iSwitch User manual
Pack Contents
Carefully check the contents of
the box, which are:
iSwitch unit
USB charging cable
These instructions
INSTRUCTIONS
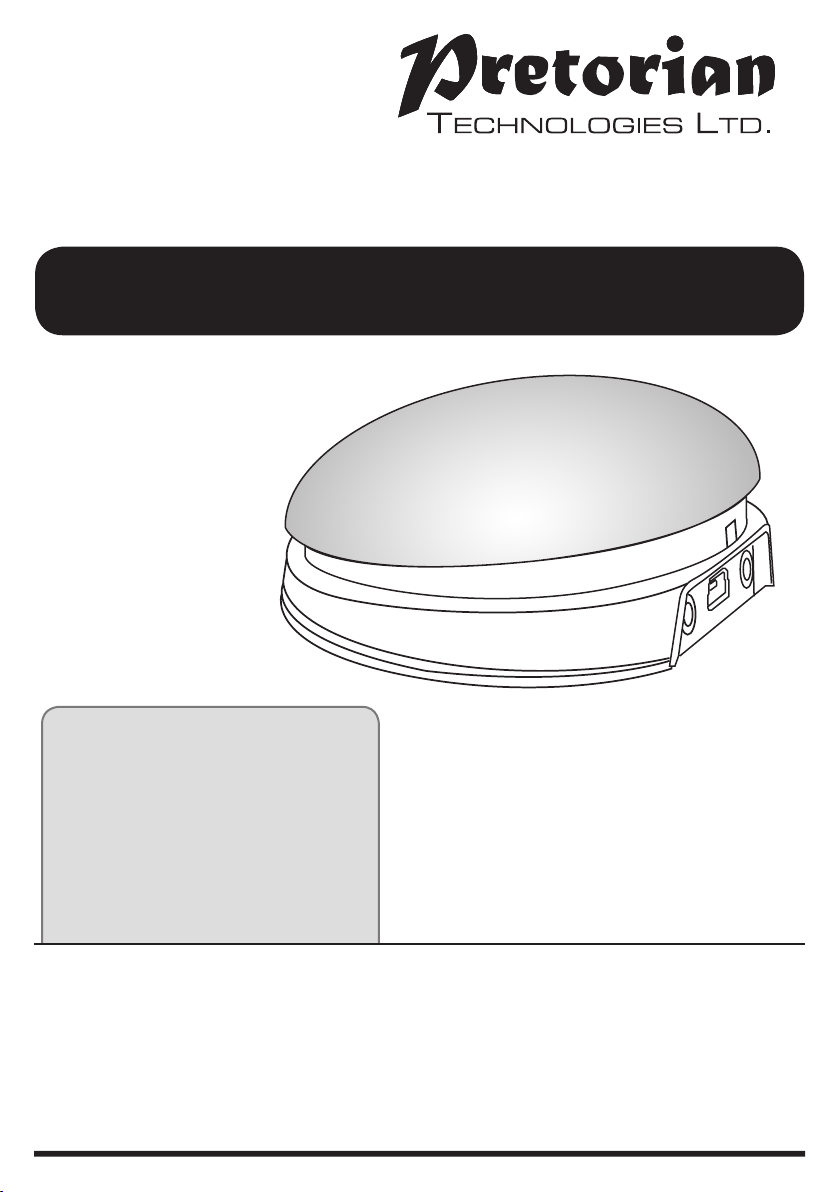
iSwitch iPad/iPhone/iPod Access Device
Product Description
iSwitch is a highly versatile switch access
device specifically designed to give you
access to iOS Switch Control, switch
adapted apps, music and photography.
Specifically designed around users’
needs, iSwitch is simple to set up and
use, but loaded with features to cater
for all requirements. Although simple
to operate, to ensure you get the
best experience from using your new
iSwitch, please take time to read this
instruction booklet.
Features
• Integral 75mm switch
• Pairs directly with your iPad/iPhone/iPod without PIN entry.
• Connect up to two additional wired switches of any type.
• Function of each switch/socket may be individually selected.
• Includes enhanced access to iOS Switch Control
• Integral button allows on-screen keyboard to be displayed or hidden
at any time.
• 20m (64’) operating range.
• Integral lithium-ion rechargeable battery.
• Charged from any USB socket.
• Manual and automatic sleep modes to conserve battery life.
• Choice of four switch colours (red, yellow, green, blue)
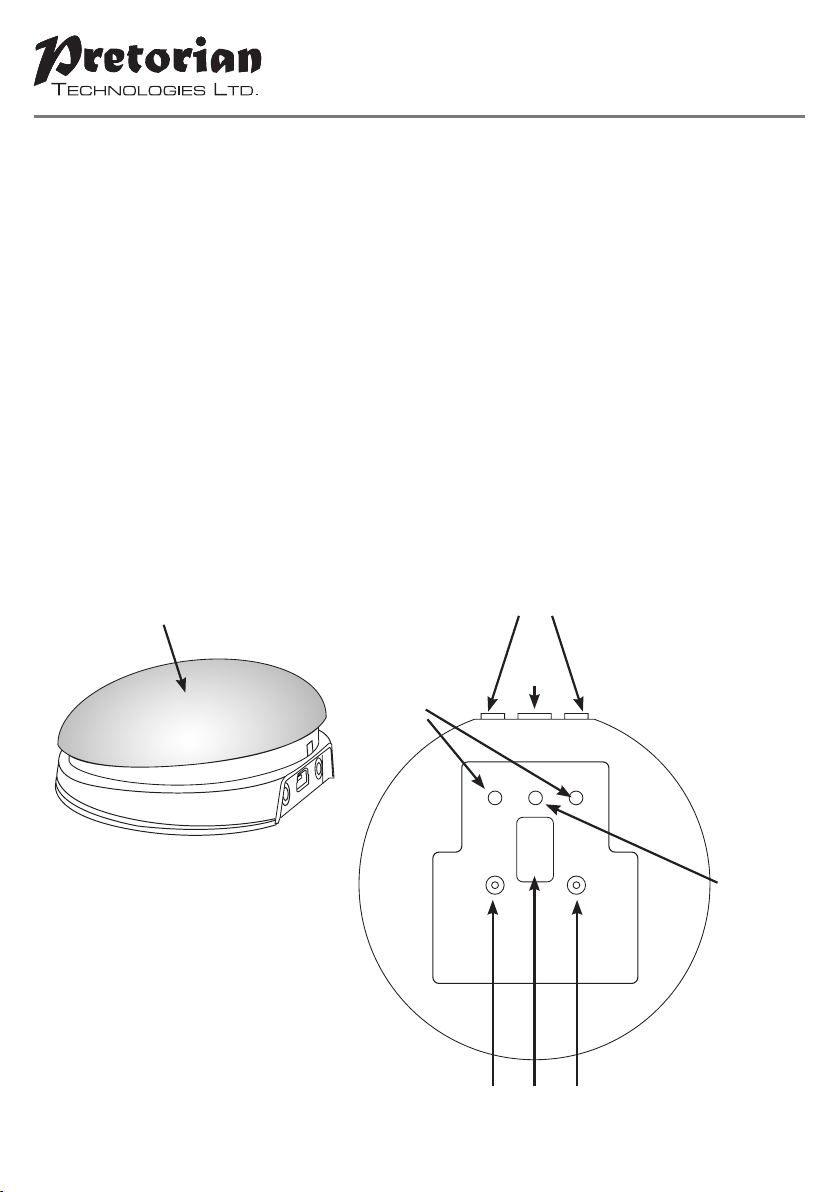
A
D
E
HGF
B
C

Compatibility
Your iSwitch is compatible with the following Apple products:
iPad - all models
iPod Touch 3rd Generation onwards
iPhone 3GS onwards
Android tablets vary enormously in specification so compatibility with these products is dependent
upon the specific tablet. Please contact Pretorian Technologies or your local distributor for guidance.
Throughout these instructions, all references to iPad should be taken as meaning any of the above
Apple products.
Charging your iSwitch
Ensure that the integral battery is fully charged by plugging the charging cable into iSwitch and then
into a computer USB port. The charging LED (E) will illuminate green to show that charging is taking
place. Once charged, the charging light is extinguished.
Notes about Bluetooth Connections
Once connected with a particular iPad, it will no longer be visible (‘discoverable’) by other iPads. If you
turn your iPad off, turn off Bluetooth or if you go out of range, the connection between the two devices
is automatically re-established when you next power on, turn Bluetooth on or go back into range.
If you wish to connect with a different iPad at any time, please refer to the ‘Re-Connecting your
iSwitch’ section of this manual.
Connecting to your iPad/iPhone/iPod
Wake up iSwitch by pressing either the Channel or Mode buttons (F or H)*.
Go to the Bluetooth menu on your iPad (Settings Bluetooth). First of all ensure Bluetooth is turned
on using the slider at the top of the screen.
After a few seconds the iSwitch should appear as a ‘discoverable’ device. It will appear as something
similar to:
Pretorian-V59.0-ABC1
Tap on the name and the pairing process will begin. Typically it takes around 20 seconds to connect,
after which the iPad will state that the device is ‘Connected’. Your iSwitch is now ready for use.
* If the unit awakes but you do not see the rotating pattern on the display, refer to the ‘re-connecting
your iSwitch’ section of this manual.
*The iSwitch is shipped in manual sleep mode- please refer to page 7 for more details.

Mode Settings
The default modes for the integral switch (A) and sockets (B) are given in Table 1:
To change the integral switch (A) mode setting,
press the channel button (F) once. The current
mode setting is then shown on the display (G).
To change, press the mode button (H) until the
desired setting appears on the display. Table
2 shows the available settings. After a few
seconds the display is extinguished to save
power and the settings saved.
Note that neither of the LEDs (C) are illuminated
when setting the internal switch mode.
To change the setting of either socket (B),
first select the socket which you would like
to change by repeatedly pressing the Channel
button (F) until the LED (C) adjacent to that
socket is illuminated.
The current setting is then shown on the display
(G). To change, press the Mode button (H) until
the desired setting appears on the display.
Table 2 shows the available settings. After a
few seconds the display is extinguished to save
power and the settings saved.
Any combination of settings can be programmed,
including duplicates, should you wish to use
iSwitch for turn-taking and cooperation.
SWITCH (A) Space
SOCKET 1 (B) Enter
SOCKET 2 (B) Home
Table 1: Default Switch/Socket Modes
Mode Setting Class Function
0 Keyboard Numeral 0
1 Keyboard Numeral 1
2 Keyboard Numeral 2
3 Keyboard Numeral 3
4 Keyboard Numeral 4
5 Keyboard Space
6 Keyboard Enter
7 Keyboard ~1
8 Keyboard ~3
9 Keyboard Up Arrow
A Keyboard Down Arrow
B Keyboard Left Arrow
C Keyboard Right Arrow
D Op. System Keyboard
E Media Play/Pause
F Media Skip Forward
G Media Skip Back
H Media Volume Up
J Media Volume Down
L Media Mute
P Media Timed Play 10s
R Media Timed Play 30s
T Switch Control Home
U Switch Control Enter / Home Table 2: Switch Functions
Accessing Music/Media
Many of the settings in Table 2 give access to the
iPad media player rather than to switch adapted
Apps. Any switch or socket may be programmed
to use these settings and they may be mixed with
switch adapted App settings in any sequence at all.
Selecting these settings is exactly as described above.
On-Screen Keyboard
Because your iSwitch appears to the iPad as a keyboard, the iPad automatically turns off the
on-screen keyboard. This can cause difficulties in some Apps which require a typed input such as
entering a user’s name.
To overcome this, iSwitch allows you to deploy the on-screen keyboard manually at any time. Simply
press the mode button (H) while the display (G) is off.. The on-screen keyboard will be deployed
automatically. To turn it off again, press and hold the mode button once again.
Mode setting ‘D’ allows any switch to be configured to deploy the on-screen keyboard, and is
particularly useful if you can’t easily access the Mode button (for example if your iSwitch is attached
to a surface).
Note that iPad remembers your on-screen keyboard preference so there’s no need to press to deploy
every time.
Note that the iPad only allows the on-screen keyboard to be deployed when a text input box is selected.
Timed Play
Timed Play settings allow you to create a ‘reward’ for pressing a button, completing a task, or any
number of other outcomes. You have a choice of 10 or 30 seconds play time.
Because this setting uses the ‘Play/Pause’
command, it is important that the iPad is paused
(not playing) before you press the switch to give
timed play, otherwise the iPad will pause for a
timed period instead of playing.
If a switch programmed to Play/Pause is pressed
during a timed play, the timed play will be cut
short and the unit will be Paused.
Skip Forward and Skip Back commands have no
effect on the duration of a timed play.
If you wish to end a timed play early, you
can use a switch already programmed to
Play/Pause.

Switch Control (iOS7 onward)
Using Home functions with Switch Control
iOS7 and later operating systems include the
Switch Control feature, allowing the user to
scan apps, menu items and the pop-up keyboard
without using the touch screen. iSwitch may be
used as the Bluetooth switch device to allow you
to scan and select items.
Before enabling Switch Control, first decide what
type of switch interface will be best for the user.
For example, this could be a single select switch
in combination with the Auto Scanning feature
within Switch Control, or it may comprise several
switches to allow manual scanning and select.
Almost any switch setting in Table 2 categorised
as ‘Keyboard’ may be used to effect any scanning/
selecting function. However, it is important
not to use ~1 or ~3, since iPad accepts the first
character only and both of these begin with ~.
Media functions such as Play/Pause, Skip Fwd
etc cannot be used.
Once you have decided on a particular number
of switches, plug any external switches into
iSwitch and program their respective settings as
described above. For example, if three switches
are required for Scan to Next Item, Scan to
Previous Item and Select Item it may make sense
to use , and Enter (B, C and 6 respectively
on the display).
With iSwitch already paired to your iPad, go to
Settings General Accessibility Switch
Control and tap on ‘Switches’. Then tap on ‘Add
New Switch’ and ‘External’. You will be asked to
activate your external switch. At this point, press
the relevant switch (either integral or external).
Once your iPad has recognised the switch press,
it will ask you to give the switch a name. This may
be anything but should help to identify which
switch it refers to. Consider names such as ‘red
switch’, ‘grasp switch’ etc’.
Next, your iPad will ask you to assign the switch
to a particular task. Using the above example, if
you were setting up the switch (setting B), you
would tap on Scan to Next Item.
Repeat this exercise for each of the switches you
would like to use and then turn on Switch Control
using the slide at the top of the screen. Also
set Auto Scanning to the desired setting (auto
scanning will be disabled if you have pressed
any switches that are set to Scan to Next Item or
Scan to Previous Item). Generally speaking, fewer
switches will be required when Auto Scanning
compared to manual scanning so the choice of
which to use is often governed by the number of
switches the user is able to operate.
Tutorial videos are available on the Pretorian
Technologies’ website - please visit
www.pretorianuk.com/iswitch and click on
Videos.
Settings T and U in Table 2 have been added to
make iSwitch easier to use with Switch Control.
Setting T is ‘Home’ and is exactly equivalent to
pressing the Home button on iPad. Note that this
setting can be used whether in Switch Control or
not and does not need to be programmed within
Switch Control.
Setting ‘U’ is Enter/Home which gives Enter if
pressed briefly or Home after an extended press.
This is extremely useful when combined with
Auto Scanning since it allows the integral switch
to carry out virtually every task on iPad without
needing any external switches.
To get the best experience from setting U,
program Enter (brief press) to Select Item. Be
sure to use a brief press when iPad asks you to
activate your external switch and then set it to
Select Item.
There is no need to set a function for Home (long
press) since this is an inherent function for iPad.
Once set up in this way, a brief press of the switch
allows you to control Auto Scanning and select an
item whereas a long press allows you to quit back
to the home screen.

Automatic Sleep Mode
To conserve battery life, iSwitch automatically
enters a low-power sleep mode if it remains unused
for an hour. Pressing any external switch (integral or
external) or any button on the unit instantly wakes
it again. While asleep, the connection with the iPad
is lost but is automatically re-established within a
few seconds of wake-up.
If the unit remains unpaired for more than 5
minutes, it will also enter low-power sleep mode.
Press any button or switch to wake the unit.
Manual Sleep Mode
When the unit goes to sleep automatically,
pressing any of the switches will wake it. This
is very convenient, but if the unit is to be
transported while not in use, inadvertent presses
of any switch will wake the unit, reducing battery
charge. To avoid this situation, there is an option
to manually put the unit to sleep:
Simply press and hold the channel button (F)
until all the LEDs light, then release. The iSwitch
is then asleep and will not wake when a switch is
pressed. Instead, press either Channel or Mode
(F or H) briefly to wake the unit.
Battery Life and Battery Charging
A fully charged battery gives approximately 40
hours of use. When the battery is getting low, the
Charging LED (E) begins to blink red. This is an
indication that you should charge the battery soon.
Plug the charging cable into the charging socket (D)
and then into a USB socket on a computer. Ensure
the computer is turned on.
While charging, the Charging LED will be illuminated
green. Once charging is complete (a matter of a few
hours if fully discharged) the charging LED will be
extinguished. You can then unplug the cable.
Note that you can continue using iSwitch while it
is charging
iSwitch plugs into a computer USB port for
charging purposes only - it does not give a
functional connection this way.
Maintenance
Your iSwitch has no user
serviceable parts. If repair
is necessary the unit should
be returned to Pretorian
Technologies or an authorised
distributor.
iSwitch contains a lithium
ion battery that isn’t user
replaceable. Although the unit
uses the very latest battery
technology, it may eventually
need to be replaced.
Disposal of batteries is often
subject to local laws. Please
consult your local authorities
for information relating to your
locale. Never dispose of a battery
in fire.
Re-Connecting your iSwitch
If, when waking up your iSwitch, the rotating
pattern does not appear on the display, this
indicates that the unit is already connected to
another iPad in the vicinity. In this case you will
need to ‘forget’ this connection before you can
re-connect with another unit.
Similarly, if you have been using your iSwitch
with a particular iPad that is still in the vicinity
and you wish to swap it to another, you will also
need to forget the existing connection.
Go to the Bluetooth menu on your iPad
(Settings Bluetooth) and tap the blue tab
adjacent to the unit name, for example:
Pretorian-V59.0-ABC1
Then tap on ‘Forget this device’. At this point
the unit is no longer connected with the original
iPad and will appear as a ‘discoverable’ device on
all iPads in the vicinity. You can then re-connect
with a different iPad by again tapping on the unit
name in the Bluetooth menu.

www.pretorianuk.com
Unit 37 Corringham Road Industrial Estate
Gainsborough Lincolnshire DN21 1QB UK
Tel +44 (0) 1427 678990 Fax +44 (0) 1427 678992
SimplyWorks®is a registered
trademark of Pretorian Technologies Ltd
Warranty
Your iSwitch is warranted against defects in manufacture or component failure. The unit is designed
for domestic and educational applications. Use outside these areas will invalidate the warranty.
Unauthorised repair or modification, mechanical abuse, immersion in any liquid or connection to
incompatible equipment will also invalidate the warranty.
S040089. Use with firmware version 59.0
The Apple brand name and iOS trademark are used for
identification purposes only and are acknowledged.
Troubleshooting
If your iSwitch doesn’t operate correctly, please use the following guide to determine the cause. If, after
following this guide, your unit still doesn’t operate, please contact your supplier before returning it.
Symptom Possible Cause/ Remedy
My iSwitch is not ‘discoverable’ on
my iPad
• Ensure battery is charged.
• Ensure unit is awake by pressing mode or channel button.
• Unit may be connected with another iPad which is
in range. Use ‘forget this device’ in Bluetooth menu
of other iPad to make unit available again.
My iSwitch has been connected to
this iPad before but won’t connect
now.
• Re-connection should be automatic but if
difficulties persist, try ‘forget this device’
and then re-connect. This usually resolves any
connection issues.
My iSwitch does not wake up when
I press a switch.
• iSwitch has been put to sleep manually. Press
either channel or mode buttons to wake unit.
When I select timed play, the
music stops.
• Ensure iPad playback is paused before
selecting a timed play.
This manual suits for next models
6
Table of contents
Other Pretorian Cell Phone Accessories manuals


