manuals.online logo
Brands
  1. Home
  2. •
  3. Brands
  4. •
  5. Primera
  6. •
  7. Label Maker
  8. •
  9. Primera Cyclone User manual

Primera Cyclone User manual

010301-510172-(01)
Users Manual
© 2001 All rights reserved.
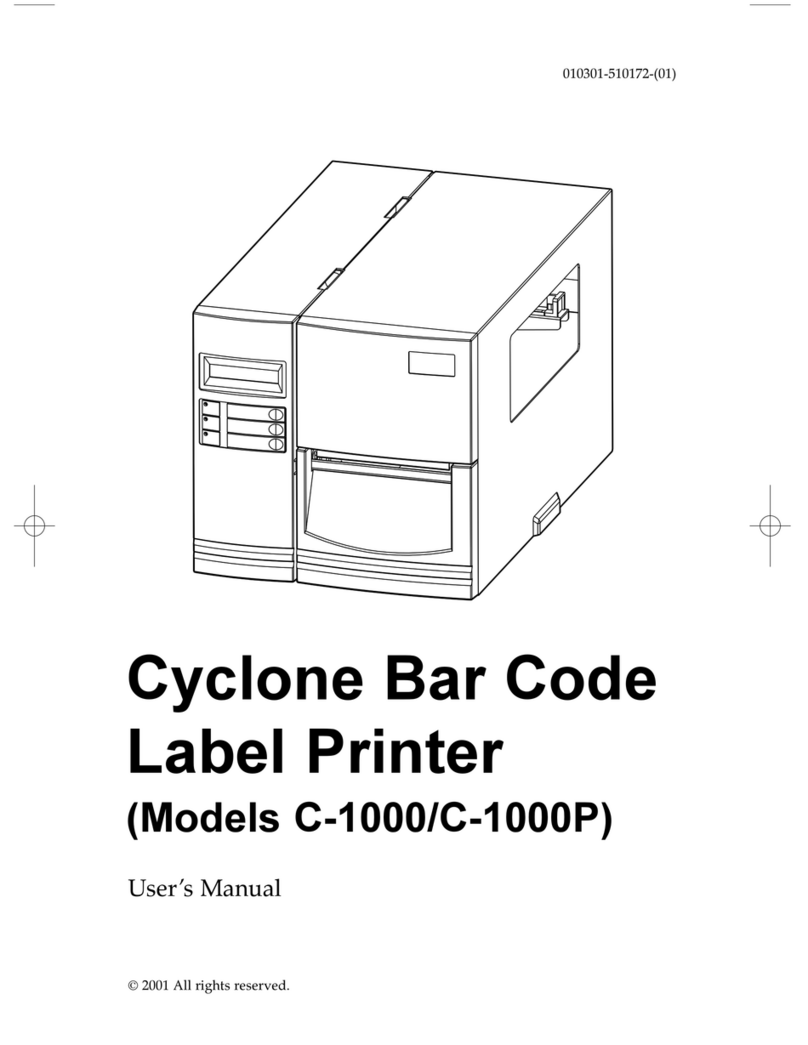
Cyclone Bar Code
Label Printer
(Models C-1000/C-1000P)
510172_r1.qxd 3/21/2001 6:25 PM Page i
Notices: The inf rmati n in this d cument is subject t change with ut n tice.
NO WARRANTY OF ANY KIND IS MADE WITH REGARD TO THIS MATERIAL, INCLUDING, BUT
NOT LIMITED TO, THE IMPLIED WARRANTIES OF MERCHANTABILITY AND FITNESS FOR A
PARTICULAR PURPOSE. N liability is assumed f r err rs c ntained herein r f r incidental r
c nsequential damages in c nnecti n with the furnishing, perf rmance, r use f this material. This
d cument c ntains pr prietary inf rmati n which is pr tected by c pyright. All rights are reserved.
N part f this d cument may be ph t c pied, repr duced, r translated int an ther language
with ut pri r written c nsent.
Trademark Acknowledgments: IBM is a registered trademark f Internati nal Business
Machines C rp rati n. Wind ws is a trademark f Micr s ft C rp rati n. All ther trademarks are the
pr perty f their respective wners. CandelaC l r®Charged by Pict graphics is a registered trademark
f Pict graphics Internati nal C rp rati n.
Printing History
Editi n 1.0, #010103, © C pyright 2001, All rights reserved.
FCC Compliance Statement: This device c mplies with part 15 f the FCC rules. Operati n
is subject t the f ll wing tw c nditi ns: (1) this device may n t cause harmful interference, and (2)
this device must accept any interference received, including interference that may cause undesired
perati n.
For Users in the United States: This equipment has been tested and f und t c mply with
the limits f r a Class B digital device, pursuant t Part 15 f the FCC Rules. These limits are designed
t pr vide reas nable pr tecti n against harmful interference in a residential installati n. This
equipment generates, uses, and can radiate radi frequency energy and, if n t installed and used in
acc rdance with the instructi ns, may cause harmful interference t radi c mmunicati ns. H wever,
there is n guarantee that interference will n t ccur in a particular installati n. If this equipment d es
cause harmful interference t radi r televisi n recepti n, which can be determined by turning the
equipment ff and n, the user is enc uraged t try t c rrect the interference by ne r m re f the
f ll wing measures:
 Re- rient r rel cate the receiving antenna.
 Increase the separati n between the equipment and receiver.
 C nnect the equipment int an utlet n a circuit different fr m that t which the receiver is
c nnected.
 C nsult the dealer r an experienced radi /TV technician f r help.
Use f a shielded cable is required t c mply with the Class B limits f Part 15 f the FCC Rules. Y u
are cauti ned that any changes r m dificati ns n t expressly appr ved in this manual c uld v id
y ur auth rity t perate and/ r btain warranty service f r this equipment.
Within the U.S., this pr duct is intended t be supplied by a UL Listed Direct Plug-in P wer Unit
marked Class 2 and rated 30 Vdc, 500 mA r 830 mA.
For Users in Canada: This digital apparatus d es n t exceed the Class B limits f r radi n ise
f r digital apparatus set ut n the Radi Interference Regulati ns f the Canadian Department f
C mmunicati ns. Le present appareil numerique nemet pas de bruits radi electriques depassant les
limites applicables aux appareils numeriques de la class B prescrites dans le Reglement sur le
br uillage radi electrique edicte par le ministere des C mmunicati ns du Canada.
CAUTION
TO PREVENT FIRE OR SHOCK HAZARD, DO NOT EXPOSE THE UNIT TO RAIN OR MOISTURE.
TO REDUCE THE RISK OF ELECTRIC SHOCK, DO NOT REMOVE EXTERIOR PANELS. NO USER-
SERVICEABLE PARTS INSIDE. REFER SERVICING TO QUALIFIED SERVICE PERSONNEL. OPERATE
THE UNIT WITH ONLY THE PROPER ELECTRICAL SPECIFICATIONS AS LABELED ON THE
PRINTER AND AC ADAPTER
ii
510172_r1.qxd 3/21/2001 6:25 PM Page ii
iii
Table of Contents
Section 1: Getting Started
A. Ch sing a G d L cati n...............................................................................2
B. Unpacking and Inspecti n ...............................................................................2
C. Identifying the Parts..........................................................................................4
D. Applying P wer.................................................................................................6
E. C nnecting the Printer t Y ur C mputer .........................................6
Section 2: Loading Media
A. L ading Labels r Tags.....................................................................................9
B. L ading the Ribb n.........................................................................................11
C. Label Sens r Calibrati n ................................................................................13
D. Perf rming a Self Test .....................................................................................13
E. Resetting the Printer t Fact ry Default C nditi n ...................................14
Section 3: Using the Optical Disc Printer ith Windo s
A. Installing the Printer Driver...........................................................................15
B. H w t Use the Driver ...................................................................................16
C. Printing Labels .................................................................................................20
Section 4: Troubleshooting and Maintenance
A. Tr ublesh ting ...............................................................................................21
B. Maintenance .....................................................................................................23
Appendix A: Command Language Quick Reference
A. C mmand Set f r PPLA .................................................................................25
B. C mmand Set f r PPLB..................................................................................31
Appendix B: Interface Specifications
A. Intr ducti n......................................................................................................34
B. Parallel (Centr nics) ........................................................................................36
C. Aut P lling......................................................................................................36
Appendix C: ASCII Table ............................................................................................37
Appendix D: Fonts and Bar Codes for PPLA ..........................................................38
Appendix E: Fonts and Bar Codes for PPLB............................................................51
Appendix F: Specifications .........................................................................................57
Appendix G: Internal Fonts, Bar Codes and Graphics..........................................58
Index ................................................................................................................................60
510172_r1.qxd 3/21/2001 6:25 PM Page iii
iv
510172_r1.qxd 3/21/2001 6:25 PM Page iv
Getting Started 1
Section 1: Getting Started
THANK YOU
f r purchasing the Cycl ne C1000/C-1000P Bar C de Label
Printer. Cycl ne is a high-perf rmance, l w-c st direct
thermal/thermal transfer label printer designed f r use in m st
industrial, retail and ffice applicati ns. Its user-friendly
design and aff rdable price set a new standard f excellence
f r industrial-strength bar c de label printers.
The printer inc rp rates a highly efficient mem ry
management techn l gy called TrueSpeed. This feature all ws
c nstant print speeds f 1 t 4 per sec nd. The printer is
bundled with flexible printer driver s ftware and a highly
capable label design pr gram called PrimaBar f r Wind ws®.
T gether, they all w y u t quickly and easily print ut bar
c des, text and graphics using a standard PC running
Wind ws 95/98/Me/2000 and NT. A wide variety f the m st
p pular bar c des and 9 different f nts are als resident in the
printers internal mem ry f r legacy applicati ns in which a
particular pr gramming language is required.
The s lidly designed mechanism delivers l ng life and all ws
quick and easy media and ribb n l ading. Tw Cycl ne
m dels are available:
 C-1000  feeds labels ut the fr nt. An integrated tear- ff
bar is included.
 C-1000P  includes an internal rewind and peel- ff
mechanism.
The internal rewind and peel- ff mechanism f the C-1000P
all ws dispensing f labels either ut the fr nt r ne label at a
time already peeled. Backing paper is re-w und inside the
printer. This m del can als rewind up t 1/3 f a r ll f
printed labels inside the printer with the backing paper still
attached.
This Users Manual will help y u understand basic perati ns
f the printer such as set-up, installati n, c nfigurati n and
maintenance.
510172_r1.qxd 3/21/2001 6:25 PM Page 1
A. CHOOSING A GOOD LOCATION
 Place the printer in a l cati n with adequate air circulati n
t prevent internal heat build-up.
 D n t place the printer near heat s urces such as radiat rs
r air ducts, r in a place subject t direct sunlight,
excessive dust, mechanical vibrati n r sh ck.
 All w f r adequate clearance in fr nt f the printer t
acc mm date the labels c ming ut f the printer.
 Find a s lid, flat surface with adequate r m f r the
printer. Make sure there is en ugh r m t pen the side
access d r t change ribb ns and media.
 The l cati n sh uld be as cl se as p ssible t y ur PC r
terminal. C nsider the distance between h st and printer
f r the c mmunicati n cable (serial r parallel cable).
Especially f r parallel cable c nnecti ns, it is imp rtant t
keep the cable as sh rt as p ssible.
 Be sure t c nnect the p wer c rd t a pr perly gr unded
p wer receptacle.
B. UNPACKING AND INSPECTION
T unpack y ur printer:
 The c ntainer sh uld stay right side up.
 Lift the printer ut f the b x carefully.
 Rem ve any access ry items.
 Set the printer n a s lid, flat surface.
2 Getting Started
510172_r1.qxd 3/21/2001 6:25 PM Page 2
Getting Started 3
While unpacking y ur printer, inspect the cart n t ensure that
n damage has ccurred during shipping. Make sure that all
supplied access ries are included with y ur unit. The
f ll wing items sh uld be included:
a. Printer
b. CD-R with printer driver s ftware, PrimaBar Label Design
S ftware f r Wind ws 95/98/Me/2000/NT and
Operat rs Manual in Ad be Acr bat .pdf f rmat. An
Ad be Acr bat Reader is als included n the CD-R.
c. P wer c rd f r either 100/110VAC r 220VAC
d. Extra ribb n c re
e. Starter thermal transfer ribb n
Save the cart n and packing materials. They will c me in
handy when transp rting the printer.
a
c
d
e
b
510172_r1.qxd 3/21/2001 6:25 PM Page 3
4 Getting Started
C. IDENTIFYING THE PARTS
Front Panel
The illustrati n bel w sh ws the printers fr nt panel:
The fr nt panel includes:
 3 LED indicat rs (READY, MEDIA and RIBBON)
 3 butt ns (FEED, PAUSE and CANCEL)
LED Indicators
There are three LED indicat rs n the fr nt panel labeled
READY, MEDIA and RIBBON. These indicat rs display
the perati nal status f the printer.
The READY indicat r will remain lit except
during the f ll wing c nditi ns
- The printer is in PAUSE state.
- A fault c nditi n has ccurred.
The MEDIA indicat r will remain lit except
when the media (labels r ribb n) has run ut.
ON  lit when using thermal transfer m de
with ribb n installed.
OFF  n t lit when in direct thermal m de (n
ribb n installed).
Blinking  ribb n has run ut.
RIBBON
MEDIA
READY
CANCEL/
PAUSE/
RESET
CALIBR.
FEED/
RIBBON
MEDIA
READY CONFIG.
510172_r1.qxd 3/21/2001 6:25 PM Page 4
Getting Started 5
Buttons
There are three butt ns n the panel; each f them has at least
tw basic functi ns.
Press the button and
Under normal turn on the power
Button condition simultaneously
Feeds a label. Perf rms self test
and prints ut the
c nfigurati n rep rt.
1. St ps the printing Perf rms media
pr cess. calibrati n.
2. Resumes printing
after butt n is
pressed again.
1. Interrupts and Resets the settings
deletes the current at E2PROM.
print j b.
2. Requests that the
printer start again
after an err r has
been s lved.
Important
It is highly suggested that you perform a media calibration
Note:
using the Pause Button as described above:
- after the first installation of labels.
- after you change to a different type or size of media
(Before calibration the media and ribbon should be loaded
properly and the label sensor moved to the correct position).
CANCEL/
RESET
PAUSE/
CALIBR.
FEED/
CONFIG.
510172_r1.qxd 3/21/2001 6:25 PM Page 5
Getting Started
Rear Panel
The rear panel includes
 A Centr nics-type parallel c nnect r (36-pin)
 An RS-232 serial c nnect r (9-pin)
 A P wer Slide Switch
 A P wer Switch and P wer C nnect r
 An External Label Feed Sl t with C ver
D. APPLYING POWER
1. Make sure that the V ltage Select r Switch is in the c rrect
p siti n f r y ur l cal p wer (120 VAC r 220VAC).
2. Leave the P wer Switch in the ff (O) p siti n.
3. C nnect the P wer C rd t the printer and the ther end t
y ur AC p wer s urce.
E. CONNECTING THE PRINTER TO YOUR COMPUTER
The printer is designed t be used with nearly any Wind ws-
based PC. Operating systems supp rted are Wind ws
95/98/Me and Wind ws NT/2000. The printer is equipped
with a standard 8-bit Centr nics-type parallel p rt. This p rt is
used t receive data fr m y ur c mputer. T c nnect the
printer, btain a shielded, bi-directi nal parallel cable. An
IEEE1194-c mpliant cable, n t l nger than 5 feet (1.5m) is
highly rec mmended. Then, f ll w these steps:
I
O
115
Centronics
RS232
Power Switch
Power Connector
Power Slide Switch
External Label
Feed Slot Cover
510172_r1.qxd 3/21/2001 6:25 PM Page 6
Getting Started 7
NOTE:
For fastest possible printing your computers parallel port should be
set to ECP mode. If you experience problems with this setting or if
your computers parallel port is not ECP compatible set your
computers parallel port to the standard LPT Printer Port setting.
Refer to your computers system documentation for instructions on
checking and/or changing the parallel port settings.
1. C nnect the Centr nics-type parallel side f the cable t
the printer. Snap the fastening clips int place.
2. C nnect the ther side t the back f y ur c mputer at
LPT1, LPT2 r the PARALLEL c nnect r.
3. Alternatively, y u can c nnect the printer with a serial
cable t the RS232C p rt f y ur c mputer r terminal (f r
PC c mpatibles, the RS232C p rt is COM1, COM2 r
COM3).
4. In preparati n f r sending y ur first print j b, the printers
p wer sh uld n w be turned n.
Note:
A Centronics-type parallel connection allows for a much higher
communication speed than the use of RS232C serial.
If y u use the serial p rt with y ur wn cable, refer t
Appendix A and check the pin c nnecti n. Be sure that the
speed (baud rate) and pr t c l are c nsistent between printer
and h st.
510172_r1.qxd 3/21/2001 6:25 PM Page 7
8 Getting Started
The fact ry default parameters f the serial p rt are:
Speed (baud rate) 9600
Data format 1 start bit, 8 data bits and
1 st p bit.
Parity N ne
Handshaking XON/XOFF as well as
(Flo control) RTS/CTS
Notes:
1. It is not necessary to change any switches or send any commands
for the parallel and serial port selection. The printer can
automatically detect it.
2. The default settings can also be read from the self- test page.
510172_r1.qxd 3/21/2001 6:25 PM Page 8
Loading Media 9
Section 2: Loading Media
A. LOADING LABELS OR TAGS
1. Open the Side Access Door by lifting it up and t the left
and pen the Fr nt Access D r by pulling it f rward and
dr pping it d wn.
2. Open the print head m dule by pushing the Head Latch
t ward the rear f the printer. The print head m dule is
spring-l aded and will aut matically pen as s n as the
head latch is disengaged. Als dr p d wn the Head Latch
Support Bracket.
Side Access Door
Front
Access
Door
Outside Label Guide
Label
Supply
Guide
Head Latch
Head Latch
Support Bracket
510172_r1.qxd 3/21/2001 6:25 PM Page 9
10 Loading Media
3. M ve the Label Supply Guide t the utside f the printer.
This all ws the maximum label width t be fed thr ugh
the machine.
4. L ad the label r ll nt the Label Supply Spindle. Make
sure the print side f the labels faces upwards when y u
pull it t wards the print head m dule. Push the r ll all the
way t the inside f the printer and push the Label Supply
Guide snugly against the utside f the label r ll. See
diagram ab ve f r l ading labels and the diagram bel w
f r l ading tags. If using fan-f ld tags, be sure t rem ve
the Label Feed Slot c ver bef re l ading media. Fan-f ld
media must be stacked neatly behind the printer.
5. M ve the Outside Label Guide t the utside f the
printer t h ld the maximum label width.
6. Inspect the label r uting and verify that the path matches
the illustrati n in the Label Loading Diagram. M ve the
Outside Label Guide inwards t keep the labels against
the inside f the printer.
7. Check the Sensor Adjust Knob. Make sure its p siti n is
under the gap path during printing. Adjust it inwards r
utwards if necessary.
Outside Label Guide
Label Supply Guide
Label
Supply
Spindle
Outside Label Guide
Label Supply Spindle
Label Supply Guide
Feed Slot
510172_r1.qxd 3/21/2001 6:25 PM Page 10
Loading Media 11
8. If the ribb n is already l aded r y u just want t print
with direct thermal m de, raise back the Head Latch
Support Bracket and cl se the print head m dule by
pushing d wnward n the Head Latch.
B. LOADING THE RIBBON
1. Open the Side Access Door by lifting it up and t the left.
2. Open the print head m dule by pushing the Head Latch
t ward the rear f the printer. The print head m dule is
spring-l aded and will aut matically pen as s n as the
Head Latch is disengaged. Pull d wn the Head Latch
Support Bracket.
3. L cate the Extra Ribbon Core supplied with the printer.
Place the c re n the Ribbon Re ind Spindle, pushing it
all the way t the inside f the spindle.
Sensor Adjust Knob
Head Latch Empty Core
Ribbon Supply Roll
Ribbon Rewind Spindle
510172_r1.qxd 3/21/2001 6:25 PM Page 11
12 Loading Media
4. L ad the ribb n nt the Ribbon Supply Spindle. The
dull side f the ribb n sh uld be facing d wn as it travels
thr ugh the print head m dule.
5. Feed the leading p rti n f the ribb n thr ugh the Print
Head Assembly and up t the Ribbon Re ind Spindle
f ll wing the r uting as sh wn in the diagram ab ve. Be
sure that the ribb n travels under the black plastic ribb n
sens r.
6. T secure the ribb n n t the c re, manually turn the
rewind spindle twice. Y u may als ch se t use a small
piece f tape t h ld the leading p rti n f the ribb ns t
the ribb n c re.
7. If the media is already l aded, raise the Head Latch
Support Bracket and cl se the Head Latch by pushing
d wnward and cl se the Side Access Door.
Note:
The new empty core of each subsequent roll becomes the next rewind
core.
Ribbon Roll
Ribbon Supply Spindle
Label
Supply
Spindle
Label Path
Ribbon
Rewind
Spindle
Print Head
Assembly
Head Latch
Support Bracket
Head Latch
Ribbon Supply Roll
Tape
510172_r1.qxd 3/21/2001 6:25 PM Page 12
Loading Media 13
C. LABEL SENSOR CALIBRATION
After the ribb n and labels are l aded, it is necessary t
perf rm a quick calibrati n pr cedure f r the label sens r.
1. Turn ff the printer. Press and h ld the PAUSE butt n.
2. Turn n the p wer.
3. When the printer is in calibrati n m de, b th the READY
and the MEDIA LED indicat rs will blink. At this p int
release the butt n.
4. The printer will feed the labels f r 12 inches.
5. When the READY and MEDIA LED indicat rs st p
blinking and remain illuminated, the calibrati n is
c mplete and the labels sh uld feed pr perly between
gaps.
Note:
This procedure is very important to perform upon initial installation
and every time thereafter that the media type is changed. Failure to
do so will result in the gap and label-empty detection being incorrect.
D. PERFORMING A SELF TEST
Bef re sending data t the printer, y u may want t perf rm a
Self Test t c nfirm that the printer itself is w rking pr perly.
1. Turn ff the printer. Press and h ld the FEED butt n.
2. Turn n the p wer.
3. The READY LED indicat r will blink f r few sec nds.
4. The printer will print ut a c nfigurati n rep rt.
5. The READY LED indicat r will st p blinking and stays lit.
6. The f ll wing inf rmati n will be printed n this rep rt.
- F nt list
- Hardware c nfigurati n and status
- Label parameters
- Firmware versi n
510172_r1.qxd 3/21/2001 6:25 PM Page 13
14 Loading Media
Self Test Pattern
E. RESETTING THE PRINTER TO FACTORY DEFAULT
CONDITION
If y u w uld like t reset the printer t its fact ry defaults
c nditi n after certain c mmands have been sent r settings
changed:
1. Turn ff the printer. Press and h ld the CANCEL butt n.
2. Turn n the p wer.
3. The READY LED indicat r will blink f r few sec nds, then
release the butt n.
4. The READY LED indicat r will st p blinking and stays lit.
5. The f ll wing parameters aut matically reset.
- Label parameters
- Heat (Darkness)
- Speed
- Symb l set (language)
- Others vari us emulati n settings
Notes:
1. It is necessary to perform label sensor calibration after resetting.
2. The printed label count wont be reset.
510172_r1.qxd 3/21/2001 6:25 PM Page 14
Using the Printer with Windows 15
Section 3: Using the Printer With
Windo s
A. INSTALLING THE PRINTER DRIVER
The supplied Wind ws printer driver is used f r applicati ns
running under Wind ws 95/98/Me and Wind ws 2000/NT.
Y u may use any p pular s ftware applicati n as l ng as it
runs under Wind ws and it is capable f printing t a standard
Wind ws printer driver.
When y u use the Wind ws printer driver, all f nts, graphics,
bar c des and ther label data are received in graphics bit-map
m de fr m the PC, interpreted by the printer driver, and
printed. This is the m st c nvenient and easiest way t use the
printer and is rec mmended f r all new applicati ns. Y u will
have the full range f TrueType®f nts available t y u f r
printing, pening up literally th usands f p ssible typefaces
f r y ur label designs. Y ull als be able t use the many
p werful Wind ws graphics and ph t editing t ls that are
familiar t m st c mputer users t day. This secti n gives an
verview f the specific printer driver pti ns that y ull need
t kn w ab ut when printing under Wind ws.
Under the r t direct ry f the CD there are several sub-
direct ries
- WIN98/Me
- WIN95
- WIN2000
- NT4.0
- DOS
- UTILITY
Select the pr per direct ry f r installati n acc rding t y ur
perating system.
510172_r1.qxd 3/21/2001 6:25 PM Page 15
1 Using the Printer with Windows
Driver Installation
 Start Wind ws.
 Insert the printer driver CD-R (f r Win 95/98/Me/2000 r
NT) int y ur CD-ROM drive.
 F r Wind ws 95/NT4.0:
- Click the Start butt n.
- Select Settings, then Printers
- D uble click the Add Printer ic n. Click Next
- Specify the Netw rk r L cal butt n and click the
Next butt n.
- Select Have Disk, enter the CD-ROM drive and path,
e.g. D:\Cyclone Drivers.
- The driver name Label Dr. 200 will appear in the
List f Printers. Click Next.
- Select y ur desired perating system, e.g. WIN98.
Click OK.
- Click OK again if necessary.
- Select the c mmunicati n p rt f r the label printer. F r
select "LPT1:", "LPT2:" r "LPT3", f r serial p rt select
"COM1:" r "COM2:".
- After the related files have been c pied t y ur system,
the pr cedure is c mplete.
- If y u need t print fr m the label printer y u sh uld
set "Label Dr. 200" as the Default Printer.
Note:
If you are just updating your driver make sure to delete the previous
version first.
B. HOW TO USE THE DRIVER
After the driver is installed, y u can pen the Label Dr. 200
dial gue b x and make parameter settings thr ugh the same
paths as menti ned ab ve:
1. Wind ws 95/NT4.0 - Start > Settings > Printers > Label Dr.
> Pr perties
510172_r1.qxd 3/21/2001 6:25 PM Page 16

This manual suits for next models

2

Other Primera Label Maker manuals

Primera LX800 User manual

Primera

Primera LX800 User manual

Primera LX500 User manual

Primera

Primera LX500 User manual

Primera LX810 User manual

Primera

Primera LX810 User manual

Primera LX810 User manual

Primera

Primera LX810 User manual

Primera Digital Color Label Press CX1200e User manual

Primera

Primera Digital Color Label Press CX1200e User manual

Primera DX850 User manual

Primera

Primera DX850 User manual

Primera LX810e User manual

Primera

Primera LX810e User manual

Primera 510212 User manual

Primera

Primera 510212 User manual

Primera LP130e User manual

Primera

Primera LP130e User manual

Primera LX1000e Manual

Primera

Primera LX1000e Manual

Primera LX400 User manual

Primera

Primera LX400 User manual

Primera Label Applicator AP360e User manual

Primera

Primera Label Applicator AP360e User manual

Primera LX500e User manual

Primera

Primera LX500e User manual

Primera LX800 User manual

Primera

Primera LX800 User manual

Primera LX400e User manual

Primera

Primera LX400e User manual

Primera LX200e User manual

Primera

Primera LX200e User manual

Primera LX810e User manual

Primera

Primera LX810e User manual

Primera LX600 User manual

Primera

Primera LX600 User manual

Primera AP362 User manual

Primera

Primera AP362 User manual

Primera LX900 User manual

Primera

Primera LX900 User manual

Primera LX900 User manual

Primera

Primera LX900 User manual

Primera Cyclone C-1000 User manual

Primera

Primera Cyclone C-1000 User manual

Primera DL 500 User manual

Primera

Primera DL 500 User manual

Primera LX200 User manual

Primera

Primera LX200 User manual

Popular Label Maker manuals by other brands

Inline PARADIGM 700 Operation manual

Inline

Inline PARADIGM 700 Operation manual

AFINIA LABEL DLF L Series manual

AFINIA LABEL

AFINIA LABEL DLF L Series manual

Brother P-touch 1650 user guide

Brother

Brother P-touch 1650 user guide

Printronix SL5000r MP Reference manual

Printronix

Printronix SL5000r MP Reference manual

CAB Hermes C Series Operator's manual

CAB

CAB Hermes C Series Operator's manual

Epson TM-L90 series user manual

Epson

Epson TM-L90 series user manual

Ithaca 9700 Setup instructions

Ithaca

Ithaca 9700 Setup instructions

Brother TJ-4420TN Setup guide

Brother

Brother TJ-4420TN Setup guide

CognitiveTPG CognitiveTPG Advantage DLX user manual

CognitiveTPG

CognitiveTPG CognitiveTPG Advantage DLX user manual

BIXOLON SLP-DL410KV user manual

BIXOLON

BIXOLON SLP-DL410KV user manual

AMT Datasouth Fastmark 6000 Series user guide

AMT Datasouth

AMT Datasouth Fastmark 6000 Series user guide

Argox iX4 Series installation guide

Argox

Argox iX4 Series installation guide

Dymo RHINO 6000 Quick reference guide

Dymo

Dymo RHINO 6000 Quick reference guide

Carl Valentin Dynacode II Series operating manual

Carl Valentin

Carl Valentin Dynacode II Series operating manual

Intermec EasyCoder 501XP Service manual

Intermec

Intermec EasyCoder 501XP Service manual

Neopost T-950 Service manual

Neopost

Neopost T-950 Service manual

Datamax E-4304 Operator's manual

Datamax

Datamax E-4304 Operator's manual

Intermec EasyCoder PX4i user guide

Intermec

Intermec EasyCoder PX4i user guide

manuals.online logo
manuals.online logoBrands
  • About & Mission
  • Contact us
  • Privacy Policy
  • Terms and Conditions

Copyright 2025 Manuals.Online. All Rights Reserved.