Primo Water 900129 User manual

Troubleshooting Guide for Dispenser Model #900129
Q. The cold water is room temperature.
A. There is a cold water thermostat control mounted to the back of the majority of our
appliances. Simply unplug the power cord of the appliance. Pull the appliance away
from the wall so you have free access to the back. Do not remove anything from the
appliance; simply locate the dial which resembles a gold/brass-colored flathead screw
in the area of the black condenser coil grill. Use a flat screwdriver to adjust the dial
clockwise to cool the water. Do Not adjust this piece more than ¼turn. Turning the
control too much will cause water to freeze in the appliance’s reservoir and may lead
to other issues.
Q. The water does not dispense from either tap.
A. In most cases, this would indicate an improper seal on the bottle. Your model is an
air pressure over water system designed to force air into the bottle. The air pressure
builds within the bottle to push water into the reservoir of the appliance. If the air seal
is compromised, water will not fill the reservoir causing the LED lights to blink and the
audible chirp alert to sound.
To resolve this, simply secure the hoses and the seal on the bottle. If your probe is
designed to snap on the bottle cap, please call customer service to receive the
upgraded seal and lock probe. Please see video for visual assistance.
Q. Water leaks from the tap.
A. A mineral build up occurs within the tap over time. Water drips from the tap as a
result. Follow the cleaning instructions below to resolve the issue. Click here to view
the cleaning video.
Time Required: 30 minutes.
Need: (1) tablespoon regular bleach
(1) Empty bottle
(1) 2-gallon bucket
1. Turn energy saving switch to OFF.
2. Unplug power cord from wall outlet.
3. Remove water bottle and place probe on hanger.
4. Move appliance away from wall to gain access to the back.
5. Remove remaining water from reservoirs by dispensing from the hot and
cold taps into a pitcher.
6. Remove the cap from a spare empty 5 gallon bottle. Pour the bleach and
tap water into the empty bottle.
7. Attach the cleaning bottle to the dispenser.
8. Slide the bottle in and close the door.
9. Plug power cord into a grounded wall outlet.
10. Turn energy saving switch ON.
11. Allow the bleach solution to fill the reservoirs.
12. Wait 10 minutes then drain the water from the reservoirs as described in
step 5."USE CAUTION."Water will be HOT.
13. Turn energy saving switch OFF.
14. Repeat the flushing process in steps 6-13. This time with Hot tap water
only.
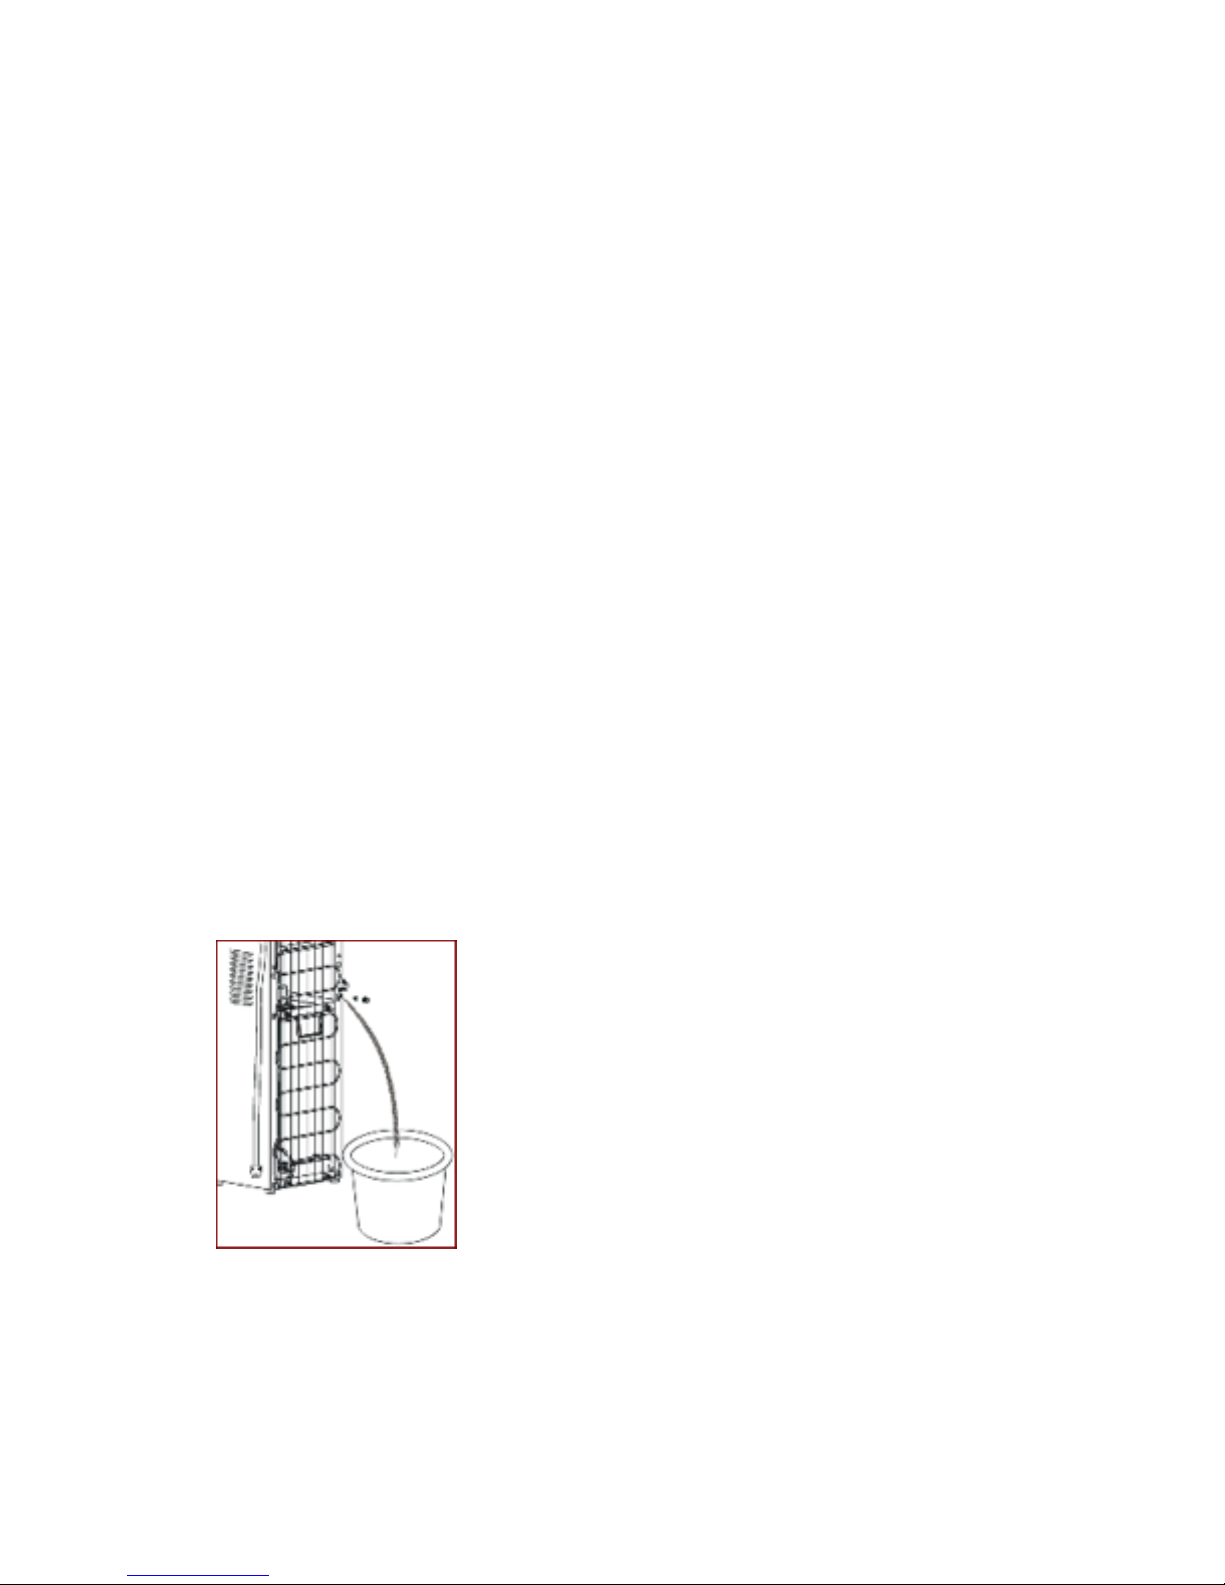
15. Place a two bucket in the back of the appliance and remove the drain plug
and cap as illustrated.
"
16. Replace the silicon plug and drain cap.
17. Return the unit to its location, install a fresh water bottle, plug the power
cord into the grounded wall outlet and turn the energy saving switch ON.
Q. Water is leaking from the hose attachment.
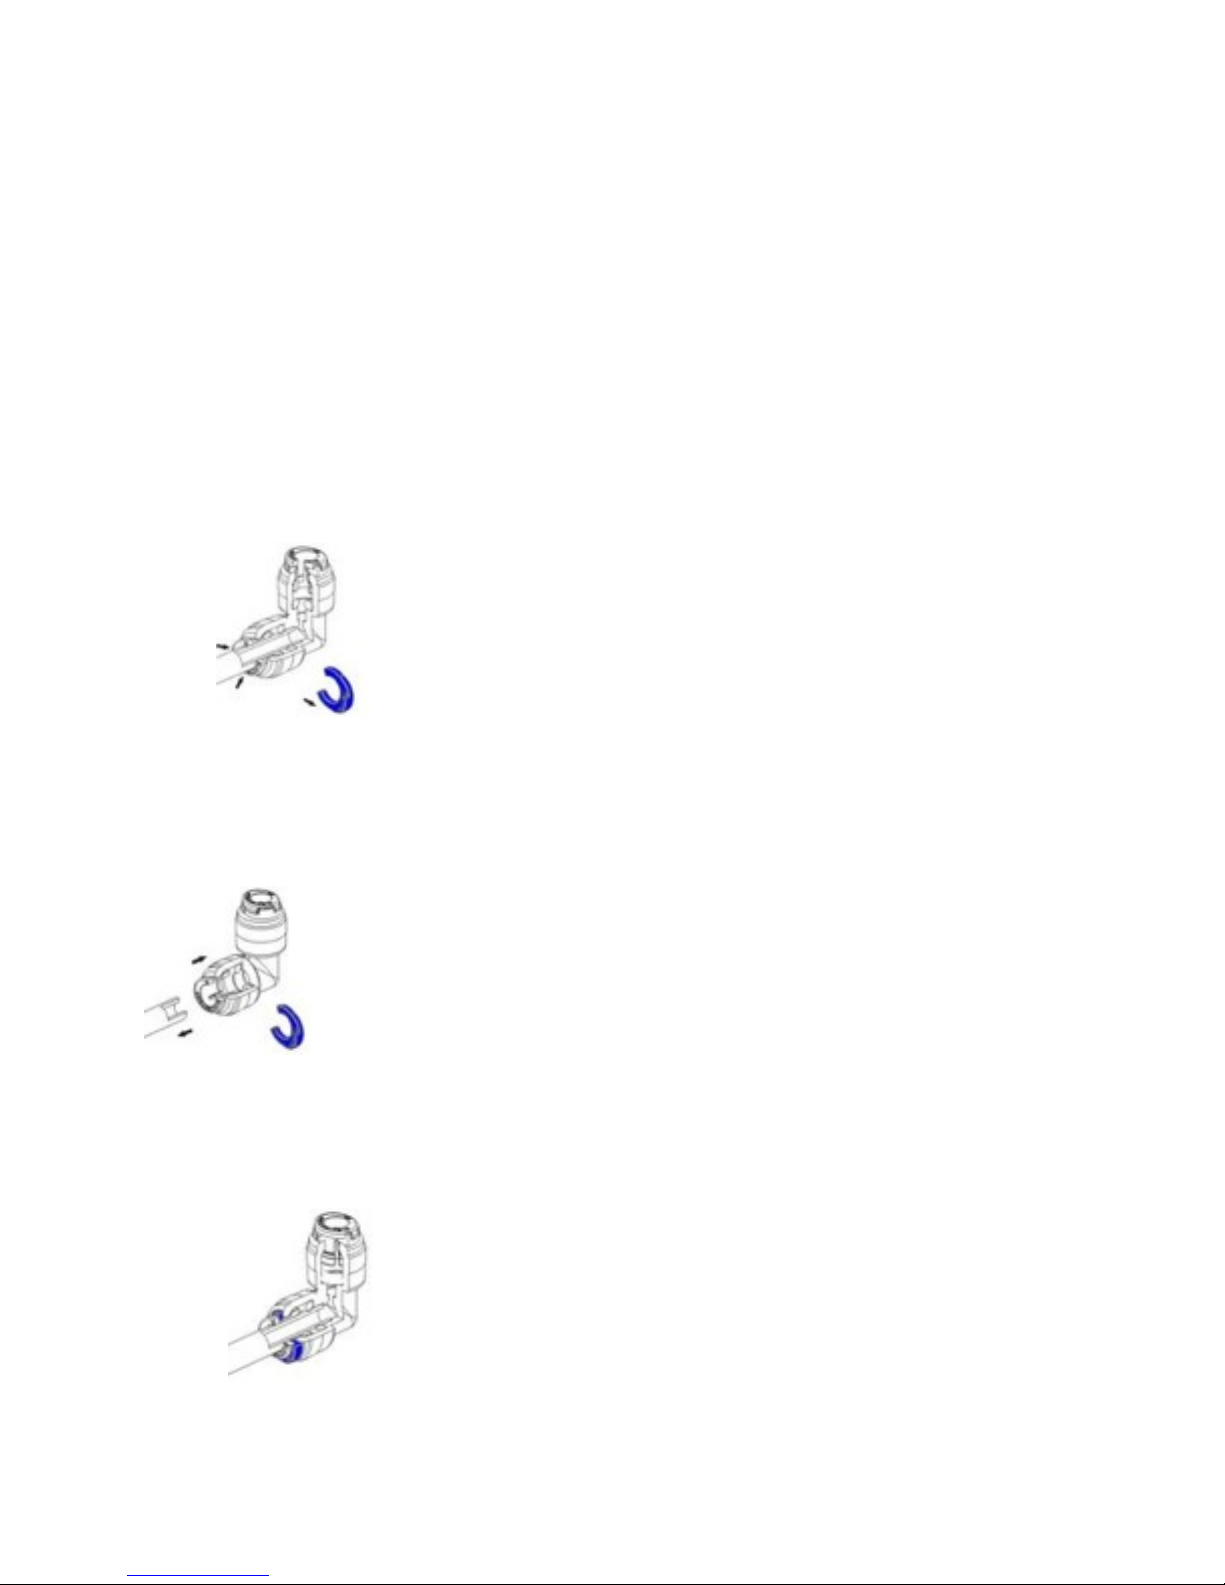
A. The water hose connections may be loose and should be reconnected."Please use
the following instructions.
1. Remove the blue clip from the quick connector then press the white
round collar into the connector. This releases the tube.
*Note:"If you do not have the blue fork that is not a problem."You have a
di#erent type of connector that does not require that piece."Simply skip the
steps for removing and reattaching the blue fork and continue with the other
instructions."
2. Hold the collar up so it meets the connector while you are pulling out the
tube.
3. Reattach the tube. Hold the collar up so it meets the connector and push
the tube in until it stops. "Pull the connector collar down to allow space
for the blue clip to snap in place."Do Not pull the tube. Reinsert the clip.
"

Q. I have missing or damaged parts.
Part replacement is often covered under the manufacturer warranty. Please call
866-429-7566 to find out how your part can be replaced. (Should change when the
part order site is available.)
Q. Flashing lights and Chirp.
A. In most cases, this would indicate an improper seal on the bottle. Your model is an
air pressure over water system designed to force air into the bottle. The air pressure
builds within the bottle to push water into the reservoir of the appliance. If the air seal
is compromised, water will not fill the reservoir causing the LED lights to blink and the
audible chirp alert to sound.
To resolve this, simply secure the hoses and the seal on the bottle. If your probe is
designed to snap on the bottle cap, please call customer service to receive the
upgraded seal and lock probe. Please see video for visual assistance.
Q. Water tastes bad.
A. Cleaning the dispenser should correct the taste. Please use the following
instructions to do so.
Time Required: 30 minutes.
Need: (1/4) cup lemon juice
(1) Empty bottle
(1) 2-gallon bucket
1. Turn energy saving switch to OFF.
2. Unplug power cord from wall outlet.
3. Remove water bottle and place probe on hanger.
4. Move appliance away from wall to gain access to the back.
5. Remove remaining water from reservoirs by dispensing from the hot and
cold taps into a pitcher.
6. Remove the cap from a spare empty 5 gallon bottle. Fill the bottle with 1
gallon of HOT tap water and ¼cup of lemon juice.
7. Place the spare bottle cap that comes with this unit onto the bottle so there
is a complete seal.
8. Insert probe so it has a complete seal on the bottle cap.
9. Slide bottle in and close door.
10. Plug power cord into a grounded wall outlet.
11. Turn energy saving switch ON.
12. Allow the water and lemon juice solution to fill the reservoirs.
13. Wait 10 minutes then drain the water from the reservoirs as described in
step 5."USE CAUTION."Water will be HOT.
14. Turn energy saving switch OFF.
15. Repeat the flushing process. This time with Hot tap water only.
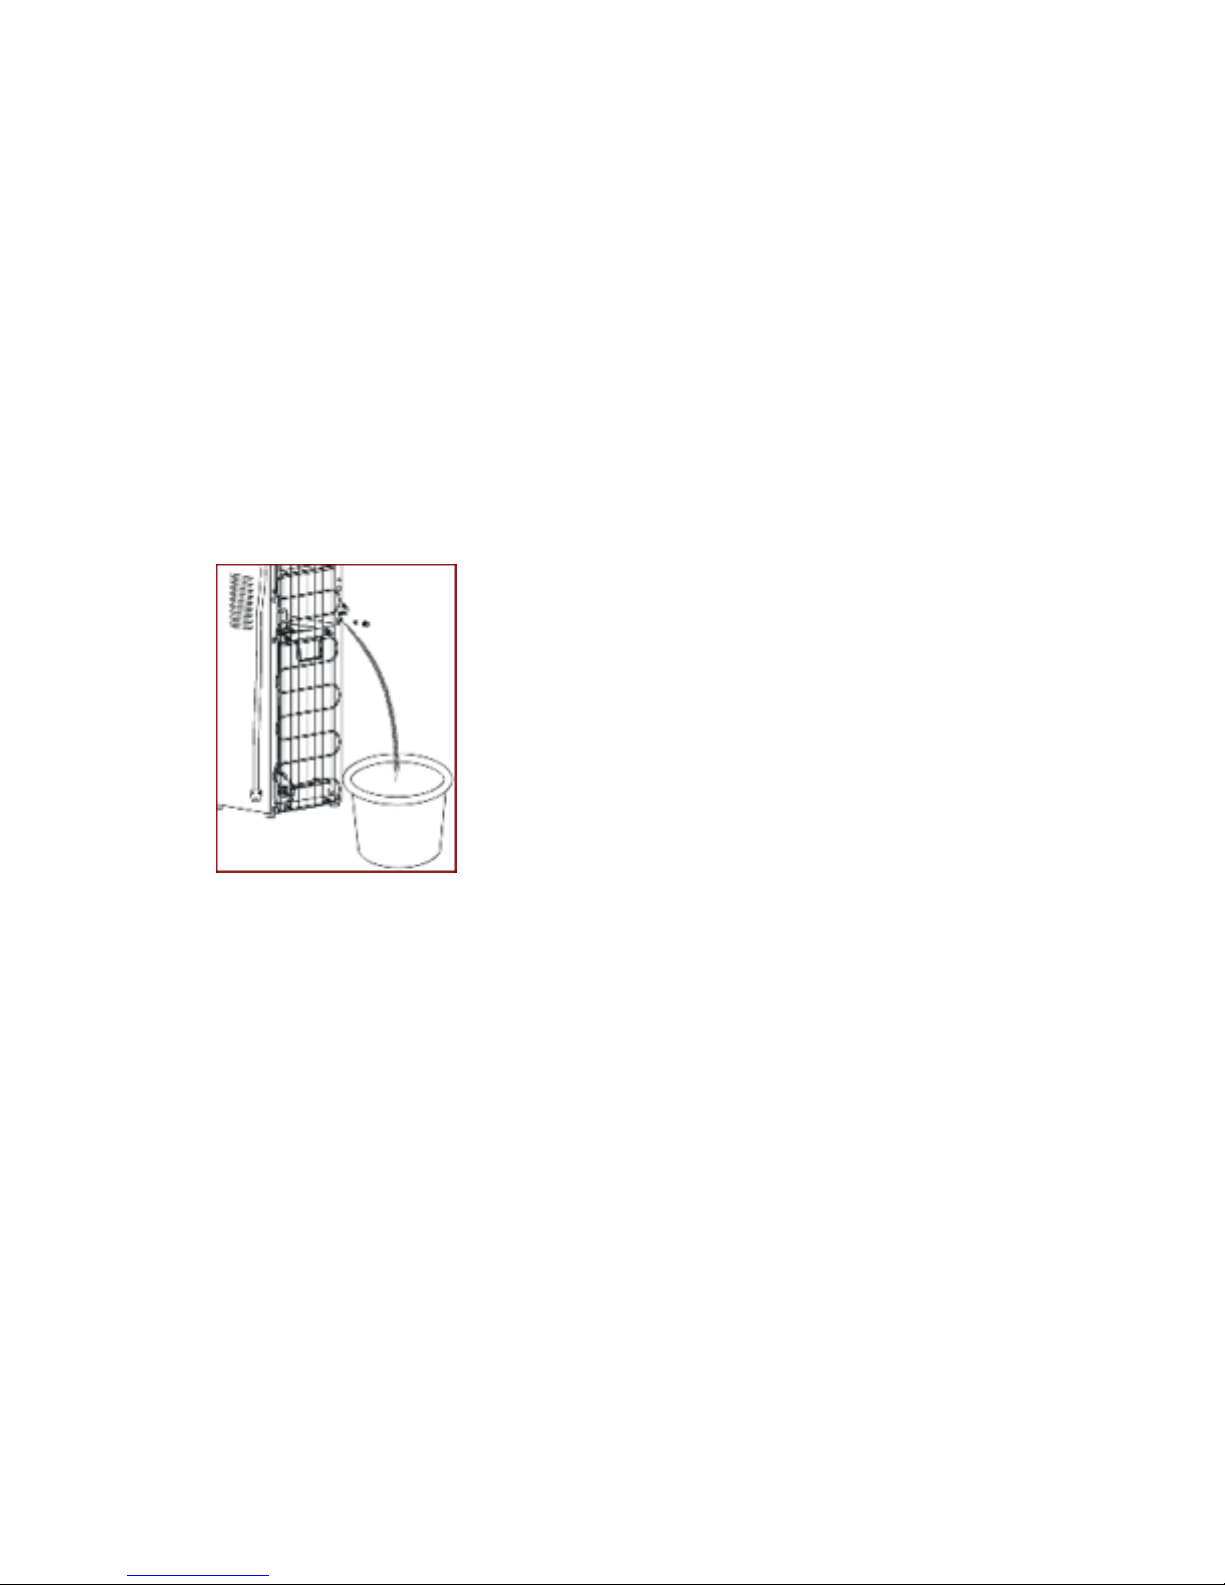
16. Place a two bucket in the back of the appliance and remove the drain plug
and cap as illustrated.
17. Replace the silicon plug and drain cap.
18. Return the unit to its location, install a fresh water bottle, plug the power
cord into the grounded wall outlet and turn the energy saving switch ON.
Q. Hot water is room temperature.
A. Please ensure the appliance is plugged into a working grounded wall outlet and the
hot water energy switch on the back of the appliance is in the On position. The light in
the switch will illuminate when On. Please allow 15 after initial set up for water to heat
to the maximum temperature.

Q. My appliance is noisy.
A. All appliances make certain sounds during operation. When heater is on, you may
hear a rumbling sound as water heats. The compressor will make a low humming
sound. If the dispenser not level, you may hear additional vibrating sounds as the
compressor runs. Simply level the dispenser using the adjustable feet or furniture
pads to prevent the excess sound.
Q. Cold water trickles from the tap.
A. This would indicate the cold water thermostat is set too low. There is a cold water
thermostat control mounted to the back of the majority of our appliances. Simply
unplug the power cord of the appliance. Pull the appliance away from the wall so you
have free access to the back. Do not remove anything from the appliance; simply
locate the dial which resembles a gold/brass-colored flathead screw in the area of the
black condenser coil grill. Use a flat screwdriver to adjust the dial counter-clockwise
to increase the temperature setting.
Q. Hot water trickles from the tap.
A. There is likely a block in the lines preventing air flow. To release this block, unplug
the appliance from the electrical outlet and allow it to rest one hour. Use a two gallon
bucket to empty the hot water reservoir by opening the drain plug per the illustration.
Replace the drain plug and cap. Plug the dispenser into the electrical outlet and allow
water to refill the reservoir before attempting to dispense water.
Other manuals for 900129
1
Table of contents
Popular Dispenser manuals by other brands

Husky
Husky XS E159503 Recommended Installation, Maintenance and Inspection Instructions

ophardt
ophardt ingo-man plus Original Operator's Manual

VIEWEG
VIEWEG DC 200 user manual

Dover
Dover Hydro systems HydroChem 918 manual

Planktovie
Planktovie FISHGUN D1 user manual

Franke
Franke EXOS Series Installation and operating instructions


