05
Please visit www.PrimoWater.com for more useful information, instructional videos, tips and special oers.
IMPORTANT: Do not return dispenser to store. If you have qurstions or issues please contact 1-866-429-7566 for expert assistance.
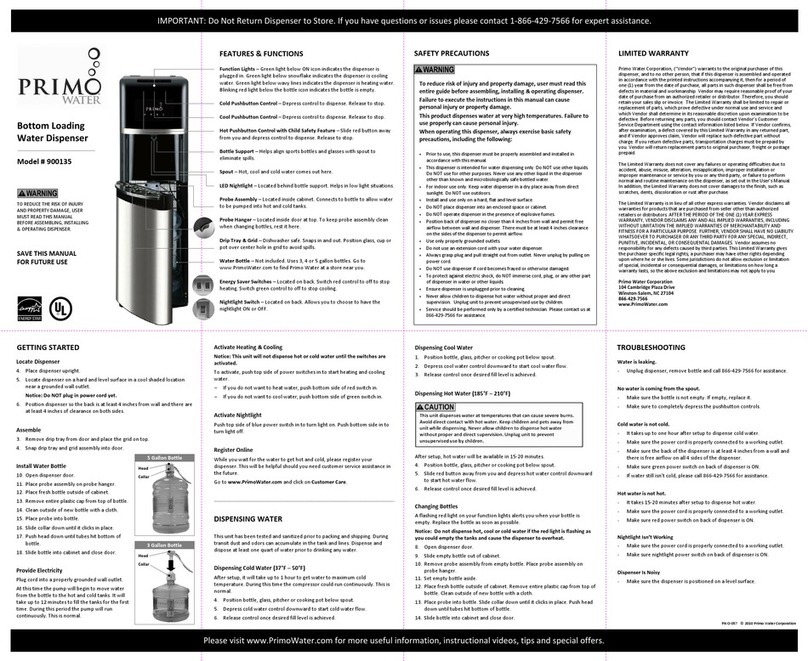
TROUBLESHOOTING
To watch a complete library of troubleshooting videos,
please visit www.primowater.com.
WATER IS LEAKING.
• Unplugdispenser,removebottleandcall866-429-7566for
assistance.
NO WATER IS COMING FROM THE SPOUT.
• Makesurethebottleisnotempty.Ifempty,replaceit.
• Makesurethereispowertotheunitandyouareoperating
controls per instructions.
COLD WATER IS NOT COLD.
• Ittakesuptoonehouraftersetuptodispensecoldwater.
• Makesurethepowercordisproperlyconnectedtoa
working outlet.
• Makesurethebackofthedispenserisatleast4inchesfroma
wall and there is free airow on all 4 sides of the dispenser.
• MakesuregreenpowerswitchonbackofdispenserisON.
• Ifwaterstillisn’tcold,pleasecall866-429-7566forassistance.
HOT WATER IS NOT HOT.
• Ittakes15-20minutesaftersetuptodispensehotwater.
• Makesurethepowercordisproperlyconnectedtoa
working outlet.
• MakesureredpowerswitchonbackofdispenserisON.
NIGHTLIGHT IS NOT WORKING
• Makesurethepowercordisproperlyconnectedtoa
working outlet.
• MakesurenightlightpowerswitchonbackofdispenserisON.
COFFEE IS NOT BREWING
• Makesurethereispowertothemodule.Lockiconisgreen
when there is power.
• Makesurethecarafeisinplaceandengagingtheswitch.
• Makesurethewaterbottleisnotempty.
• Remembertounlockthecontrolbeforechoosingthe
amount of cups to make.
• Makesurethebrewingbasketisinstalledandthelidisclosed.
• Make sure there is enough water in the bole to re-
plenish the hot tank before aempng to make a pot.
• If coee doesn’t start brewing within a few seconds,
remove carafe to reset.
DISPENSER IS NOISY
• Makesurethedispenserislevelbyadjustingtheheight
of the feet.
LIMITED WARRANTY
Primo Water Corporation, (“Vendor”) warrants to the original
purchaser of this dispenser, and to no other person, that if this
dispenser is assembled and operated in accordance with the
printed instructions accompanying it, then for a period of one
(1) year from the date of purchase, all parts in such dispenser
shall be free from defects in material and workmanship. Vendor
may require reasonable proof of your date of purchase from an
authorized retailer or distributor. Therefore, you should retain
your sales slip or invoice. The Limited Warranty shall be limited
to repair or replacement of parts, which prove defective under
normal use and service and which Vendor shall determine in
its reasonable discretion upon examination to be defective.
Beforereturning anyparts,you shouldcontactVendor’sCus-
tomer Service Department using the contact information listed
below. If Vendor conrms, after examination, a defect covered
by this Limited Warranty in any returned part, and if Vendor ap-
proves claim, Vendor will replace such defective part without
charge. If you return defective parts, transportation charges
must be prepaid by you. Vendor will return replacement parts
to original purchaser, freight or postage prepaid.
The Limited Warranty does not cover any failures or operating
diculties due to accident, abuse, misuse, alteration, misappli-
cation, improper installation or improper maintenance or ser-
vice by you or any third party, or failure to perform normal and
routinemaintenanceonthedispenser,assetoutintheUser’s
Manual. In addition, the Limited Warranty does not cover dam-
ages to the nish, such as scratches, dents, discoloration or rust
after purchase.
The Limited Warranty is in lieu of all other express warranties.
Vendor disclaims all warranties for products that are purchased
from seller other than authorized retailers or distributors.
AFTER THE PERIOD OF THE ONE (1) YEAR EXPRESS WARRANTY,
VENDOR DISCLAIMS ANY AND ALL IMPLIED WARRANTIES,
INCLUDING WITHOUT LIMITATION THE IMPLIED WARRANTIES
OF MERCHANTABILITY AND FITNESS FOR A PARTICULAR PUR-
POSE. FURTHER, VENDOR SHALL HAVE NO LIABILITY WHATSO-
EVER TO PURCHASER OR ANY THIRD PARTY FOR ANY SPECIAL,
INDIRECT, PUNITIVE, INCIDENTAL, OR CONSEQUENTIAL DAM-
AGES. Vendor assumes no responsibility for any defects caused
by third parties. This Limited Warranty gives the purchaser
specic legal rights; a purchaser may have other rights depend-
ing upon where he or she lives. Some jurisdictions do not allow
exclusion or limitation of special, incidental or consequential
damages, or limitations on how long a warranty lasts, so the
above exclusion and limitations may not apply to you.
06
Please visit www.PrimoWater.com for more useful information, instructional videos, tips and special oers.
IMPORTANT: Do not return dispenser to store. If you have qurstions or issues please contact 1-866-429-7566 for expert assistance.
INSTALL CARAFE
1. Place lid onto carafe and turn to the closed position.
2. Position empty carafe into place.
Note - When the carafe is properly installed a thermo switch
is activated telling the module to proceed. If you activate the
controls without the carafe being properly installed, brewing
will not begin and the green circle around the lock icon will
blink to alert you.
MEASURE AND LOAD COFFEE INTO BREWER
1. Open lid.
2. This module is programmed
to make 2, 4 or 12 cups of
coee at the touch of a but-
ton. Determine amount of
cups to be brewed.
3. Add the appropriate amount
of coee grinds to the lter
basket or paper lter.
4. Close lid.
MAKING COFFEE
To watch videos of the processes noted in this section,
please visit www.primowater.com.
NOTES
1. Unlike traditional coee brewers, this brewer does not
contain a water reservoir. Water is pumped directly from
thedispenser’shottanktoprovidegreattastingpuried
water to the brewing head.
2. The carafe, lter basket and lter holder provided with
the brewer should be cleaned with dishwashing soap and
warm water before using.
3. This brewer comes with a lter basket. It can also be used
with standard paper lters and is designed to use coee
ground for drip coee makers only.
4. Use only the carafe provided. The brewer will not operate
with a carafe that was designed for other brewers.
ACTIVATE CONTROLS
1. Touch the lit green icon to unlock the controls. The green
circle around the icon will light up.
2. Touch the control that matches the amount of cups you
want to brew - 2, 4 or 12 cups.
Note - You have 3 seconds to activate the desired selection.
If you fail to make a selection in 3 seconds the control will
automatically relock.
3. If you activate in 3 seconds, the circle around the
number you selected will begin to ash indicating
brewing is underway. Water from the hot tank will
automatically begin owing to the lter basket.
BREW & ENJOY
1. Brewing is complete when the circle stops blinking and
remains lit.
2. Remove carafe to pour. Lit circle around the cup indicator
will go out once carafe is removed.
3. Coee will remain hot inside carafe for up to 2 hours.
4. Discard used coee grinds and paper lters. Rinse lter
basket and carafe before brewing next pot.
Primo Water Corporation
104 Cambridge Plaza Drive
Winston-Salem, NC 27104
866-429-7566
www.PrimoWater.com
Lock 2 Cups 4 Cups 12 Cups


