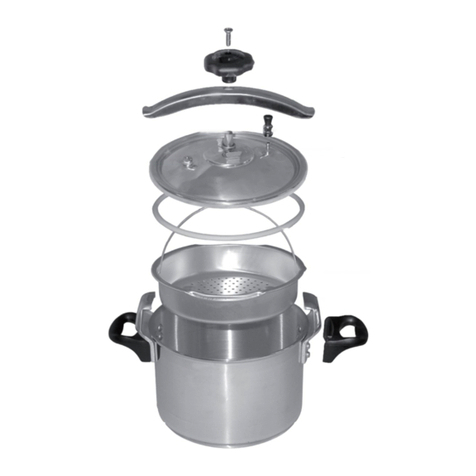
PRINCESS HOUSE Heritage Guide

CARE & USE MANUAL
MY PRINCESS HOUSE CONSULTANT
PHONE NUMBER
C5149 8/22
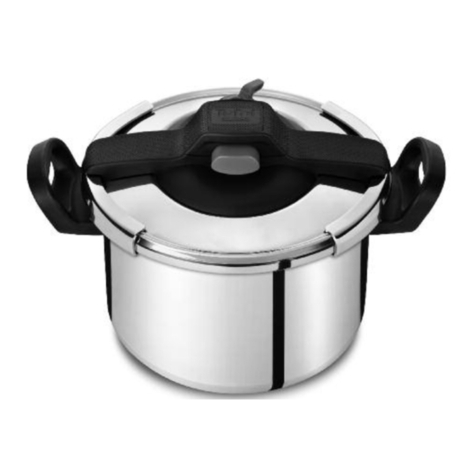
Princess Heritage®Stainless Steel Classic
8-Qt. Easy-Close Pressure Cooker
U.S.: 508.823.6800 • princesshouse.com / MX: 800.265.0104 • princesshouse.mx • ©2022 Princess House, Inc.

TABLE OF CONTENTS
Important Safeguards..................................................................................................................2
Manufacturer’s Recommendations .............................................................................................3
Introduction.................................................................................................................................4
Components and Features...........................................................................................................4
Cooking with the Princess Heritage®Stainless Steel Classic 8-Qt. Easy-Close
Pressure Cooker .......................................................................................................................6
• Before first use
• Adding food and liquid
• Closing the Lid and cooking
• Releasing pressure after cooking
Care and Cleaning .......................................................................................................................9
• Pressure Cooker Pressure Valve: cleaning, removing, replacing
Basic instructions for cooking....................................................................................................10
• Fresh and frozen vegetables
• Dried beans and legumes
• Rice and grains
• Meat and poultry
Adapting Traditional Recipes to use in the Pressure Cooker....................................................14
Troubleshooting ........................................................................................................................15
Warranty ....................................................................................................................................19
IMPORTANT SAFEGUARDS
When using Pressure Cookers, basic safety precautions should always be followed:
1. Read all instructions.
2. Do not touch hot surfaces. Use handles and oven mitts whenever necessary.
3. Close supervision is necessary, especially when the Pressure Cooker is used near children
or pets.
4. Do not place the Pressure Cooker in a heated oven.
5. Extreme caution must be used when moving a Pressure Cooker containing hot liquids.
6. Do not use the Pressure Cooker for anything other than its intended use.
7. Pressure Valve is set in RELEASE position from the factory. Pressure will not build inside the
Pot when valve is in this setting.
8. When the normal pressure is reached, turn the heat down so all the liquid, which creates the
steam, does not evaporate.
9. This appliance cooks under pressure. Improper use may result in a scalding injury. Make
certain it is properly closed before operating. See the "Closing the Lid and Cooking" section
in this manual.
10. Do not fill the unit over ⅔full. When cooking foods that expand during cooking such as rice,
beans or dried vegetables, do not fill the unit over ½full. Over filling may cause a risk of
clogging the Pressure Valve and developing excess pressure. See the "Basic Instructions for
Cooking" section in this manual on page 10.
11. Be aware that certain foods, such as applesauce, cranberries, pearl barley, oatmeal or other
cereals, split peas, noodles, macaroni, rhubarb, or spaghetti can foam, froth, and sputter,
clogging the Safety Valve – located under Lid – and/or the Pressure Valve. These foods
should not be cooked in a Pressure Cooker.
2

12. Always check the Safety Valve (located under Lid) and the Pressure Setting Valve to ensure
there is no food residue clogging it, before use.
13. Do not open the Pressure Cooker until it has cooled and all internal pressure has been
released. If the Open button is difficult to push, this indicates that it is still pressurized –
DO NOT FORCE IT OPEN. Run cold water over the Pressure Cooker to cool it to reduce
the internal pressure. Any pressure in the cooker can be hazardous. See the "Releasing
Pressure After Cooking" section in this manual on page 8.
14. Before releasing pressure from the Pressure Cooker, ensure there is enough clearance above
the stove to avoid damages due to hot steam being released.
15. Do not use this Pressure Cooker for pressure frying with oil.
16. When the normal operating pressure is reached, turn the heat down so all the liquid, which
creates the steam, does not evaporate.
17. SAVE THESE INSTRUCTIONS.
MANUFACTURER’S RECOMMENDATIONS
To fully enjoy your new Princess Heritage®Stainless Steel 8-Qt. Easy-Close Pressure Cooker,
please read and follow these recommendations carefully before you start using it.
1. Please make sure children do not have access to or are not within reach of the Pressure
Cooker while cooking.
2. Never use the Pressure Cooker with a worn or torn Gasket. Inspect the Gasket before every
use to make sure it is pliable and does not have any cracks or tears. If you need to replace it,
see the Care and Cleaning section of this manual on page 9.
3. While cooking with the Pressure Cooker, make sure the Safety Vent
(see image to right) points toward the back of the stove and away
from you. This will reduce the risk of burns in the event the Safety
Vent is triggered to release excess pressure.
4. When placing the Lid on the Pot, ensure Safety Vent is not above the handles. It should
always be facing the back of the stove.
5. It is very important that the Pressure Cooker is not filled beyond its MAX line with food
and liquid.
6. If you are cooking grains or foods that expand during cooking, do not fill the pot more
than ½ of its capacity. Too much steam might be produced if the unit is too full with
food and liquid.
7. Before cooking, make sure that the Gasket is in good condition and in place, and that the
Pressure Valve is free of food particles that could clog it. See the instructions in this manual
for more detailed information.
8. Press the OPEN button, and center the Lid on top of the Pot. Press the CLOSE button to
secure the Lid to the Pot.
9. After releasing the pressure from the Pressure Cooker, open the Lid away from you toward
the back of your stove because there may be some steam still inside the cooker.
10. Caution: Do not use the Pressure Cooker on an outdoor gas burner or on commercial
ranges. This Pressure Cooker is for household use ONLY.
3

4
11. Pressure Cookers are not to be used for medical purposes, such as sterilizers, as they are not
designed to reach the temperatures necessary for complete sterilization.
12. Do not allow anyone who is not familiar with the instructions to use the Pressure Cooker.
INTRODUCTION
Pressure Cookers provide many advantages over traditional cooking. Most foods can be cooked
in up to one-third of the time it takes using standard methods. Because the food is being cooked
for shorter periods of time, it is less likely to lose its color and flavor, as well as vital minerals and
vitamins that are normally evaporated or diluted when cooking in large quantities of water for
longer periods of time.
Made from high-quality, heavy-gauge 18/10 stainless steel, our Pressure Cooker is manufactured
and designed with function and safety in mind, meeting all international safety standards.
The Princess Heritage®Stainless Steel 8-Qt. Easy-Close Pressure Cooker's easy-to-use Pressure
Valve makes it simple to select between High Pressure and Low Pressure to cook perfect meals.
The Pressure Valve signal indicates when to lower or raise the heat to maintain the desired level of
pressure. We know that once you begin using your Pressure Cooker, you will understand why it is
the single most important piece of cookware you will ever own.
Before you begin cooking, it is important that you read this detailed Manual and make sure you
understand how to operate, care for and maintain your Pressure Cooker so that you will be able to
enjoy many years of use.
COMPONENTS AND FEATURES
1. Pressure Cooker Pot
2. Encapsulated Base
3. Side Handles
4. Lid
5. Lid’s Handle
6. Open & Close Buttons
7. Red Pressure Indicator
8. Pressure Valve
9. Safety Valve (Under Lid)
10. Gasket (Under Lid)
11. Safety Vent
7. 5.
8.
6.
11. 1.
2.
4.
3.

5
1. Pressure Cooker Pot – Made of high-quality, heavy-gauge, 18/10 stainless steel.
2. Encapsulated Base – The bottom of the Pressure Cooker Pot has an encapsulated base
made of three layers of metal that distributes heat evenly. The Body is 18/10 stainless steel.
The aluminum middle layer is sandwiched between the body and stainless steel cap.
Aluminum is the best heat conductor and therefore provides fast and even heat distribution.
The last layer is a magnetic stainless steel cap, making the Pressure Cooker compatible with
induction cooking.
3. Side Handles – Are designed to move the pot easily.
4. Lid – Made of high-quality, heavy-gauge stainless steel, the Lid has a unique locking rim that
secures the Lid in any position with no threading or aligning needed.
5. Lid’s Handle – Designed to help remove or place the Lid on the Pot.
6. Open and Close Buttons – Easily open or securely
close the Lid in place with one touch of a button.
7. Red Pressure Indicator – Located on top of the
Lid’s handle, it raises up as pressure builds inside
the Pressure Cooker. If the Red Pressure Indicator
is raised, there is pressure inside the Pot and the
Pressure Cooker cannot be opened. If the Red
Pressure Indicator is not raised, there is no pressure
inside, and you can safely open the Lid.
8. Pressure Valve – Features two pressure settings
for cooking, High Pressure and Low Pressure, and
a Steam Release position used to manually release
steam when cooking is complete.
9. Safety Valve – This valve is located under the Lid, and it releases pressure in case of an excess
pressure buildup. The Pressure Cooker cannot be opened if there is still pressure
inside the cooker.
10. Gasket – In order to provide an airtight seal, a silicone Gasket is positioned around the
underside of the Lid. Never use the Pressure Cooker without the silicone Gasket properly
positioned under the four small triangular tabs. Do not use the Pressure Cooker with a worn
or torn Gasket; it should be replaced immediately. Please contact Princess House Customer
Service at 508.823.6800 for information on how to purchase a replacement Gasket.
11. Safety Vent – In case of high-pressure buildup,
steam will be released through the Safety Vent
cutout located in the rim of the Lid. The cutout
on the side of the rim of the Pressure Cooker is an
emergency pressure release mechanism that should
never become operative under normal use. If both
Pressure Release Valves become blocked due to
over-filling, for example, the pressure will tear
the Gasket and escape through this hole.
PLEASE SEE WARNING ON NEXT PAGE
Pressure Level PSI (Pounds of pressure per square inch)
Release 0
Low 8
High 15

WARNING: Before cooking, ensure Safety Vent is not positioned over side handles of pan. Excess
steam escaping through the Safety Vent cutout located in the rim of the Lid will be very hot and
might cause serious injuries. In the event the Safety Vent is triggered to release excess pressure,
always place the Pressure Cooker on the stove in such a position that the Safety Vent is not facing
toward you or toward anything that could be damaged by the steam and sputtering liquid.
COOKING WITH THE PRINCESS HERITAGE®STAINLESS STEEL
CLASSIC 8-QT. EASY-CLOSE PRESSURE COOKER
NOTE: PRINCESS HERITAGE®STAINLESS STEEL CLASSIC 8-QT. EASY-CLOSE PRESSURE COOKER IS
INTENDED FOR HOUSEHOLD DOMESTIC COOKING ONLY.
BEFORE THE FIRST USE
Before using the Pressure Cooker for the first time, wash all the parts and components with
warm water, vinegar and mild dishwashing soap. Rinse well and towel dry. Princess House
recommends washing the Pressure Cooker Lid and all its components by hand.
Always remove the Gasket when washing the Lid. Wash the Gasket with warm, soapy water;
rinse well and towel dry. Cover the Gasket periodically with a thin coating of oil (e.g.,
vegetable, olive, canola, etc.). Refer to page 9.
Follow this procedure every time you wash the Pressure Cooker in order to extend the life of
the Gasket and to facilitate locking the Lid in place.
The Pressure Cooker Pot only is dishwasher safe.
ADDING FOOD AND LIQUID
1. To cook with the Pressure Cooker, it is very important to use at least a ½ cup of liquid if
you’re cooking for 10 minutes or less, or 2 cups of liquid if you’re cooking for more than
10 minutes; NEVER USE LESS LIQUID THAN RECOMMENDED.
It is important to always use some liquid when cooking with a Pressure Cooker, because it
is the liquid that creates the steam necessary to build the pressure. Without liquid, the
Pressure Cooker cannot build any pressure.
You can use water, broth, wine or any other kind of liquid to cook, except oil. You can use oil
to brown meat or soften onions directly in your Pressure Cooker Pot before adding the rest of
the ingredients, but the oil should never be the ONLY cooking liquid.
WARNING: Pressure Cookers are NOT pressure fryers.
Do not fill the Pressure Cooker past the MAX line with liquid and food, or more than ½ full if
you’re cooking foods that expand during cooking, such as beans, rice or other grains.
2. Never fill the Pressure Cooker beyond the MAX line of its capacity (see MAX line in Pressure
Cooker Pot). It is necessary to leave enough space in the cooker for it to be able to build
pressure. Fill only to ½ of its capacity when cooking with foods that will either expand in
size and/or produce foam as they cook, such as dried beans or other legumes and grains.
Also, fill only ½ full when preparing soups or stock.
CLOSING THE LID AND COOKING
1. When you’re ready to start cooking, add ingredients according to recipe. To cover the
Pressure Cooker Pot with the Lid, press the OPEN button to place the Lid on the rim of the
Pot. Press the CLOSE button to attach the Lid to the Pot.
Note: The Lid does not need to thread into place or be positioned using a certain orientation
to attach securely. If the Lid is not closed and locked securely in place, the Pressure Cooker
will not build pressure.
6

The lock will engage automatically as soon as the Red Pressure Indicator has risen, and will
unlock the Lid only when the Red Pressure Indicator has dropped again.
2. Once the Pressure Cooker’s Lid is closed, turn the Pressure Valve to select one of the two
pressure levels.
HIGH PRESSURE, equivalent to
15 psi (15 pounds of pressure
per square inch). Use this setting
for most recipes: stews, soups,
meats, grains, etc.
LOW PRESSURE, equivalent to 8 psi (8 pounds of pressure per square inch). Use this setting
for delicate foods such as fish fillets or vegetables.
Note: The Pressure Valve will be set on RELEASE mode when you take the Pressure Cooker
out of the box. This is the factory default setting. You need to select a Pressure Level, as
explained above, to be able to cook.
3. Position the Pressure Cooker on the center of the stovetop burner. The Pressure Cooker can
be used on all types of stovetops including gas, electric, ceramic and induction. In order to
avoid discoloring the sides of the pot when using a gas stove, the flames should remain under
the base and not extend up the sides. When cooking on an electric stovetop, select a burner
with the same diameter as the base of the Pressure Cooker or smaller.
4. To reach pressure, begin heating on HIGH heat until the Red Pressure Indicator rises and
steam comes out of the Pressure Valve. It will take 3-5 minutes for steam to escape from
the Pressure Valve after the Red Pressure Indicator rises. Immediately REDUCE HEAT to
LOW or MEDIUM LOW to maintain pressure indicated by the release of a gentle, steady
stream of steam. This is when your COOKING TIME STARTS. We recommend using a kitchen
timer to monitor the exact cooking time. (ELECTRIC STOVE USERS – SEE BELOW).
5. If, at any time during cooking, an excessive amount of steam is released by the Pressure
Valve, lower the heat setting to adjust and maintain the proper level of pressure.
6. If the pressure drops and little or no steam comes out of the Pressure Valve, raise the heat
setting until a gentle, steady stream of steam is released and can be maintained.
7. While cooking, never inadvertently shake the Pressure Cooker. This can cause the Pressure
Valve to release steam, which will create a drop in pressure.
NOTE TO ELECTRIC STOVETOP USERS
Because the coils on an electric stove retain heat for a long time, food often becomes
overcooked when the heat setting is turned down for simmering (when cooking time is
started). To compensate for that, you have two options:
One-Burner Method: Turn on heat setting to medium heat and bring your cooker to pressure.
Once pressure has been achieved and steam starts to come out of the Pressure Valve, turn your
heat setting to low and start your pressure cooking time. Make sure you do not lower the heat
too much; there should always be some steam coming out of the Pressure Valve. If there is no
more steam coming out of the Pressure Valve and/or the Red Pressure Indicator drops, raise the
heat until steam starts coming out of the Pressure Valve, and adjust the cooking time by 1 or
2 minutes.
Two-Burner Method: Turn on two electric stovetop heat settings: one on high and the other
on low. Place your Pressure Cooker on the burner set to high, and bring to pressure. Once
pressure has been achieved, move your cooker over to the burner set on low and start your
pressure cooking time. Make sure the heat setting is not too low; there should always be some
steam coming out of the Pressure Valve. If there is no more steam coming out of the Pressure
Valve and/or the Red Pressure Indicator drops, raise the heat until steam starts coming out of
the Pressure Valve, and adjust the cooking time by approximately 1 or 2 minutes.
7
Pressure Level PSI (Pounds of pressure per square inch)
Release 0
Low 8
High 15

RELEASING PRESSURE AFTER COOKING
Always check your recipe to determine if the Pressure Cooker should be cooled down naturally or
whether the quick release method should be used. The Pressure Cooker also features an automatic
release position on the Pressure Valve that can be used for releasing pressure automatically when
cooking foods such as stews, meats, poultry and soups.
1. Natural Release Method: To use this method,
remove the Pressure Cooker from the hot burner,
let the pressure drop, and cool down naturally.
Depending on the amount of food and liquid in the
cooker, this method can take 10-15 minutes. Once
pressure has been released completely and there
isn’t any more steam coming out and the Red
Pressure Indicator has dropped, go to Step #4 in
this section.
2. Cold Water Release Method: This method is used
to release pressure as quickly as possible, and is
primarily used for vegetables, seafood and other
tender foods that can quickly overcook. To use this
method, remove the Pressure Cooker from the
burner, place it in the sink and run cold tap water
gently over the Lid, away from the Pressure Valve,
until steam dissipates and the Pressure Indicator
is lowered.
IMPORTANT! When using the Cold Water Release Method, always run cold tap water at a gentle
flow over the metal portion of the Pressure Cooker Lid. Never direct the faucet directly onto the
Pressure Valve.
WARNING: By disregarding this advice and deploying a strong cold water stream directly onto
the Pressure Valve, you will create the risk of sudden drop in pressure inside the cooker, which can
result in steam being suddenly ejected from under the Pressure Cooker Lid. This steam is extremely
hot and can potentially cause serious burns. When putting the cooker in the sink, tilt it so the
cold water will run down the sides of the cooker. Once the pressure has been released completely
and the Pressure Indicator has dropped, go to Step #4 in this section. NEVER IMMERSE THE
PRESSURE COOKER IN WATER.
3. Automatic Release Method: To use this method,
turn the dial on the Pressure Valve to the release
position and the steam will be released automatically.
WARNING: The steam coming out of the Pressure Valve
will be very hot, and might disperse some droplets of hot
water. Do not place your hands directly in front of the
steam, and make sure it is not directed toward anything
that can be damaged by the heat. Once the steam has
been released completely and the Pressure Indicator has
dropped, go to Step #4 in this section.
4. After all the pressure has been released and you see the Red Pressure Indicator has lowered,
press the Open button. Even though you have already released the pressure, never open
the Pressure Cooker toward your face because there may be intense cooking steam still
inside the Pressure Cooker. To avoid the risk of scalding, let the droplets of condensed
water drip back from the Lid into the Pot.
8

9
Opening during cooking. If you should need to open the Pressure Cooker during the
cooking process, it must be depressurized first as described in this section. We recommend
using the Automatic Release Method for this purpose, as this method will cool down your
Pressure Cooker the least, and will help to build pressure again faster to continue cooking.
The Lid, Pot and handles will be hot, so be careful when opening and closing the Pressure
Cooker; to reduce the risk of burns, only touch the handles using oven mitts or potholders.
Remember that you are interrupting the cooking process by opening the cooker; when you
continue cooking, you must adjust the remaining cooking time and set the timer accordingly.
Never force the Pressure Cooker open. It may only be opened if the Red Pressure Indicator
has dropped into its socket completely and no more steam escapes. Turn the Pressure Valve
to the release position to ensure pressure is released before opening the Lid.
CARE AND CLEANING
POT
1. The Pressure Cooker Pot is dishwasher safe. You can use a nylon or plastic scouring pad on
the inside to remove any stuck-on foods. We recommend using Princess House®Earth Friendly
Stainless Steel Cookware Cleaner to remove any discoloration or spots. Follow directions
on label.
2. To remove stubborn stains and starch from food in the interior of the Pressure Cooker, try
simmering water and mild dishwashing soap without the Lid. Let the water cool down and
proceed to clean again.
3. After cleaning, towel dry with a clean, soft kitchen cloth.
LID
1. We recommend handwashing the Lid using a soft sponge or dish cloth in hot, soapy water
with a mild detergent. You can use Princess House®Earth Friendly Stainless Steel Cookware
Cleaner to remove any discoloration or spots on the stainless portions of the Lid. Follow
directions on label. DO NOT USE CLEANER ON THE VALVE MECHANISM AS IT MAY
LEAVE RESIDUE.
2. In order to extend the life of the silicone Gasket, remove it after every use and wash with
warm water and mild dishwashing soap. Rinse and dry well, then cover the Gasket with a
thin coating of vegetable oil before putting it back into place. For optimal safety and best
results, the silicone Gasket should be replaced at least once a year, depending on the
frequency of usage. Please contact Customer Service at 508.823.6800 for
replacement information.
3. To store, always place the Lid upside down on top of the Pressure Cooker pot. Do not close
the Lid over the Pot to avoid the risk of a vacuum forming inside the cooker during storage,
which would make opening the Lid difficult. This will also prevent stale odors from forming
inside the cooker.
CLEANING THE PRESSURE VALVE
After every use, check to make sure that the Pressure Valve is clear of any built-up particles.
Clean it by running water through it. If necessary, clean it with a small brush or pipe cleaner.

10
BASIC INSTRUCTIONS FOR COOKING
In this section, you will find basic instructions for cooking foods that are most commonly prepared
in Pressure Cookers.
Do not chop or cut food inside the cooker with a knife or other sharp utensil to avoid scratching
the bottom.
For soups and stocks, do not fill Pressure Cooker beyond ½ of its capacity! Remember to ALWAYS
use some cooking liquid such as broth, wine or water. Using the Pressure Cooker without any
cooking liquid or allowing the Pressure Cooker to boil dry will damage the cooker and will not
allow it to build pressure for proper functioning.
FRESH AND FROZEN VEGETABLES
• Wash all fresh vegetables thoroughly.
• Peel all root vegetables, such as beets, carrots, potatoes, turnips, etc.
• Whole winter pumpkins should be pierced several times with a fork before cooking.
• If the approximate cooking time is more than 10 minutes, you should use two cups of water.
• Never fill the Pressure Cooker past the MAX Fill line of its capacity.
• When you cook frozen vegetables, you must extend the total cooking time by 1-2 minutes.
• If possible, use the Cold Water Release Method when the cooking time is completed. This is
the fastest way to release the steam and prevents overcooking tender vegetables. You can
also use the Automatic Release Method.
VEGETABLES APPROXIMATE PRESSURE
COOKING TIME LEVEL
Artichoke, large, without outer leaves 9-11 minutes High
Artichoke, medium, without leaves 6-8 minutes High
Asparagus, fine, whole 1-1½ minutes High
Asparagus, thick, whole 1-2 minutes High
Beans, white, in the pod 8 minutes High
Broccoli, shoots 2-3 minutes High
Brussels sprouts, whole 4 minutes High
Cabbage, red or green, ¼-inch slices 1 minute High
Cabbage, red or green, in quarters 3-4 minutes High
Cabbage, thickly cut 1-2 minutes High
Carrots, ¼-inch slices 1 minute High
Carrots, 1-inch slices 4 minutes High
Cauliflower, flower heads 2-3 minutes High
Corn, on the cob 3 minutes High
Endive, thickly cut 1-2 minutes High
Green beans, whole 2-3 minutes High
Green curly kale, thickly cut 5 minutes High
Okra, small pods 2-3 minutes High
Onions, whole, 1½-inch diameter 2 minutes High
Peas, in the pod 1 minute High

11
Potatoes, red, 1½-inch slices 6 minutes High
Potatoes, red, new, small, whole 5 minutes High
Potatoes, white, 1½-inch slices 6 minutes High
Potatoes, white, new, small, whole 5 minutes High
Pumpkin, 2-inch slices 3-4 minutes High
Red beet, ¼-inch slices 4 minutes High
Red beet, large, whole 20 minutes High
Red beet, small, whole 12 minutes High
Snap beans, in the pod 4 minutes High
Spinach, fresh, thickly cut 2 minutes High
Spinach, frozen 4 minutes High
Sweet potato, 1½-inch slices 5 minutes High
Swiss chard, thickly cut 2 minutes High
Tomatoes, in quarters 2 minutes High
Turnip, 1½-inch slices 3 minutes High
Turnip, small, in quarters 3 minutes High
Yellow turnip, 1-inch slices 7 minutes High
Zucchini, Acorn Squash, half 7 minutes High
Zucchini, Summer, 1-inch slices 8 minutes High
DRIED BEANS AND LEGUMES
WARNING: Only fill the Pressure Cooker to the ½ FULL/BEANS line when cooking beans and
legumes, as these foods tend to expand and froth during cooking.
Overfilling the Pot may cause the Pressure Valve to clog, and excessive pressure inside the Pot will
activate Safety Valve mechanism. When Safety Valve mechanism is activated, pressure and steam
will be released through the cutout on the side of the Lid. Steam will be very hot and a strong
gush of pressure will be coming out from the Safety Valve.
• Clean out any foreign particles. For frozen beans and legumes, rinse them with warm water.
• Soak dry beans in four times their volume of warm water for at least 4 hours before cooking
or, if you prefer, leave them to soak overnight. Do not add salt to the water as this hardens
the beans and prevents absorption of water.
• Do not soak dried split lentils.
• After soaking, remove any floating beans and shells.
• Strain the water from the beans.
• Rinse in warm water. This also applies to dried split lentils.
• Put the beans or legumes in the Pressure Cooker. Add 3 cups of water for each cup of beans
or legumes. Do not add salt; beans and legumes should be salted after cooking.
• Add a tablespoon of vegetable oil for each cup of water to eliminate the foam they produce.
• To add more flavor, cook beans or lentils with some bay leaves and onions with spices and
other seasonings of your choice, like garlic.
• After the cooking time is up, use the Natural Release Method to allow the pressure to
decrease naturally.

12
• Cooking times may vary depending on the quality of the beans or other legumes. If, after the
recommended cooking time, the beans are still hard, continue cooking them with the Lid off.
If necessary, add water.
• A cup of beans or other legumes yields approximately two cups when cooked.
BEANS AND LEGUMES APPROXIMATE PRESSURE
COOKING TIME LEVEL
Azuki beans 4-5 minutes High
Beans, white 5-7 minutes High
Beans, scarlet, red 10-12 minutes High
Beans, black 8-10 minutes High
Beans, colored 4-6 minutes High
Pigeon peas 7-9 minutes High
Chick peas 10-12 minutes High
Lentils, red 7-9 minutes High
Lentils, green 8-10 minutes High
RICE AND GRAINS
WARNING: Never fill the Pressure Cooker to more than half its capacity with rice, or other grains
like bulgur, as these food tends to expand and froth during cooking.
• Remove any foreign particles from grains and/or rice. Rinse with warm water.
• Soak grains in four times their volume of warm water for at least 4 hours before cooking
them or, if you prefer, leave them to soak overnight. Do not add salt as this hardens grains
and prevents them from absorbing water. Do not leave rice to soak. After soaking, remove
floating grains or shells.
• Drain the water from grains.
• Rinse grains in warm water. This also applies to rice.
• Cook each cup of grains or rice in the quantity of water indicated in the recipe or on
the package.
• If you prefer, add salt to taste according to recipe.
• After the cooking time is up, use the Natural Release Method to allow the pressure to
decrease naturally.
• Cooking times may vary depending on the quality of the grain or rice. If, after the
recommended cooking time, the grain or rice is still hard, continue cooking with the Lid off.
If necessary, add water.
• A cup of grains or rice expands to approximately 2 cups when cooked.
RICE APPROXIMATE COOKING PRESSURE
(1 cup) WATER QUANTITY TIME LEVEL
Rice, basmati 1 ½ cups 5-7 minutes High
Rice, brown 1 ½ cups 15-20 minutes High
Rice, long grain 1 ½ cups 5-7 minutes High
Rice, wild 3 cups 22-25 minutes High

13
MEAT AND POULTRY
• Remove all the visible fat from the meat or poultry. If you are preparing a complete cut of
meat or poultry, such as a roast, cut it in such a way that it fits in the Pressure Cooker
without touching the sides.
• Meat and poultry cut up into small pieces cook faster.
• To achieve best results, brown the meat or poultry without Lid with 2-3 tablespoons of
vegetable, canola or olive oil in the Pressure Cooker before adding the other ingredients.
Do not overload the Pressure Cooker Pot (never past the MAX line). Brown the meat in
batches, if necessary. Drain the excess fat and begin cooking as indicated in the recipe.
• Always cook meat and poultry with at least a ½ cup of liquid. If the cooking time exceeds
10 minutes, use two cups of liquid. Meats with preservatives, or salted meats, should be
covered by the water.
• Never fill the Pressure Cooker past the MAX line.
• When you prepare a concentrated stock or soup, put all the ingredients in the Pressure
Cooker Pot and add water to ½ of the pot's capacity.
• Exact cooking times vary depending on the quality and quantity of the meat that is cooked.
Unless the recipe indicates otherwise, the cooking times given on the Meat and Poultry cooking
time chart are for 3 lbs. of meat or poultry. The larger the cut of meat, the longer the cooking
time will be.
• After the cooking time is up, use the Natural Release Method to allow the pressure to
decrease naturally.
• When you cook beef or poultry with vegetables, begin by cooking the meat in stock or
another liquid. Subtract the vegetable’s cooking time from the meat’s cooking time (base
this on the vegetable with the longest cooking time). Pressure cook the meat for this time.
Release the pressure from the Pressure Cooker using the Automatic Release Method. Open
the Pressure Cooker Lid and add the vegetables. Check the seasoning. Replace the Lid and
bring the Pressure Cooker up to pressure again and continue pressure cooking for the
cooking time recommended for the vegetables.
• If you want to add vegetables that cook faster, such as peas or mushrooms, do not pressure
cook them at the same time as the other vegetables that take longer to cook. Add them to
the cooker right before serving and cook them in the Pressure Cooker Pot with the Lid off
until they are ready.
Example: If you are cooking a beef brisket (cooking time: 35 minutes) with potatoes
(cooking time: 6 minutes) and sliced carrots (cooking time: 4 minutes), you should first cook
the meat by itself for 29 minutes, then release the pressure, add the potatoes and cook for an
additional 6 minutes. Finally, release the pressure again, add the carrots and let them simmer
for a few more minutes until they are fully cooked.

14
MEAT AND POULTRY APPROXIMATE PRESSURE
COOKING TIME LEVEL
Beef/veal, roast or brisket 35-40 minutes High
Beef/veal, (shanks) 1½-inch wide 25-30 minutes High
Beef/veal, 1-inch cubes, 1½-pounds 10-15 minutes High
Beef, dressed, 2 pounds 10-15 minutes Low
Meatballs, 1-2 pounds 5-10 minutes High
Beef, cured 50-60 minutes High
Pork, roast 40-45 minutes High
Pork, ribs, 2 pounds 15 minutes High
Pork leg, smoked, 2 pounds 20-25 minutes High
Pork, ham, pieces 20-25 minutes High
Lamb, leg 35-40 minutes High
Lamb, 1-inch cubes, 1½-pounds 10-18 minutes High
Chicken, whole, 2-3 pounds 12-18 minutes High
Chicken, in pieces, 2-3 pounds 8-10 minutes High
Spring chickens, two 8-10 minutes High
Soup or concentrated stock of beef or fowl 10-15 minutes High
ADAPTING TRADITIONAL RECIPES TO USE IN THE PRINCESS HERITAGE®
STAINLESS STEEL CLASSIC 8-QT. EASY-CLOSE PRESSURE COOKER
It is easy to adapt your favorite recipe for use in a Pressure Cooker. For the most part, soups, stews,
braised and slow-roasted meats and poultry, and slow-simmered recipes, such as tomato sauce
and fruit preserves, provide the best results.
Meats and Poultry: When preparing meats and poultry, brown well in the Pressure Cooker Pot
using at least 2 tablespoons of vegetable or olive oil. Drain any excess fat and add sautéed or raw
onions, garlic or any other vegetables as called for in the recipe. Add the remaining ingredients
and at least a ½-cup (or 2 cups if cooking over 10 minutes) of cooking liquid, such as broth,
diluted tomato purée or wine.
Soups: Soups are quick and easy to prepare. Add meat, poultry or seafood to the Pressure Cooker
along with any desired vegetables, herbs and spices. Add liquid ingredients, filling the Pressure
Cooker up to ½ its capacity.
Tomato Sauce and Fruit Preserves: When preparing tomato sauce, sauté minced onion and/or
garlic. Add and brown the meats as specified in the recipe. Add the strained or pureed tomatoes,
filling the Pressure Cooker to only ½ of its capacity. Position Lid and secure in place. Cook for 20
minutes. Remove from heat and let pressure drop naturally. Season with salt and pepper to taste.
To make fruit preserves, place the fruit in the Pressure Cooker with the desired quantity of sugar.
Let sit one hour to release the fruit's natural juices. Bring to a boil, uncovered. Stir well and add
other ingredients as indicated in your recipe. Position Lid and secure in place. Cook for 8 minutes.
Remove from heat and use the Natural Release Method to let the pressure drop naturally.

15
TROUBLESHOOTING
In order to ensure best results when using the Princess Heritage®Stainless Steel Classic 8-Qt.
Easy-Close Pressure Cooker, be certain to read all of the instructions and safety tips contained in
this owner’s manual. The following are practical tips and solutions to some common problems
you may experience when using the Pressure Cooker.
PROBLEM:
There is water leaking from the Pot Handles while the Pressure Cooker is building pressure.
REASON:
While the Pressure Cooker is building pressure, a little water might drip from the rim of the Lid.
The water comes from steam condensed on the inside of the Lid. The dripping will stop when the
Pressure Cooker reaches full pressure. If there is a continuous leak, or it does not stop after pressure
has been reached, it might be due to one of the following reasons:
1. The burner heat is too high.
2. The Gasket has not been oiled.
3. The Silicone Gasket needs to be removed and repositioned in Lid under tabs.
SOLUTION:
1. Lower the heat to medium if needed; a gentle, steady stream of steam will be released from
the Pressure Valve and maintain the pressure needed for cooking.
2. Make sure you wash and dry your Gasket after every use, and oil it regularly.
3. Release the pressure (see page 8) before removing the Lid to reposition the Silicone Gasket.
PROBLEM:
Pressure does not build up (the Red Pressure Indicator does not pop up after more than 5 minutes
on high heat).
REASON:
1. There is not enough liquid.
2. The Pressure Cooker was not properly closed.
3. The Pressure Valve is dirty and/or obstructed.
4. The Silicone Gasket is not in place, or is dirty or worn.
5. The Pressure Valve may be in the Release position.
SOLUTION:
1. Always use the appropriate amount of liquid called for in the recipe. This amount should
never be less than ½ cup. Never fill the Pressure Cooker more than ½ full with liquids.
2. Following the instructions given in this manual, close the Pressure Cooker so that a tight seal
is created, which will allow adequate pressure to build up.
3. The Pressure Valve can become dirty or clogged when cooking foods such as dried beans,
which have a tendency to foam. Clean the Pressure Valve periodically. See instructions for
cleaning on page 9.
4. Make sure the Silicone Gasket is clean and properly positioned before using the Pressure
Cooker. After continued use, the Gasket will begin to wear and should be replaced at least
once a year.
5. Make sure the Pressure Valve has been turned to either the HIGH pressure setting or the
LOW pressure setting. The Pressure Cooker will not build up pressure if the Pressure Valve is
in the release position.

16
PROBLEM:
The Red Pressure Indicator has popped up, but there is no steam released by the Pressure Valve.
REASON:
1. There is not enough liquid in the cooker.
2. The Pressure Valve is dirty and/or obstructed.
3. The heat setting is not high enough.
SOLUTION:
1. Use the Cold Water Release Method to release any pressure. Make sure there is enough
liquid. There should always be at least ½ a cup of liquid in the Pressure Cooker, or 2 cups if
the cooking time is over 10 minutes.
2. The Pressure Valve can become dirty when cooking foods such as dried beans, which have a
tendency to foam. Clean the Pressure Valve periodically. See instructions for cleaning on
page 9.
3. Turn up the heat to medium high until a gentle, steady stream of steam is released from the
Pressure Valve.
PROBLEM:
A gentle, steady stream of steam is released from the Pressure Valve and small drops of
condensation collect on the Lid.
REASON:
This is normal operation, and when used properly, the Pressure Valve will release a gentle, steady
stream of steam as well as some drops of condensed water on the Lid.
SOLUTION:
This is normal operation.
PROBLEM:
A strong, forceful, gushing jet of steam is escaping from the Pressure Valve with or without drops
of condensation.
REASON:
1. The burner heat is too high.
2. The Pressure Valve is dirty.
3. The Safety Valve is malfunctioning.
SOLUTION:
1. Lower the heat so that only a gentle, steady stream of steam is released.
2. After releasing pressure, check the Pressure Valve to see if there are any remaining food
particles. Remove particles with a toothpick only after pressure has been released to avoid
getting burned with hot steam.
3. The Safety Valve, located under the Lid, must be replaced. Please contact Customer Service at
508.823.6800 for Lid replacement information.

17
PROBLEM:
Steam is escaping around the edge of the Lid.
REASON:
1. The Pressure Cooker is too full.
2. The Pressure Cooker was not closed properly.
3. The Silicone Gasket is not in place, or is dirty or worn.
SOLUTION:
1. Never fill the Pressure Cooker more than the MAX line or ½ full when cooking liquids or
foods that froth and expand during cooking.
2. Following the instructions given in this manual, close the Pressure Cooker so that a tight seal
is created which will allow for adequate pressure buildup.
3. Make sure the Silicone Gasket is clean and properly positioned under the four small triangular
tabs before using the Pressure Cooker. After continued use, the Silicone Gasket will begin to
wear and should be replaced at least once a year if the Pressure Cooker is used frequently.
PROBLEM:
A strong, forceful, gush of steam is escaping from the cutout/Safety Vent on the side of the Lid.
REASON:
This is a safety mechanism that activates to release excessive pressure from the Pressure Cooker
through the Safety Vent when:
1. The Pressure Cooker is too full.
2. The Pressure Valve is dirty and/or obstructed.
SOLUTION:
1. To prevent this from happening, never fill the Pressure Cooker more than the MAX line or
½ full when cooking liquids or foods that froth and expand, like beans and rice.
2. Certain foods, such as applesauce, cranberries, pearl barley, oatmeal or other cereals, split
peas, noodles, macaroni, rhubarb, or spaghetti can foam, froth, and sputter, clogging the
Pressure Release Valve. These foods should not be cooked in a Pressure Cooker.
3. After the Safety Valve has released all pressure, move the Pressure Valve to the Steam Release
position to ensure any remaining pressure is released. Make sure the Pressure Indicator has
dropped. Lid can be opened now.
4. After all components have cooled off, check the Pressure Valve to see if there are any
remaining food particles.
5. Make sure the Silicone Gasket is clean and well positioned before using the Pressure Cooker.
After continued use, the Silicone Gasket will begin to wear and should be replaced at least
once a year if the Pressure Cooker is used frequently.
PROBLEM:
The Pressure Cooker cannot be opened after cooking.
REASON:
There is still pressure built up in the Pressure Cooker.
SOLUTION:
Use the Automatic or the Cold Water Release Method to release any remaining pressure. Make
sure the Red Pressure Indicator has dropped. Try opening again.

18
PROBLEM:
Foods are undercooked.
REASON:
1. Cooking time is too short.
2. The Automatic or Cold Water Release Method was used to release pressure, when the
Natural Release Method should have been used.
SOLUTION:
1. Always check the cooking time in your recipe. If food is still undercooked, extend cooking
time by approximately 1-2 minutes and cook under pressure, or simmer without Lid until
desired texture is achieved.
2. Use the Natural Release Method so that food has the benefit of additional cooking time as
pressure drops.
PROBLEM:
Food is overcooked.
REASON:
1. Cooking time is too long.
2. The Natural Release Method was used to release pressure, when the Automatic or Cold
Water Release Method should have been used.
SOLUTION:
1. Always check the cooking times in your recipe. If food is overcooked, shorten the cooking
time by at least 1-2 minutes.
2. Use the Automatic or the Cold Water Release Method so that pressure drops immediately.
For more information, please visit https://www.princesshouse.com/product/details/5818

19
LIMITED WARRANTY
Princess House offers the original purchaser, from the date of purchase, a limited lifetime warranty
to replace the Pot and Lid for the Princess Heritage®Stainless Steel Classic 8-Qt. Easy-Close
Pressure Cooker and a 1-year warranty on replaceable components such as Gasket and Pressure
Valve cap if found defective in material, construction or workmanship when the product is used
in normal domestic household use and in accordance with the care and use instructions provided.
Princess House shall have the right to determine if the item is defective and, at its option, replace
it with a similar or equivalent item, or provide a refund of the purchase price. In order for a
replacement or refund to be made, the defective product must be returned at customer’s expense
to Princess House with a brief explanation and proof of purchase.
THIS WARRANTY DOES NOT COVER DAMAGE FROM IMPROPER USE AND FAILURE TO
FOLLOW THE CARE & USE INSTRUCTIONS ENCLOSED WITH THE PRODUCT.
Exclusions from warranty:
• Discoloration and deterioration due to use of high heat and improper cleaning after
each use
• Stains, discolorations or scratches on the inside or outside of cookware
• Warping or metal separation due to the use of high heat
• Prolonged heat exposure when cookware is empty
• Damage caused by use of metal or sharp utensils
• Damage caused by scouring pads, steel wool, abrasive cleaners, bleach and the like
• Damage caused by any accident, fire, flood, etc.
• Damage caused by improper use and/or negligence (including overheating and
boiling dry)
• Damage resulting from repairs or manipulations carried out by unauthorized or
non-qualified repair/service personnel
This warranty is available to the original purchaser only and is void when the covered product is
used for any reason other than for personal, family or household purposes.
THIS WARRANTY IS IN LIEU OF ALL OTHER WARRANTIES AND REPRESENTATIONS, EXPRESS
OR IMPLIED, AND ALL OTHER OBLIGATIONS OR LIABILITIES ON PRINCESS HOUSE’S
PART. ANY IMPLIED WARRANTIES THAT MAY BE IMPOSED BY LAW ARE LIMITED TO ONE
YEAR, OR THE SHORTEST PERIOD ALLOWED BY APPLICABLE LAW. SOME STATES DO
NOT ALLOW LIMITATIONS OR EXCLUSIONS ON HOW LONG AN IMPLIED WARRANTY OF
MERCHANTABILITY OR FITNESS LASTS, SO THE ABOVE LIMITATIONS OR EXCLUSIONS MAY
NOT APPLY TO YOU.
THIS WARRANTY IS LIMITED AND EXPRESS TO THE TERMS AND CONDITIONS SET FORTH
HEREIN. THIS WARRANTY EXCLUDES ALL INDIRECT, CONSEQUENTIAL OR INCIDENTAL
DAMAGES. SOME STATES DO NOT ALLOW LIMITATION OR EXCLUSION OF THESE
DAMAGES SO THESE EXCLUSIONS MAY NOT APPLY TO YOU.
IF APPLICABLE, THESE DISCLAIMERS CONTINUE AFTER EXPIRATION OF THE EXPRESS
WARRANTIES SET FORTH ABOVE.
This warranty gives you specific legal rights and you may also have other rights which vary from
state to state.

20
Table of contents
Languages:
