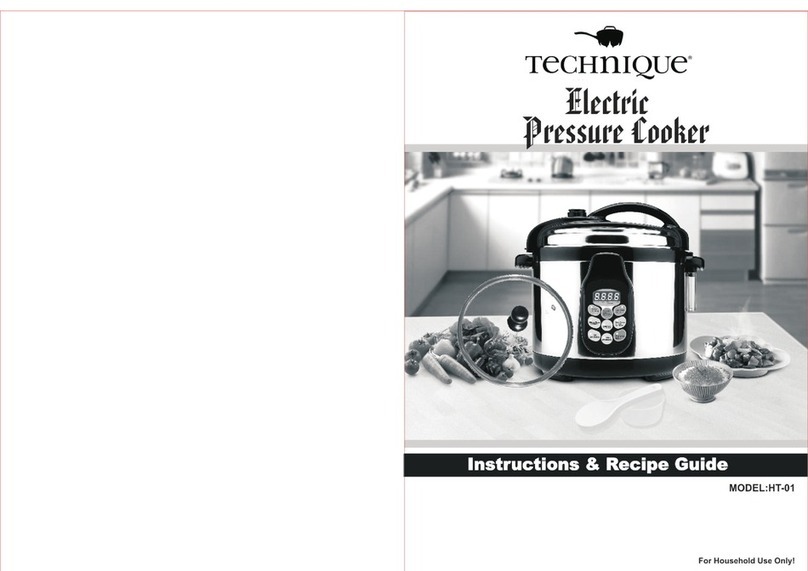
Technique HT-01 User manual

1
EASY STEPS GUIDE
Model: HT-01
Important: Do Not Use This Pressure Cooker Until You Have Read
The Entire Owner’s Manual That Comes With This Unit
Technique Electric Pressure Cooker Model HT-01
Easy Steps Guide
Important: Do Not Use This Pressure Cooker Until You Have
Read The Entire Owner’s Manual That Comes With This Unit
Included in this Easy Steps Guide, you will find the following:
1) Parts List 2
2) Display Control Panel 3
3) For General Use 4
4) Glass Lid Handle Assembly 6
5) To Cook Using Preset Cooking Options 6
6) To Cook Using A Custom Cooking Time 7
7) Care and Cleaning 7
TPC_ESG_QVC_V2_110318

2
Parts List

3
Display Control Panel
Preset the Time –This is a Delay
Time Feature. Push the PRESET THE
TIME Button, and your meal will
cook at a later time, from 0.5 to 10
hours later, as displayed on the left
side of the LED.
Optional Pressure Holding Time -
This allows you to set your own
Cooking Time. Push the OPTIONAL
PRESSURE HOLDING TIME Button to
select a Cooking time from 0 –99
minutes, as displayed on the right
side of the LED. The cooking
Pressure will be 70kPa.
Keep Warm/Cancel –While the unit is in a cooking cycle, or if you want
to reset an incorrect cooking mode, pushing KEEP WARM/CANCEL will
stop the cooking cycle/cancel the mode. When a cooking cycle runs its
full course, the unit automatically goes into the KEEP WARM mode. A
flashing indicator light on the KEEP WARM mode represents High
pressure inside the unit. When the unit is in the KEEP WARM mode,
pressing the KEEP WARM/CANCEL button will CANCEL the KEEP WARM
operation.
Chicken Pieces –Push the CHICKEN PIECES Button on the Control Panel
for the CHICKEN PIECES default setting with a pressure of 70kPa and a
cook time of 9 minutes.
Soup/Stock –Push the SOUP/STOCK Button on the Control Panel for
the SOUP/STOCK default setting with a pressure of 70kP and a cook
time of 12 minutes.
Whole Chicken –Push the WHOLE CHICKEN Button on the Control
Panel for the WHOLE CHICKEN (2-3LBS) default setting with a pressure
of 70kPa and a cook time of 15 minutes.
Chilli –Push the CHILLI Button on the Control Panel for the CHILLI
default setting with a pressure of 70kPa and a cook time of 20 minutes.
Ribs –Push the RIBS Button on the Control Panel for the RIBS default
setting with a pressure of 70kPa and a cook time of 25 minutes.
Function Menu –If you select your own cooking time, you will need to
press the FUNCTION MENU Button once you have set the time for the
unit to begin building pressure.

4
For General Use
Make sure the Sealant Washer is seated properly on the inner steel
ring inside the Lid. (See Figure 1)
1. To remove the Sealant Washer, Pull up from the inner steel ring. The
Sealant Washer should be separated from the inner steel ring for
proper cleaning.
2. To replace the Sealant Washer, Press down into/around the inner
steel ring. The Sealant Washer will make a clicking sound as you press
it firmly into place.
Figure 1
The Floating Valve found on the underside of the Lid should be able to
move up and down freely only stopping when the rubber gasket meets
the Lid. (See Figure 2)
Figure 2
Place Inner Tank into the Outer Tank. Never load Inner Tank more
than 4/5 of the way full (3/5 for foods that expand when cooking) or
less than 1/5 of the way full. Rotate the Inner Tank to make certain that
it is seated properly on the Heating Plate. (See Figures 3-5)
Figures 3, 4 and 5
Place the Water Collector on the
Outer Tank by pushing it up on the
underside of the right Outer Tank
Handle. (See Figure 6)
Figure 6

5
Place Pressure Lid on Cooker so that the Lid Handle and the Pressure
Discharging Valve are pointed to the “10 o’clock” position. Rotate Lid
counter-clockwise until Lid Handle is in line with the Outer Tank
Handles, and a clicking sound is heard. (See Figures 7-8)
Figures 7 and 8
Insert the Pressure Discharging Valve into the Lid Handle. Push down
until it clicks. Turn the small lever on the Valve so that the SEAL mark is
in line with the Floating Valve opening on the handle. Always be
certain the Pressure Discharging Valve is free floating and clear of any
obstructions. (See Figures 9a and b)
Figures 9a and b
For best results, always check that the Pressure Discharging Valve,
Floating Valve and Sealant Washer are in good working order and that
there are no foreign particles blocking the Valve openings on the
underside of the Lid.
When the unit is first plugged in, it will sound a beep and the LED will
light up with 0000. When a Preset Cooking Option is selected such as
CHICKEN PIECES, the small red indicator light on this selection will light
up for 5 seconds, then the LED will show the applicable Cooking Time (9
minutes). A beep will be heard and a small red indicator light will also
show on the KEEP WARM mode until a pressure of 70 kPa is reached.
A Red ‘P’ will display on the Panel to the left of the Cooking Time once
Pressure is reached, and the red indicator light on the KEEP WARM
button will go out. The time will count back to “00” minutes until the
cooking cycle has completed. Three beeps will be heard and the KEEP
WARM button will display a blinking orange indicator until cancelled.
When the Cooking process is complete... Steam and pressure must be
released completely from the Cooker before the Lid will open. To do
this, carefully turn the small lever on the Valve so that either of the
EXHAUST marks are in line with the Floating Valve opening on the
handle. This will release the steam and pressure from the Cooker, until
the Floating Valve drops.
CAUTION: During this process protect your skin from any contact with
escaping steam.
To open the Lid, hold the Handle and gently turn clockwise until Lid
meets resistance. Lift carefully and place aside. Avoid personal injury
resulting from hot unit surfaces and dripping liquids. (See Figures 10a
and b)

6
10a 10b
Note: The “cook times” shown in the recipes do not include the
additional time needed to pressurize the unit before cooking begins.
Full pressurization could take up to 17 minutes.
Glass Lid/Handle Assembly
1. Place the small plastic washer on the screw
2. Insert the screw through the underside of lid and hold in place
3. Place the wider metal ring around the screw, with the larger diameter
sitting on the top of the glass lid
4. Turn the black handle onto the screw until it fits snugly
(See Figures 11a, b and c)
Use the Glass Lid to cook without pressure. Press the FUNCTION MENU Button to cook.
To Cook Using Preset Cooking Options
1) Place Inner Tank into the Outer Tank. Add ingredients as per your
recipe. Rotate the Inner Tank to make certain that it is seated
properly. Place Pressure Lid on unit. Rotate Lid counter-clockwise
until you feel a click.
IMPORTANT: Insert the Pressure Discharging Valve located on top
of the Lid Handle and set it to the SEAL position, and ensure that
the Floating Valve is in a lowered position.
2) Attach AC Cord to base of unit and plug other end into the wall
outlet. Before handling the AC Cord, dry hands thoroughly if you
have been preparing wet foods or liquids.
3) Delay Time Feature –You may select a future time for Cooking from
0.5 to 10 hours by pressing the PRESET THE TIME Button.
4) To use a Preset Cook option, push the applicable Button on the
Control Panel –CHICKEN PIECES, SOUP/STOCK, WHOLE CHICKEN,
CHILLI OR RIBS. The LED will display the applicable cooking time.
Preset
Cook
Option
Chicken
Pieces
Soup/Stock
Whole
Chicken
Chilli
Ribs
Cook
Time
9
Minutes
12 Minutes
15
Minutes
20
Minutes
25
Minutes
Pressure
Setting
70 kPa
70 kPa
70 kPa
70 kPa
70 kPa
5) The Complete Cook Cycle - Once the Default Pressure is reached,
the Cook time will countdown. When Cook time reaches “00” the
unit will provide three ring sounds and automatically go to Keep
Warm. It will stay WARM until you select CANCEL .
NOTE: Pushing CANCEL will stop the cooking process at any point.

7
To Cook Using A Custom Cooking Time
This mode is the easiest way to select Time settings that are less or
greater than the preset defaults. You may select a time setting from 0
minutes to 99 minutes.
1) Place Inner Tank into the Outer Tank. Add ingredients as per your
recipe. Rotate the Inner Tank to make certain that it is seated
properly. Place Pressure Lid on unit. Rotate Lid counter-clockwise
until you feel a click.
IMPORTANT: Insert the Pressure Discharging Valve located on top
of the Lid Handle and set it to the “Seal” position, and ensure that
the Floating Valve is in a lowered position.
2) Attach AC Cord to base unit and plug other end into the wall outlet.
Before handling the AC Cord, dry hands thoroughly if you have
been preparing wet foods or liquids.
3) Delay Time Feature –You may select a future time for Cooking from
0.5 to 10 hours by pressing the PRESET THE TIME Button.
4) To set your own Cooking Time, press the OPTIONAL PRESSURE
HOLDING TIME Button, the time will start from 0 minutes and
increase up to 99 minutes, then begin again at 0 minutes. Select
desired time.
5) Once you have set your own cooking time, press the FUNCTION
MENU Button for the unit to begin building pressure.
6) The Complete Cook Cycle - Once the Default Pressure of 70kPa is
reached, the Cook time will countdown. When Cook time reaches
“00” the unit will provide three ring sounds and automatically go to
Keep Warm. It will stay WARM until you select CANCEL.
NOTE: Pushing CANCEL will stop the cooking process at any point.
Care and Cleaning
Before using the Pressure Cooker for the first time, wash the Inner Tank,
the Lid, Sealant Washer and Anti-Blocking Case with warm soapy water.
Rinse with clean water and dry thoroughly.
CLEANING THE SAFETY DEVICES: In addition to the Sealant Washer, other
safety devices on the pressure cooker must also be cleaned after each use.
THE ANTI-BLOCKING CASE: To remove the Anti-
Blocking Case, pull this small metal thimble up
from the inside of the Lid. Apply mild detergent
and wash it under warm running water. Put the
Anti-Blocking Case back in place by pushing it
down until it clicks. (See Figure 12)
Figure 12

8
THE PRESSURE DISCHARGING VALVE: To remove the Pressure Discharging
Valve, simply pull up and the valve will release from its spring lock
mechanism. Apply mild detergent and wash under warm running water.
Put the Valve back in place by pushing down until it clicks.
After use, unplug unit and allow to cool completely before cleaning.
The Pressure Cooker must be cleaned thoroughly after each use in order to
avoid staining caused by a build-up of food or cooking residue.
DO NOT POUR COLD WATER INTO A HOT PRESSURE COOKER.
Note: To ensure safe operation of this pressure cooker, strictly follow the
cleaning and maintenance instructions after each use. Should a tiny
fragment of food (such as a grain of rice or pea shell) remain in the unit, it
could prevent the safety devices from operating during subsequent use.
IMPORTANT: Always remove the Pressure Discharging Valve and clean to
remove any blockage that might have occurred during the cooking process.
This must be done after each use.
The Inner Tank and Lid should be rinsed under hot running water. Use only
a mild liquid detergent and a soft cloth, sponge or nylon scrubber for
cleaning. Do not use abrasive powders, bicarbonate of soda or bleach. Do
not use scouring pads. Rinse off with clean water and towel dry.
*This Guide is not a substitute for the Owner’s Manual. Refer to this
guide only after you have read the Owner’s Manual thoroughly.
When cleaning the Lid, the Sealant Washer must be removed and washed
separately with a sponge or soft cloth and warm, soapy water. Rinse off
with clean water and towel dry.
Remove the Water Collector and spill out water if necessary so that it is
empty for next use.
WIPE BASE AFTER EACH USE WITH A SOFT, DAMP CLOTH OR SPONGE,
MAKING SURE ALL FOOD RESIDUE IS REMOVED. DO NOT IMMERSE BASE IN
WATER.
Never use harsh chemical detergents, scouring pads or powders on any of
the parts or components.
• The Sealant Washer must always be properly positioned on the
underside of the Lid. Check periodically to make sure that it is clean,
flexible and not torn. If damaged, do not use this unit.
• Always check that the Pressure Discharging Valve and Floating Valve are
in good working order and debris free.
Note: The Sealant Washer must be replaced every year, or sooner if
necessary. It may also need replacing if Pressure Cooker is not used for a
long period of time, as it can harden from disuse, making it unable to form
an airtight seal. The Sealant Washer must be replaced only with another
one of the correct type and size for this Pressure Cooker.
Other manuals for HT-01
1
Table of contents
Other Technique Electric Pressure Cooker manuals
Popular Electric Pressure Cooker manuals by other brands

Ginnys
Ginnys 733112 user guide

Wolfgang Puck
Wolfgang Puck BPCRM800 user manual

Crown Food Service Equipment
Crown Food Service Equipment EC-2 Installation and operation manual

Tower Hobbies
Tower Hobbies 8605782 Safety and instruction manual
SilverOnyx
SilverOnyx 6QT instruction manual

Cosori
Cosori C2126-PC user manual
