Printrbot CNC User manual

Printrbot CNC Operation
Manual

Printrbot Operation Manual 1
Table of Contents
Introduction .................................................................................................................................... 2
Technical Specifications.................................................................................................................. 3
Regular Operation........................................................................................................................... 4
Software Required .......................................................................................................................... 5
Software Operation ........................................................................................................................ 6
Gcode Software....................................................................................................................... 6
Serial Port JSON Server ........................................................................................................... 6
Chillipeppr.com....................................................................................................................... 7
Software Installation Steps............................................................................................................. 8
Hardware Operation..................................................................................................................... 10
Troubleshooting............................................................................................................................ 11
Chillipeppr..................................................................................................................................... 12
Serial Port JSON .................................................................................................................... 12
NEMA 23 Stepper Motors..................................................................................................... 12
Stepper Motor Limit Switches .............................................................................................. 12
TinyGv9 ................................................................................................................................. 13
TinyG Motor Configuration........................................................................................................... 14
Original Settings.................................................................................................................... 14
Updated Settings *Changes Highlighted in Green*.............................................................. 14
Revision History ............................................................................................................................ 15
References .................................................................................................................................... 16

Printrbot Operation Manual 2
Introduction
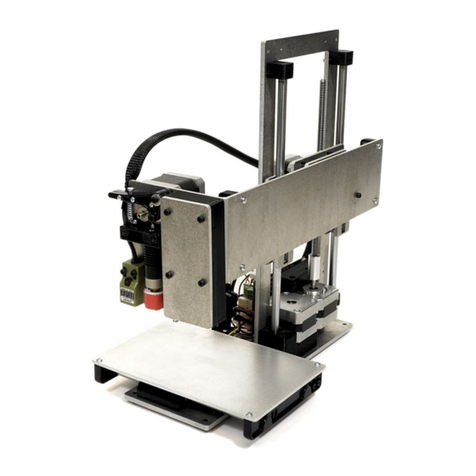
The CNC router that will be used in this manual is a limited run (only 19 made) CNC created
by the now out of business company known as Printrbot. While there is a lot of information on
the internet about Printrbot and their machines, much knowledge was lost when the company
and their website were shut down. This manual is a collection of information about this
particular machine that was either found on the internet or put together during the machine’s
operation with Professor Simon Penny.
In this manual, we will discuss the Technical Specifications of the Printrbot CNC, Regular
Operation of the machine and compatible software, and various different Troubleshooting
methods that have been proven to solve issues relating to this particular machine and its
software. There will also be a Revision History page that will act as a record of all changes made
to this document. If you are interested in updating this document, please fill out a row on the
Revision History table when you have completed the necessary changes, save the updated word
document, and replace the current PDF version in the CNC folder.
Because this machine was built in such a small quantity, there may be issues that have not
been discovered or do not have a solution yet, but this manual will hopefully be able to assist in
both the operation and troubleshooting process.

Printrbot Operation Manual 3
Technical Specifications
The Printrbot CNC features the following:
Item
Quantity
NEMA 23 stepper motors
5 [1 x-axis, 2 y-axis, 2 z-axis]
TinyGv9 Board
1
Stepper motor Limit Switch
5 [2 x-axis, 2 y-axis, 1 z-axis]
USB 2.0 A to USB 2.0 B Cable
1
100-240V AC to 24V DC XP Power Adapter
1
Stepper Belt Drive
4 [2 x-axis, 2 y-axis]
Stepper Linear Rail
4 [2 x-axis, 2 y-axis]
Stepper Lead Screws
2 [2 z-axis]

Printrbot Operation Manual 4
Regular Operation

Printrbot Operation Manual 5
Software Required
In order to run the CNC, we will need some software downloaded first. The following is a list of
the required software:
A program to create the gcode for our part
Software to connect to the tinyg v9 board on the Printrbot (serial-port-json-server.exe)
A program to interpret the gcode (in our case, we will use a website: chillipeppr.com/tinyg)
All listed software is free to download or use and will be simple to operate once we have a basic
understanding on how each program works.

Printrbot Operation Manual 6
Software Operation
Gcode Software
Serial Port JSON Server
Now that the part is ready, we need to send it to the CNC to print. The first things that need
to be checked are that the USB cable that connects the computer to the CNC is plugged in and
the CNC is powered on. When powered on, the Printrbot CNC will temporarily power all
motors (an audible noise will come from the motors but they should not move) and the
TinyGv9 board will power on (indicated by blue and blinking red LED lights on the TinyG board
located underneath the CNC). If both of these are true, we are ready to connect to the TinyGv9
on the CNC. In the included CNC folder, open the program called serial-port-json-server.exe.
The program will then run for around 3 to 5 seconds before it has completed searching for the
connected USB cable. If the program is able to find the USB cable and connect to the TinyG
board, the following will be shown:

Printrbot Operation Manual 7
Note that the date visible on each line on the left side of the screen will match the current
calendar date and time that the program is run.
The most important lines needed in order to continue are the last two:
COM4 and COM5 indicate that the USB cable is connected and functioning properly. If these
lines are not showing, see Troubleshooting for JSON. If these lines are showing, we can proceed
to Chillipeppr. Note: Do not close JSON while operating the CNC.
Chillipeppr.com
Now that we have a gcode part and are connected to the TinyG board with JSON, we can
proceed to chillipeppr.com/tinyg

Printrbot Operation Manual 8
Software Installation Steps
Setting up Chilipeppr:
Step 1: Download the Serial Port JSON Server
Step 2: Extract the zip file and open up the folder
* We tested the latest version already (Jul 27th, 2019), but be sure the boards.txt file has the
string "tinyg" in it and that a bossac folder exists
Step 3: Run the Serial Port.exe; Be sure to allow it through your firewall
*You should see in the command line window that popped up COM# showing up; that
means your ports are available to be used!
Step 4: Go to Your Servers, and Proceed to Connect to localhost.
The TinyG board should be detected by now
Step 5: Head to Port List; Check off the TinyG G2 Board (it'll have a PNG)

Printrbot Operation Manual 9
Step 6: Drag in your gcode into the browser, and start!

Printrbot Operation Manual 10
Hardware Operation
After our software changes in Chillipeppr, the XYZ coordinate system will look like the following
(Note the corner with respect to the location of the wiring):

Printrbot Operation Manual 11
Troubleshooting

Printrbot Operation Manual 12
Chillipeppr
TinyG Not Showing on Port List:
If the TinyG is not showing on the port list, the USB COM 4 and COM 5 may not be
registering. Try disconnecting and reconnecting the USB cable from the computer and
restarting the JSON software
Serial Port JSON
COM 4 and COM 5 are not registering on the JSON software:
Both COMs may not show on the JSON software when the program is run. Make sure that
the TinyG board is powered on.
Try disconnecting and reconnecting the USB cable from the computer and restarting the
JSON software.
If this does not work, try hitting the manual reset button on the TinyGv9 board. This is a
small red button located underneath the Printrbot on the TinyG board. This will reset the
TinyG board and may reset any settings that have been modified
NEMA 23 Stepper Motors
Stepper Motor Limit Switches
Motor Limit Switches Not Stopping the Motors When Pressed:
The limit switches may not always function as desired. When pressed on a surface, they will
send a signal to the TinyG board to stop the motor from moving. This, however, has been
known to fail. One possible problem is that the limit switch may be disabled in the software
settings on Chillipeppr. This can be checked by typing the following into the Console:
$lim

Printrbot Operation Manual 13
If the Limit Switch is enabled, the Console will then show the following:
[lim] limit switch enable 1 [0=disable,1=enable]
If a 0 is shown instead of a 1, type the following into the Console:
$lim=1
When pressed, there should be an audible click sound. If there is no sound, the switch
mechanical button may be broken and will not send a signal to the TinyG board to stop the
motor. The switch can be tested by jogging the motor in Chillipeppr while holding the limit
switch corresponding with that axis down (e.g. Jog the x-axis motor and hold the x-axis limit
switch). If the motor moves while the switch is pressed, this likely means that the switch is
no longer working properly.
TinyGv9

Printrbot Operation Manual 14
TinyG Motor Configuration
Original Settings
Updated Settings *Changes Highlighted in Green*

Printrbot Operation Manual 15
Revision History
Name
Date
Changes made
Michael DeLessio
6/1/2020
Creation of Manual
Adrien Sanding
6/11/2020
Creation of Manual
Table of contents
Other Printrbot 3D Printer manuals

