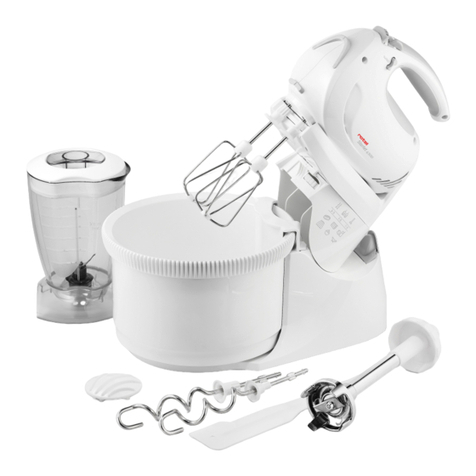
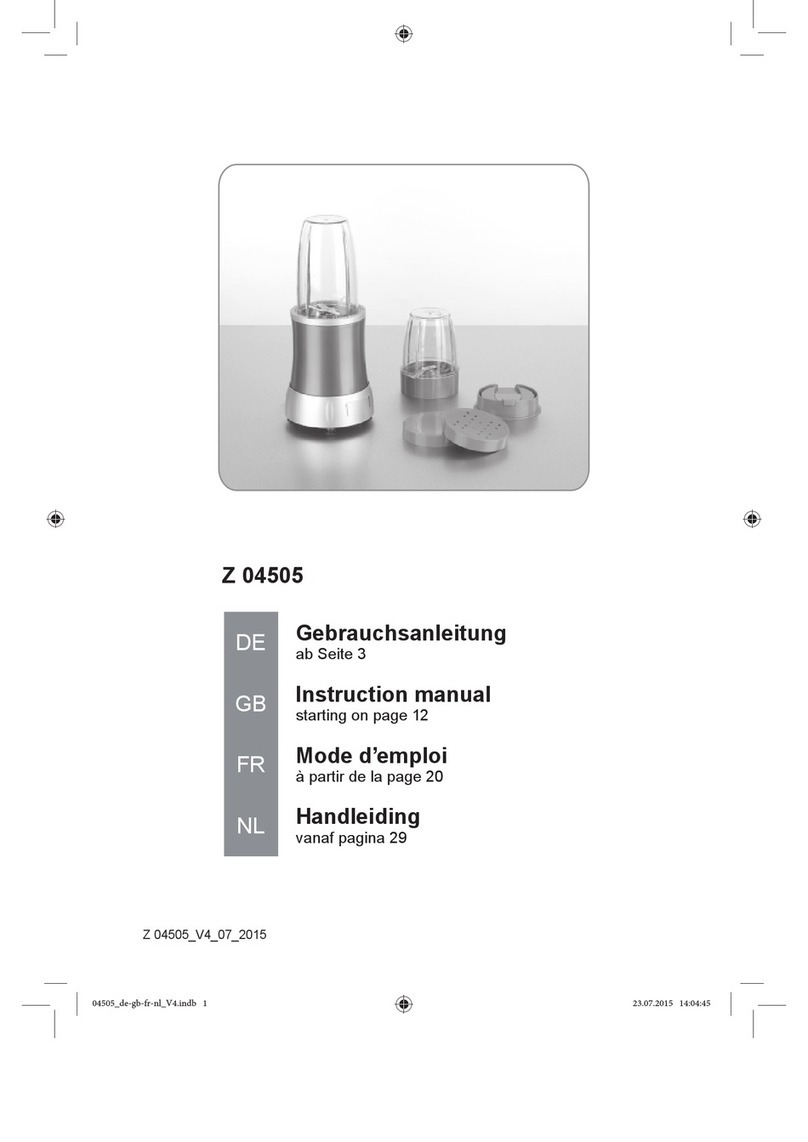
PRIXTON Kitchen+ KR100W User manual

Instrucciones de uso
ES
Kitchen+ KR100W

Datos técnicos:
Modelo: KR100W
Voltaje: 220-240V~, 50/60Hz
Consumo: 1000W
Clase de protección: II
Tiempo de funcionamiento corto: 6 min.
Este electrodoméstico ha sido probado respetando todas las directrices CE vigentes,
tales como la compatibilidad electromagnética y las directi- vas de baja tensión, y ha
sido construido de acuerdo con las últimas normas de seguridad.
El aparato está sujeto a cambios técnicos sin previo aviso.
Instrucciones generales de seguridad:
Lea atentamente el manual de instrucciones antes de poner en funcionamiento el
aparato y conserve las instrucciones, la garantía, el recibo y, si es posible, la caja con el
embalaje interno. Si entrega este aparato a otra persona, facilítele también el manual
de instrucciones.
previsto. No es apto para uso comercial. No lo utilice al aire libre (salvo que esté diseña-
do para ello). Manténgalo alejado de las fuentes de calor, la luz solar directa, la hume-
dad (no lo sumerja en ningún líquido) y de bordes a lados. No utilice el aparato con las
manos húmedas. Si el aparato está húmedo o mojado, desconéctelo inmediatamente.
- Para limpiar o guardar el electrodoméstico, así como cuando no esté utilizándolo,
apáguelo, desenchúfelo (tirando del enchufe, no del cable) y quítele los accesorios.
- No deje la batidora en funcionamiento sin supervisión. Si debe abandonar el lugar de
trabajo, apague el aparato o desenchúfelo (tirando del enchufe, no del cable).
presentar daños, no lo utilice.
- No intente repararlo usted mismo. Contacte siempre con un técnico autorizado. Para
evitar la exposición a peligros, solicite el reemplazo de cables defectuosos exclusiva-
mente al fabricante, a través de nuestro servicio de atención al cliente, o solicítele a
una persona cuali cada que lo reemplace por un cable del mismo tipo.
- Utilice exclusivamente repuestos originales.
- Lea atentamente y tenga en cuenta las siguientes "Instrucciones especiales de
seguridad".
Niños y personas vulnerables:
- Para garantizar la seguridad de los niños, mantenga todo el embalaje (bolsas de
plástico, cajas, poliestireno, etc.) fuera de su alcance.
Precaución: No permita que los niños pequeños jueguen con el envoltorio de plástico,
- Para proteger a los niños o a las personas vulnerables de los peligros de los equipos
eléctricos, asegúrese de que no utilicen este aparato sin supervisión. No es un juguete.
No permita que los niños jueguen con él.
Instrucciones especiales de seguridad para este producto:
- Utilice este aparato sólo bajo supervisión.
- No obstaculice ningún interruptor de seguridad.
- No inserte ningún objeto en los accesorios mientras el aparato esté en funcionmien-
to.
- Coloque el aparato sobre una super cie de trabajo lisa, plana y estable.
- Coloque todos los accesorios necesarios antes de enchufar el aparato.

1
5
6
7
8
2
3
4
Vista general de los componentes:
1. Eje impulsor
2. Botón de elevación
3. Ruleta de selección de velocidad
4. Cable de alimentación
5. Recipiente
6. Accesorio para amasar
7. Cuchilla batidora
8. Batidor de alambre
Uso del recipiente de mezcla:
1. Coloque el recipiente dentro de su dispositivo de sujeción y gírelo hasta que encaje.
2. Para levantar el brazo del aparato, presione el botón de elevación (2). El brazo se
moverá hacia arriba.
3. Coloque los utensilios necesarios insertando la parte superior en el eje impulsor
hasta que encajen.
4. Coloque los ingredientes.
No sobrecargue el aparato – el límite máximo es de 1,2 kg de ingredientes.
5. Baje el brazo presionando el botón de elevación (2).
6. Enchufe el aparato a una toma de corriente segura de 230 V/50 Hz debidamente
instalada.
7. Ajuste la velocidad del aparato con la ruleta de velocidad y elija el nivel de 1 a 6
(según la preparación).
8. Para utilizar la función Pulse (operación en breves intervalos), coloque el interruptor
en la posición "PULSE". El interruptor debe mantenerse en esta posición para que el
aparato funcione. Al soltar el interruptor, éste regresa automáticamente a la posición
"0".
9. Después de amasar/batir y una vez que se haya formado el bollo, vuelva a colocar la
ruleta de selección de velocidad (3) a la posición “0”. A conti- nuación, desenchufe la
batidora.
10. Presione el botón de elevación (2) y el brazo del aparato se levantará.
11. Ahora puede despegar la preparación con la ayuda de una espátula y retirarla del
recipiente.
12. A continuación, retire el recipiente.
13. Limpie las piezas como se indica en la sección “Limpieza”.

Niveles Uso Tipo de preparación
1-3 Accesorio para amasar Preparaciones pesadas (p.ej. pan
o masa quebrada)
3-4 Cuchilla batidora Preparaciones semi-pesadas (p.
ej. tortitas o masas esponjosas)
5-6 Batidor de alambre Preparaciones livianas (p. ej.
crema, clara de huevo, manjar
blanco)
Función Pulse Batidor de alambre Preparaciones a intervalos (p.ej.
para preparaciones esponjosas,
clara de huevo)
Ajuste de los niveles y uso de los accesorios para amasar preparaciones de no más
de 1,2 kg
Nota:
Tiempo de operación breve: Si la preparación es pesada, no opere la batidora durante
más de seis minutos y, después de usarla, déjela enfriar durante diez minutos.
Recetas sugeridas:
Bizcocho (receta básica), nivel 1-4
Ingredientes:
200 g de mantequilla pomada o margarina, 200 g de azúcar, 1 cucharada de esencia
de vainilla o ralladura de limón, 1 pizca de sal, 4 huevos, 400 g de harina de trigo, 1
sobre de levadura en polvo, aprox. 125 ml de leche.
Preparación:
Coloque la harina de trigo y los demás ingredientes en el recipiente, mezcle con la
cuchilla batidora durante 30 segundos en el nivel 1 y, luego, durante aproximadamente
3 minutos en el nivel 2. Enmanteque un molde o cúbralo con papel de hornear. Vierta
la preparación y llévela al horno. Antes de sacar el bizcocho del horno, veri que que
esté cocido. Pinche/perfore el centro del bizcocho con un palito de brocheta. Si la
preparación no se adhiere, el bizcocho está listo. Coloque el bizcocho sobre una rejilla y
déjelo enfriar.
Horno tradicional
Altura de inserción: 2.
Cocción: en horno eléctrico, calor superior e inferior de 175 a 200°C; en horno a gas:
nivel 2 o 3.
Tiempo de cocción: 50 a 60 minutos.
Es posible adaptar esta receta según los gustos de cada uno; por ejemplo, agregando
-
tas.

Panes de lino, niveles 1-4
Ingredientes:
500 a 550 g de harina de trigo, 50 g de lino, 375 ml de agua, 1 pastilla de levadura (40 g),
100 g de cuajada baja en grasa (bien escurrida) 1 cucha- radita de sal. Para el recu-
brimiento: 2 cucharadas de agua.
Preparación:
Ponga el lino en remojo en 125 ml de agua tibia. Coloque el resto del agua tibia (250
ml) en el recipiente, desgrane la levadura, añada la cuajada y mezcle con el accesorio
para amasar en el nivel 2. La levadura debe disolverse completamente. Ponga la harina
con el lino remojado y
la sal en el recipiente. Amase bien en el nivel 1 y, luego, pase al nivel 3 y continúe
amasando durante 3 a 5 minutos. Cubra la preparación y deje reposar en un lugar
cálido durante 45 a 60 minutos. Vuelva a amasarla bien, retírela del recipiente y haga
16 bollos. Cubra el molde con papel de horno húmedo. Coloque los bollos encima y
déjelos reposar durante 15 minutos. Mójelos con el agua tibia y lleve al horno.
Horno tradicional:
Altura de inserción: 2.
Cocción: en horno eléctrico: calor superior e inferior de 200 a 220°C (precalentar 5
minutos); en horno a gas, nivel 2 o 3.
Tiempo de cocción: 30 a 40 minutos.
Mousse de chocolate, niveles 5-6
Ingredientes:
200 ml de nata dulce, 150 g de chocolate cobertura semi-amargo, 3 huevos, 50/60 g de
azúcar, 1 pizca de sal, 1 cucharada de esencia de vainilla, 1 cucharada de coñac o ron y
copos de chocolate.
Preparación:
Coloque la nata en el recipiente y bátala con el batidor de alambre hasta que esté
el envase o colóquelo en el microondas a 600 W durante 3 minutos. Mientras tanto,
coloque los huevos, el azúcar, la esencia de vainilla, el coñac o el ron y la sal en el
recipiente y bátalos con el batidor de alambre en el nivel 2 hasta que se forme una
espuma. Añada el chocolate derretido y mezcle uniformemente en los niveles 5 o 6.
Reserve una porción de nata para la decoración. Agregue el resto de la nata a la
preparación y mezcle brevemente utilizando la función Pulse. Decore el mousse de
chocolate y sirva bien frío.
Masa para pizza, niveles 1-4
Ingredientes
400 g de harina común, 250 ml de agua tibia, media cucharadita de azúcar, 1 sobre de
levadura en polvo (aprox. 2 cucharaditas y media), 1 cucharadita y media de aceite de
oliva y 1 cucharadita de sal. Preparación:
Coloque la harina en el recipiente. Mezcle el resto de los ingredientes en otro recipi-
ente o en una jarra. Ponga en marcha la batidora en nivel 1 o 2, y agregue gradual-
mente el líquido. A medida que los ingredientes vayan incorporándose y el bollo de
masa adquiera forma, aumente la velocidad a 3 o 4. Amase durante un par de minutos
en este nivel hasta obtener un bollo de masa suave. Retírela del recipiente y divídala en
2 a 4 bollos.

Amase las bases de pizza (circulares o rectangulares) sobre una super cie enharinada y
colóquelas sobre una placa para horno o una bandeja para pizza. Unte las bases de
pizza con salsa de tomate y añada los aderezos que desee (champiñones, jamón,
aceitunas, tomates secos, espinacas, alcachofas, etc). Encima, coloque hierbas secas,
trozos de mozzarella y un chorrito de aceite de oliva. Hornee en un horno a gas
precalentado a 200°C (400°F), en nivel 6, durante 15 a 20 minutos, hasta que se doren
los aderezos.
Pan blanco básico, niveles 3-6
Ingredientes:
600 g de harina de trigo con alto contenido en gluten, 1 sobre de levadu- ra en polvo
(aprox. 2 cucharaditas y media), 345 ml de agua tibia, 1 cucharadita de aceite de girasol
o mantequilla, 1 cucharadita de azúcar, 2 cucharaditas de sal.
Preparación:
Siga las instrucciones de mezcla para la masa de pizza y, luego, coloque la masa en un
recipiente, cúbrala y déjela en un lugar cálido hasta que duplique su tamaño (30 a 40
minutos). Retire la masa y golpéela para sacar el aire. Amase suavemente sobre una
super cie enharinada, dele forma de pan o coloque la masa en un molde, cúbrala y
déjela en un lugar cálido para que se eleve durante otros 30 minutos. Hornee en un
horno a gas precalentado a 200°C(400°F), en nivel 6, durante 25 a 30 minutos, hasta
que se dore y la parte inferior haga un ruido hueco.
Esponjosos panes con semillas de amapola, niveles 1-3
Ingredientes:
570 g de harina de trigo con alto contenido en gluten, 1 sobre de
levadura en polvo (aprox. 2 cucharaditas y media), 300 ml de leche
(apenas tibia), 2 huevos (a temperatura ambiente), 1 cucharada de aceite de girasol, 1
cucharadita y media de azúcar, 2 cucharaditas de sal y 75 g de semillas de amapola.
Preparación:
Mezcle la leche, los huevos, el aceite, el azúcar, la sal y la levadura en una jarra o un
recipiente y deje reposar la preparación 5 minutos. Coloque la harina y las semillas de
amapola en el recipiente y mezcle en el nivel 1, agregando gradualmente el líquido.
Luego, aumente la velocidad al nivel 2 y mezcle durante 5 minutos. Retire la masa y
colóquela sobre una super cie enharinada, divídala en 8 a 10 bollos, deles forma de pan
y colóquelos sobre una placa para horno antiadherente. Déjelos en un lugar cálido
hasta que dupliquen su tamaño. Píntelos con un poco de huevo o leche y cocínelos en
un horno a gas precalentado a 220°C (425°F), en nivel 7, durante 20 a 25 minutos, hasta
que se doren y la parte inferior haga un ruido hueco.
Pan con hierbas italiano
Ingredientes:
575 g de harina de trigo con alto contenido en gluten,1 sobre de levadu- ra en polvo
(aprox. 2 cucharaditas y media), 290 ml de agua, 2 cucharadas de aceite de oliva, 2
cucharaditas de azúcar, 2 cucharaditas de sal y 4 cucharadas de mezcla de hierbas
secas.
Preparación:
Mezcle el agua, el aceite, el azúcar, la sal y levadura en una jarra o un recipiente y deje
reposar la preparación 5 minutos. Coloque la harina y las hierbas secas en el recipiente
y mezcle en el nivel 1, agregando gradualmente el líquido. Luego, aumente la velocid-
ad al nivel 2 y mezcle durante 5 minutos.

Coloque la masa en un recipiente, cúbrala y déjela en un lugar cálido hasta que
duplique su tamaño (20 a 30 minutos). Coló- quela sobre una super cie enharinada,
amásela suavemente para quitarle el aire, dele la forma que desee, colóquela sobre
una placa para horno hasta que duplique su tamaño. Hornee en un horno a gas
precalentado a 200°C (400°F), en nivel 6, durante 25 minutos o hasta que se dore y la
parte inferior haga un ruido hueco.
Helado de café y coñac, niveles 5-6
Ingredientes:
3 huevos, 75 g de azúcar glas, 300 ml de nata para cocinar, 2 cucharadas de café en
polvo instantáneo, 300 ml de nata para montar, 2 cucharaditas y media de coñac.
Preparación:
Coloque el azúcar y los huevos en el recipiente y mézclelos en el nivel 6 hasta obtener
una preparación de textura suave. En una cacerola, calien- te la nata para cocinar y el
café hasta que hiervan, y agregue la mezcla de huevo y azúcar. Coloque en un recipi-
ente resistente al calor a baño María y cocine lentamente, revolviendo bien, hasta que
la preparación esté lo su cientemente espesa como para cubrir el dorso de una cucha-
ra. Coloque la preparación en un recipiente y déjela enfriar. Bata la nata para montar
en el nivel 6 hasta que se formen picos suaves y, luego, incorpore a la mezcla fría de
huevo y azúcar, con el coñac. Vierta en un recipiente, cubra la preparación y llévela al
congelador durante 2 horas y media o 3 horas, hasta que esté parcialmente congelada.
Retírela, mézclela bien y vuelva a congelarla hasta obtener la textura deseada.
Merenguitos caseros, nivel 5-6
Ingredientes:
4 claras de huevo, 100 g de azúcar en polvo, 100 g de azúcar glas. Preparación:
Coloque las claras de huevo en el recipiente y procéselas en el nivel 6 hasta obtener
una preparación bastante rme. Agregue la mitad del azúcar y vuelva a mezclar hasta
que la preparación esté suave y se hayan formado picos rmes. Retire el recipiente e
incorpore lentamente el resto de azúcar con una cuchara metálica. Forre la bandeja
para hornear y haga óvalos con la preparación de merengue con la ayuda de una
cuchara o manga pastelera. Espolvoree con el azúcar restante y coloque la bandeja en
el estante inferior de un horno a gas a baja temperatura (120°C/250°F) durante una
hora y media. Deje enfriar sobre una rejilla de alambre. Decore con frutos rojos, choco-
late y crema batida
Limpieza:
-Antes de limpiar el aparato, desenchúfelo.
-No sumerja nunca la carcasa con el motor en agua.
-No utilice objetos a lados ni detergentes abrasivos.
Carcasa del motor
-Sólo debe utilizarse un trapo húmedo para limpiar el exterior de la carcasa.
Recipiente y accesorios
PRECAUSIÓN:
Los componentes NO son aptos para lavavajillas. Si se los expone al calor o a limpi-
adores cáusticos, pueden deformarse o decolorarse.
-Aquellos componentes que están en contacto con alimentos pueden limpiarse con
agua jabonosa.
-Deje secar bien los accesorios antes de volver a colocarlos en el aparato.
-Aplique una pequeña cantidad de aceite vegetal o similar a los ltros una vez que
estén secos.

Política de garantía
En cumplimiento de lo establecido a tal efecto por el Real Decreto Legislativo
03/2014, de 27 de marzo, se pone a disposición de los interesados, accediendo a
www.prixton.com, cuanta información sea necesaria para ejercer los derechos
de desistimiento atendiendo a los supuestos que recoge dicha ley, dando por
cumplidas las exigencias que esta demanda de la parte vendedora en el
contrato de venta.
Declaración UE de Conformidad Simplificada
Por la presente, La Trastienda Digital SL como propietaria de la marca comercial
Prixton, ubicada en Avenida Cervantes 49, módulo 25, Basauri 48970, Bizkaia,
declara que el tipo de equipo radioeléctrico que a continuación se expone:
Es conforme con la Directiva 2014/53/UE del Parlamento Europeo y del consejo
de 16 de abril de 2014.
El texto completo de la declaración UE de conformidad está disponible en la
dirección de Internet siguiente:
www.prixton.com
LA TRASTIENDA DIGITAL
MARCA MODELO DESCRIPCIÓN CATEGORÍA
Prixton KR100W Kitchen+ Home
Eliminación correcta del producto:
No tire el aparato a la basura doméstica.
Deseche el electrodoméstico a través de una empresa de eliminación de residuos
registrada o a través de las instalaciones municipales de elimina- ción de residuos.
Lea las disposiciones vigentes. En caso de duda, consulte con el centro de eliminación
de residuos más cercano.

Instruction manual
EN
Kitchen+ KR100W

Technical data:
Model: KR100W
Rated voltage: 220-240V~, 50/60Hz
Power consumption: 1000W
Protection class: II
Short operation time: 6 Min.
This device has been tested according to all relevant current CE guidelines, such as
electromagnetic compatibility and low voltage directives, and has been constructed in
accordance with the latest safety regulations. Subject to technical changes without
prior notice!
General safety instructions:
Read the operating instructions carefully before putting the appliance into operation
and keep the instructions including the warranty, the receipt and, if possible, the box
with the internal packing. If you give this device to other people, please also pass on
the operating instructions.
- The appliance is designed exclusively for private use and for the envisaged purpose.
designed to be used outdoors). Keep it away from sources of heat, direct sunlight,
humidity (never dip it into any liquid) and sharp edges. Do not use the appliance with
wet hands. If the appliance is humid or wet, unplug it immediately.
- When cleaning or putting it away, switch o the appliance and always pull out the
plug from the socket (pull on the plug, not the cable) if the appliance is not being
used and remove the attached accessories.
- Do not operate the machine without supervision. If you should leave the workplace,
always switch the machine o or remove the plug from the socket (pull the plug itself,
not the lead).
- Check the appliance and the cable for damage on a regular basis. Do not use the
appliance if it is damaged.
- Do not try to repair the appliance on your own. Always contact an autho- rized
technician. To avoid the exposure to danger, always have a faulty cable be replaced
only by the manufacturer, by our customer service or by a quali ed person and with a
cable of the same type.
- Use only original spare parts.
- Pay careful attention to the following “Special Safety Instructions”.
Children and frail individuals:
- In order to ensure your children‘s safety, please keep all packaging (plastic bags,
boxes, polystyrene etc.) out of their reach.
Caution! Do not allow small children to play with the foil as there is a danger of suffo-
cation!
- In order to protect children or frail individuals from the hazards of electrical equip-
ment, please ensure that this device is only used under supervision. This device is not
a toy. Do not allow small children to play with it.
Special safety instructions for this machine:
- Only operate this machine under supervision.
- Do not interfere with any safety switches.
- Do not insert anything into the rotating hooks while the machine is working.
- Place the machine on a smooth, at and stable working surface.
- Do not insert the mains plug of the machine into the power socket without having
installed all the necessary accessories.

1
5
6
7
8
2
3
4
Overview of the components:
1. Output shaft
2. Rise button
3. Speed knob
4. Power Cord
5. Mixing bowl
6. Dough hook
7. Beater
8. Whisk
Using the mixing bowl :
1. Place the mixing bowl into its holding device and turn the bowl until it locks into
place.
2. In order to lift the arm, push the rise button(2) down. The arm will now move
upwards.
3. Mount the required utensil by inserting the top into the output shaft and locking.
4. Now ll in your ingredients.
Do not over ll the machine - the maximum quantity of ingredients is 1.2 kg.
5. Lower the arm using the rise button (2).
6. Insert the mains plug into a properly installed 230 V/50 Hz safety power socket.
7. Switch the machine using the speed button to a speed between 1 and 6 (corre-
sponding to the mixture).
8. For pulse operation (kneading at short intervals), turn the switch to the “PULSE”
position. The switch has to be held in this position according to the desired interval
length. When the switch is released it returns automatically to the “0” position.
9. After kneading/stirring turn the speed knob (3) back to the “0” position as soon as
the mixture has formed a ball. Then remove the mains plug.
10. Press the rise button (2) downwards and the arm will be raised.
11. The mixture can now be released with the help of a spatula and removed from the
mixing bowl.
12. The mixing bowl can now be removed.
13. Clean the parts as described under “Cleaning” .

Levels Use Type of Mixture
1-3 Dough hook
3-4 Beater
5-6 Whisk
Pulse Whisk
Heavy mixtures(e.g. bread or
short pastry)
Medium-heavy mixtures(e.g.
crepes or sponge mixture)
Light mixtures (e.g. cream, egg
white, blancmange)
Interval (e.g. for mixing under
sponge, egg white)
Adjusting the levels and using the hook for not more than 1.2 kg of mixture
Note:
Short operation time: With heavy mixtures, do not operate the machine for more
than six minutes, and then allow it to cool down for a further ten minutes.
Suggested recipes:
Sponge Mixture (Basic Recipe), Level 1-4
Ingredients:
200grams soft butter or margarine, 200grams sugar, 1 packet vanilla sugar or 1 bag
Citro-Back, 1 pinch of salt, 4 eggs, 400grams wheat our, 1 packet baking powder,
approx. 1/8 litre milk.
Preparation:
Transfer the wheat our and the remaining ingredients to the mixing bowl, stir with the
beater for 30 seconds on level 1, then for approximately 3 minutes on level 2. Grease a
tin or cover with baking paper. Fill in the mixture and bake. Before the cake is removed
from the oven, test to see if it is done. With a sharp wooden stick pierce the centre of
the cake. If no mixture sticks to it, the cake is cooked. Turn the cake on to a cake grid
and allow to cool.
Traditional Oven
Insertion height: 2
Heating: electric oven, top and bottom heat 175-200° Celsius; gas oven: level 2-3
Baking time: 50-60 minutes
Depending on taste, this recipe can be changed, for example with 100g raisins or 100g
nuts or 100g grated chocolate. In fact, the possibilities are endless.

Linseed Bread Rolls, Level 1-4
Ingredients:
500-550g wheat our, 50g linseed, 3/8 litre water, 1 cube of yeast (40g), 100g low-fat
curds, well drained, 1 tsp salt. For coating: 2 tbsp of water.
Preparation:
Soak the linseed in 1/8 litre of lukewarm water. Transfer the remaining lukewarm water
(1/4 litre) into the mixing bowl, crumble in the yeast, add the curds and mix with the
dough hook on level 2. The yeast must be completely dissolved. Put the our with the
soaked linseed and the salt into the mixing bowl. Knead thoroughly on level 1, then
switch to level 3 and continue kneading for 3-5 minutes. Cover the mixture and allow
to rise in a warm place for 45-60 minutes. Knead thoroughly once more,
remove from the bowl and form sixteen rolls. Cover the baking tin with wet baking
paper. Place the rolls on this and allow to rise for 15 minutes. Coat with lukewarm water
and bake.
Traditional Oven:
Insertion height: 2
Heating: electric oven: top and bottom heat 200-220°C (preheated for 5 minutes),gas
oven level 2-3
Baking time: 30-40 minutes
Chocolate Cream, Level 5-6
Ingredients:
200ml sweet cream, 150g semi-bitter chocolate coating, 3 eggs, 50-60g sugar, 1 pinch
of salt, 1 packet of vanilla sugar, 1 tablespoon cognac or rum, chocolate akes.
Preparation:
Beat the cream in the mixing bowl with the whisk until sti . Remove from the bowl and
place somewhere to cool. Melt the chocolate coating in accordance with the instruc-
tions on the packet or in the microwave at 600W for 3 minutes. In the meantime, beat
the eggs, sugar, vanilla sugar, cognac or rum and salt in the mixing bowl with the
whisk on speed 2 to form a foam. Add the melted chocolate and stir in evenly on speed
5-6. Leave a little of the cream for decoration. Add the remaining cream to the creamy
mixture and stir in brie y using the pulse function. Decorate the chocolate cream and
serve well cooled.
Pizza dough, Level 1-4
Ingredients
400g plain our, 250ml warm water, 1/2 tsp sugar, 1sacher active dried yeast (about 2-1/2
tsp), 1-1/2 tsp olive oil and 1 tsp salt.
Preparation:
Put the our in the bowl. Mix the remaining ingredients in a bowl or jug. Run the mixer
at speed 1-2, and gradually add the liquid. As the ingre- dients incorporate, and the
dough ball becomes more formed, increase the speed to 3-4. Knead for a couple of
minutes on this speed, till the dough ball is smooth. Remove from the bowl and split
into 2-4 pieces.
Roll into pizza bases (circles or rectangles) on a oured surface, then lay them on a
baking sheet or pizza tray. Spread the pizza bases with tomato purée and add
toppings – mushrooms, ham, olives, sun dried tomatoes, spinach, artichoke, etc. Top
with dried herbs, pieces of mozzarella, and a drizzle of olive oil. Bake in a preheated
oven at 200°C/400°F/gas 6 for 15-20 minutes, till the toppings are bubbling and golden
brown.

Basic White Bread, Level 3-6
Ingredients:
600g strong white bread our 1 sachet active dried yeast (about 2 tsp) 345ml warm
water 1 tbsp sun ower oil or butter 1 tsp sugar 2 tsp salt Preparation:
Use the mixing instructions for pizza dough, then put the dough in a bowl, cover and
leave in a warm place till it’s doubled in size (30-40 minutes). Remove the dough and
punch down to remove air. Knead lightly on a oured board, shape it into a loaf, or put
it in a tin, cover, and leave in a warm place to rise for another 30 minutes. Bake in a
preheated oven at 200°C/400°F/gas 6 for 25-30 minutes, till golden brown and hollow
sounding on the bottom.
Soft Poppy Seed Rolls , Level 1-3
Ingredients:
570g strong white bread our 1 sachet active dried yeast (about 2 tsp) 300ml milk
(warmed slightly) 2 eggs (room temperature) 1 tbsp sun ower oil 1 tsp sugar 2 tsp salt
75g poppy seeds
Preparation:
Mix the milk, eggs, oil, sugar, salt and yeast in a jug or bowl, and leave for 5 minutes.
Put the our and poppy seeds in the bowl, and mix at speed 1, gradually adding the
liquid, then increase the speed to 2, and mix for ve minutes. Remove the dough to a
oured surface, cut into 8-10 pieces, roll into shape, then put on a greaseproof baking
sheet. Leave in a warm place till doubled in size. Brush with a little egg or milk, and
bake in a preheated oven at 220°C/425°F/gas 7 for 20-25 minutes, till golden brown and
hollow sounding on the base.
Italian Herb Bread
Ingredients:
tbsp olive oil, 2 tsp sugar 2 tsp salt, 4 tbsp mixed dried herbs
Preparation:
Mix the water, oil, sugar, salt and yeast in a jug or bowl, and leave for 5 minutes. Put the
our and dried herbs in the bowl, and mix at speed 1, gradually adding the liquid, then
increase the speed to 2, and mix for 5 minutes. Put the dough in a bowl, cover and
leave in a warm place till doubled in size (20-30 minutes). Put on a oured surface,
knead gently to knock out the air, then shape, put on a baking sheet, and leave in the
warm till doubled in size. Bake in a preheated oven at 200°C/400°F/gas 6 for 25
minutes or till golden brown and hollow sounding on the bottom.
Coffee & Brandy Ice Cream, Level 5-6
Ingredients:
3 eggs 75g caster sugar, 300ml single cream 2 tbsp instant co ee powder, 300ml
Preparation:
Add the sugar and eggs to the bowl and process at speed 6 till smooth in texture. In a
saucepan, bring the single cream and co ee just to the boil and stir in the egg and
sugar mixture. Put in a heatproof bowl over a simmering pan of water and cook gently,
stirring well, till thick enough to coat the back of a spoon. Strain into a bowl and leave
to cool. Whip the double cream at speed 6 till soft peaks form, then fold into the cold
egg and
sugar mixture, with the brandy. Pour into a container, cover, and freeze for 2-3 hours,
till partially frozen. Remove, stir well and then freeze again, till the desired texture is
achieved.

Warranty policy
This product is guaranteed for 2 years from the date of purchase. When you
have a problem that you can not solve, you must access the web www.prix-
ton.com and click on the contact option to send us your assistance form.
Basic Meringues, Level 5-6
Ingredients:
4 egg whites, 100g caster sugar, 100g icing sugar Combine Preparation:
Put the egg whites in the bowl and process at speed 6 till fairly sti . Add half the sugar
and whisk again till the mixture is smooth, and sti peaks have formed. Remove the
bowl, and lightly fold in the remaining sugar with a metal spoon. Line a baking sheet
and spoon or pipe the meringue mixture into ovals. Sprinkle with the remaining sugar
A and put on the lowest shelf of a cool oven (120°C/250°F/ gas ) for 1 hours. Cool on
a wire rack. Top with soft fruits, chocolate, and sweetened cream.
Cleaning:
- Before cleaning remove the mains lead from the socket. - Never immerse the hous-
ing with motor in water!
- Do not use any sharp or abrasive detergents.
Motor Housing
- Only a damp rinsing cloth should be used to clean the outside of the housing.
Mixing Bowl, Mixing Equipment
Caution:
- The components are not suitable for cleaning in a dishwasher. If expo- sed to heat or
caustic cleaners they might become misshapen or disco- lored.
- Components that have come into contact with food can be cleaned in soapy water.
- Allow the parts to dry thoroughly before reassembling the device.
- Please apply a small quantity of vegetable oil likely to the screens after they have
dried.
Disposal :
Do not dispose of the device in normal domestic waste.
Dispose of the device over a registered waste disposal rm or through your communal
waste disposal facility.
Observe the currently valid regulations. In case of doubt, consult your waste disposal
facility.

Simplified eu declaration of conformity
We, La Trastienda Digital located in Avenida Cervantes 49, módulo 25, Basauri
48970, Bizkaia hereby declare that the following goods, imported and selling at
European market:
Are in compliance with the EC Council Directive of 2014/53/EU (EM DIRECTIVE)
and harmonized standards and with the board of the 16th of April 2014.
The complete text of the UE Declaration of conformity is available anytime at
this website address:
www.prixton.com
LA TRASTIENDA DIGITAL
Prixton KR100W Kitchen+ Home
BRAND MODEL NAME DESCRIPTION CATEGORY

Manuel d’instructions
FR
Kitchen+ KR100W

Technical data:
Modèle: KR100W
Tension : 220-240V~, 50/60Hz
Consommation : 1000W
Classe de protection : II
Temps de fonctionnement court : 6 min.
Cet appareil a été testé en conformité avec toutes les directives européennes en
vigueur, telles que les directives sur la compatibilité électromagnétique et la basse
tension, et a été fabriqué conformément aux normes de sécurité les plus récentes.
Instructions générales de sécurité :
Lisez attentivement le manuel d'utilisation avant d'utiliser l'appareil et conservez les
instructions, la garantie, le reçu et, si possible, la boîte avec l'emballage à l'intérieur. Si
vous donnez cet appareil à une autre personne, veuillez également lui remettre le
manuel d'utilisation.
prévue. Il n'est pas adapté à un usage commercial. Ne l'utilisez pas à l'extérieur (sauf
s'il est conçu pour être utilisé à l'extérieur). Tenez-le à l'écart des sources de chaleur, de
la lumière directe du soleil et de l'humidité (ne l'immergez pas dans un liquide).
N'utilisez pas l'appareil avec les mains mouillées. Si l'appareil est mouillé ou humide,
éteignez-le immédiatement.
- Pour nettoyer ou ranger l'appareil, ainsi que lorsqu'il n'est pas utilisé, éteignez-le,
débranchez-le (en tirant sur la prise et non sur le câble) et retirez les accessoires.
- Ne laissez pas le mixeur en marche sans surveillance. Si vous devez quitter le lieu de
travail, éteignez l'appareil ou débranchez-le (en tirant sur la prise, pas sur le câble).
dommage, ne l'utilisez pas.
- N'essayez pas de le réparer vous-même. Contactez toujours un technicien autorisé.
Pour éviter toute exposition au danger, demandez le remplacement des câbles
défectueux uniquement au fabricant, par l'intermédiaire de notre service clientèle, ou
- N'utilisez que des pièces de rechange d'origine.
- Veuillez lire attentivement et respecter les "consignes de sécurité spéciales" suivant-
es.
Enfants et personnes vulnérables:
- Pour assurer la sécurité des enfants, rangez tous les emballages (sacs plastiques,
boîtes, polystyrène, etc.) hors de leur portée.
Attention : Ne permettez pas aux jeunes enfants de jouer avec l'emballage plastique,
car il y a danger d'étouffement.
- Pour protéger les enfants ou les personnes vulnérables contre les dangers des
appareils électriques, veillez à ce qu'ils n'utilisent pas cet appareil sans surveillance. Ce
n'est pas un jouet. Ne laissez pas les enfants jouer avec.
Instructions spéciales de sécurité pour ce produit:
- N'utilisez cet appareil que sous surveillance.
- N'obstruez les interrupteurs de sécurité.
- N'insérez aucun objet dans les accessoires lorsque l'appareil est en fonctionnement.
- Placez l'appareil sur une surface de travail lisse, plane et stable.
- Placez tous les accessoires nécessaires avant de brancher l'appareil.

1
5
6
7
8
2
3
4
Vue d’ensemble des composants:
1. Axe du batteur
2. Bouton d’inclinaison
3. Molette de sélection de vitesse
4. Câble d’alimentation
5. Récipient
6. Crochet de pétrissage
7. Feuille ou palette
8. Fouet
Utilisation du récipient mélangeur:
1. Placez le récipient sur son socle et faites-le tourner jusqu’à ce qu’il s’emboîte.
2. Pour relever le bras de l’appareil, appuyez sur le bouton de relevage (2). Le bras
remonte.
3. Placez les accessoires requis en insérant la partie supérieure dans l’axe du batteur
jusqu’à ce qu’ils soient verrouillés en place.
4. Ajoutez les ingrédients.
Ne surchargez pas l’appareil. La quantité maximale d’ingrédients est de 1,2 kg.
5. Abaissez le bras en appuyant sur le bouton de relevage (2).
6. Branchez l’appareil sur une prise secteur de 230 V/50 Hz correctement installée.
7. Réglez la vitesse de l’appareil avec la molette de sélection de vitesse, puis choisissez
le niveau de 1 à 6 (en fonction de la préparation). Pour utiliser la fonction Pulse (com-
mande manuelle), placez l'interrupteur sur la position « PUSH ». L'interrupteur doit être
maintenu dans cette position pour que l'appareil fonctionne. Lorsque vous relâchez
l’interrupteur, il revient automatiquement sur la position « 0 ».
8. L'interrupteur doit être maintenu dans cette position pour que l'appareil fonctionne.
Lorsque l'interrupteur est relâché, il revient automatiquement en position « 0 ».
9. Après pétrissage/battage et une fois la pâte formée, repositionnez la molette de
sélection de vitesse (3) sur la position « 0 ». Débranchez ensuite le batteur.
10. Appuyez sur le bouton de relevage (2) pour lever le bras de l’appareil.
11. Vous pouvez alors décoller la préparation à l'aide d'une spatule et la retirer du
récipient.
12. Retirez ensuite le récipient et nettoyez les pièces.

Niveaux Utilisation Type de préparation
1-3 Crochet de pétrissage
3-4 Feuille
5-6 Fouet
Pulse Fouet
Préparations compactes (par
exemple : pain ou pâte brisée)
Préparations semi-compactes
(par exemple : pâte à crêpe ou
pâte à pizza)
Préparations légères (par
exemple : crème, blancs d’œufs,
crème chantilly)
Préparations nécessitant un
battage par intervalle (par
exemple : pour les pâtes à pizza,
les blancs d’œufs)
Réglage des niveaux et utilisation des accessoires de pétrissa- ge de préparations
de moins d’1.2 kg
Remarque :
Durée d’utilisation courte Si la préparation est compacte, ne faites pas fonctionner le
batteur pendant plus de 6 minutes et laissez-le refroidir pendant 10 minutes après
utilisation.
Recettes suggérées :
Gâteau (recette de base), niveau 1-4
Ingrédients :
200 g de beurre pommade ou de margarine, 200 g de sucre, 1 cuillère à soupe d'extrait
de vanille ou de zeste de citron râpé, 1 pincée de sel, 4 œufs, 400 g de farine de blé, 1
sachet de levure chimique, environ 125 ml de lait
Préparation :
Versez la farine de blé et les autres ingrédients dans le récipient, mélangez avec le
mixeur pendant 30 secondes au niveau 1, puis pendant environ 3 minutes au niveau 2.
Beurrez un moule ou recouvrez-le de papier sulfurisé. Versez la préparation et
centre du gâteau avec une pique à brochette. Si la préparation n'adhère pas, le gâteau
est prêt. Placez le gâteau sur une grille et laissez-le refroidir.
Four traditionnel. Hauteur d'insertion : 2.
Cuisson : au four électrique, chaleur supérieure et inférieure de 175 à 200°C ; au four à
gaz : niveau 2 ou 3
Temps de cuisson : 50 à 60 minutes.
Il est possible d'adapter cette recette en fonction de ses goûts, par exemple en
ajoutant 100 g de raisins secs, de noix ou de pépites de chocolat. En fait, les possibilités
Table of contents
Languages:
Popular Mixer manuals by other brands

Berkel
Berkel PM60 Specifications
Farberware
Farberware SM3481RBR manual
Cleveland
Cleveland MKET-12-T Operator's manual
Extron electronics
Extron electronics MVC 121 user guide
Hans Grohe
Hans Grohe Ecostat Comfort HQ Instructions for use/assembly instructions
Nostalgia Electrics
Nostalgia Electrics DMB-790 instructions

