PRIXTON Century User manual
TOCADISCOS RECORD PLAYER
CENTURY

ES
INSTRUCCIONES DE SEGURIDAD GENERALES
Las precauciones de seguridad que se adjuntan reducen el
riesgo de incendios, descargas eléctricas y lesiones si se respetan correctamente.
• Para evitar el contacto con los componentes de alto voltaje del interior, no intente abrir
el equipo.
• Antes de instalar este equipo, asegúrese de que el voltaje de su toma de corriente se
corresponde con el indicado en la etiqueta de características del aparato.
• Cuando conecte el equipo, alinee el enchufe correctamente e introdúzcalo por completo
para evitar descargas eléctricas.
• Utilice el equipo solo con el cable y el enchufe suministrados, y no sobrecargue la toma
de corriente.
• Si el cable de alimentación está dañado, no utilice el equipo. Para evitar posibles
peligros, la sustitución del cable deberá llevarla a cabo el fabricante o personal cualificado
similar. Póngase en contacto con la línea de asistencia posventa para obtener
asesoramiento.
• No repare el aparato usted mismo. Encargue el mantenimiento a personal cualificado.
Póngase en contacto con la línea de asistencia posventa para obtener asesoramiento.
• Desenchufe la unidad de la toma de corriente después de su uso para evitar posibles
daños si se producen tormentas eléctricas, o cuando el equipo vaya a estar desatendido o
sin usar durante un periodo prolongado.
• Deberá supervisar a los niños pequeños para asegurarse de que no jueguen con el
equipo. Si los niños utilizan un aparato o se usa cerca de ellos, siempre deben
supervisarse atentamente.
• Desenchufe la unidad de la toma de corriente antes de limpiarla. Limpie la unidad
únicamente con un paño seco y limpio. No utilice limpiadores líquidos o en aerosol.
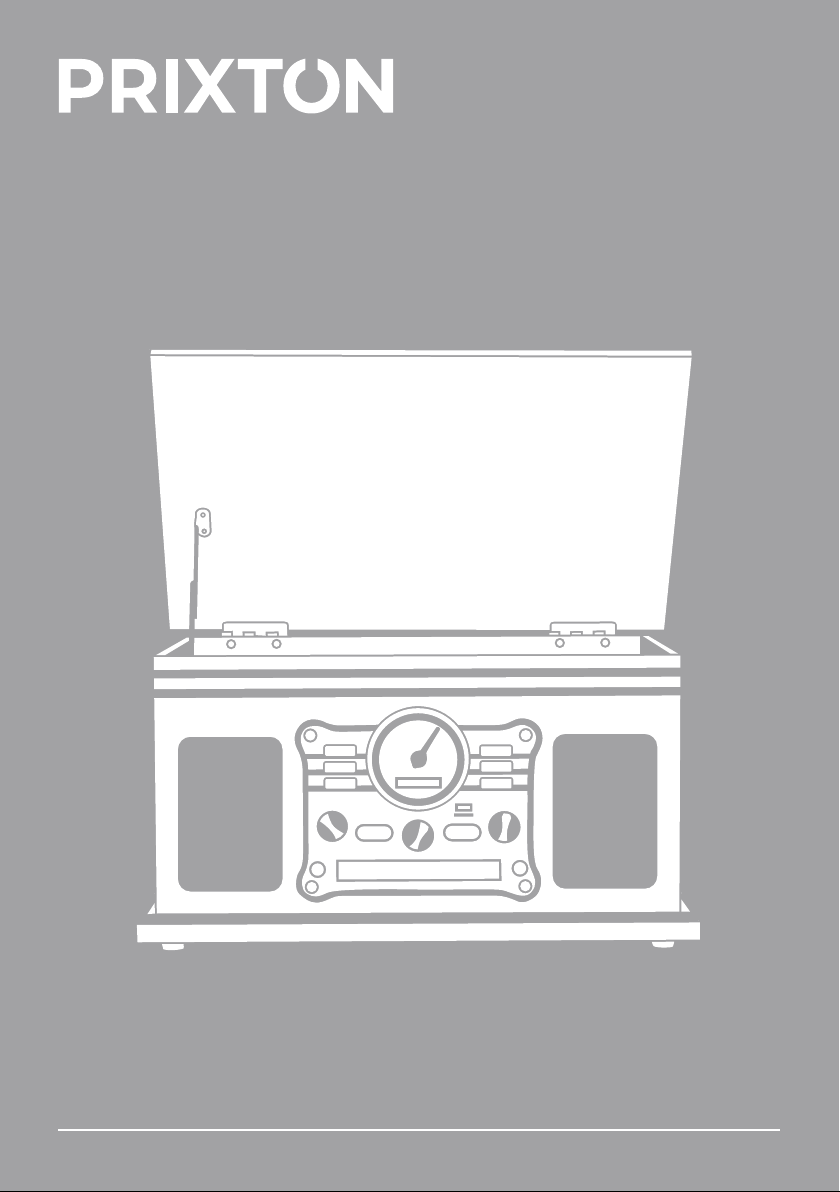
INSTRUCCIONES DEL PRODUCTO
2

(1). Cubierta para el polvo
(2). Barra de soporte
(3). Altavoces
(4). Panel de control
(5). Bandeja de casete y botón de funcionamiento: expulsar/adelantar el casete.
(6). Adaptador 45 RMP
(7). Elevador del brazo
(8). Interruptor de velocidad 33/45/78
(9). Interruptor de parada automática ON/OFF
(10). Bloqueo del brazo de tono
(11). Brazo de tono
(12). Cartucho
(13). Plato giratorio
(14). Bisagras
(15). Antena FM
(16). Salida RCA
(17). Cable de alimentación de CA
3

1- Panel de visualización.
2- Tecla de pausa y reproducción (pulsación corta para pausar/reproducir música en el
modo CD/USB/TF/BT; pulsación larga durante 6 segundos para emparejar el dispositivo
Bluetooth).
3- Siguiente canción o avance rápido (pulsación corta para seleccionar la siguiente
canción en el modo CD/BT/USB/TF; pulsación larga para adelantar la canción en el modo
CD).
4- Canción anterior o retroceso rápido (pulsación corta para seleccionar la canción anterior
en el modo CD/BT/USB/TF; pulsación larga para retroceder la canción en el modo CD).
5- Pantalla LED digital.
6- Ranura USB.
7- Ranura para tarjetas TF.
8- Botón OPEN/CLOSE para abrir/cerrar la bandeja del CD en el modo CD.
9- Mando de volumen.
10- Tomas AUX-IN de 3,5 mm y de auriculares.
11- Mando de sintonización: sintonización de la emisora de radio en el modo RADIO.
12- Bandeja de discos compactos.
13- Tecla de selección de banda FM/AM en el modo RADIO.
14- Tecla POWER de encendido/apagado.
15- Mando de cambio de función (girar el botón para seleccionar el modo
PHONO/CD/TAPE/AUX/RADIO).
16- Tecla de repetición/programación (Pulsación corta para cambiar la repetición
individual/repetición de carpeta/repetición de CD entero bajo el modo CD/USB/TF)
17- Grabar/borrar (pulsación corta para iniciar la grabación desde
CD/PHONO/RADIO/BT/TAPE/AUX; pulsación larga durante 2 segundos para borrar la
música actual de USB/TF).
18- Tecla de selección del modo STOP/USB/TF/BT (pulsación corta para detener la
reproducción en el modo CD/USB/TF; pulsación corta para detener la grabación cuando
se graba música; pulsación larga para seleccionar el modo USB/TF/BT/CD).
Funcionamiento
CONEXIÓN A LA ALIMENTACIÓN: enchufe el tocadiscos y asegúrese de que el voltaje
de su toma de corriente se corresponde con el indicado en la etiqueta de características
del aparato. (Nota: desenchufe la clavija de alimentación de CA si no se utiliza durante
mucho tiempo).
ENCENDIDO: encienda con la tecla POWER de encendido/apagado y ajuste el
volumen a un nivel apropiado con el mando de volumen.
MODO FONÓGRAFO: Gire el mando de función a la posición PHONO.
INSERTE EL DISCO DE VINILO (no incluido): saque el disco de vinilo de su caja con
cuidado y colóquelo en el plato giratorio.
SELECCIÓN DE VELOCIDAD: seleccione la velocidad entre 33, 45 y 78 rpm mediante el
interruptor de velocidad en función de la velocidad del disco de vinilo. Cuando reproduzca
un disco de vinilo de 45 rpm, utilice el adaptador de 45 RMP incluido.
MOVIMIENTO DE LA AGUJA: Quite el protector de la aguja, desbloquee el brazo de
tono y levántelo por el elevador de brazo, mueva lenta y suavemente la aguja sobre el
disco y póngala en la parte más externa o en la posición deseada del disco de vinilo.
BAJADA DE LA AGUJA: use la palanca del elevador y baje el brazo de tono lentamente
hasta la parte más externa o en la posición deseada del disco de vinilo.
DISFRUTE DE LA MÚSICA: una vez completados los pasos anteriores, el disco de vinilo
reproducirá música. (El tocadiscos se detendrá automáticamente si el interruptor de
parada automática está en la posición ON cuando la aguja haya llegado al final del disco
de vinilo. Si el interruptor está en la posición OFF entonces seguirá girando hasta que se
mueva el brazo de tono).
FINALIZAR: cuando haya terminado, levante el brazo de tono y vuelva a colocarlo en su
sitio, bloquéelo, coloque el protector de la aguja y apague el dispositivo con el botón
POWER.
4

Conexión a un sistema de sonido externo
Conecte un cable de audio RCA (no suministrado) a las tomas AUDIO LINE OUT de la
parte trasera del tocadiscos. Conecte el otro extremo del cable a una ENTRADA DE
AUDIO del amplificador.
Enchufe rojo en la salida del canal R.
Enchufe blanco en la salida del canal L.
Reproducción de CD/MP3
Gire el mando de función a la posición CD hasta que aparezca «CD» en la pantalla.
Pulse brevemente el botón OPEN/CLOSE para abrir la bandeja, entonces aparecerá
«OP» en la pantalla. Coloque un disco en la bandeja correctamente. (Nota: no coloque
más de un disco en la bandeja a la vez y no fuerce la bandeja con la mano cuando se esté
abriendo o cerrando. El disco debe colocarse en el centro de la bandeja. Si el disco no está
bien colocado, es posible que no se pueda sacar el disco una vez que se haya cerrado).
Pulse brevemente el botón OPEN/CLOSE para cerrar la bandeja, entonces aparecerá
«CL» en la pantalla. A continuación, el sistema leerá el índice e iniciará la reproducción en
secuencia de forma automática.La pantalla mostrará el progreso actual de la reproduc-
ción. (Nota: si no se carga ningún disco, aparecerá «NO» en la pantalla; si el disco no se
reconoce, aparecerá «ERR» en la pantalla).
Pulse el botón PLAY/PAUSE [▶ǁ] durante la reproducción para detenerla en la posición
actual. Para reanudar la reproducción, pulse el botón PLAY/PAUSE [▶ǁ] de nuevo.
Pulse el botón STOP [ ] durante la reproducción y el dispositivo dejará de reproducir.
Pulse el botón PLAY/PAUSE [▶ǁ] de nuevo para reiniciarla reproducción desde la primera
pista.
Durante la reproducción de CD, pulse brevemente la tecla SIGUIENTE [ ] para
seleccionar y reproducir la siguiente canción; pulse y mantenga pulsada la tecla SIGUI-
ENTE [ ] para adelantar la canción actual.
Durante la reproducción de MP3, pulse y mantenga pulsada la tecla SIGUIENTE [ ]
durante 2 segundos para seleccionar y reproducir la siguiente carpeta.
Durante la reproducción de CD, pulse brevemente la tecla ANTERIOR [ ] para
seleccionar y reproducir la canción anterior; mantenga pulsada la tecla ANTERIOR [ ]
para retroceder rápidamente la canción actual.
Durante la reproducción de MP3, pulse y mantenga pulsada la tecla ANTERIOR [ ]
durante 2 segundos para seleccionar y reproducir la carpeta anterior.
Durante la reproducción del CD, pulse la tecla REP dos veces para repetir la reproduc-
ción de la canción actual, la pantalla alternará la visualización de 2 segundos "ONE" y
mostrará el tiempo de la pista actual. Pulse brevemente la tecla REP para repetir la
reproducción de todas las canciones, la pantalla alternará la visualización de 2 segundos
"ALL" y mostrará el tiempo de la pista actual.
Durante la reproducción de MP3, pulse brevemente la tecla REP para repetir la
reproducción de la carpeta, la pantalla mostrará alternativamente durante 2 segundos
"FOLD" y mostrará el tiempo de la pista actual.
5

Reproducción de un programa
Bajo el modo CD en parada, ajuste la reproducción de programa basándose en los
siguientes pasos si nunca se ha ajustado antes.
Pulse brevemente la tecla PROG hasta que P 01 parpadee en la pantalla.
Pulse la tecla NEXT [ ] o PREVIOUS[ ] para seleccionar su número de pista favorito
como primera canción programada y pulse PROG para confirmar.
Siga el mismo paso para ajustar la segunda y más canciones programadas hasta que
aparezca P X2/3/4... en la pantalla. (Nota: El número máximo de programas de reproduc-
ción es de 20 canciones)
Pulse el botón PLAY/PAUSE [▶II] para iniciar la reproducción de las canciones del
programa en secuencia automáticamente después de terminar el ajuste.
Pulse el botón PLAY/PAUSE [▶II] para reproducir o pausar la canción actual.
Pulse la tecla NEXT [ ] o PREVIOUS[ ] para cambiar las canciones durante la reproduc-
ción.
Salir de la reproducción del programa
Pulse el botón STOP [ ] durante la reproducción y el dispositivo dejará de reproducir.
Pulse el botón STOP [ ] de nuevo, el dispositivo saldrá de la reproducción del
programa.
Borrar la configuración de la reproducción del programa
Pulse brevemente el botón OPEN/CLOSE para abrir la bandeja de CD.
Pulse brevemente la tecla POWER de encendido/apagado para apagar el dispositivo.
Función USB/TF
Turn the Function switch knob to the CD position, long press mode switch key [ /USB/T-
F/BT] to select USB/TF mode.
Insert your USB disk or TF card until “USB” or “TF” appear on the screen, USB or TF music
will begin automatically.
USB disk or TF card on device but under the other modes, long press mode switch key [
/USB/TF/BT] 2 seconds to select USB or TF mode.
Long press and hold 2 seconds DEL key and short press again to delete the current
USB/TF music.
Grabación en USB/TF
El dispositivo puede grabar directamente desde un disco de vinilo/casete/CD/BT/AUX y
convertir las canciones a formato digital mediante USB o tarjeta TF.
Inserte el disco USB o la tarjeta TF.
Entre en el modo PHONO/Casete/CD/BT/AUX y reproduzca la música que desee
grabar. (Nota: asegúrese de que el cable AUX no está conectado cuando quiera grabar
música desde un casete).
Press the stop button [ ] to stop the record, END will appear on the screen. The
music will save on USB disk or TF card.
Press the stop button [ ] until “ONE” appear on the screen and press this button
again to stop the record under the CD mode.
Función Bluetooth
Gire el mando de función a la posición CD.
Pulse prolongadamente la tecla de cambio de modo [ /USB/TF/BT] para seleccionar
el modo BT hasta que el icono « » se ilumine y «BT» parpadee en la pantalla.
Asegúrese de que el dispositivo Bluetooth disponible esté en «modo de empareja-
miento». Seleccione y haga clic en el nombre correcto de Bluetooth para conectarse.
You will be heard the Connected once connect successful. Then the music can be
playback via Bluetooth.
6

Por la presente, La Trastienda Digital SL como propietaria de la marca comercial Prixton,
ubicada en Avenida Cervantes 49, módulo 25, Basauri 48970, Bizkaia, declara que el tipo
de equipo radioeléctrico que a continuación se expone:
Es conforme con la Directiva 2014/53/UE del Parlamento Europeo y del consejo de 16 de
abril de 2014.
El texto completo de la declaración UE de conformidad está disponible en la dirección de
Internet siguiente:
www.prixton.com LA TRASTIENDA DIGITAL
Declaración UE De Conformidad Simplificada
MARCA MODELO DESCRIPCIÓN CATEGORÍA
Prixton CENTURY Tocadiscos Audio
Política de garantía
En cumplimiento de lo establecido a tal efecto por el Real Decreto Legislativo 03/2014, de
27 de marzo, se pone a disposición de los interesados, accediendo a www.prixton.com,
cuanta información sea necesaria para ejercer los derechos de desistimiento atendiendo a
los supuestos que recoge dicha ley, dando por cumplidas las exigencias que esta
demanda de la parte vendedora en el contrato de venta.
Las características técnicas y eléctricas que aquí se brindan corresponden a unidades
típicas y podrían cambiarse sin previo aviso con el fin de proveer un mejor equipo.
Volver a conectarse a un dispositivo Bluetooth disponible
El dispositivo Bluetooth conectado se conectará automáticamente cuando vuelva a la
zona de conexión en el modo BT.
Pulse prolongadamente el botón PLAY/PAUSE [▶ǁ] durante 6 segundos para
desconectar el dispositivo Bluetooth conectado. Pulse prolongadamente el botón
PLAY/PAUSE [▶ǁ] durante 6 segundos de nuevo, se conectará de nuevo si no se actualiza
el emparejamiento.
Función Casete/AUX-IN
Gire el mando de función a la posición TAPE/AUX.
Inserte el casete en la ranura de casete correctamente.
Empuje el casete ligeramente, se deslizará en su lugar y comenzará la reproducción
automáticamente.
Push the [Cassette eject/ Fast forward] button will fast forward the cassette.To resume
normal playback, push the button again.
Pulse el botón [expulsar/adelantar el casete] hasta el fondo, la reproducción se
detendrá y el casete se expulsará.
Inserte un extremo del cable AUX-IN de 3,5 mm (no suministrado) en la toma AUX-IN
de 3,5 mm del panel frontal del dispositivo y el otro extremo en su dispositivo de audio
disponible (como: reproductor de CD, tableta, reproductor de MP3, etc.).
Nota: la reproducción del casete se detendrá cuando el cable AUX-IN se inserte en el
dispositivo.
Función de auriculares
Conecte su clavija de auriculares de 3,5 mm a la toma de auriculares.
7

GENERAL SAFETY INSTRUCTIONS
Read this manual thoroughly before first use and keep it in a safe place for future
reference, along with the completed warranty card, purchase receipt and carton. The
safety precautions enclosed herein reduce the risk of fire, electric shock and injury when
correctly adhered to.
Electrical safety and cord handling
• To prevent contact with high voltage components inside, do not attempt to open the
equipment.
• Before installing this equipment, make sure your outlet voltage corresponds to the
voltage stated on the appliance rating label.
• When connecting the equipment, align the plug properly and insert it fully to prevent
electric shock.
• Only use this equipment with the cord and plug supplied, and do not overload the
power outlet.
• If the power cord is damaged, do not use the equipment. The cord must be replaced by
the manufacturer or similarly qualified personnel to avoid a hazard. Contact the
after-sales support line for advice.
Usage conditions and restrictions
To reduce the risk of fire or electric shock, do not expose this equipment, the cord or plug
to rain or moisture; do not use it anywhere near water or where water splashes or drips;
do not touch the plug with wet hands. In the event of water or other liquids entering the
device, unplug it immediately and clean and dry it as best as possible. Then have it
checked for damage by a qualified technician, or contact the after-sales support line.
• Do not repair the unit yourself. Only have it serviced by qualified personnel. Contact the
after-sales support line for advice.
• Unplug the unit from the power outlet after use to avoid possible damage during
electrical storms, or when the equipment will be unattended or unused for an extended
period.
• Do not let the cord hang over the edge of a table or counter, or touch any hot surface. Do
not allow anything to rest on or roll over the power cord, and run any cords so that no one
steps on or trips over them.
• Do not run the cord near heat-producing appliances such as radiators, stoves or irons.
Excessive heat could melt insulation and expose live wires.
• Always grasp the plug, not the cord, when disconnecting the unit. Pulling the cord can
damage the internal wires and may cause a fire.
• Avoid placing the unit in direct sunlight or close to any sources of heat. Also avoid
locations subject to vibrations and excessive dust, heat, cold or moisture.
• Do not install the unit in an inclined position. It is designed to be operated in a horizontal
position only.
• Openings on the cabinet are provided for ventilation and to protect the unit from
overheating. To ensure proper operation, do not cover them with things such as
newspapers, tablecloths, curtains etc.
• Do not place heavy objects on top of the equipment or step on it.
• Do not place objects filled with water (such as vases) or any naked flame sources (such
as lit candles, incense sticks or cigarettes) on top of the unit.
• The equipment is not intended for use by persons (including children) with reduced
physical, sensory or mental capabilities, or lack of experience and knowledge, unless they
have been given supervision or instruction concerning use of the equipment by a person
responsible for their safety.
EN
8

• Young children should be supervised to ensure they do not play with the equipment.
Close supervision is always necessary when an appliance is used by or near children.
• Unplug the unit from the power outlet before cleaning. Clean the unit only with a dry,
clean cloth. Do not use liquid or aerosol cleaners.
• During playback, the disc rotates at high speeds. Do not move or lift the unit during
playback as this may damage the unit and the disc.
• When moving the unit to a different location or packing the unit away, be sure to
remove the record or disc. Moving the unit with a disc or record inside may cause damage
to the unit.
• We assume no liability for any damage caused by noncompliance with these
instructions or any other improper use or mishandling of the Equipment.
PRODUCT INSTRUCTION
9

(1). Dust Cover
(2). Support frame
(3). Speakers
(4). Control panel
(5). Cassette tray and operation button: Eject/Fast Forward cassette.
(6). 45 RMP adaptor
(7). Arm lifter
(8). 33/45/78 Speed switch
(9). Auto stop ON/OFF switch
(10). Tone arm lock
(11). Tone arm
(12). Cartridge
(13). Turntable platter
(14). Hinges
(15). FM Antenna
(16). RCA output
(17). AC Power Cable
1-Display Panel
2-Pause and Play switch key (Short press Pause/Play music under the CD/USB/TF/BT
mode; Long press and hold 6 seconds to pair the Bluetooth device)
3-Next music or Fast forward (Short press to select next song under the CD/BT/USB/TF
mode; Long press for fast forward song under the CD mode)
4-Previous song or Fast reverse (Short press to select previous song under the
CD/BT/USB/TF mode; Long press for fast reverse song under the CD mode)
5-Digital LED display
6-USB slot
7-TF card slot
8-OPEN/CLOSE CD Tray under the CD mode
9-Volume knob
10-3.5mm AUX-IN and earphone jacks
11-Tuning knob: Tuning the radio station under the Radio mode
12-Compact Disc Tray
13-FM/AM band selection key under the RADIO mode.
14-Power ON/OFF key
15-Function switch knob (Rotate the knob to select Phono/CD/TAPE/AUX/RADIO mode)
10

16-Repeat/Program key (Short press to switch the single repeat/ folder repeat/ entire CD
repeat under the CD/USB/TF mode)
17-Record/Delete (Short press start recording from CD/Phono/Radio/BT/TAPE/AUX; Long
press and hold 2 second to delete the current USB/TF music)
18-Stop/USB/TF/BT mode selection key (Short press to stop playback under the
CD/USB/TF mode; Short press to stop the record when record the music, Long press to
select USB/TF/BT/CD mode)
Operation
SET-UP: Place your record player in a secure location where it will be protected from
the elements or possible falls.
POWER CONNECTION: Plug in the record player and make sure your outlet voltage
corresponds to the voltage stated on the appliance rating label. (Remark: Please unplug
the AC power supply plug If it is not used for a long time.)
TURN ON: Turn on the Power ON/OFF key and adjust the volume to an appropriate
level by Volume knob.
PHONO MODE: Turn the Function switch knob to the PHONO position.
INSERT THE VINYL RECORD (Not include): Carefully remove the vinyl record from its
case and place the record on the turntable plate.
SPEED SELECTION: Select the speed between 33, 45 and 78 rpm through speed
switch according to the speed of vinyl record. When playing a 45 RPM vinyl record, use
the included 45 RMP adaptor.
MOVE THE NEEDLE: Take off the protector of needle, release the tone arm lock and lift
up the tone arm by arm lifter, slowly and gently move the needle over the record, put it
on the outermost part or the desired position of the vinyl record.
DROP THE NEEDLE: Use the lifter lever put down Tone Arm slowly on the outermost
part or desired position on the vinyl record.
ENJOY YOUR MUSIC: Once above steps are completed, then the vinyl record will play
music. (the turntable will stop automatically if the auto-stop switch is in the ON position
when the needle has reached the end of the vinyl record . If the switch is in the OFF
position then it will keep revolving until the tone arm is moved.)
FINISHING UP: Lift up the tone arm and put it back and lock it once finished, put on
the protector of needle, turn off the Power Switch.
Connecting to an external sound system
Connect an RCA audio cable (not supplied) to the AUDIO LINE OUT sockets on the rear of
the turntable.
Connect the other end of the cable to an AUDIO INPUT on the amplifier.
Red plug into R channel output.
White plug into L channel output.
CD/MP3 Playback
Turn the Function switch knob to the CD position until “CD” appears on the screen.
Short press OPEN/CLOSE button to open the tray, then “OP” will appears on the
screen. Place a disc on the tray correctly. (Remark: Do not place more than one disc in the
tray at a time and do not force the tray by hand when it is opening and closing. The disc
must be placed in the centre of the disc tray. If the disc is not properly inserted, it may not
be possible to get the disc out once it has closed. )
Short press OPEN/CLOSE button to close the tray, the “CL” will appears on the screen.
After that the system will read TOC and start playback in sequence automatically.The
screen will display current playing progress.(Remark: No disc load, then “NO” will appear
on the screen; Unrecognized disks will appear “ERR” on the screen).
Press the PLAY/PAUSE button [▶ǁ]during playback, the playback will stop at the
current position. To resume playback, press the PLAY/PAUSE button [▶ǁ] again.
Press the Stop button [ ]during playback, the device will stop to playback. Press the
PLAY/PAUSE button [▶ǁ] again, it will restart playing from the first track.
11

While CD playback, short press NEXT key [ ] to select and play next song; Press and
hold down NEXT key [ ] for fast forward the current song.
Press the PLAY/PAUSE button [▶ǁ]during playback, the playback will stop at the
current position. To resume playback, press the PLAY/PAUSE button [▶ǁ] again.
Press the Stop button [ ]during playback, the device will stop to playback. Press the
PLAY/PAUSE button [▶ǁ] again, it will restart playing from the first track.
While CD playback, short press NEXT key [ ] to select and play next song; Press and
hold down NEXT key [ ] for fast forward the current song.
While MP3 playback, press and hold NEXT key [ ] 2 seconds for select and play next
folder.
While CD playback, short press PREVIOUS key[ ] to select and play previous song;
Press and hold down PREVIOUS key [ ] for fast reverse the current song.
While MP3 playback, press and hold PREVIOUS key [ ] 2 seconds for select and play
previous folder.
While CD playback, Press REP key twice to repeat playback current song, the screen
will alternate display 2 seconds“ONE” and will display the time of current track. Short
press REP key again to repeat playback all songs, the screen will alternate display 2
seconds “ALL” and will display for the time of current track.
While MP3 playback, short press REP key to repeat playback folder, the screen will
alternate display 2 seconds“FOLD” and will display for the time of current track.
Program Playback
Under the CD mode in stop, setting the program playback based on below steps if never
setting before.
Short press the PROG key until P 01 flashing on the screen.
Press NEXT key [ ] or PREVIOUS key[ ] to select your favorite track number as the
first programs song and press PROG to confirm.
Use the same step to set second and more programs songs until P X2/3/4... appear on
screen. (Remark: The maximum number of programs playback setting is 20 songs)
Press the PLAY/PAUSE button [▶ǁ] to start playback program songs in sequence
automatically after finished setting.
Press the PLAY/PAUSE button [▶ǁ] to play or pause the current song.
Press NEXT key [ ] or PREVIOUS key[ ] to switch the songs during playback.
Exit Program Playback
Press the Stop button [ ]during playback, the device will stop to playback.
Press the Stop button [ ] again, the device exit the program playback.
Clear Program Playback Settings
Short press OPEN/CLOSE button to open the CD tray.
Short press Power ON/OFF key to turn off the device.
12

USB/TF function
Turn the Function switch knob to the CD position, long press mode switch key [ /USB/T-
F/BT] to select USB/TF mode.
Insert your USB disk or TF card until “USB” or “TF” appear on the screen, USB or TF music
will begin automatically.
USB disk or TF card on device but under the other modes, long press mode switch key [
/USB/ TF/BT] 2 seconds to select USB or TF mode.
Long press and hold 2 seconds DEL key and short press again to delete the current
USB/TF music.
USB/TF recording
The device can directly record from Vinyl record/Cassette/CD/BT/AUX and convert songs to
digital format by USB or TF card.
Insert the USB disk or TF card.
Enter into PHONO/Cassette/CD/BT/AUX mode and play the music you want to record.
(Remark: Please make sure the AUX cable not connect when you want to record the
music from Cassette)
Press the REC key until “REC” appear on the screen. The record start while the “REC” is
flashing after several seconds.
Press the stop button [ ] to stop the record, END will appear on the screen. The music
will save on USB disk or TF card.
Press the stop button [ ] until “ONE” appear on the screen and press this button again
to stop the record under the CD mode.
Bluetooth function
Turn the Function switch knob to the CD position.
Long press mode switch key [ /USB/TF/BT] to select BT mode until “ ” icon light up
and “BT” is flashing on the screen.
Make sure the available Bluetooth device into “pairing mode”. Choose and click the
correct Bluetooth name to connect.
You will be heard the Connected once connect successful. Then the music can be
playback via Bluetooth.
Connect back to the available Bluetooth device
The connected Bluetooth device will connect back automatically when you back to the
workable area under the BT mode.
Long press the PLAY/PAUSE button [▶ǁ] 6 seconds the current connected Bluetooth
device will disconnect. Long press the PLAY/PAUSE button [▶ǁ] 6 seconds again, it will
connect back if no pairing update.
FM/AM function
Turn the Function knob to the RADIO position.
Toggle [FM/AM] wave changing switch to select FM or AM radio.
Left/ Right rotate the TUNING knob to tune the radio station.
Extend and move the FM antenna to obtain the best reception.
Turn the Function knob to AUX/TAPE position
Insert the cassette into the cassette slot correctly
Push the cassette slightly, it will slide into place and begin playback automatically.
Push the [Cassette eject/ Fast forward] button will fast forward the cassette.To resume
normal playback, push the button again.
13

Warranty policy
This product complies with the warranty law in force in the country of purchase. When
you have a problem that you can not solve, you must access the web www.prixton.com
and click on the contact option to send us your assistance form.
We, La Trastienda Digital located in Avenida Cervantes 49, módulo 25, Basauri 48970,
Bizkaia hereby declare that the following goods, imported and selling at European
market:
Simplified EU Declaration Of Conformity
Are in compliance with the EC Council Directive of 2014/53/EU (EM DIRECTIVE) and
harmonized standards and with the board of the 16th of April 2014.
The complete text of the UE Declaration of conformity is available anytime at this website
address:
www.prixton.com LA TRASTIENDA DIGITAL
BRAND MODEL NAME DESCRIPTION CATEGORY
Prixton CENTURY Record Player Audio
These technical and electrical specifications are those of typical units and may be
changed without prior notice in order to provide improved equipment.
Push the [Cassette eject/ Fast forward] button to the bottom, playback will stop and the cassette will
eject.
Insert one end of the 3.5mm AUX-IN cable (not supplied) into the 3.5mm AUX-IN Jack on the front
panel of the device and the other end to insert your audio available device’s (Such as: CD player, Tablet,
MP3 player etc.)
Remark: Cassette playback will stop when AUX-IN cable insert the device.
Headphone function
Plug in your 3.5mm headphone jack to the headphone socket.
MAINTENANCE
REPLACING THE STYLUS NEEDLE
Push back the arm lock to release the tone arm.
Unclip and remove the stylus needle from the cartridge then replace with a new one.
INSTALLING A NEW STYLUS CARTRIDGE
Note: Please exercise extreme care whilst performing this operation so as to avoid the tone arm and
audio line wires from any damage.
Gently unclip the cartridge from the tone arm.
Gently pull out the audio wires attached to the cartridge.
Replace with a new cartridge, please ensure audio wires are fitted securely then clip back on to the
tone arm.
NOTES
We advise you to clean your records with an anti-static cloth to gain maximum enjoyment from them
and to make them last.
We would also point out that for the same reason your stylus should be replaced periodically
(approximately every 250 hours) Dust the stylus from time to time using a very soft brush dipped in
alcohol. (Brushing from back to front of the cartridge)
WHEN TRANSPORTING YOUR RECORD PLAYER DO NOT FORGET TO
Replace the protective cap on the stylus.
Put the rest clip into the pick-up arm.
14

FR
INSTRUCTIONS D’UTILISATION
15

(1). Capot anti-poussière
(2). Tige de maintien
(3). Haut-parleurs
(4). Panneau de commande
(5). Lecteur de cassette et touches : éjection/avance de la cassette.
(6). Adaptateur pour 45 tours
(7). Lève-bras
(8). Bouton de vitesse de lecture (33/45/78 tours)
(9). Bouton d’arrêt automatique (ON/OFF)
(10). Système de verrouillage de la cellule
(11). Cellule
(12). Tête de lecture
(13). Plateau tournant
(14). Charnières
(15). Antenne FM
(16). Sortie RCA
(17). Câble d’alimentation CA
1- Panneau d’affichage.
2- Touche de pause et de lecture (appui bref pour mettre en pause/lire de la musique en
mode CD/USB/TF/BT ; appui long pendant 6 secondes pour apparier l'appareil Bluetooth).
3- Titre suivant ou avance rapide (appui bref pour sélectionner le titre suivant en mode
CD/BT/USB/TF ; appui long pour faire avancer le titre en mode CD).
4- Titre précédent ou retour rapide (appui bref pour sélectionner le titre précédent en
mode CD/BT/USB/TF ; appui long pour revenir en arrière en mode CD).
5- Écran numérique à LED.
6- Port USB.
7- Port pour cartes TF.
8- Bouton D’OUVERTURE/DE FERMETURE du lecteur de CD en mode CD.
9- Bouton de volume.
10- Prise AUX-IN de 3,5 mm et prise casque.
11- Bouton de syntonisation : syntonisation du tuner radio en mode RADIO.
12- Lecteur de CD.
13-Bouton de sélection de bande FM/AM en mode RADIO.
14-Bouton « POWER » de marche/arrêt.
16

15-Bouton de changement de fonction (tourner le bouton pour sélectionner le mode
PHONO/CD/TAPE/AUX/RADIO).
16-Touche Répétition/Programme (Une pression courte permet de passer de la répétition
d'un seul disque à la répétition d'un dossier ou à la répétition de tout le CD en mode
CD/USB/TF).
17-Touche « REC/DEL » d’enregistrement/de suppression (appui bref pour lancer
l’enregistrement à partir de CD/PHONO/RADIO/BT/TAPE/AUX ; appui long pendant 2
secondes pour effacer la musique du périphérique USB/de la carte TF).
18-Touche de sélection de mode STOP/USB/TF/BT (appui bref pour arrêter la lecture en
mode CD/USB/TF ; appui bref pour arrêter l’enregistrement de musique ; appui long pour
sélectionner le mode USB/TF/BT/CD).
Fonctionnement
RACCORDEMENT DE L’ALIMENTATION : brancher la platine et vérifier que la tension
de la prise de courant correspond à celle indiquée sur l'étiquette de caractéristiques de
l'appareil. (Remarque : débrancher la fiche d’alimentation en courant alternatif en cas
d’inutilisation prolongée de la platine).
MISE EN MARCHE : allumer la platine en appuyant sur la touche « POWER » et régler le
volume sur le niveau souhaité à l’aide du bouton de volume.
MODE PHONO : Placer le bouton de fonction en position « PHONO ».
MISE EN PLACE DU VINYLE (non fourni) : sortir soigneusement le vinyle de sa pochette
et le poser sur le plateau tournant.
SÉLECTION DE LA VITESSE : sélectionner la vitesse de lecture (33, 45 ou 78 tr/min) à
l’aide du commutateur de vitesse. En cas de lecture d'un 45 tours, utiliser l'adaptateur
pour 45 tours inclus.
DÉPLACEMENT DE L'AIGUILLE : retirer la protection de l’aiguille, déverrouiller la cellule
et la soulever à l’aide du lève-bras, déplacer lentement et délicatement l’aiguille pour
l’amener au-dessus du disque, et la poser sur la partie la plus externe ou à l’emplacement
souhaité sur le vinyle.
DESCENTE DE L'AIGUILLE : utiliser la manette du lève-bras et abaisser lentement la
cellule sur la partie externe du disque ou à l’emplacement souhaité sur le vinyle.
ÉCOUTE DE LA MUSIQUE : une fois les étapes précédentes terminées, le vinyle jouera
de la musique. (La platine s'arrête automatiquement dès que l'aiguille atteint la fin du
vinyle si le bouton d'arrêt automatique a été placé en position « ON ». Si il est en position «
OFF », la platine continuera à tourner jusqu’à ce que la cellule soit déplacée).
FIN DE L'ÉCOUTE : une fois la lecture terminée, soulever la cellule, la remettre dans sa
position d’origine, la verrouiller, remettre la protection de l’aiguille en place, puis éteindre
la platine en appuyant sur la touche « POWER ».
Lecture de CD/MP3
Placer le bouton de fonction en position CD jusqu’à ce que « CD » s’affiche à l’écran.
Appuyer sur la touche « PLAY/PAUSE » [▶ǁ] pendant la lecture pour arrêter la musique
à l’emplacement actuel. Pour rependre la lecture, appuyer à nouveau sur la touche «
PLAY/PAUSE » [▶ǁ].
Fonction USB/TF
Enregistrement en USB/TF
L'appareil peut enregistrer directement à partir d'un disque vinyle, d'une cassette, d'un
CD, d'un BT/AUX et convertir les chansons au format numérique par USB ou carte TF.
Insérez le disque USB ou la carte TF.
Passez en mode PHONO/Cassette/CD/BT/AUX et lisez la musique que vous voulez
enregistrer. (Remarque : Assurez-vous que le câble AUX n'est pas connecté lorsque vous
souhaitez enregistrer de la musique à partir d'une cassette.)
Appuyez sur la touche REC jusqu'à ce que "REC" apparaisse à l'écran. L'enregistrement
commence pendant que le "REC" clignote après quelques secondes.
Appuyez sur la touche stop [ ] pour arrêter l'enregistrement, END apparaîtra à l'écran.
17

Politique de garantie
Ce produit est conforme à la loi sur la garantie en vigueur dans le pays d'achat. Lorsque
vous avez un problème que vous ne pouvez pas résoudre, vous devez accéder au site
www.prixton.com et cliquer sur l`option de contact pour nous envoyer votre formulaire
d`assistance.
Les caractéristiques techniques et électriques ici correspondent à des unités spécifiques
et pourraient être modifiées sans préavis afin d’améliorer le matériel.
La musique sera sauvegardée sur le disque USB ou la carte TF.
Appuyez sur le bouton stop [ ] jusqu'à ce que "ONE" apparaisse à l'écran et appuyez à
nouveau sur ce bouton pour arrêter l'enregistrement en mode CD.
Fonction Bluetooth
Tournez le bouton du commutateur de fonction sur la position CD.
Appuyez longuement sur la touche de commutation de mode [ /USB/TF/BT] pour
sélectionner le mode BT jusqu'à ce que l'icône " " s'allume et que " BT " clignote à
l'écran.
Assurez-vous que le périphérique Bluetooth disponible est en "mode de couplage".
Choisissez et cliquez sur le nom Bluetooth correct pour vous connecter.
Une fois la connexion réussie, vous entendrez le message "Connected". La musique peut
alors être lue via Bluetooth.
Se reconnecter au périphérique Bluetooth disponible
Le périphérique Bluetooth connecté se reconnecte automatiquement lorsque vous
revenez dans la zone utilisable en mode BT.
Appuyez longuement sur le bouton PLAY/PAUSE [▶ǁ] pendant 6 secondes pour
déconnecter l'appareil Bluetooth actuellement connecté. Appuyez longuement sur le
bouton PLAY/PAUSE [▶ǁ] pendant 6 secondes, il se reconnectera s'il n'y a pas de mise à
jour de l'appairage.
Remplacement de la tête de lecture:
Poussez le dispositif de verrouillage pour libérer le bras.
Détachez la tête de lecture de la cartouche, retirez-la, puis remplacez-la par une neuve.
Installation d'une nouvelle cartouche de tête de lecture:
Remarque : Effectuez cette opération avec précaution, de manière à ne pas endommager
le bras ou les câbles audio.
Détachez doucement la cartouche du bras. Tirez doucement les câbles audio rattachés à
la cartouche. Remplacez -la par une cartouche neuve, assurez-vous que les câbles audio
sont solidement fixés, refixez cette dernière sur le bras.
Nous vous conseillons de nettoyer vos disques avec un chiffon antistatique pour profiter
pleinement de la musique et prolonger leur durée de vie.
Nous soulignons également que pour la même raison, la tête de lecture doit être
remplacée de façon périodique (environ 250 heures). Retirez la poussière de la tête de
lecture de temps à autre en utilisant une petite brosse souple trempée dans de l'alcool.
(Vous devez brosser la cartouche d'arrière en avant)
18

Déclaration De Conformité Simplifiée
La Trastienda Digital SL, en tant que propriétaire de la marque Prixton, située dans Avenida
Cervantes 49, módulo 25, Basauri 48970, Bizkaia, déclare que le type d'équipement
radioélectrique indiqué ci-dessous est le suivant :
Est conforme à la directive 2014/53/UE du Parlement européen et du Conseil du 16 avril
2014.
Le texte intégral de la déclaration de conformité de l'UE est disponible sur Internet à
l'adresse suivante :
www.prixton.com
LA TRASTIENDA DIGITAL
MARQUE MODÈLE DESCRIPTION CATÉGORIE
Prixton CENTURY Record Player Audio
19

IT
ISTRUZIONI DEL PRODOTTO
20
Table of contents
Other PRIXTON Turntable manuals


