ro-Bel TX 410 operators guide
U-TX 410OG 9
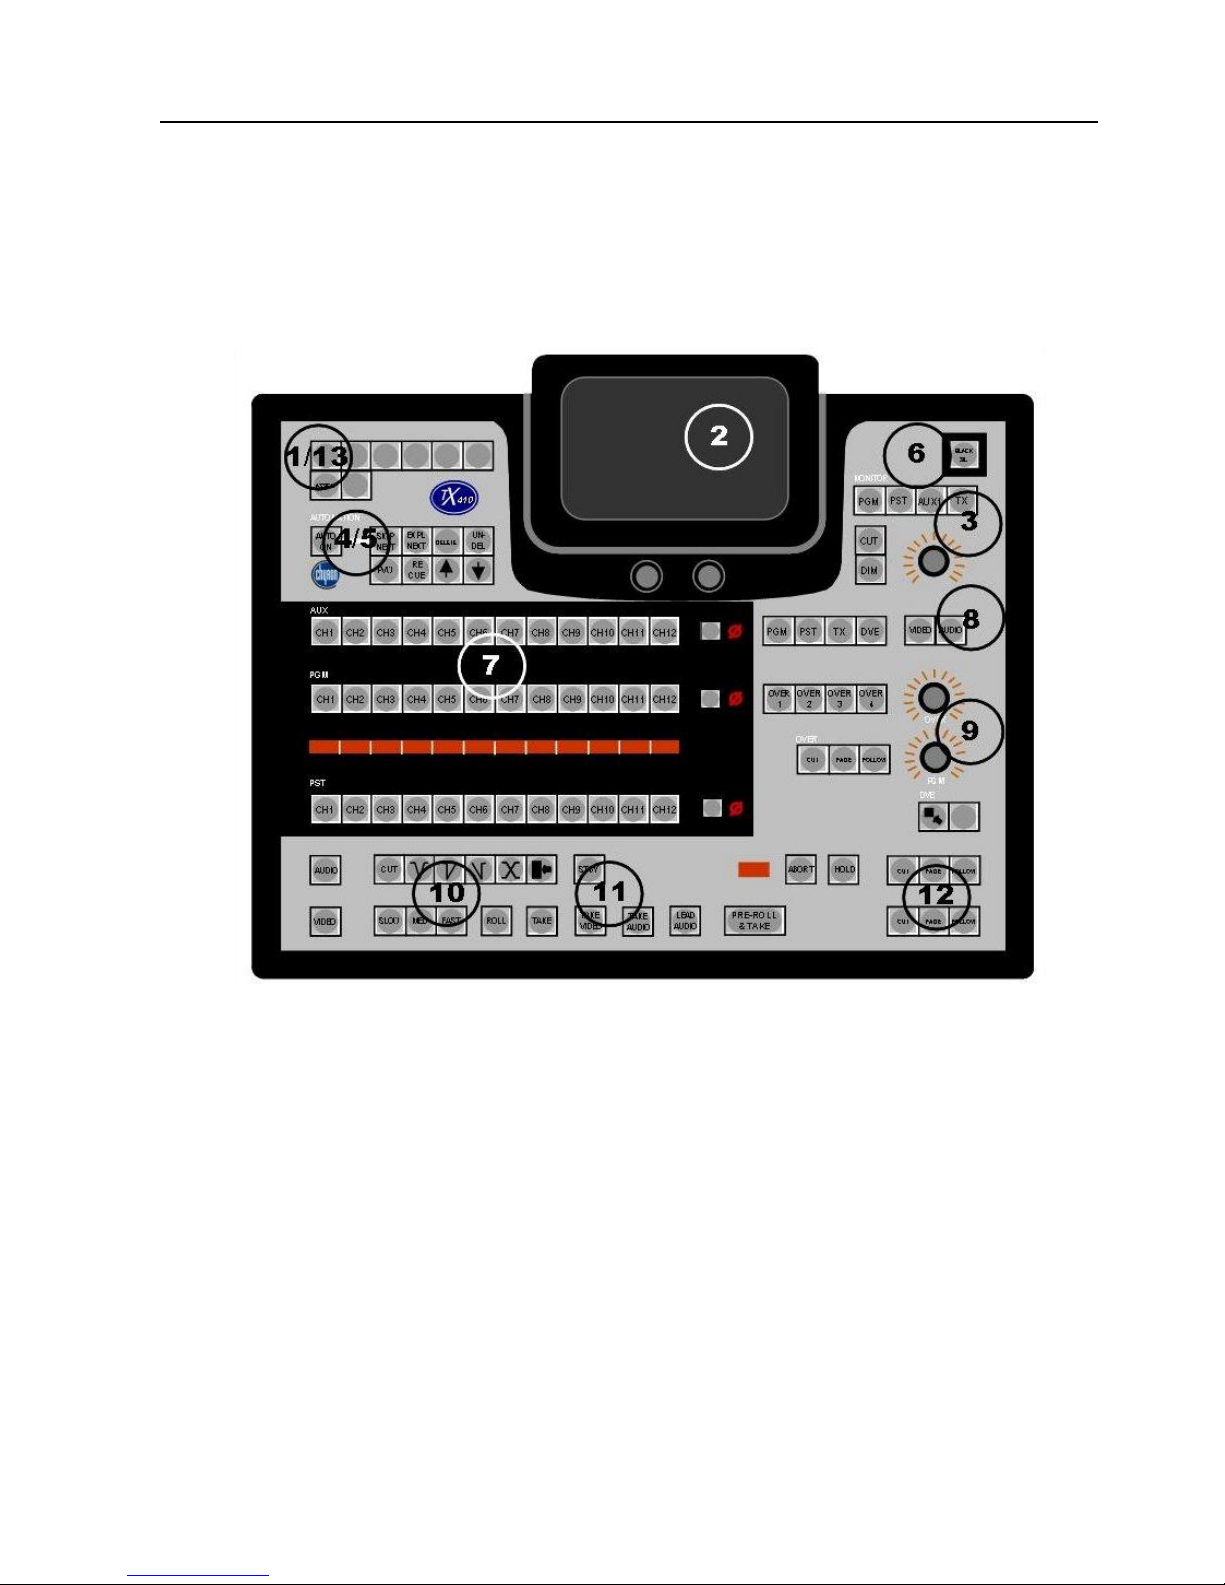
he panel includes:
(1) Bypass switcher control or (13) the buttons for multi-channel
control.
(2) he LCD touchscreen display,
(3) Audio monitoring control.
(4) Machine control or (5) Automation control.
(6) he BLACK/SIL> button, permitting the output to be faded or
cut to black/silence.
(7) Source selection busses - AUX, PGM, and PS - and 4 character
source name displays for all the busses. At the end of each row of
source selection buttons, a single small button is used for
controlling unity audio gain for that bus.
(8) Level select buttons for the auxiliary bus, either VIDEO> or
AUDIO>.
(9) Audio-over control.
(10) Selecting a transition type,
(11) aking sources to air,
(12) Downstream keyers (DSK1 and DSK2) and
(14) DVE controls.
2.2 Source selection busses
here are three source selection busses located in the black background
on the panel, PGM, PS and AUX. he X 410 can have up to 12 primary
sources accessible to each bus, with an additional four sources available
to the auxiliary bus for monitoring independent sources, for example,
DSK and DVE previews and return Air feeds.
he Keys are colour coded, allowing easy recognition of their function.