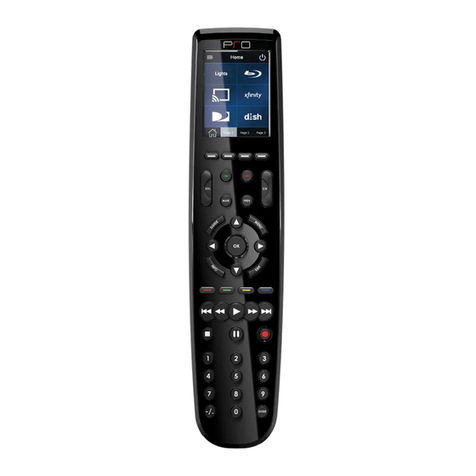
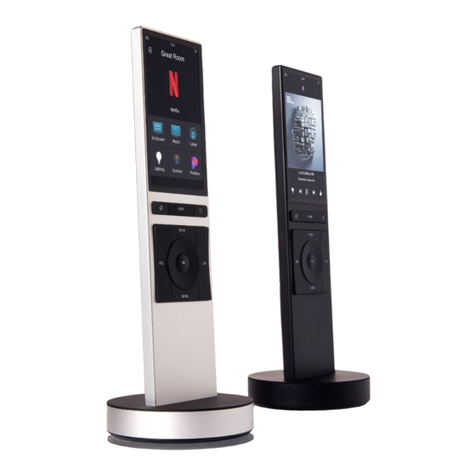
Pro Control iPro.8 User manual

iPro.8®
Quick Reference Guide
Companion Remote Control
Sleek and ergonomic, the IPro.8 is the ideal companion remote for
smart phones and tablets that are using the ProPanel control app.
The IPro.8 comes loaded with the following features:
•433MHz and 2.4GHz Zigbee®RF transmission capability
•Completely customizable and programmable
•Security screw on battery door for hotel applications
Safety Suggestions
Read and Follow Instructions. Read all safety and operating instructions before
operating the unit.
Retain Instructions. Keep the safety and operating instructions for future
reference.
Heed Warnings. Adhere to all warnings on the unit and in the operating
instructions.
Heat. Keep the unit away from heat sources such as radiators, heat registers,
stoves, etc., including ampliers that produce heat.
Power Sources. Use only batteries of the type described in the operating
instructions, or as marked on the unit.
Water and Moisture. Do not use the unit near water—for example, near a sink,
in a wet basement, near a swimming pool, near an open window, etc.
Object and Liquid Entry. Do not allow objects to fall or liquids to be spilled into
the enclosure through openings.
Servicing. Do not attempt any service beyond that described in the operating
instructions. Refer all other service needs to qualied service personnel.
Damage Requiring Service. The unit should be serviced by qualied service
personnel when:
Objects have fallen or liquid has been spilled into the unit.
The unit has been exposed to rain.
The unit does not appear to operate normally or exhibits a marked change
in performance.
The unit has been dropped or the enclosure has been damaged.
Product Contents
Contents within the box include the following items:
•One (1) IPro.8 Remote Control
•Four (4) AAA batteries
•One (1) Security screw removal tool
•Two (2) Button label lens covers (1 black - installed, 1 clear)
•One (1) Sheet of remote ID labels
• One (1) Sheet of button labels
•Three (3) Battery door screws (Tri-head security)
Limited Warranty
Pro Control warrants its products for a period of one (1) year (90 days only for
included battery packs); or for a period of time compliant with local laws when
applicable from the date of purchase from Pro Control or an authorized Pro
Control distributor.
This warranty may be enforced by the original purchaser and subsequent owners
during the warranty period, so long as the original dated sales receipt or other
proof of warranty coverage is presented when warranty service is required.
Except as specied below, this warranty covers all defects in material and
workmanship in this product. The following are not covered by the warranty:
Damage resulting from:
1. Accident, misuse, abuse, or neglect.
2. Failure to follow instructions contained in this Guide.
3. Repair or attempted repair by anyone other than Remote Technologies
Incorporated.
4. Failure to perform recommended periodic maintenance.
5. Causes other than product defects, including lack of skill, competence or
experience of user.
6. Shipment of this product (claims must be made to the carrier).
7. Being altered or which the serial number has been defaced, modied or
removed. 71-500008-21 V1.2
Pro Control is a division of Remote Technologies Inc. For news about
the latest updates, new product information, and new accessories,
please visit our web site at: www.procontrol.com
For general information, you can contact Pro Control at:
Pro Control
5775 12th Ave. East, Suite 180
Shakopee, MN 55379
Tel. (952) 224-5024
Fax (952) 253-3131
Contacting Pro Control
If you are encountering any problems or have a question about your Pro Control
product, please contact Pro Control Technical Support for assistance.
Pro Control provides technical support by telephone, fax or e-mail. For the
highest quality service, please have the following information ready, or provide it
in your fax or e-mail.
• Your Name
• Company Name
• Telephone Number
• E-mail Address
• Product model and serial number (if applicable)
If you are having a problem with hardware, please note the equipment in your
system, a description of the problem, and any troubleshooting you have already
tried.
If you are having a problem with software, please note what version you have
installed, the operating system on your PC, a description of the problem, and
any troubleshooting you have already tried. If you are calling about a software
or programming question or problem, please be at you computer when you place
your call. This will considerably speed up the troubleshooting process.
Please do not return products to Pro Control without return
authorization.
Service & Support
This equipment has been tested and found to comply with the limits for a Class
B digital device, pursuant to Part 15 of the FCC Rules. These limits are designed
to provide reasonable protection against harmful interference in a residential
installation. Any changes or modications not expressly approved by the party
responsible for compliance could void the user’s authority to operate the device.
This equipment generates, uses, and can radiate radio frequency energy and, if
not installed and used in accordance with the instructions, may cause harmful
interference to radio communications. However, there is no guarantee that
interference will not occur in a particular installation.
If this equipment does cause harmful interference to radio or television
reception, which can be determined by turning the equipment off and on, the
user is encouraged to try to correct the interference by one or more of the
following measures:
Reorient or relocate the receiving antenna.
Increase the separation between the equipment and the receiver.
Connect the equipment into an outlet on a circuit different from that to
which the receiver is connected.
Consult the dealer or an experienced radio/TV technician for help.
This device complies with Part 15 of the FCC Rules. Operation is subject to the
following two conditions:
1. This device may not cause harmful interference.
2. This device must accept any interference received including interference
that may cause undesired operation.
N27917
DECLARATION OF CONFORMITY (DOC)
The Declaration of Conformity for this product can be found on the Pro Control
website at: www.procontrol.com/declaration
Contains:
FCC ID: MMUPro Control1500
IC (Canada): 3166A-1500
Federal Communications Commission Notice
iPro.8®Companion Remote Control
Get more control®®
Key Features

iPro.8®Companion Remote Control
Programming the IPro.8
The IPro.8 remote control is programmed using Pro Control’s
Pro Control Studio software. Once you have completed the
programming, Pro Control Studio will generate a unique 10 digit
conguration code that will allow the Pro Control processor to
identify the IPro.8. This code is entered manually into the remote
via a series of button presses on the numeric keypad.
NOTE: This conguration code is based on IPro.8’s programming
functions, RF transmission output type, zone code etc. Therefore
this code may need to be updated in the IPro.8 if any of these
options change.
1) Enter Conguration Mode on IPro.8
The IPro.8 is in conguration mode when the LED status light
(located at the top of the remote) is blinking red and green. The
IPro.8 is automatically in conguration mode the rst time it is
powered-up (when it is in its factory default state). To put the IPro.8
in conguration mode:
• Press and hold the “Power” button (located at the top of the
remote) for 10 seconds until the LED status light blinks red and
green.
2) Get Conguration Code
When you have completed programming the IPro.8, in Pro Control
Studio go to the Download menu to get the IPro.8 Conguration
Code.
3) Enter Conguration Code into IPro.8
a) Press “Enter” button on IPro.8 (LED status light blinking stops)
b) Enter 10 digit code using numeric keypad on IPro.8 (remote
beeps with each press).
c) Press “Enter” button on IPro.8 to nish.
Authorized Pro Control dealers can download Pro Control Studio
software from: www.procontrol.com
Installing Batteries
The IPro.8 uses four (4) AAA batteries and ships without a screw
installed in the battery door. Three optional tri-head security screws
are included for installations such as hotels, to hinder access to the
battery compartment. The included security screw removal tool can
be used to install the security screw.
1 Remove the screw on the battery door (if installed).
2 Remove the battery door from the rear of the remote by applying
pressure near battery door seam and pulling down (pressing
down near seam “unlocks” the door latch).
3Insert the batteries into the battery compartment sleeves so that
the positive (+) and negative (-) ends of the batteries match the
diagrams.
4Slide the battery door onto the remote until it snaps into place.
5Reinstall the battery door security screw using the security screw
tool (optional).
August 13, 2012
Battery Access Door
Rear of IPro.8
Battery Door Screw
• Optional security screw
Rear of IPro.8
1) Push in to release latch
2) Pull down to slide off
Installing Remote ID Label
Located on the backside of the
IPro.8 is an area to label the
zone or room that the remote
will be used in. A sheet of
labels with common locations is
included in the IPro.8 box.
1 Remove the remote label
cover by placing a at head
screwdriver in notch along
edge and prying up.
2 Choose remote ID label from
included sheet and adhere to
remote label area.
3Reinstall remote label cover
by snapping into position.
Battery Door Security Screws
The IPro.8 ships with three (3)
tri-head security screws for
the battery door and a security
screw removal tool. Two of these
extra screws are mounted inside
the battery compartment. Use
the security screw removal tool
(included) to use these screws.
Battery Door Screw
Battery Door
Extra Battery Door
Security Screws (x2)
Top of IPro.8
Remote ID Label
Remote ID
Label Cover
Installing Button Labels
Located on the front of the IPro.8 are eight custom buttons which
can be custom labelled with the function or activity that these
buttons will control. A sheet of labels with common functions/
activities is included in the IPro.8 box.
1 Remove the button label cover by placing a at head screwdriver
in notch along edge and prying up.
2 Choose function/activity labels from included sheet and adhere to
label areas next to each button.
3Install the clear button label cover by snapping into position.
NOTE: If you choose not to label these buttons, use the black
button label cover.
Top of IPro.8
Button Label Area
Button Label Cover
Status LED
• Green indicates
a command
code being
transmitted.
• Red slow blink
indicates that
the battery
power is low.
• Red fast blink
indicates that
battery power is
critically low.
• Red/Green
alternating
blink indicates
the IPro.8 is in
Conguration
Mode.
Custom Buttons
• Allow custom labeling.
Keypad Buttons
• Custom programmed
for commonly used
functions.
Power Button
• Programmed to control
equipment.
• Used to put IPro.8 in
Conguration Mode.
Front of IPro.8
Remote
ID Label
Get more control®
Table of contents
Other Pro Control Remote Control manuals
