manuals.online logo
Brands
  1. Home
  2. •
  3. Brands
  4. •
  5. Fly Sky
  6. •
  7. Remote Control
  8. •
  9. Fly Sky FS-TH9X User manual

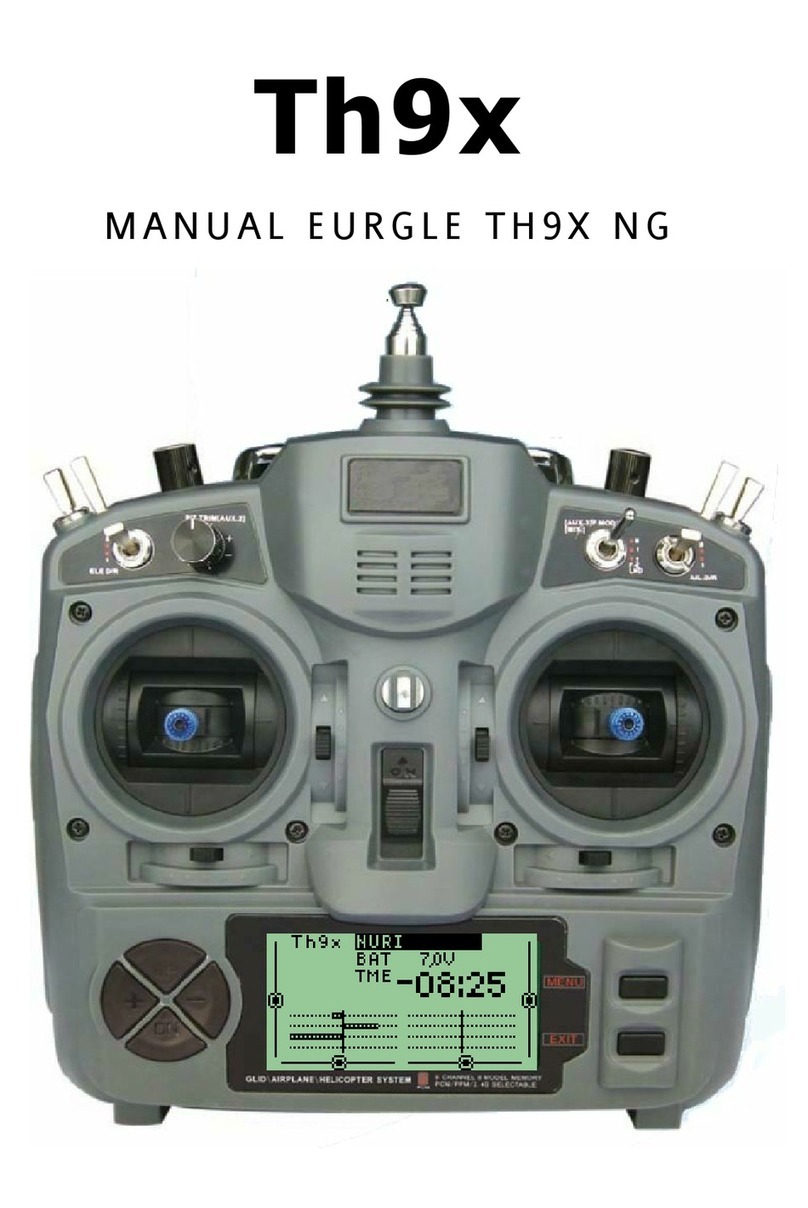
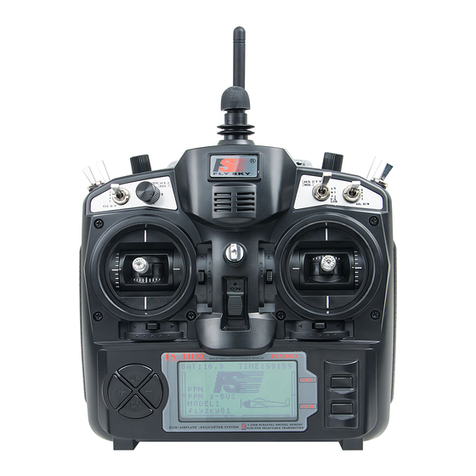
Fly Sky FS-TH9X User manual

INSTRUCTION MANUAL
FS-TH9X
Technical updates available at:
Http://www.flyskychina.com
Entire Contents c Copyright 2007
All manuals and user guides at all-guides.com
all-guides.com
Table of contents
6.1 Display
1.Introduction
2.Service
5.Radio installation
5.1 Receiver and servo connections
5.2 Charging the Ni-Cd batteries
5.3 Range Testing Your R/C System
6.Multi LCD and Programming controls
6.2 Main manu
7.The systematic function for setting
7.1 mode selections
7.2 user name editors
7.3 Type selections
7.4 modulates mode selection
7.5 Stick mode selections
7.6 Mode copy
7.7 Lcd contrast adjust
8.The helicopter basic function for setting
8.1 Reverse setting
8.2 Throttle curve setting
8.3 Pitch curve setting
8.4 Sub-Trim
8.5 End-point
8.6 Throttle Hold
8.7 Auxiliary channal
8.8 Swash setup
8.9 Dual Rate and exponential
8.10 Trim
8.11 Revolution Curve
8.12 Fail safe
8.13 Hover Throttle setup
8.14 Hover Pitch setup
8.15 Trainer setup
8.16 Servo Display
8.17 Timer
8.18 Gyro sence
8.20 Program mixing(1.2.3)
8.19 Stnt.trim
9.The plane basic function for setting
9.1 Reverse setting
9.2 Trainer
9.3 Sub-Trim
9.4 End-point
9.5 Throttle Hold
9.6 Flaperon
9.7 Dual Rate and exponential
9.8 Timer
9.9 Idel down
9.10 Fail safe
9.11 Timer
9.12 Servo Display
9.13 Flap Trim
9.16 ELE.Flap
9.17 V_Tail
9.18 ELEVON
9.19 Snap-roll
9.20 THR.needle Mixing
9.21 PROG.MIX
9.23 THR.delay
9.2 _4 AUX CH
9.22 AILVTAOL
10.The glider basic function for setting
10.1 Reverse setting
10.2 Sub-Trim
10.3 End-point
10.4 Dual Rate and exponential
10.5 Trim
10.6 Fail safe
10.7 Timer
10.8 Flap Trim
10.10 ELE.Flap
10.9 AilDiff
10.11 V_Tail
10.12 PROG.MIX
10.13 Butterfly
10.17 Tranier
10.14 Startofs
10.18 Flaperon
10.15 Speedofs
10.19 Elevon
10.16 Display
10.20 AUX-CH
......2
......2
......3
......5
......7
......7
......8
......8
......10
......10
......10
......11
......11
......12
......12
......14
......14
......15
......15
......16
......16
......17
......17
......18
......18
......19
......19
......20
......20
......21
......21
......22
......22
......23
......23
......24
......24
......25
......26
......28
......28
......29
......29
......30
......30
......31
......31
......32
......32
......33
......33
......34
......34
......35
......35
......36
......36
......37
......37
......38
......38
......40
......40
......41
......42
......42
......43
......43
......44
......44
......45
......45
......46
......46
......47
......47
......48
......50
......52
......49
......51
......50
......52
......51
......53
9.15 AIR BRAKES
3.Meaning of special markings
4.Transmitter controls
......25
FS-TH9X
9.14 AilDiff
All manuals and user guides at all-guides.com
1.Introduction
Suggestion:If,while reading the instructions,you are unclear of so me of the procedures or functions an d
become stuck,continue to r ead on anyway.Often,th e function o r procedure will ge explained again late r in
a different way providing another perspedctive from whic h to understand it.Another suggestion is to
connect the battery,switch and servos to the rece iver and actually operate the radio of y our wordbench
as you make programming changes.Then,you'll b e able to see the effects o f y our programming inputs.
Thank you for purchasing the digital proportional remot control system.If this
your first computer radio.rest assured that it is designed t o m ake initial setup and field-
tuning of y our more accurate than would be i f using a non-computer radio.Although this is a
geginner or sport system with the requirements of those flyers in mind,in order to make the best
use of your FLYSKY FS-TH9X and t o operate it safely,you must carefully read all o f the
instructions.
2.Service
If any difficulties are encountered while setting up or operating your
system,please consult the instruction manual first.For further assistance
you may also refer to yout hobby dealer,or contact the Service
Center at the web site.
Http:\\www.flyskychina.com
FS-TH9X
2
All manuals and user guides at all-guides.com
3.Meaning of special markings
Pay special attention to safety where indicated by the following marks:
DANGER-Procedures which ma y lead to dangerous conditions and cause death/serious injury if
not carried out properly.
WARN ING-Procedures which ma y lead to a dangerous condition or cause death or serious injury
to the user if not carried out properly,or procedures where the probability of superficial injury or
physical dama ge is high.
CAUTIO-proce dures wher e the possi bility of ser ious inj uty to the user is sm al l,but there is a danger
of inj uty ,or physi cal dam age ,if not car ried out proper ly.
Warning:Always keep electrical components away from small children.
=Prohibited =Mandatory
FLYING SAFETY
To ensure the safety of yorself and others,please bserve the following precautions:
Have regular maintenance performed.Although our TH9X super protects the model memories
with non-volatile EEPROM memory(which does not require periodic replacement)and not a
battery, it still should have regular checkups for wear and tear,We recommend sending
your system to the FLYSKY Service Center annually during your non-flying-season for a
complete checkup and service.
NI-Cd Battery
Charge the batteries!(See Charging the Ni-Cd batteries,p.9,for details.)Always recharge
the transmitter and receiver batteries for at least 8 hours before each flying session.A
low battery will soon die,causing loss of control and a crash.When you begin your flying
session,reset your TH9Xsuper's built-in timer,and during the session pay attention to the
duration of usage.
Stop flying long before your batteries become low on charge.Do not rely on yout radio's
low battery warning systems,intended only as a precaution,to tell you when to techarge.
Always check yout transmitter and receiver batteries prior to each flight.
Aways pay particular attention to the flying field's rules,as well as the presence and location of
spectators,the wind direction,and any obstacles on the field.Be very careful flying in areas near
power lines,tall buildings,or communication facilities as there maybe radio interference in theit
vicinity.
Before flying,be sure that the frequency you intend to fly with is not in use ,and secure any frequency
Control device(pin,tag,etc)for that frequency before turning on your transmi tter,It is never possible
to fly two or nore mo dels on the same frequency at the same time .Even though there are different types of
modulation(AM,FM.PCM) only one model ma y be flown on a single frequency at any one time .
To prevent possible damage to your radio gear,turn the power switches on and off in the proper sequence:
1.Pull throttle stick to idle position,or otherwise disarm your motor/engne。
2.Turn on the transmitter power and allow your transmitter to reach its home screen
3.Confirm the proper model memory has been selected
4.Fully extend the transmitter antenna
5.Turn on your receiver power
At the flying field
If you must fly away from a club field,be sure there are no other modelers flying within a three-to-
five-mile range,or you may lose control of your aircraft or cause someone else to lose control.
FS-TH9X
3
All manuals and user guides at all-guides.com
8.Complete a full range check (see p.9)
9.After flying,bring your throttle stick to idle position,engage any kill switches or otherwise disarm
your motor/engine
11.Turn off transmitter power
10.Turn off receiver power.
While you are getting ready to fly,if you place your transmitter on the ground,be sure that the wind
won't tip it over. If it is knocked over,the throttle stick may be accidentally moved,causing the
engine to speed up.Also ,damage to your transmitter may occur
Before taxiing,be sure to extend the transmitter antenna to its full length .
A collapsed antenna woll reduce your flying range and cause a loss of control It is a good idea to avoid
pointing the transmitter antenna directly at the model ,since the signal is weakest in that direction
Don't fly in the rain!Water or moisture may enter the transmitter through the antenna or stick op-
enings and cause erratic operation or loss lf control If you mu st fly in wet weather during a contest ,
be sure to cover your transmi tter with a plastic bag or waterproof barrier.Never fly if lightning is expected
If you do not turn on your system in this order,you may damage your servos or control surfaces,flood
your engine,or in the case of electric-powered or gasoline-powered models,the engine may unesp-
ectedly turn on and cause a severe injury
7.Start your engine
6.Test all controls If aservo operates abnormally,don't attempt to fly until you determine the cause
of fhe problem(For PCM systems only:Test to ensure that the FailSafe settings are correct by waiting
at least2 mi-nutes after adjusting then,turning the transmitter off and confirming the proper
surface/throttle movements,Turn the transmitter back on.)
FS-TH9X
4
All manuals and user guides at all-guides.com
HO V THR
POWER SWITCH
MENU
DOWN
UP
EXIT
EL E D/R AI LE D/R
AIL/THR STICK
PROGRAMMABLE
ST ICK
PIT TRIM
LCD DISPLAY
ANTENNA
HO V PIT
TR N
TH RO CUT
RUDD D/R
F.MOD
GEAR
PROGRAMMABLE
TR IM
PROGRAMMABLE
TR IM
LCD
MENU: The function of the main menu for button
EXIT: Withdraw from the button
UP: The menu is chosen upwards
DOWN: The menu is chosen downwards
+: Increase the value of the parameter
-: Reduce the value of the parameter
Press for short and long
1.Press long: Lasting button is more than 2 seconds
2.Press short: The lasting button does not exceed one second
NOTE:
Transmitter controls
FS-TH9X
5
All manuals and user guides at all-guides.com
all-guides.com
6
NOTE:If you need to remove or replace the transmitter battery,
do not pull on its wires to remove it.Instead,gently pull on
the connector's plastic housing where it plugs into the transmitter.
CAUTION
The module is unremovable which i s fixed to
the product.
RF module
Trainer function
/DSC function connector
Battery cover
Carrying Handle
Stick lever tension adjustment:
You may change the length of the control sticks t o make your transmitter more comfortable t o
hold and operate.To lengthen o r shorten yout transmitter's sticks,first unlock the stick tip
by holding locking screw B and urning stick tip A counterclockwise. Next,move the locking screw
B up o r down(to lengthen or shroten).When the length feels comfortable,lock the position b y
turning locking screw B counterclockwise.
SCREW B STICK TIP A
RUDDER
ELEVATOR
AILERON
Mode 1 transmitter with rear cover removed.
Yo u ma y ad ju st th e te ns io n of yo ut st ic ks
to pr ov id e th e fe el th at yo u pr ef er fo r
fl yi ng .To ad ju st yo ut sp ri ng s ,yo u 'll ha ve
to re mo ve th e re ar ca se of th e tr an sm it te r.
Fi rs t,us in g a sc re wd ri ve r ,re mo ve th e si x
sc re ws th at ho ld th e tr an sm it te r 's re ar
co ve r in jp os it io n ,an d pt th em in a sa fe
pl ac e.Ge nt ly ea se of f th e tr an sm it te r's
re ar co ve r .No w yo u'll se e th e vi ew sh ow n
in th e fi gu re ab ov e.
Using a small phillips screwdriver,rotate
the adjusting screw for each stick for the
desired spring tension.The tension increases
when the adjusting screw in turned clockwise.
When you are satisfied with the spring tensions,
reattach the transmitter's rear cover.Check
that the upper PCB is o n its locating pins,
reinstall the rear cover and tighten the six
screws.
FS-TH9X
All manuals and user guides at all-guides.com
5.Radio installation
Follow these guidelines to properly mount the servos,receiver and battery
lf any servo wires are not long enough to reach the receiver ,servo extension wires (available separately)may be used.
Alw a ys mo u nt th e s er v os wi t h the s u pp l ied r u bbe r g ro m met s .
Do n o t o ve r t igh ten t h e s c r ews . No p a rt o f t he s e rvo c asi n g
sho u ld cont act the mo u nti n g r ail s ,s e rvo tra y o r a n y o the r
parl of the airplane structure.Otherwise,vibration will
be t ra n smi t ted to the se r vo caus ing pre m at u re wear an d /or
ser v o fai l ur
Note the small numbers(1.2.3.4)molded into each arm on
the Futaba 4-arm servo arms.The numbers indicate tow many
degrees each arm is “off”from 90 degrees to correct for
minute manufacturing deviations from servo to servo
To center the servos,c onnect them to the receiver and turn on
the tran s mitter and receiver ,Center the trims on the transm-
itter,th en find the arm that will be perpendi cular to the pushrod
when placed on the servo
After the servos are installed operate each servo over its full travel and check that
the pushrods and servo arms do not bind or contact each other Also make sure the controls
do not require excess force to operate lf there is an objectionable buzzing sound
coming from a servo there is probably too much resistance in the control.Find and
correct the problem Even if there is no servo damage excess battery drain will result
Use the mounting plate from the receiver on/off switch as a template for the cutout
and screw holes Mount the switch on the side of the fuselage opposite the engine exhaust,
and where it won't be inadvertently turned on or off during handling or storage Be
certain the switch moves without restriction and “snaps”from ON to OFF,and that the
cutout allows full motion of the switch in both directions
IMP O RTA N T:N EVE R cu t th e re c eiv e r a nte n na or m orn t it in the mode l f o lde d ba c k o n i t se l f
Doing so will change its electrical length,possibly reducing the distance from the model
can b e c ont r oll ed (“ra n ge”).
The receiver antenna may be mounted inside or outside the model
Make certain the alignment tab on the battery,switch and servo connectors is oriented correctly and “ key” int o
the corresponding notch in the receiver or connectors before plugging them in .when unplugging connectors,never pull
on the wires.Always pull on the plastic connector instead
5.1 Receiver and servo connections
Ch1
Ch1
Ch2
Ch3
Ch4
Ch5
Ch6
Ch7
Ch8
Ch9
BAT
Ch2 Ch3 Ch4 Ch5 Ch6 Ch7 Ch8 Ch9
TO CHARGER JACK
TO BATTERY
FS-RH9X
RECEIVER
POWER SWITCH
FS-TH9X
7
90
NOT 9 0
All manuals and user guides at all-guides.com
5.2 Charging the Ni-Cd batteries
The transmitter and receiver batteries included with you
FS-TH9 X system are rechargeable,Ni-Cd batteries.Ni-Cd
batteries require special care and charging.
NOTE:The batteries are partially charged,but will require
a full, overnight charge before the model may be flown.
1.Connect the transmitter charging cord coming from the
A/C wall charger to the charge jack in the right side of
the transmitter case. The receiver charging cord may be
connected t o the batteries two different ways:The charge
cord may be connected directly t o the battery pack, o r t o
the vacant charge connector(llack)coming from the on/off
switch i n the model.Charging"through the switch"i s preferred
as there w i l l b e no need disconnect th e battery.
2.Plug the A/C wall charger into a wall outlet.Note:If the wall outlet can b e turned
off b y a switch in the romm, be certain the switch remains o n after leaving the room.
Otherwise,the batteries will not b e charged!
3.The LEDs(light-emitting diodes)should light red, indicating that current is flowing
and the batteries are being charged.Discharged batteries will take about 15 hours t o
fully charge.I f using an aftermarket fast charger,be certain to follow the manufacturer's
instructions provided with the charger so you do not overcharge the batteries.NEVER
charge the batteries at a rate higher than 1000mA.The batteries should als o b e discharged
periodically t o periodically to prevent a condition called"memory".If,for example,
only two flights are m o d e each time you g o flying,the batteries will not have"reached
"very far down into their full capacity.After doing this several times the batteries
will"remember"and eventually"think"t h e y can supply only enougt power for two fights.
After t w o flights the batteries may not provide enough power to operate the system,
thus causing a crash.T o erase any potential memory,cycle the batteries b y discharging,
then charging t h em with a commercial battery cycler,o r leave the system on and exercise
the servos by moving the transmitter sticks until t h e even during the winter or periods
of long storage.I f using a cycler with a readout,note the cajpacity after the batteries
have been cycled.I f there is a noticeable drop in capacity the batteries should be
replaced.
NOTE :charging your batteries with the included FLYSKY A/C battery charger is always
safe.However,fast-charging w i t h a n aftermarket charger is acceptable as long as you
know how to properly operate the charger,NEVER charge a t a rate higher than 1000mA.I f
not d o n e correctly,fast-charging can damage the batteries.
Charger
TX :Tr an sm it te r
ch ar gi ng in di ca to r
RX:Receiver charging
indicator
To transmitter
charging jack
Receiver Ni-C d battery
5.3Range Testing Your R/C System
Please note that different systems demonstrate different range checks and the same system will
range check differently in different conditions.Also,the receiver antenna's installation affects
the range test--exiting the top of the model i s ideal.This is a brief explanation of range test.
For more in-depth specifics onreceiver antenna mounting,additional checks if unsatisfactroy rage
is demonstrated,range checking with gasoline powered engines,etc,please see our F.A.Q.page a t
www.flyskychina.com.
.Leave the transmitter's antenna retracted and be sure both batteries are fully charged.
.Plsition the aircraft away from wires,other transmitters,etc.
Test one-engine/motor off,minimum of 100 ft.range:
.Have a friend view the model but not hold it,engine off.(People conduct signals,too!)
.Walk away from the model,working all controls constantly.Stop when the servos jitter
significantly(a jitter here and there is normal),control movement stops(PCM),or you lose
control altogether.
.Measure the distance.If greater t han 1 00 feet,great!Proceed to T est 2.Less t han 100 f eet o f
range check means you ne ed mo re information to determine i f your system is sa fe to fly.Please
see ou t web sit e or call support for additional tests to perform before f lyi ng yo ur system.
.Repeat with friend holding the model.Note any differences.
FS-TH9X
8
All manuals and user guides at all-guides.com
.Repeat the test with the model's engine running and with someone holding the model.If a
decrease of more than 10% i s noted,research and resolve the cause of interference prior to
flying your model.
Test two-engine/motor on:
FS-TH9X
9
All manuals and user guides at all-guides.com
10
Battery voltage
Modulation indicator
(PPM&PCM)
Elevator/Throttle trim
display
Throttle/Elevator trim
display
Rudder trim
display Aileron trim
display
Timers
Model number
and name Model type
6.1 DISPLAY
System setting Function seting
Battery voltage:Battery voltage display (If after the voltage of the battery is lower than 8.5V,Buzzer sends the suggestion sound through
5S once).
Model number and name:User's parameter serial number showing(8groups can choose at most).
Rudder trim display:Rudder trim
Aileron trim display:Aileror trim
Elevator/Throttle trim display:Elevator/Throttle trim
Throttle/Elevator trim display:Throttle/Elevator trim
Timers:Competition count-down(99 minutes and 59 seconds for a long time most).
Model type:Ailplane Helicopter Glider select.
Modulation indicator:pulse position modulation & pulse code modulation select.
6.2 Main menu
System setting:Establish the initializing og the system.
Function setting:The function parameter of the mode type is established.
Press the UP or DOWM key to select the MENU screen.
Press the MENU key into next menu
Press the EXIT key to return last menu
.
The menu acts once and BUZZER sends a sound.
If the parameter transfers after the maximum in themenu,continuing pressing the button,BUZZER will not be pronounced.
NOTE:
6.Multi LCD and Programming controls
Under the state of the initial picture,press MENU key for long,access the main menu.
FS-TH9X
All manuals and user guides at all-guides.com
all-guides.com
11
Press the UP or DOWM key to select
the MODULAT screen.
Under the state of the initial
picture,press MENU key for long,
access the main menu.
Press UP/DOWN key choose MODEL SELE
menu,press MENU key for short into
next submenu.
Press MENU key for short to keep
result and retur n last menu.
press EXIT key for short to not ke e p
and return last menu.
Press the UP or DOWM key to select
the SYSTEM SETTING screen.
Under the state of the initial
picture,press MENU key forlong,
access the main menu.
Pr e s s UP/D O WN key for short and
ch o o s e S YSTEM S E T T I NG menu ,press
ME N U k e y f or short into n e xt submenu.
Press MENU key for short into next
submenu.
Press EXIT Key return last menu.
STEPS:
STEPS:
7.1 MODEL SELE
MODEL SELECT:
This function selects which o f the 8 model memories
in the transmitter to set up or fly.For clarity
the model's name and an image o r its type are
indicated after its mumber.(Each model memory
may b e o f a different model type from the other
memories.)
Press the UP o r DOWM key to select the MODEL
SEL screen.
Press the UP o r DOWM key to select the SYSTEM
SETTING screen.
Press the MENU key to save and return last
menu.
Press the MENU key into next menu.
Press t h e EXIT key to not keep and re-turn last
menu.
Press the EXIT key to return last menu.
7 SYSTEM SETTING
SYSTEM SETTING
SYSTEM SETTING:
COPY:Model copy
STICK SET:Stick mode1-4 selects
MODEUAT:PPM&PCM selects.
TYPE SELE:Model type selects.
MODEL NAME:User name edit
MODEL SELE:This function selects which of the
8 model memories in the transmitter t o set up
or fly.
Press UP/D O W N k ey select the SYSTEM
SETTING menus,and press ME N U k ey
for short into ne x t submenu.
FS-TH9X
All manuals and user guides at all-guides.com
12
NAME EDIT:
The Model Name function i s used to input and
assign the model's name to a specific memory,
allowing easy identification of each model's
program.Each model's name is displayed on the
main screen when that model is selected Up to
eignt characters that include numbers and
letters are available.
Press the UP o r DOW M key to move the cursor t o
the desired character's position.
Press the MENU key save and return last menu.
Press the EXIT key to not keep and return l a s t
menu.
Press the "+"or"-"key to select the desired
character.
Press the MENU key for long time enter.
7.2NAME EDIT
Under the state of the initial
picture,press MENU key forlong,
access the main menu.
Press the UP or DOWM key to move
the cursor to the desired chara-
cter's position.
Press the "+"or"-"key t o select
the desired character.Press the
MENU key for long time enter.
7.3TYPE SELE
Press the UP or DOWM key to select
the TYPE screen.
Under the state of the initial
picture,press MENU key forlong,
access the main menu.
If choo se heli copt er mode , shor t to pres s MENU key en-
ter down the firs t clas s menu , choo se diff eren t conn -
ecti on meth ods of five kind s of the serv er, u.i. .
TYPE:
Sets the type of programming u s e d for this model.
Press the UP o r DOWM key to select the
TYPE screen.
Press the MENU key to save and return
last menu
Press the EXIT key to not keep and re-
turn last menu
Bec aus e ACR O and GLID hav e a kin d of cho ice onl y, so,
pre ss the men u key to sav e and ret urn las t men u .
NOTE:
STEPS:
STEPS:
SYSTEM SETTING
SYSTEM SETTING
Press UP/DOWN key se l e ct the SYSTEM
SETTING menus,and press MENU key
fo r short into next submenu.
Press UP/DOWN key to select the
NAMEEDIT menu,and press MENU key
for short into next submenu.
Press MENU key for short to keep
result and return last menu.
press EXIT key for short to not
keep and treurn to last menu.
Press UP/D O W N k ey select the SYSTEM
SETTING menus,and press ME N U k ey
for short into ne x t submenu.
Press UP/DOWN key to select the
TYPE menu,and press MENU key
for short into next submenu.
Press MENU key for short to keep
result and return last menu.
press EXIT key for short to not
keep and treurn to last menu.
FS-TH9X
All manuals and user guides at all-guides.com
13
Press the UP or DOWM key to select
the HELI screen.
Press UP/DOWN key for short and
select HELI menu,and press MENU
key for short into next menu.
Press the UP o r DOWM key to select the TYPE
screen.
Press the MENU key to save and return last
menu.
Press the EXIT key to not keep and re-turn last
menu.
HELI:
The FS-T H 9 X super radios support 5basic swashplate
setups,including " single servo"(SW1-most helicop-
ters u s e t h i s type)and 4types of CCPM(cycand coll-
ective pitch mixing).
HELI1:Independent aileron,pitch and elevator servos linked to
swashplate.Most kits are HELI1 type.
HELI2:Pushrods positioned as shown.Elevator operates with a
mechanical linkage.W i t h Aileron inputs,the aileron and pitch servos
tilt the swashplate le ft and right;with pitch inputs,the aileron a n d
pitch servos raise th e swashplate up and dow n .
HELI3-1:Pushrods positioned as shown.With Aileron inputs,the
aileron and pitch servos tilt the swashplate left and right;with
Elevator inputs,the three servos t i l t the swashplate fore and
aft;with Pitch inputs,all three servos raise the swashplate
up and down.
HELI3-2:Pushrods positioned as shown.With Aileron inputs,the
three servos tilt the swashplate left and right;with Elevator inputs,
the elevator and pitch servos tilt the swashplate fore and aft;with
Pitch inputs,all three servos raise the swashplate u p and down.
HELI4:Pushrods positioned as shown.With Aileron inputs,the
aileron a n d pitch servos tilt the swashplate left and right;with
Elevator inputs,t h e servos tilt the swashplate fo re and aft;with
Pitch inputs,all four servos raise the swashplate up and down.
Aileron
Aileron
Aileron
(Aileron)
(Aileron)
Aileron
Pitch
Pitch
Pitch
(Pitch)
(Pitch)
Pitch
Elevator
Elevator1
Elevator2
Elevator
120
120
120
120
120
120
(Ch8)
STEPS:
Under the state of the initial
picture,press MENU key forlong,
access the main menu.
Press UP/DOWN key se l e ct the SY S T EM
SETTING menus,and press MENU key
fo r short into next submenu.
Press MENU key for short to keep
result and return last menu.
press EXIT key for short to not
keep and treurn to last menu.
Press UP/DOWN key to select the
TYPE menu,and press MENU key
for short into next submenu.
FS-TH9X
SYSTEM SETTING
7.3.0 HILI TYPE SELECT
All manuals and user guides at all-guides.com
14
7.4 Modulation selection
Modulation select:
sets the type of modeulation transmittec.
PCM:Pulse Code Modeulation
PPM:Pulse Position Modulation(also called F M )
Press the UP o r DO WM key to select the MODULAT
screen.
Press the MENU key to save and return last
menu.
Press the EXIT k e y to not k e e p and re-turn last
menu.
7.5 Stick mode selections
Stick mode selections:
To change the Stick Mode.
Right and left move is Rudder Control
LeftStick UP and DOWN move I S Elevator Control
Right and left move is Aileron Control
Right Stick UP and DOWN move I S Throttle Control
MODEL1
Right and left move is Rudder Control
LeftStick UP and DOWN move I S Throttle Control
Right and left move is Aileron Control
Right Stick UP and DOWN move I S Elevator Control
MODEL2
Right an d lef t mov e is Aileron Control
LeftStick UP and DOWN move I S Elevator Control
Right and left move is Rudder Control
Right Stick UP and DOWN move I S Throttle Control
MODEL3
Right and left move is Aileron Control
LeftStick UP and DOWN move I S Elevator Control
Right and left move is Rudder Control
Right Stick UP and DOWN move I S Throttle Control
MODEL4
Press the UP or DOWM key to select the STICK
screen.
Press the UP or DOWM key to select
the MODULAT screen.
Press the UP or DOWM key to select
the STICK screen.
Press the MENU key to sa v e a n d r e turn last
menu.
Press the EXIT key to not keep and re-turn last
menu.
Under the state of the initial
picture,press MENU key forlong,
access the main menu.
Under the state of the initial
picture,press MENU key for long,
access the main menu.
Press U P /D O WN key select the SY S T E M
SETTING menus,and press MENU key
fo r short into next submenu.
Press U P /D O WN key select the SYSTEM
SETTING menus,and press ME N U k ey
for short into ne x t submenu.
Press UP/DOWN key to select the
MODEULAT menu,and press MENU key
for short into next submenu.
Press UP/DOWN key to select the
STICK menu,and press MENU key
for short into next submenu.
Press MENU key for short to keep
result and return last menu.
press EXIT key for short to not
keep and treurn to last menu.
Press MENU key for short to keep
result and return last menu.
press EXIT key for short to not
keep and treurn to last menu.
STEPS:
STEPS:
SYSTEM SETTING
SYSTEM SETTING
FS-TH9X
All manuals and user guides at all-guides.com
15
Under the state of the initial
picture,press MENU key forlong,
access the main menu.
Under the state of the initial
picture,press MENU key forlong,
access the main menu.
Press UP/DOWN key choose to dup-
licate the source or duplicate
the destination
Press " -" or " +" key choos e to dupl i-
cate the source or duplicate
conc rete user s of left and righ t
side s of the dest inat ion.
Press " -" or " +" key sele ct to chan ge
the lcd volu e.
7.6COPY
7.7LCD ADJUST
MODEL COPY:
Copies the current model data into another
model memory.T h e n a m e of the model memory
you are copying into is displayed for clarity.
Duplicate source includes to be as follows,
MODEL1 -----MODEL8, HEL1, ACRO
NOTE:
Duplicate the purpose to contain: MODEL1----
MODEL8, ALL
ALL,show duplicating by source with establishment
copy to MODEL1 --- MODEL8,
Press t h e MEN U key to save and r e t u r n l ast menu
Press the EXIT key to not keep and return last
menu
Pres s UP or DOWN key choo se to dupl icat e the sour ce
or dupl icat e the dest inat ion
Pre ss " -"or " + " ke y cho os e to du pl ic at e th e so ur ce or
du pl ic at e co nc re te us er s of le ft an d ri gh t si de s of th e
de st in at io n.
SYSTEM SETTING
SYSTEM SETTING
Press U P /D O WN key select the SYSTEM
SETTING menus,and press ME N U k ey
for short into ne x t submenu.
Press U P /D O WN key select the SY S T E M
SETTING menus,and press ME N U key
fo r short into next submenu.
Press UP/DOWN key to select the
COPY menu,and press MENU key
for short into next submenu.
Press UP/DOWN key to select the
ADJ CONTRAST menu,and press MENU
key for short into next submenu.
Press MENU key for short to keep
result and return last menu.
press EXIT key for short to not
keep and treurn to last menu.
Press MENU key for short to keep
result and return last menu.
press EXIT key for short to not
keep and treurn to last menu.
FS-TH9X
LCD ADJ CONTRAST:
Press "+"or"-" key to change t h e lcd volue.
Press the UP o r DOWM key to se l e c t t he D/R & EXP
screen.
Press the MEN U key to save and return last menu
Press the EXIT key to not keep and return last
menu
The lcd adjust contrast function is useto lcd
screen light adjust.
STEPS:
STEPS:
All manuals and user guides at all-guides.com
all-guides.com
FS-TH9X
16
8 FUNCTION SETTING(HELICOPTER)
8.1REVERSE
Under the state of the initial
picture,press MENU key forlong,
access the main menu.
Press "+"or"-" key t o reverse the
servo direction for that selected
channel.
Press UP/D O W N k ey to choose t h e REVERSE screen.
REVERSE:
The reverse switch function allows electronic
means o f reversing the servo's throw . Servo
reversing i s available for all 9 channels.
Press the UP o r DOWM key to select the Reverse screen.
Press the MEN U k e y t o save a n d r e t urn last menu
Press the EXIT key to not keep and return last menu
Press " +"or"-" key to reverse the servo direction
for that selected channel.
AIL: Aileron
ELE: Elevator
THR: Throttle
RUD: Rudder
GEA: Retractable landing Gear
PIT: Ptich(ch6)
AUX1: Auxiliary1
AUX2: Auxiliary2
Page1
Page2
HELICOPTER
STEPS:
Press UP/DOWN key se l e ct the FU N C
SETTING menus,and press ME N U key
fo r short into next submenu.
Press UP/DOWN key to select the
REVERSE menu,and press MENU key
for short into next submenu.
Press MENU key for short to keep
result and return last menu.
press EXIT key for short to not
keep and treurn to last menu.
All manuals and user guides at all-guides.com
FS-TH9X
17
Under the state of the initial
picture,press MENU key forlong,
access the main menu.
Under the state of the initial
picture,press MENU key forlong,
access the main menu.
Pr e s s UP/D O WN key choose the systematic
function toestablish menus,press MENU
ke y f o r short and enter the next pageto
establish.
Press U P /D O WN key ch o o s e PITCH CURVE menu,
press M E N U k ey for short a nd enter th e
pa g e t o establish.
Press "+"or"-" key t o adjust the throttle
value o f the selected throttle position .
Press "+"or"-" key t o adjust the throttle
value o f the selected throttle position .
Press " +"or"-" key to adjust the throttle value of t h e selected
throttle position .
Press " +"o r "-" k e y to adjust the throttle value o f t h e selected
throttle posit i o n .
Press UP/DOWN key to choose the THRO CURVE screen.
Press U P /D O WN key to choose the PITCH C U R V E screen.
8.2THRO CURVE
THRO CURVE:
The FS-TH9X offers three separate throttle curves
with five adjustable points per curve.This fun c t i o n
allows you to adust the throttle curve to optimizeengine
rpm a t a p a r t icular pitch setting.Once the thrott l e
curves are established,each can be activt e d i n f l i ght
using the 3-position flight mode switch. The flght
mode switch offers th r e e selectable curves:Norma l ,
IDE1,IDE2.
Press t h e UP or DOWM k e y to select t h e T HRO CURVE
screen.
Press the UP o r DOWM key to select the PITCH CURVE
screen.
Press the MENU key to save and return last menu
Press t h e MEN U k e y t o save and return last menu
Press t h e EXIT key to not k e e p and return last menu
Press the EXIT k e y to not keep and return last
menu
PITCH CURVE:
The FS-TH9X offer s f o u r independent pitch curves,eac h
with up to five adjustable points.This functionallocates
a separate p i t c h curve setting during Normal,IDL 1 ,I D L 2
and Throttle hol d modes.O n c e the pit c h c u r v es are adjusted,
each can b e activated in flight using th e three-position
flight mode and throttle hold switc h e s .E a ch of the five
points of the pitch curve are independently adjustable from
0-100%.These f i v e points correspond to low,25%,50%,75% and
high stick positions.
8.3PITCH CURVE
STEPS:
STEPS:
HELICOPTER
HELICOPTER
Press U P /D O WN key select the FUNC
SETTING menus,and press MENU key
for short into ne x t submenu.
Press UP/D O W N key to select the
TH R O CURVE menu,and press MENU key
for short into next submenu.
Press MENU key for short to keep
result and return last menu.
press EXIT key for short to not
keep and treurn to last menu.
Press MENU key for short to keep
result and return last menu.
press EXIT key for short to not
keep and treurn to last menu.
All manuals and user guides at all-guides.com
FS-TH9X
18
Under the state of the initial
picture,press MENU key forlong,
access the main menu.
Under the state of the initial
picture,press MENU key forlong,
access the main menu.
Press UP/DOWN key choose SUB TRIM menu,
press MENU key for short and enter the
pa g e t o establish.
Press UP/DOWN key choose E.POINT menu,
press MENU key for short and enter the
pa g e t o establish.
Pr e s s U P /DOWN key t o c h o ose the SUB TRIM sc r e e n.
Pr e s s U P /DOWN key t o c h o ose the E.P O I N T s creen .
Press " +"or"-" key to adju s t t h e sub-t r im posi-
tion for that sel e c t e d channel.
Press " + " or" -" key to adjust the sub-tr i m
position for that selected channel.
Press the UP o r DOWM key to select t h e SUB TRIM
screen.
Press the MENU key to save and return last menu
Press the EXIT key to not keep and return last
menu.
8.4SUB TRIM:
8.5END POINT
SUB TRIM:
The SUB-TRIM function allows you to electronically
adjust the centering of each servo.Sub trim is
individually adjustable for all 8 channels,with a
range o f + or-120% .
NOT E:Do not use excessive sub-trim values a s
it is possible t o overdrive the servo's maximum
travel.
END POINT:
The m o s t flexible version of travel adjustment
available. It independently adjusts each end
of each individual servo's travel,rather than
one setting for the servo that affects both
directions.Ranges from0% t o 120% .
Press " +"or"-" key to adjust the END POINT pos-
ition for that selected channel.
Press "+"or" - " key t o adjust the
E.POINT position for that selected
channel.
Press the UP o r DO WM key to select the E.POINT
screen.
Press the MENU key to save and return last menu.
Press the EXIT key to not keep and return last
menu
NOTE:Do not use excessive E.POINT values as
it is possible t o overdrive the servo's maxim-
um travel.
HELICOPTER
HELICOPTER
STEPS:
STEPS:
Press U P /D O WN key select the FU N C
SETTING menus,and press ME N U key
fo r short into next submenu.
Press U P /D O WN key select the FU N C
SETTING menus,and press ME N U key
fo r short into next submenu.
Press MENU key for short to keep
result and return last menu.
press EXIT key for short to not
keep and treurn to last menu.
Press MENU key for short to keep
result and return last menu.
press EXIT key for short to not
keep and treurn to last menu.
All manuals and user guides at all-guides.com
FS-TH9X
19
Under the state of the initial
picture,press MENU key forlong,
access the main menu.
Under the state of the initial
picture,press MENU key forlong,
access the main menu.
Press UP/DOWN key choose THRO HOLD menu,
press MENU key for short and enter the
pa g e t o establish.
Press UP/DOWN key choose AUX-C H menu,
press MENU key for short and enter the
pa g e t o establish.
Press UP/D O W N key to c h o o s e the THEO H O LDM scr e e n .
Press U P /DOWN key t o c h o ose the AUX-C H screen.
8.6THRO HOLD
THRO HOLD:
The Throttle hold function i s used to practice
autorotation and is often use a s a safety switch
for electric helicopters,olding the throttle
in the off position.When the throttle hold switc
is activated the throttle hold function holds
the throttle servo/ESC in a specific position
(normally low or off throttle)while all other
servos function normally.
Press " +"o r "-" key to select the state(INT OR ACT)
and change the throttle hold value. .
Press " +"or"-" key to select input channels.
Press "+"or"-" key t o select the
state(INT o r ACT) a n d change the
throttle hold value..
Press "+"or"-" key t o select input
channels..
Press the UP o r DOWM key to select the THRO HOLD
screen.
Press t h e UP or DO WM key t o select the AUX-CH
screen.
Press the MENU key to save and return last menu.
Press the MEN U key to save and return last menu
Press the EXIT key to not keep and return last
menu.
Press the EXIT key to not keep and return last
menu
8.7AUX-CH
AUX-CH:
Defines the relationship between the transmi-
ttercontrols and the receiver output for cha-
nnels 5-9.Also,the ch9 servo reverse is used
to change the ch9 servo direction.
Note tha t t h e c h 9 functions a r e o n l y visible in the
AUX-CH screen when PCM modulation i s selected.
The ch9 is not supported in PPM modulation.
STEPS:
STEPS:
Press UP/DOWN key sel e c t the FUNC
SETTING menus,and press MENU key
for short into ne x t submenu.
Press UP/DOWN key sel e c t the FUNC
SETTING menus,and press MENU key
for short into ne x t submenu.
Press MENU key for short to keep
result and return last menu.
press EXIT key for short to not
keep and treurn to last menu.
Press MENU key for short to keep
result and return last menu.
press EXIT key for short to not
keep and treurn to last menu.
HELICOPTER
HELICOPTER
All manuals and user guides at all-guides.com

Other manuals for FS-TH9X

1

Other Fly Sky Remote Control manuals

Fly Sky FS-G7P User manual

Fly Sky

Fly Sky FS-G7P User manual

Fly Sky FS-i6 User manual

Fly Sky

Fly Sky FS-i6 User manual

Fly Sky FS-GT3 User manual

Fly Sky

Fly Sky FS-GT3 User manual

Fly Sky FS-CT6A User manual

Fly Sky

Fly Sky FS-CT6A User manual

Fly Sky FS-T2A User manual

Fly Sky

Fly Sky FS-T2A User manual

Fly Sky FS-GT3B User manual

Fly Sky

Fly Sky FS-GT3B User manual

Fly Sky FS-T6 User manual

Fly Sky

Fly Sky FS-T6 User manual

Fly Sky FS-GT2B User manual

Fly Sky

Fly Sky FS-GT2B User manual

Fly Sky FS-lT4S User manual

Fly Sky

Fly Sky FS-lT4S User manual

Fly Sky FS-TH9X User manual

Fly Sky

Fly Sky FS-TH9X User manual

Fly Sky FS-i10 User manual

Fly Sky

Fly Sky FS-i10 User manual

Fly Sky Noble NB4+ User manual

Fly Sky

Fly Sky Noble NB4+ User manual

Fly Sky FS-VK-G4P User manual

Fly Sky

Fly Sky FS-VK-G4P User manual

Fly Sky FS-T6 User manual

Fly Sky

Fly Sky FS-T6 User manual

Fly Sky FS-IT4S User manual

Fly Sky

Fly Sky FS-IT4S User manual

Fly Sky Noble NB4 User manual

Fly Sky

Fly Sky Noble NB4 User manual

Fly Sky FS-MG7 User manual

Fly Sky

Fly Sky FS-MG7 User manual

Fly Sky FS-GT2B User manual

Fly Sky

Fly Sky FS-GT2B User manual

Fly Sky Eurgle th9x User manual

Fly Sky

Fly Sky Eurgle th9x User manual

Fly Sky Paladin PL18 EV User manual

Fly Sky

Fly Sky Paladin PL18 EV User manual

Fly Sky FS-i4X User manual

Fly Sky

Fly Sky FS-i4X User manual

Fly Sky FS-i6X User manual

Fly Sky

Fly Sky FS-i6X User manual

Fly Sky FS-HW-G4P User manual

Fly Sky

Fly Sky FS-HW-G4P User manual

Fly Sky FS-MG41 User manual

Fly Sky

Fly Sky FS-MG41 User manual

Popular Remote Control manuals by other brands

DStv A6 user manual

DStv

DStv A6 user manual

Carlon RC7000D Instruction guide

Carlon

Carlon RC7000D Instruction guide

Itvers ITV-R01 user manual

Itvers

Itvers ITV-R01 user manual

iSNATCH HEYWIRI manual

iSNATCH

iSNATCH HEYWIRI manual

Philips SRU5130/53 user manual

Philips

Philips SRU5130/53 user manual

NINCOAIR NH92017 RTF manual

NINCOAIR

NINCOAIR NH92017 RTF manual

Nipon Coolair NPGA/19 user guide

Nipon Coolair

Nipon Coolair NPGA/19 user guide

Televes Digidom 721903 quick start guide

Televes

Televes Digidom 721903 quick start guide

Zenith Allegro MBC300P user guide

Zenith

Zenith Allegro MBC300P user guide

Miele DARC 6 operating instructions

Miele

Miele DARC 6 operating instructions

C&H 120N Installation and owner's manual

C&H

C&H 120N Installation and owner's manual

Amazon Fire TV Stick 4K quick start guide

Amazon

Amazon Fire TV Stick 4K quick start guide

Cavotec MC-3-series Operation and maintenance manual

Cavotec

Cavotec MC-3-series Operation and maintenance manual

Radio Shack 7-in-One IR owner's manual

Radio Shack

Radio Shack 7-in-One IR owner's manual

Philips Perfect replacement SRP5107/27 quick start guide

Philips

Philips Perfect replacement SRP5107/27 quick start guide

Ground Zero GZDSP REMOTE PRO-X owner's manual

Ground Zero

Ground Zero GZDSP REMOTE PRO-X owner's manual

Philips SRP5004/87 user manual

Philips

Philips SRP5004/87 user manual

Häfele Connect Mesh Eco instructions

Häfele

Häfele Connect Mesh Eco instructions

manuals.online logo
manuals.online logoBrands
  • About & Mission
  • Contact us
  • Privacy Policy
  • Terms and Conditions

Copyright 2025 Manuals.Online. All Rights Reserved.