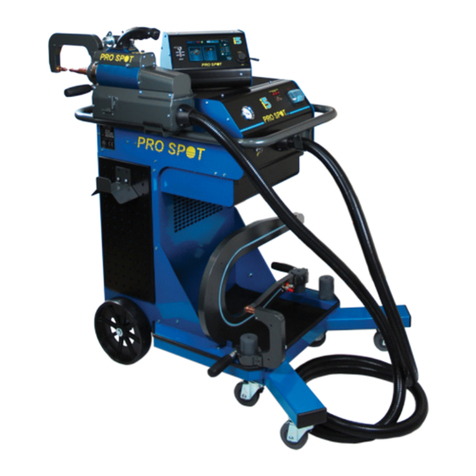
Pro Spot PR-3 AUTO User manual

All Info Copyright © Pro Spot International Inc.
Instruction Manual
Version 2.0
PR-3 AUTO

Pro Spot training and services
Pro Spot Distributors and Sub-Distributors are carefully se-
lected and are well trained in the collision repair industry. We offer
technical and service education at our world wide training facilities at
regular intervals so your local distributor will always be up to date and
able to pass on the latest in spot welding technology to our custom-
ers.
Customer service is an important part of any investment and
our distributors and sub-distributors will be there to support your
technical and service needs. We have a great customer service re-
cord, we tend to keep it that way.
About Pro Spot
-
Pro Spot International, Inc. U.S.A.
www.prospot.com
5932 Sea Otter Pl.
Carlsbad, CA 92010
Phone: +1 760-407-1414
Toll free (US only): 877- PRO SPOT
Fax: 760-407-1421
E-Mail: [email protected]
Contact Information
Pro Spot is certified by CASE and a member of the ICAR Industry Training Alliance
Pro Spot International, Inc., based in Carlsbad, California, manufactures resistance spot welding equipment spe-
cializing in applications for the collision repair industry. The company began in 1986. The company owns and manages
an on site machine shop, research & development department, a fabrication facility and production lines for the various
welders
Pro Spot International exports its products worldwide, export sales are managed through our headquarter office.
The company owns numerous patents for our ingenious application tools, machines, and procedures.
All Info Copyright © Pro Spot International Inc.2

3
For Instructional Videos:
https://www.youtube.com/c/Prospotwelding All Info Copyright © Pro Spot International Inc. 2023
TABLE OF CONTENTS
Installation Requirements............................4
Warning .........................................4
Product Information and Function .....................4
PR-3 Assembly Instructions . . . . . . . . . . . . . . . . . . . . . . . . . . 5
Part List .........................................5
Weld-on Ground ...................................5
Manual Mode | Auto Mode ...........................6
Spot Hammer Welding | Washer Welding | Shrinking ......7
Stretching | Moulding Clip Rivets | Stitch Welding .........8
Welding of Threaded Studs and Nuts...................9
Weld-on Pull Assembly..............................10
Pull Key Welding ..................................11
Troubleshooting Guide ..............................12
NOTES ..........................................13

All Info Copyright © Pro Spot International Inc.4

All Info Copyright © Pro Spot International Inc. 5
Need Description/Step by Step
SA-0157
Need Description.
WELDING-ON GROUND Auto Or Manual
MANUAL TRIGGER MODE
PR-3 Parts List
PR-3 Assembly Instructions

All Info Copyright © Pro Spot International Inc.6
• When the Manual Mode gun assembly is used, the operator
has control of when to weld by pulling the trigger.
• Typically used with large slide hammer and heavier pulls.
• Used when stretching with carbon rod or stitch welding.
• When the Auto Mode gun assembly is used, the welder delays
for one second and welds automatically. Ground and weld tip
needs to be on clean/bare metal.
• Can be used with either Auto or Manual Guns attached. (When
the manual gun is used in Auto Mode, the trigger does not
function and machine welds after the 1 second delay.)
• Typically used for small or quick pulling applications.
1. Push in and twist main weld cable clockwise to lock in place.
2. Connect command/trigger cable by pushing in and turning the lock ring.
3. Move the Trigger Mode switch to Manual, located on the front panel.
1. Push in and twist main weld cable.
2. Move the Trigger Mode switch to Auto, located on the front panel.
Manual Mode
Auto Mode

All Info Copyright © Pro Spot International Inc. 7
CLP-70
1. Attach the Spot hammer (CLP-70) to the cable adapter.
2. Set the welder controls according to the menu.
This is an average setting. If more or less heat is
required, adjust accordingly.
This easy-to-use dent pulling system is much faster than any other method on the market.
Simply weld on the slide hammer to the area to be pulled, immediately start to hammer the
dent out and twist clockwise to release the hammer from the sheet metal. Each welding tip
lasts for more than 1000 welds, then simply replace it.
SPOT HAMMER WELDING
For Quick Dent Pulling Auto Or Manual
MANUAL TRIGGER MODE
PS-840
This feature, using washers for dent pulling, increases
flexibility and speed. Since the washers can be used over
again, it will also save you material costs.
1. Set the welder controls according to the menu. This is an average setting, adjust the
current knob if more or less heat is desired.
2. Attach the adapter electrode (PS-840) to the cable adapter.
3. Grind the sheet metal clean where the washer is to be welded.
4. Insert a washer into the slot or hold in the adapter, and place it against the metal
Push the trigger.
5. Use slide hammer with hook (CLP-72) to pull, twist the washer to release.
WASHER WELDING
For Dent Pulling Auto Or Manual
MANUAL TRIGGER MODE
1. Set the welder controls according to the menu. This is an average setting, adjust the
current knob if more or less heat is desired.
2. Attach the shrinking electrode (PS-860) to the cable adapter.
3. Grind the sheet metal clean where you will be shrinking.
4. Place and push the electrode to the sheet metal. Push the trigger.
5. Compressed air can be applied to the work area to cool the metal, and to enhance
shrinking performace.
PS-870
This function is excellent for shrinking any kind of high
spot and can be used with a wet rag or compressed air
to enhance the shrinking performance.
SHRINKING
With Copper Tip Auto Or Manual
Back of Rivet Electrode
MANUAL TRIGGER MODE

All Info Copyright © Pro Spot International Inc. 8
1. Set the welder controls according to the menu. This is an average setting, adjust the
current knob if more or less heat is desired.
2. Attach the carbon rod (CLT-29) to the cable adapter.
3. Grind the sheet metal clean where you will be stretching.
4. Place and push the electrode to the sheet metal. Push the trigger.
5. Compressed air can be applied to the work area to cool the metal, and to enhance
stretching performance.
CLT-29
This function is excellent for stretching sheet metal. Here
you can control the heat very accurately. Use a wet rag or
compressed air to enhance the stretching performance.
STRETCHING
of Sheet Metal With Carbon Rod
MANUAL TRIGGER MODE
Manual
1. Set the welder controls according to the menu. This is an average setting, adjust the
current knob if more or less heat is desired.
2. TURN THE INTERMITTENT SWITCH ON THE FRONT PANEL TO “ON” (to engage
intermittent output).
3. Attach the stitch electrode (CLT-33) to the cable adapter.
4. Grind the sheet metal clean at the welding area. 3 sides must be clean.
5. Place and push electrode to the sheet metal edge. Push the tirgger. As the current starts
pulsating begin rolling the blade. The intermittent speed can be adjusted by turning the
timer knob. (For best results use 24 guage stainless sheet metal.)
NOT RECOMMENDED FOR STRUCTURAL REPAIR
CLT-33
Stitch Welding makes it possible to perform a seam type
weld by simply rolling the blade on top of the edge of sheet
metal. The welder will send an intermittent current output.
Excellent for patching holes, rust repair, etc.
STITCH WELDING Manual
MANUAL TRIGGER MODE
1. Set the welder controls according to the menu. This is an average setting, adjust the
current knob if more or less heat is desired.
2. Attach an adapter electrode (PS-800) to the cable adapter.
3. Grind the sheet metal clean at the welding area.
4. Insert a rivet (PS-1204) into the adapter electrode, place it against the sheet metal and
push the trigger.
PS-870
This function will weld on factory type clips for the window
moulding. The clips that hold the moulding do not come on
the replacement parts. Simply insert the rivet into the
adapter and weld it in place. Quick and easy.
WELDING OF
MOULDING CLIP RIVETS Auto Or Manual
MANUAL TRIGGER MODE

All Info Copyright © Pro Spot International Inc.
9
1. Set the welder controls according to the menu. This is an average setting, adjust the
current knob if more or less heat is desired.
2. Attach the stud adapter electrode (PS-830) to the cable adapter.
3. Grind the sheet metal clean at the welding area.
4. Insert a desired stud into the adapter electrode, place it against the sheet metal and
push the trigger.
CLT-820, CLT-830
This function will weld threaded studs and nuts M6x20 and
M5x12 on to sheet metal. Many of today’s vehicles come with
studs and nuts to hold interior panels, tail lights, door mouldings,
etc., although they are not attached to the replacement parts.
WELDING OF
THREADED STUDS AND NUTS Auto Or Manual
MANUAL TRIGGER MODE

All Info Copyright © Pro Spot International Inc.10
SA-0151 : 9” Weld-on Shaft
SA-0152 : 16” Weld-on Shaft
SA-0153 : 21” Weld-on Shaft
WELD-ON PULL ASSEMBLY
For Use With Pro Pull
MANUAL TRIGGER MODE
1. Set the welder controls according to the menu. This is an average setting, adjust the
current knob if more or less heat is desired.
2. Attach the desired quick pull shaft to the Auto gun.
3. Attach the appropriate adapter (1 of 3 plates, or single pull legs).
4. Slide shaft through the Pro Pull.
5. Contact tip will weld to the panel after one second delay.
6. Pull the handle on the Pro Pull to remove the dent.
7. Twist the handle to remove the tip from the panel.
Use the 21” Weld-on shaft with the pull bar for pulling a crease or a larger repair.
The pull bar provides stability when moving in a line. Open area is good to
hold pressure on the pull and using a hammer to work the area.
Use the 16” Weld-on shaft with the single pull stand on medium sized repairs.
Adjustable legs on the stand will allow for hammer access to work the area, or
to close in to isolate the repair area.
Use the 9” Weld-on shaft with the Pro Pull for small repairs. The three different
sized plates are easily changed to isolate the size of the dent being pulled.
The Quick Pull weld-on shafts are typically used for small and
quick pulls. The three different length shafts and options give
the user flexibility based on the type of repair.
Auto
+ +
+ +
+ +
+

All Info Copyright © Pro Spot International Inc. 11
1. Set the welder controls according to the menu. This is an average
setting, adjust the current knob if more or less heat is desired (Using
the least amount of time and welding current is best to protect the
paint/e-coat on the back side of the panel).
2. Insert the PS-880 Key Electrode into the Auto or Manual gun.
3. Hold the key in the position required and weld into place.
1. Secure Pull Bar to the work area using the provided straps if needed.
2. Insert pulling rod through the keys.
3. Use the pulling claws from the Pull Bar to grab the pulling rod.
4. Use the black knob to increase tension on the pulling claws.
5. Use a hammer/dolly to work the metal while under pressure.
PS-880
By using weld keys, you are able to pull a larger area at one
time. It is also good for pulling out creases. When the keys
are welded in a crease and the metal rod is inserted through
the group of keys, the low portion of the crease will be pulled
first and the entire crease pulled evenly flat. Used with the
Pro Pull Single Pull or Pull Bar.
PULL KEY WELDING Auto Or Manual
MANUAL TRIGGER MODE
Low area will be pulled first.

All Info Copyright © Pro Spot International Inc.
12

NOTES
All Info Copyright © Pro Spot International Inc. 11

NOTES
All Info Copyright © Pro Spot International Inc.12

NOTES
All Info Copyright © Pro Spot International Inc. 13

5932 Sea Otter Place
Pro Spot International, Inc.
Carlsbad, CA 92010
Toll Free: (877) PRO SPOT
Phone: (760) 407-1414
Fax: (760) 407-1421
E-mail: [email protected]
Web: www.prospot.com
Copyright © Pro Spot International, Inc. 2017
Table of contents
Other Pro Spot Welding System manuals

Pro Spot
Pro Spot PHS-101 User manual
Pro Spot
Pro Spot SP-5 DP User manual

Pro Spot
Pro Spot NP-3 User manual

Pro Spot
Pro Spot PR-205 User manual

Pro Spot
Pro Spot i4 User manual
Pro Spot
Pro Spot Hybrid Series Quick start guide

Pro Spot
Pro Spot PR-8 User manual

Pro Spot
Pro Spot AL-5 User manual

Pro Spot
Pro Spot i4s User manual

Pro Spot
Pro Spot PR-1.6 User manual

Pro Spot
Pro Spot SP-5.3 User manual

Pro Spot
Pro Spot SP-2 User manual

Pro Spot
Pro Spot PR-2000 User manual

Pro Spot
Pro Spot PHS-101 User manual

Pro Spot
Pro Spot PR-111 User manual
Pro Spot
Pro Spot PR-155 User manual

Pro Spot
Pro Spot AL-5 User manual
Pro Spot
Pro Spot SP-5 User manual
Pro Spot
Pro Spot i5 User manual

Pro Spot
Pro Spot i4s User manual