Pro Spot PR-2000 User manual

Instruction Manual
PR-2000
High Frequency Inverter
Resistance Spot Welder
#MNL-PR-2000

Copyright © Pro Spot International, Inc. 2005-2009
PR-2000
Quick start instructions . . . . . . . . . . . . . . . . . . . . . . . . . . . . . . . . . . . . . .3
1 Introduction . . . . . . . . . . . . . . . . . . . . . . . . . . . . . . . . . . . . . . . . . . . . . 4
2 Safety
2.1 General . . . . . . . . . . . . . . . . . . . . . . . . . . . . . . . . . . . . . . . . . . . . . . . . . . . . . . . . . . .5
2.0 Safety & Environmental Specifications . . . . . . . . . . . . . . . . . . . . . . . . . . . . . . . . . . .5
2.2 Warnings and important notices . . . . . . . . . . . . . . . . . . . . . . . . . . . . . . . . . . . . . . . .5
2.3 Safety devices . . . . . . . . . . . . . . . . . . . . . . . . . . . . . . . . . . . . . . . . . . . . . . . . . . . . . .7
2.3.1 Cooling . . . . . . . . . . . . . . . . . . . . . . . . . . . . . . . . . . . . . . . . . . . . . . . . . . . . . .7
2.3.2 Overheat protection . . . . . . . . . . . . . . . . . . . . . . . . . . . . . . . . . . . . . . . . . . . . .7
3 Installation
3.1 General . . . . . . . . . . . . . . . . . . . . . . . . . . . . . . . . . . . . . . . . . . . . . . . . . . . . . . . . . . .8
3.2 Packaging and delivery inspection . . . . . . . . . . . . . . . . . . . . . . . . . . . . . . . . . . . . . .8
3.3 Welder assembly . . . . . . . . . . . . . . . . . . . . . . . . . . . . . . . . . . . . . . . . . . . . . . . . . . .8
3.4 Connection of electrical supply . . . . . . .. . . . . . . . . . . . . . . . . . . . . . . . . . . . . . . . . .9
3.4.1 Electrical Plug / Extension cords . . . . . . . . . . . . . . . . . . . . . . . . . . . . . . . . . . .9
3.5 Connection of pneumatic air supply . . . . . . . . . . . . . . . . . . . . . . . . . . . . . . . . . . . . .9
4 Operation
4.1 Before you begin welding . . . . . . . . . . . . . . . . . . . . . . . . . . . . . . . . . . . . . . . . . . . .10
4.2 About your welder . . . . . . . . . . . . . . . . . . . . . . . . . . . . . . . . . . . . . . . . . . . . . . . . . .11
. . . . . . . . . . . . . . . . . . . . . . . . . 11
4.2.1 Welder Overview & Technical Specifications
4.2.2 Getting familiar with your welder . . . . . . . . . . . . . . . . . . . . . . . . . . . . . . . . . .11
4.2.3 PR-2000 Control Panel . . . . . . . . . . . . . . . . . . . . . . . . . . . . . . . . . . . . . . . . .12
4.2.4 Indications on the Control Panel . . . . . . . . . . . . . . . . . . . . . . . . . . . . . . . . . .12
4.3 Turning on the welder . . . . . . . . . . . . . . . . . . . . . . . . . . . . . . . . . . . . . . . . . . . . . . .12
4.4 Choosing the weld mode . . . . . . . . . . . . . . . . . . . . . . . . . . . . . . . . . . . . . . . . . . . .13
4.5 Setting the pneumatic air pressure . . . . . . . . . . . . . . . . . . . . . . . . . . . . . . . . . . . . .13
4.6 Setting the weld current . . . . . . . . . . . . . . . . . . . . . . . . . . . . . . . . . . . . . . . . . . . . .13
4.7 Setting the weld time . . . . . . . . . . . . . . . . . . . . . . . . . . . . . . . . . . . . . . . . . . . . . . .13
4.8 Setting the default weld programs . . . . . . . . . . . . . . . . . . . . . . . . . . . . . . . . . . . . .14
5 Double-Sided Welding
5.1 PS-500 Double-Acting Spot Gun . . . . . . . . . . . . . . . . . . . . . . . . . . . . . . . . . . . . . .15
5.1.1 PS-500 Component Diagram . . . . . . . . . . . . . . . . . . . . . . . . . . . . . . . . . . . .15
5.1.2 Using the Double-Acting Gun . . . . . . . . . . . . . . . . . . . . . . . . . . . . . . . . . . . .15
5.2 Extension Arms . . . . . . . . . . . . . . . . . . . . . . . . . . . . . . . . . . . . . . . . . . . . . . . . . . . .16
5.2.1 Switching to extension arms . . . . . . . . . . . . . . . . . . . . . . . . . . . . . . . . . . . . .16
5.2.2 Extension Arms and Welding Electrodes . . . . . . . . . . . . . . . . . . . . . . . . . . .17
5.3 PS-500 Electrode Alignment . . . . . . . . . . . . . . . . . . . . . . . . . . . . . . . . . . . . . . . . . .18
5.4 Removing Welding Electrodes . . . . . . . . . . . . . . . . . . . . . . . . . . . . . . . . . . . . . . . .19
5.5 Welding Electrode Maintenance . . . . . . . . . . . . . . . . . . . . . . . . . . . . . . . . . . . . . . .20
5.6 Wheel House Arm . . . . . . . . . . . . . . . . . . . . . . . . . . . . . . . . . . . . . . . . . . . . . . . . . .20
5.7 X-Adapter (optional) . . . . . . . . . . . . . . . . . . . . . . . . . . . . . . . . . . . . . . . . . . . . . . . .21
5.7.1 Attaching the X-Adapter . . . . . . . . . . . . . . . . . . . . . . . . . . . . . . . . . . . . . . . .21
5.7.2 Using the X-Adapter . . . . . . . . . . . . . . . . . . . . . . . . . . . . . . . . . . . . . . . . . . .22
5.7.3 X-Adapter Configurations . . . . . . . . . . . . . . . . . . . . . . . . . . . . . . . . . . . . . . .22
Table Of Contents

PR-2000
Page 2
6 Single-Sided Welding
6.1 Single-Sided Welding Overview . . . . . . . . . . . . . . . . . . . . . . . . . . . . . . . . . . . . . . .23
6.2 Single-Sided Spot Welding . . . . . . . . . . . . . . . . . . . . . . . . . . . . . . . . . . . . . . . . . . .25
6.3 Stud Welding . . . . . . . . . . . . . . . . . . . . . . . . . . . . . . . . . . . . . . . . . . . . . . . . . . . . . .25
6.4 Nut Welding . . . . . . . . . . . . . . . . . . . . . . . . . . . . . . . . . . . . . . . . . . . . . . . . . . . . . . .26
6.5 Dent Pulling with Spot Hammer . . . . . . . . . . . . . . . . . . . . . . . . . . . . . . . . . . . . . . . .26
6.6 Moulding Clip Rivet Welding . . . . . . . . . . . . . . . . . . . . . . . . . . . . . . . . . . . . . . . . . .27
6.7 Dent Pulling with Washers and Slide Hammer with Hook . . . . . . . . . . . . . . . . . . . .27
6.8 Contact Shrinking . . . . . . . . . . . . . . . . . . . . . . . . . . . . . . . . . . . . . . . . . . . . . . . . . .28
6.9 Carbon Rod Shrinking / Stretching . . . . . . . . . . . . . . . . . . . . . . . . . . . . . . . . . . . . .28
6.10 Stitch Welding . . . . . . . . . . . . . . . . . . . . . . . . . . . . . . . . . . . . . . . . . . . . . . . . . . . .29
6.11 Pro Pull Dent Pulling (optional) . . . . . . . . . . . . . . . . . . . . . . . . . . . . . . . . . . . . . . .30
6.11.1 Selecting Pro Pull Weld Mode . . . . . . . . . . . . . . . . . . . . . . . . . . . . . . . . . . .30
6.11.2 Pro Pull Component Diagram . . . . . . . . . . . . . . . . . . . . . . . . . . . . . . . . . . .30
6.11.3 Pro Pull Assembly . . . . . . . . . . . . . . . . . . . . . . . . . . . . . . . . . . . . . . . . . . . .31
6.11.4 Dent Pulling with Pro Pull . . . . . . . . . . . . . . . . . . . . . . . . . . . . . . . . . . . . . .31
6.11.5 Paintless Dent Pulling With Pro Pull . . . . . . . . . . . . . . . . . . . . . . . . . . . . . .31
Table Of Contents
Copyright © Pro Spot International, Inc. 2005-2009

1. Turn the Power Switch on the front panel ON.
2. Connect Air to the air inlet located on the back panel.
3. During the test procedure a “Push Help to change language” prompt appears
on the display screen . Click the Help button to acces the System settings screen
where the language can be changed. Select desired language by clicking the
“Change Language” button, then exit.
4. After test procedure, the software defaults to HSS/Galv. Two Sided weld mode.
5. The welder is now ready to operate. Make sure air pressure is set at 90 PSI.
Place the welding gun at the weld area and press the lower trigger button to weld.
The upper weld button is for spreading the electrodes open for better access.
6. There are 6 different power levels pre-programmed into the PR-2000. The soft-
ware defaults to 0.7mm weld program. That is the thickness of one of the two lay-
ers of metal you are welding . To chage between pre-set power settings press
Navigation button, Up (fig. 1.1). The programs will switch between 0.7, 1.0, 1.2,
1.5, 2.0 and 2.5mm.
7. To go to the next weld mode: “Mild Steel” press the Navigation button, Right
(fig. 1.2). The same weld power levels are available in each weld mode. Navigate
with the Right and Left arrow buttons and select weld power with the “Next
Program” button (Navigation button, Up).
8. Press the “Help” button anytime for instructions.
Figure 1.1
Figure 1.2
PR-2000
Page 3
Copyright © Pro Spot International, Inc. 2005-2009
Quick start instructions
WARNING! Before turning the welder on, make sure it is connected
to proper electricity by certified people. Connect air to the air inlet on
back panel.

Copyright © Pro Spot International, Inc. 2005-2009
The PR-2000 Spot welder is used by body shops to
duplicate the welding procedure used by the car manu-
facturers. Use of the equipment that is contrary to the
instructions in this manual can cause personal injury
and/or machine damage.
Pro Spot International, Inc. can in no way be held
responsible for intentional or unintentional damage, and
consequent unlimited loss of profit, loss of income, loss
of business opportunity, loss of use, etc. that originates
from incorrect use of this equipment ir its use in a man-
ner not intended.
Warranty
Pro Spot International, Inc. offers a two-year guarantee
from the date of delivery of the new welder. This guar-
antee covers material defects and assumes normal care
and maintenance.
The guarantee assumes that:
• the equipment is correctly installed and inspected
• the equipment has not been altered or rebuilt without
approval from Pro Spot International, Inc.
• genuine Pro Spot International, Inc. spare parts are
used to make repairs.
• operation and maintenance has been carried out
according to the instructions in this manual.
All claims on warranty must verify that the fault has
occurred within the guarantee period, and that the unit
has been used within its operating range as stated in
the specifications. All claims must include the product
type and serial number. This data is stamped on the
name plate.
Note: This instruction manual provides advice as well
as instructions for installation, operation, maintenance
and troubleshooting.
IMPORTANT! Read this manual carefully to
become familiar with the proper operation of
the welder. Do not neglect to do this as
improper handling may result in personal
injury and damage to the equipment.
The drawings in this manual are presented for illustra-
tive purposes only and do not necessarily show the
design of the equipment available on the market at any
given time. The equipment is intended for use in accor-
dance with current trade practice and appropriate safety
regulations. The equipment illustrated in the manual
may be changed without prior notice.
The contents in this publication can be changed without
prior notice.
This publication contains information that is protected by
copyright laws. No part of this publication may be repro-
duced, stored in a system for information retrieval or be
transmitted in any form, in any manner, without
Pro Spot International, Inc.’s written consent.
Conformity with directives and standards:
PR-2000 complies with CE standards.
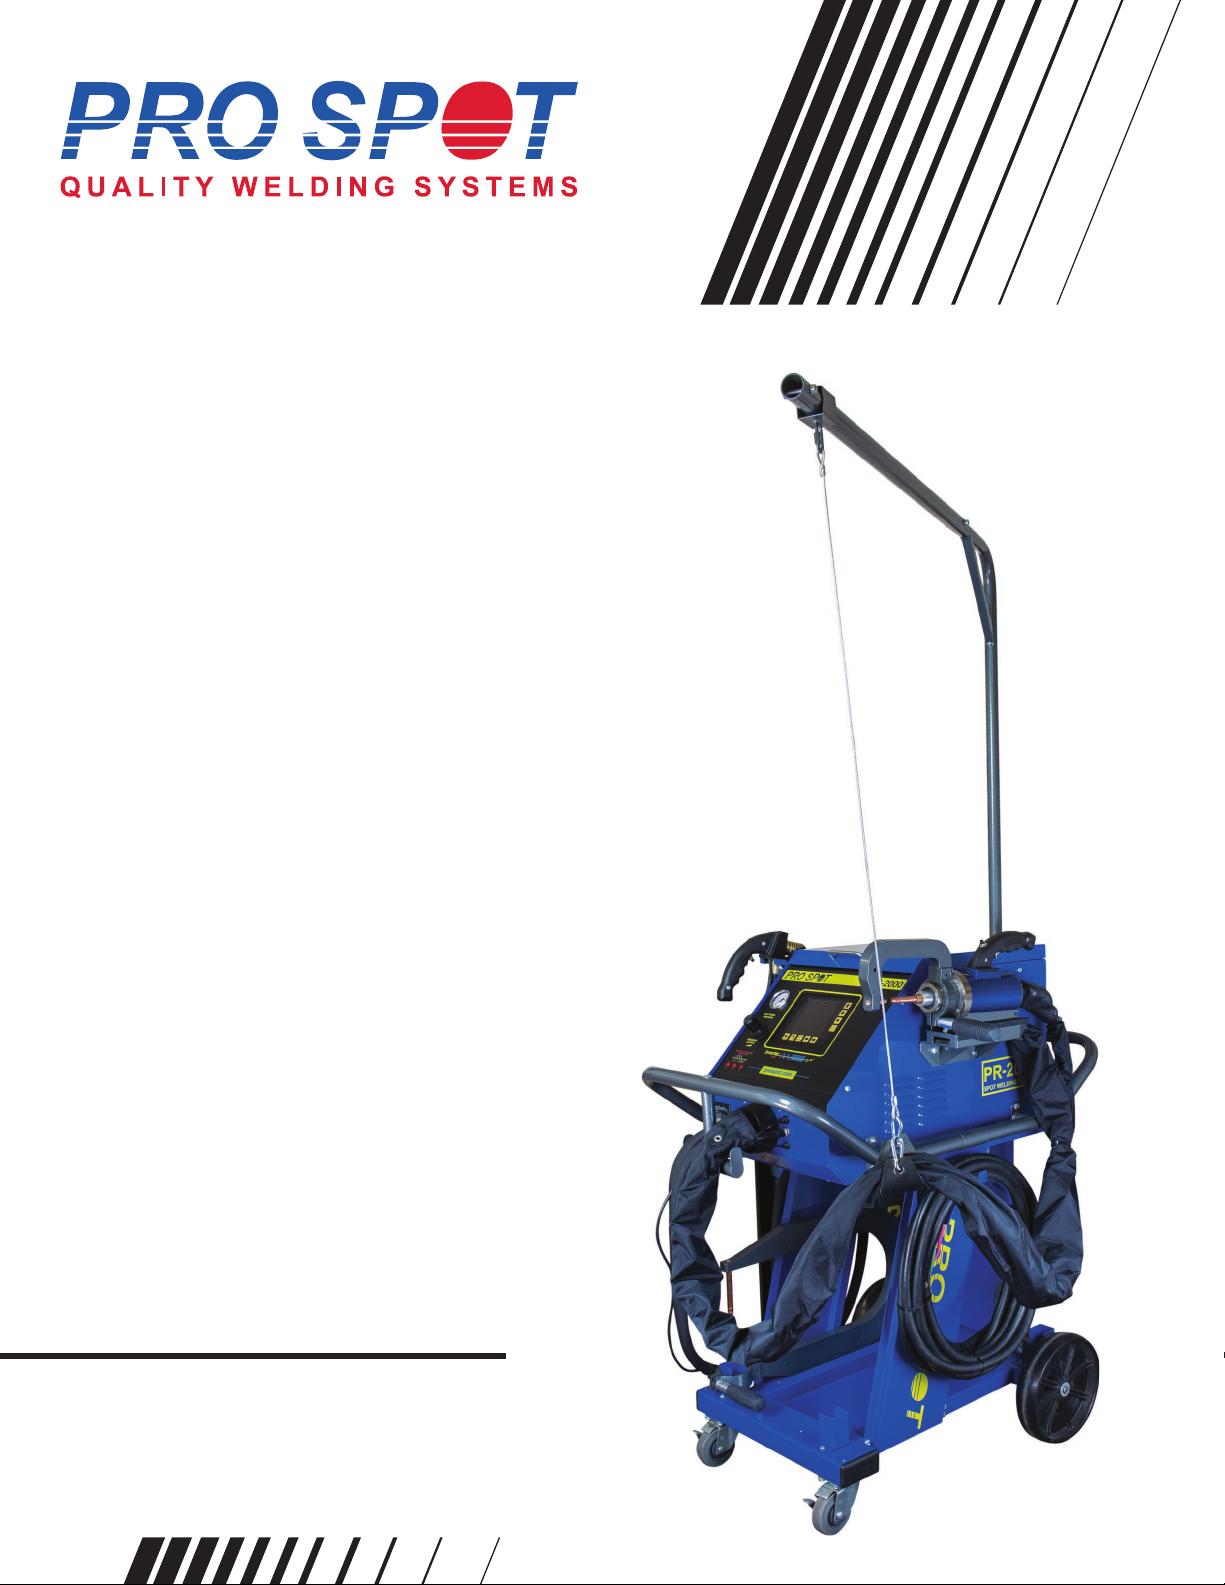
Congratulations on acquiring your new PRO SPOT PR-2000 welder!
Team Pro Spot looks forward to supporting you.
You have a welder and support group that will increase your productivity. The integrated features, ease of use,
speed and quality welds that your PR-2000 offers will become an important part of your business.
The following information will be needed when you call Pro Spot:
* MODEL TYPE: PR-2000
* SERIAL NO:________________
The serial number is located on the back of the unit.
For parts or service contact your local distributor,
Local number: ____________________________
or in the U.S. call: Toll free:1-877 PRO SPOT or 1-760-407-1414
for a customer service representative.
NOTE: You can now order parts online at: prospot.com/store/
PR-2000
1 Introduction Page 4
1 Introduction

PR-2000
2 Safety Page 5
Copyright © Pro Spot International, Inc. 2005-2009
The PR-2000 Spot welder has been designed and is tested to meet strict safety
requirements. Please read the following instructions carefully before operating the
PR-2000 and refer to them as needed to ensure the continued safe operation of
the welder
Information provided in this manual describes the suggested best working prac-
tices and should in no way take precedence over individual responsibilities or
local regulations.
The PR-2000 Spot Welder is designed to comply with all applicable safety regula-
tions for this type of equipment. During operation, it is always each individual’s
responsibility to consider:
• Their own and other’s personal safety.
• The safety of the welder through correct use of the equipment in accordance
with the descriptions and instructions provided in this manual.
By observing and following the safety precautions, users of the PR-2000 Spot
welder will ensure safer working conditions for themselves and their fellow work-
ers.
The following types of safety signs are used on the equipment and in Pro Spot’s
instruction manuals:
Prohibited.
Prohibits behaviour that can cause injury.
Command.
Calls for a specific action.
Warning.
Notice of personal injury risk and or damage to equipment.
2.2 Warnings and important notices
2.1 General
2.0 Safety & Environmental Specifications
2 Safety
The PR-2000 Spot welder is designed for indoor use - Protection Degree IP21S.
The PR-2000 Spot welder is designed to operate from -10º C to 40º C.
The unit may be stored and transported in an ambient temperature from -20º C
to +55º C. The unit can be operated at 95% Relative Humidity (RH). For opera-
tion above 1000m consult the manufacturer. Do not operate the unit on a slope
of more than 10º. The unit mets the requirements of IEC|EN60974-1 2005 third
edition and UL60974-1 2nd edition. E.M.C. classification is C1SPR11.
NOTE: Heating tests were performed at room ambient temperature and the duty
cycle at 40º C has been determined by simulation.

PR-2000
2 Safety Page 6
Copyright © Pro Spot International, Inc. 2005-2009
The following warnings and important notices are used in the instruction manual:
WARNING! Do not operate or place the welder near water, in wet
locations or outdoors. Risk for injuries or damage to the welder.
WARNING! Do not place the welder on unstable or uneven ground.
The welder might tip causing personal injuries or serious damage to
the welder.
WARNING! All electrical connections must be made by a qualified
electrician. Risk for electrical shock.
WARNING! Loose cables and hoses present tripping risks. Risk for
injuries.
WARNING! Make sure to use welding goggles when spot welding.
The sparks might otherwise injure the eyes.
WARNING! Sparks from welding could start a fire. Risk for injuries.
WARNING! Risk for damage to materials close to the weld, e.g to
glass or textiles.
WARNING! For proper cooling efficiency, never operate the welder
without connecting it to the compressed air source.
WARNING! All service and maintenance must be carried out by Pro
Spot service personnel and service support. Risk for electrical shock.
WARNING! Unplug the welder from the wall outlet before servicing,
cleaning or maintenance. Risk for electrical shock.
IMPORTANT! The PR-2000 welder may only be used by qualified
personnel. The user of the welder must have knowledge of spot
welding and of alignment of collision-damaged vehicles.
IMPORTANT! Do not turn off the welder while cooling is activated!
IMPORTANT! The air must be clean and free from oil and moisture.
Use filter.

PR-2000
2 Safety Page 7
Copyright © Pro Spot International, Inc. 2005-2009
When the Spot Gun is used continuously, the welding cables and the power trans-
former get hot. To prevent the welder from malfunctioning due to overheating, it is
cooled using the built-in air system.
PR-2000 features an air cooling system that cools all four welding cables.There
are two different Cooling Modes: "AUTO" (default) and "MANUAL". In the "AUTO"
mode, the air cooling system turns on automatically after 15-30 welds and forced
air starts to flow through the cable. In the "MANUAL" mode the cooling system
operates continuously.
To switch to “MANUAL” mode:
1) Restart the software and press “HELP” button while start-up screen is dis-
played. “System Settings” screen will display (fig. 2.1).
2) Select “System Settings” by pressing the Navigation button, Up (fig. 2.2).
3) Select “Manual Cooling” by pressing the Navigation button, Down (fig. 2.3).
AIR COOLING will activate.
The built-in overheat protection is designed to prevent damage to the welder
caused by overheating. The system will automatically shut off the welder when a
pre-programmed temperature is reached (fig.2.4). DO NOT turn off the welder! It
needs the cooling air to cool the machine faster. Wait until the display returns to
normal (usually 4-8 min.) Shorter duty cycles (due to short weld times and “rest”
periods between welds) will allow the cooling system to function better and may
prevent the auto-shut-off. (Consistently check weld strength by performing
destructuive tests).
IMPORTANT! Do not turn off the welder while the cooling system is
activated!
IMPORTANT! If the thermal breaker has switched off the welder,
please contact Pro Spot's authorized service personnel
Figure 2.1
Figure 2.4
2.3.2 Overheat protection
2.3.1 Cooling
2.3 Safety devices
Figure 2.2
Figure 2.3

PR-2000
3 Installation
The PR-2000 Spot welder is inspected and tested prior to leaving the factory to
guarantee consistent quality and the highest possible reliability. Follow the instal-
lation tips and operating instructions below to ensure user safety and proper
welder performance.
WARNING! Do not operate or place the welder near water, in wet
locations or outdoors. Risk for injuries or damage to the welder.
WARNING! Do not place the welder on unstable or uneven
ground. The welder might fall causing personal injuries and damage to
the welder. Do not operate on a slope of more than 10º.
A grounded electrical plug must be installed (refer to section 3.4 “Connection of
electrical supply”).
Check the contents of the shipping container against the packing list, consign-
ment note, or other delivery documentation to verify that everything is included
and in the correct quantity. Check the PR-2000 Spot Welder carefully to make
sure that no damage has occurred during transport. If anything is damaged or
missing, the welder may be unsafe to use till the part is repaired or replaced. If
anything is missing, please contact your supplier. Remove all packaging material
from the welder.
For your convenience, PR-2000 welder ships fully assembled.
Due to differences in wiring codes and connection methods, no electrical plug
comes with the welder. Consult a certified electrician for proper installation of the
electrical plug.
Insert the support arm (boom) as shown in Figure 3.1
Figure 3.1
IMPORTANT! It is the responsibility of the owner to ensure that
the equipment has been installed as specified in the instructions pro-
vided. It is also the owner's responsibility to ensure that the welder
is inspected in accordance with applicable regulations before it is
put into service. Do not use for thawing out frozen water pipes (17.1)
Page 8
Copyright © Pro Spot International, Inc. 2005-2009
3.3 Welder assembly
3.2 Packaging and delivery inspection
3.1 General
3 Installation

PR-2000
3 Installation
The PR-2000 Spot Welder requires one of the following voltage / frequency com-
binations:
208-240V 50/60 Hz U.S.A., Canada, Japan OR
400-420V 50/60 Hz Europe, Australia
Note: Make sure that the facility supply voltage and frequency are the same as
shown on the welder name plate (see section 4.2 “About your welder”).
The power supply must have a ground connection. The supply must also be
protected as follows:
The 208-240V 3-Phase or Single-Phase require 60A breaker.
The 400V and 420V supply require a 32A slow blow fuse (Circuit
breaker 32D).
WARNING! All electrical connections must be made by a qualified
electrician. Risk for electrical shock.
1. Connect the green wire to ground.
Note:
The PR-2000 is rated for over voltage category III and polution degree 3.
Make sure that the supply cable is at least 6 AWG at 208V and 400 V.
2. If an extension cord is used with the welder, ensure that the length of the
extension cord does not exceed 10 m (30 ft) and it meets the specifications of
Item 1 above. The cord must also be grounded. Consult
an electrician for safe and proper installation of the electrical plug.
NOTE: When connecting the welder to Single-Phase input power, install Red and
White wires. Connect Green to earth ground! Leave out the black wire. Insulate
and store the black wire properly.
Air supply port
The PR-2000 Spot welder must be connected to a pneumatic air network.
(100 PSI to 130 PSI)
1. Connect the PR-2000 to the air supply via the threaded input port at
the rear of the welder using a standard connector.
2. If not already set, adjust the air pressure setting on the welder front panel to
60 PSI (4-5 bar) (refer to section 4.5 “Setting the pneumatic air pressure”).
IMPORTANT! The air must be clean and free from oil and
moisture. Use a filter.
Figure 3.2
Page 9
3.5 Connection of pneumatic air supply
3.4.1 Electrical Plug / Extension cords
3.4
Copyright © Pro Spot International, Inc. 2005-2009
Connection of electrical supply
For optimum results use 3 phase power

PR-2000
4 Operation
Before you begin welding, be sure to read and understand the following instruc-
tions.
The Pro Spot PR-2000 is a state-of-the-art Inverter Resistance Spot Welder that
was designed for the collision repair industry. It duplicates the welding procedure
used by the car manufacturers. It is important to understand the design and func-
tion of this welder before operating it.
ELECTRICITY ONLY: The PR-2000 uses only electricity to create the welds
unlike the MIG welder which uses an arc from a feeding wire to build a weld
nugget using inert gas and the feeding wire material.
PRESSURE: The PR-2000 has a built in air cylinder that compresses the Double-
Sided Gun’s welding tips together automatically when triggered. The compression
is an important part of a good resistance weld. The pressure is adjustable from
the Control Panel. The optimum welding pressure varies between 60-90 PSI (4-
6.5 BAR). 90 PSI seems to be a common starting pressure. As a rule, increase
pressure with thicker metals but remember that too much pressure could
decrease the resistance of the metal between the electrodes, resulting in poor
weld penetration.
CURRENT: Another important aspect of a weld is the current applied through the
work piece. A weld is created when a large current is transferred through the lay-
ers of sheet metal. The resistance in the metal causes the area to heat up and
fuse the sheets together in a nugget.
WELD PROGRAM: Maintaining the air pressure after the current shuts off makes
the weld cool down under pressure resulting in a harder, stronger weld. This fea-
ture is built in to the PR-2000's weld control program and is engaged automatical-
ly during a weld cycle.
TIME: The Timer controls the duration of the current applied during the weld
cycle. The ideal is to get a weld that uses higher current and shorter time to con-
trol heat buildup.
Page 10
Copyright © Pro Spot International, Inc. 2005-2009
4.1 Before you begin welding
4 Operation

Copyright © Pro Spot International, Inc. 2005-2009 4 Operation
The welder is supplied with one of the following voltage and frequency combinations:
Input voltage: 1 or 3 phase
208-240V 50/60 Hz. OR
400-420V 50/60 Hz.
The actual voltage and frequency is stated on the rear panel name plate.
Open circuit output voltage 20v max. E.M.C. classification is C1SPR 11.
Note: For 1-phase installation leave out black wire.
Welding amperage: 11500A max (3-phase)
6300A max (1-phase)
Cable length: 8’ (2.5m) standard
Electrode Pressure: At 7 bars (90 PSI)-280 DaN (616 Lb)
Cooling system: Air (2 fans)
Welding cable cooling: Air cooling
Microprocessor program: Digital control
Weight (standard): 213lb (97kg)
The name plate is at the rear of the welder unit.
The required voltage is indicated with a check mark.
Welding output is rated at ??V.
PR-2000
Page 11
4.2.2 Getting familiar with your welder
4.2.1 Welder Overview & Technical Specifications
4.2 About your welder
R
Air
Pressure
Regulator
Power
Switch
Input Voltage Phase Indicator LED
Lights should illuminate when circuit
breaker on the rear panel is "ON".
(2 lights for 1 phase or 3 lights for 3
phase)
Air
Pressure
Gauge
Cable Holder Bracket Name Plate shows:
Input voltage,
Serial number, etc.
Input Voltage Cable.
Consult certified electrician
for installation of proper plug and voltage.
Cooling Fan
Air Input
Connect filtered air
100 PSI 7 BAR (min)
AIR HOSE AND COMMAND CABLE CONFIGURATION
5Air Supply to 2-sided spot gun (compress)
6Air Supply to 2-sided spot gun (release)
7Command cable 1-sided gun
8Command cable 2-sided spot gun
12
3
Single-Sided ground cable
Two-Sided spot gun cable
Single-Sided Weld Gun cable
Two-Sided ground cable
WELD CABLES CONFIGURATION
4
Figure 4.1 PR-2000-Front View
Figure 4.2 PR-2000-Back View
Control Panel
For optimum results use 3 phase power

Copyright © Pro Spot International, Inc. 2005-2009
Figure 4.3 The PR-2000 Control Panel
4 Operation
When two sided welding is selected, a spot gun graphic appears in the upper-left
corner of the display screen (fig. 4.4).
When single sided welding is selected, a single sided gun graphic appears in the
upper-left corner of the display screen (fig. 4.5).
1. Toggle the circuit breaker on the front panel to “ON”. Three lights on the
front panel should illuminate indicating 3-phase installation, 2 lights for 1-
phase installation (fig. 4.5.1)
2. The display will go through the start-up procedure and automatically default to
Two-Sided welding.
3. The PR-2000 is now ready to use.
IMPORTANT! Make sure to read the instruction manual before operating
the welder. Only trained personell should use this welder.
Figure 4.5.1
PR-2000
Figure 4.4
Page 12
4.3 Turning on the welder
4.2.4 Indications on the Control Panel
4.2.3 PR-2000 Control Panel
Figure 4.5

Copyright © Pro Spot International, Inc. 2005-2009 4 Operation
The PR-2000 features 6 different strength weld power modes. It defaults to
0.7mm program. To change weld program press “Next Program” (fig. 4.7).
The program box indicates the weld power (thickness).
For example, when welding two HSS Galv. metals that are 1.2mm thick, you
should use the 1.2mm program.
If more power is desired, press “Next Program” to reach the next level.
The time and current automatically change with each respective weld power
mode.
Referring to fig. 4.8: The top value indicates the time duration that will be applied
during the weld and the bottom value indicates the weld power in weld amperage
that will be applied during the weld.
The PR-2000 is a multi-functional resistance spot welder. It is equipped with a
four weld cable system for your convenience. Two of the weld cables are connect-
ed to the Two-Sided Spot Gun and the other two are connected to the Single-
Sided Weld Gun.
To select a weld mode, press the respective mode button (fig. 4.6)
Once the welding mode is selected, a group of related weld programs become
available to the user (see section 4.8 “Setting the default weld programs”)
Figure 4.6
Pneumatic air is used for:
- forcing the spot gun to close and open.
- cooling the welding cables that are connected to the spot gun.
The air pressure is regulated with the air regulator, and the set pressure is indicat-
ed on the pressure gauge. Default pressure is 90 PSI.
Change the air pressure as follows:
1. Unlock the pressure regulator by pulling on the adjustor knob till it snaps into
the unlocked position.
2. Turn the pressure regulator knob clockwise to increase or counter-clockwise to
decrease the air pressure.
3. Lock the pressure regulator by returning the knob to the lock position.
PR-2000
Figure 4.7
Figure 4.8
Page 13
4.7 Setting the weld time and current
4.6 Setting the weld program
4.5 Setting the pneumatic air pressure
4.4 Choosing the weld mode

PR-2000
4 Operation
4.8 Setting the default weld programs
There are 15 weld programs featured in the PR-2000 Spot Welder. Ten of these
programs are associated with the Single-Sided Gun and five are associated with
the Two-Sided Spot Gun.
12345
6789
1
2
3
4
5
6
7
8
9
11
10
12
HSS Steel / Galv. Steel Welding
Mild Steel Welding
Weld Bonding
Boron Steel
Custom Program
Single-Sided Spot Welding
Pro Pull Dent Removal
Pulling
Contact Shrinking
Note: Two-Sided welding mode and Program No. 1 are set by default
when the PR-2000 is turned on.
Page 14
Copyright © Pro Spot International, Inc. 2005-2009
10 11 12 13 14 15
13
14
15
Two-Sided Programs
Single-Sided Programs
Figure 4.9
Bolt Welding
Stitch Welding
Carbon Rod Shrinking
Rivet Welding
Washer Welding
The welding programs are selected on the Control Panel. Select the welding pro-
gram by using the Left and Right navigaton buttons (fig. 4.9)
The selected program is indicated by a highlighted black box over the program
name (fig. 4.10).
In any welding mode there are 6 power level programs: 0.7mm - 2.5mm. To
switch between programs press the “Next Program” button (fig. 4.7).
Some programs require a double-weld in one cycle (fig. 4.11). Those welds auto-
matically deliver Weld 1, programmed delay, then Weld 2. This is a very sophisti-
cated weld feature for controlling exact temperature into the weld area and to pre-
heat it.
Figure 4.10
Figure 4.11
Nut Welding

5Double-Sided Welding
The spot gun is used for the following weld programs:
• Two-Sided spot welding - HSS Galvanized steel, Mild steel, Weld Bonding,
Boron Steel, Pulse welding and OEM, Custom Modes
(see section 4.8 “Setting the default welding programs”)
Figure 5.1 PS-500 Spot Gun - Component Diagram
Page
15
Copyright © Pro Spot International, Inc.
2005-2009
F-44
Release Trigger Switch
F-44
Weld Trigger Switch
PS-103-CM
20mm Shank
PS-302
C-Arm
PS-025
Welding Cap
PS-1101-CM
60mm Shank PS-5203
Clamping Handle
Weld Shaft
Push this button to open electrodes wide. Push this button to close electrodes and weld.
5.1.2 Using the Double-Acting Gun
5.1.1 PS-500 Component Diagram
5.1 PS-500 Double-Acting Spot Gun
5Double-Sided Welding
PR-2000

PR-2000
5 Double-Sided Welding Page 16
Copyright © Pro Spot International, Inc.
2005-2009
PS-302:
C-Arm
PS-52-5/8:
Wheel House Arm
PS-403 (optional):
C-X Adapter
PS-305:
508mm Extension Arm
PS-503-W (optional):
600mm Extension Arm
Figure 5.2 PR-2000 Extension Arms
Loosen the handle and pull off the C-arm... Now, insert the extension arm and tighten the handle.
The Pro Spot PR-2000 comes with a variety of extension arms to accomodate
any welding job situation.
Please refer to fig. 5.3 for details on what welding electrodes to use with each
extension arm.
NOTE: Extension arms marked “optional” are available from your local
distributor or online at www.prospot.com
5.2.1 Switching to extension arms
5.2 Extension Arms

Copyright © Pro Spot International, Inc.
2005-2009
PR-2000
5 Double-Sided Welding Page 17
5.2.2 Extension Arms and Welding Electrodes
Different extension arms require the use of different welding electrodes.
Use charts in fig. 5.3 and 5.4 to determine the correct combination of extension
arms and welding electrodes.
IMPORTANT! Using incorrect welding electrodes with extension arms
may result in weak welds and/or damage to your welder.
Figure 5.3 Extension arm - Welding electrode configuration chart
Figure 5.4 Welding electrode selection chart
NOTE: PS-025 Welding Caps can be purchased in packages of 15 from
your local distributor or online at www.prospot.com
A B C
PS-302 PS-1101-CM PS-103-CM
PS-52-5/8 PS-1101-CM PS-1133-5/8
PS-403 see Sec. 5.7.3 see Sec. 5.7.3
PS-305 PS-1101-CM PS-129-CM
PS-503-W PS-1101-CM PS-128-CM
A
B C

PR-2000
5 Double-Sided Welding
5.3 PS-500 Electrode Alignment
Page 18
Copyright © Pro Spot International, Inc.
2005-2009
IMPORTANT! Always maintain proper electrode alignment. Not doing
so may result in weak, substandard welds!
Figure 5.5 Electrode Alignment
Use the set screws (A, B, C) to align the electrodes. Ex: to move electrode down,
loosen screw (C) and tighten screws (A and B).
CORRECT WRONG

PR-2000
5 Double-Sided Welding Page 19
Copyright © Pro Spot International, Inc.
2005-2009
5.4 Removing Welding Electrodes
NOTE: An optional welding electrode cap removal tool is available,
which makes cap removal easy (fig. 5.6c). You can order the cap
removal tool from your local distributor or online at: www.prospot.com
The extension arm electrodes can be easily removed by lightly tapping them
with a pin and hammer as shown in fig. 5.6
Piston Electrode Extension Arm
Electrode
Pin
Welding Cap
Removing Extension Arm Electrode
Figure 5.6 Removing Welding Electrodes
Removing Piston Electrode
To remove the piston electrode:
1. Grip piston electrode with a set of pliers or vise-grips (fig.5.6a).
2. Rock the pliers back and forth to loosen the electrode from the holder.
3. Remove the electrode
Note: Vise-Grips shown in fig. 5.6a are specially designed to hold round
objects without damaging or scarring them. You can purchase a set from your
local distributor or online at: www.prospot.com
IMPORTANT! Do not attempt to remove the electrode by hitting it.
This could damage the electrode and the spot gun.
Removing Welding Caps
To remove a welding cap:
1. Hold piston electrode with a set of pliers or vise-grips.
2. Grip welding cap with another set of pliers or wedge side cutters between
cap and shank as shown in fig. 5.6b
3. Twist the two to loosen and remove the welding cap.
Figure 5.6a: Removing
Piston Electrode
Figure 5.6b: Removing
Welding Cap
Figure 5.6c: Optional Weld
Cap Removal Tool
Table of contents
Other Pro Spot Welding System manuals

Pro Spot
Pro Spot AL-5 User manual

Pro Spot
Pro Spot PHS-101 User manual

Pro Spot
Pro Spot SP-5.3 User manual

Pro Spot
Pro Spot Hybrid Series Quick start guide

Pro Spot
Pro Spot SP-5 User manual

Pro Spot
Pro Spot i4s User manual

Pro Spot
Pro Spot i4 User manual

Pro Spot
Pro Spot AL-5 User manual

Pro Spot
Pro Spot PR-155 User manual

Pro Spot
Pro Spot PR-8 User manual

Pro Spot
Pro Spot i4s User manual

Pro Spot
Pro Spot i5 User manual

Pro Spot
Pro Spot SP-2 User manual

Pro Spot
Pro Spot SP-5 DP User manual

Pro Spot
Pro Spot PHS-101 User manual

Pro Spot
Pro Spot PR-111 User manual

Pro Spot
Pro Spot PR-1.6 User manual

Pro Spot
Pro Spot PR-205 User manual

Pro Spot
Pro Spot PR-3 AUTO User manual

Pro Spot
Pro Spot NP-3 User manual