pro3dure medical CD-2 User manual

1
ENGLISH
Working Instructions
CD-2
Light polymerisation unit
2
ENGLISH
Technical specifications
External Dimensions (WxHxD) 405 x 210 x 430 mm
Polymerisation chamber (WxHxD) 167 x 115 x 105 mm
Voltage / frequency 220 V / 50 Hz
Light source UV LED panel
Wave length 365 nm – 405 nm
Power consumption 80 W
Pressure control valve max. 5 bar
Working pressure 1.8 bar
Network Wi-Fi

3
ENGLISH
Safety instructions
Attention: Read the following notes before connecting and putting the unit into service.
The operating service and the function of the unit can only be guaranteed, if the general
safety and accident prevention instructions of the legislation as well as safety and working
instructions are followed.
1. This unit must only be used according to the present working instructions. We cannot
be held liable for damages which have been caused by improper treatment.
2. The indicated voltage on the type plate has to meet the voltage of the power source.
3. The unit must only be connected with a socket with protective conductor. Never
touch the plug with wet hands.
4. Put the unit on a stable and even basis.
5. Do not intrude any objects into the unit outside of the polymerization chamber.
6. Only those appliances and square parts may be used which are released by the
manufacturer. Pro3dure are not responsible for damages caused by the user of
external parts.
7. Do not operate the unit if the lid is open.
8. The unit has to be examined before operation in the view of proper condition. If the
unit is not in proper condition, it must be used and has to be marked accordingly.
9. Before cleaning and maintenance of the unit or exchange of parts the plug has to be
disconnected.
10. The opening of the unit and repairs are only to be carried out by accordingly trained
experts.
11. Use only nitrogen as protective gas. In no case use flammable or toxic gases. Follow
the general safety and accident prevention instructions for the use with gas.
12. Only use permitted gas pressure tanks.
13. When connecting the gas pressure tank check the tightness of the supply pipe. Make
sure that the gas pressure tank will not tip over.
14. Never connect the gas tank without using the pressure reducer, the unit has to be
operated with maximum pressure of 5 bar (70PSI).
15. If the unit is not used, block the gas supply, do not operate the unit unattended.
16. Provide sufficient ventilation in the working area.

4
ENGLISH
Description of unit
CD-2 is a light polymerization unit for curing the light polymerization materials under
protective gas. The protective gas atmosphere prevents from the development of an
inhibition layer on the surfaces of the parts. CD-2 is very easy to use. Includes an electronic
timer which can be programmed individually for all production procedures down to the
exact one second.
Putting into service
Before putting into service make sure that no transport damages occurred. Check for
external damages to the housing and IPAN. Further ensure that the indicated voltage on the
type plate meets the voltage of the power source. Put the cable into the socket of the unit
and create a connection with the enclosed connector cable. Safely fix the protective gas
supply pipe at the hose nozzle of the pressure reducer of the gas pressure tank with the help
of the hose clamp. Create a connection to the unit with a quick coupler. The pressure must
not exceed 3 bar (42 PSI).
Information on using protective gas
By using protective gas, it is possible to do the polymerization in an oxygen-free
atmosphere. The protective gas replaces the air in the polymerization chamber and
thus reduces the oxygen content in the polymerization chamber of the CD-2 leading
to a curing of the parts without inhibition layers. For checking the gas consumption,
a flowmeter has to be used.
The operator is responsible for the warranty of the operating safety of the CD-2.
Review the national safety instructions when using gases for technical purposes.
Operators using the CD-2 have to be instructed about the dangers of protective
gases. The use of protective gas reduces the oxygen content in the working areas.
If the CD-2 is adjusted correctly there is no risk of danger for operators.
Setting protective gas
The pressure reducer at the pressure tank should be set to approx. 2.5 - 4.5 bar
For the connection to the CD-2 a 6mm tube is required.
Please take care to use a proper connector to the pressure reducer

5
ENGLISH
Controls
Operation of CD-2
Before using the CD-2 check the power supply and connect the gas. Then turn on the main
switch at the right back of the unit. To turn on the curing unit, press the power button at the
right side of the unit. The software will be starting and the display shows the pro3dure Logo
during the initialization. When the software has started check on the start screen if every
status lamp is green. The CD-2 is ready to use. To control the curing device, the display must
be used. The menu items are further described below.
Info: Before the initialization of the CD-2 is ready, the pro3dure logo disappears for some
seconds and the screen will be black. This is normal during the initialization and no defect of
the curing device.
status lamps
open program
saved programs
settings
6
ENGLISH
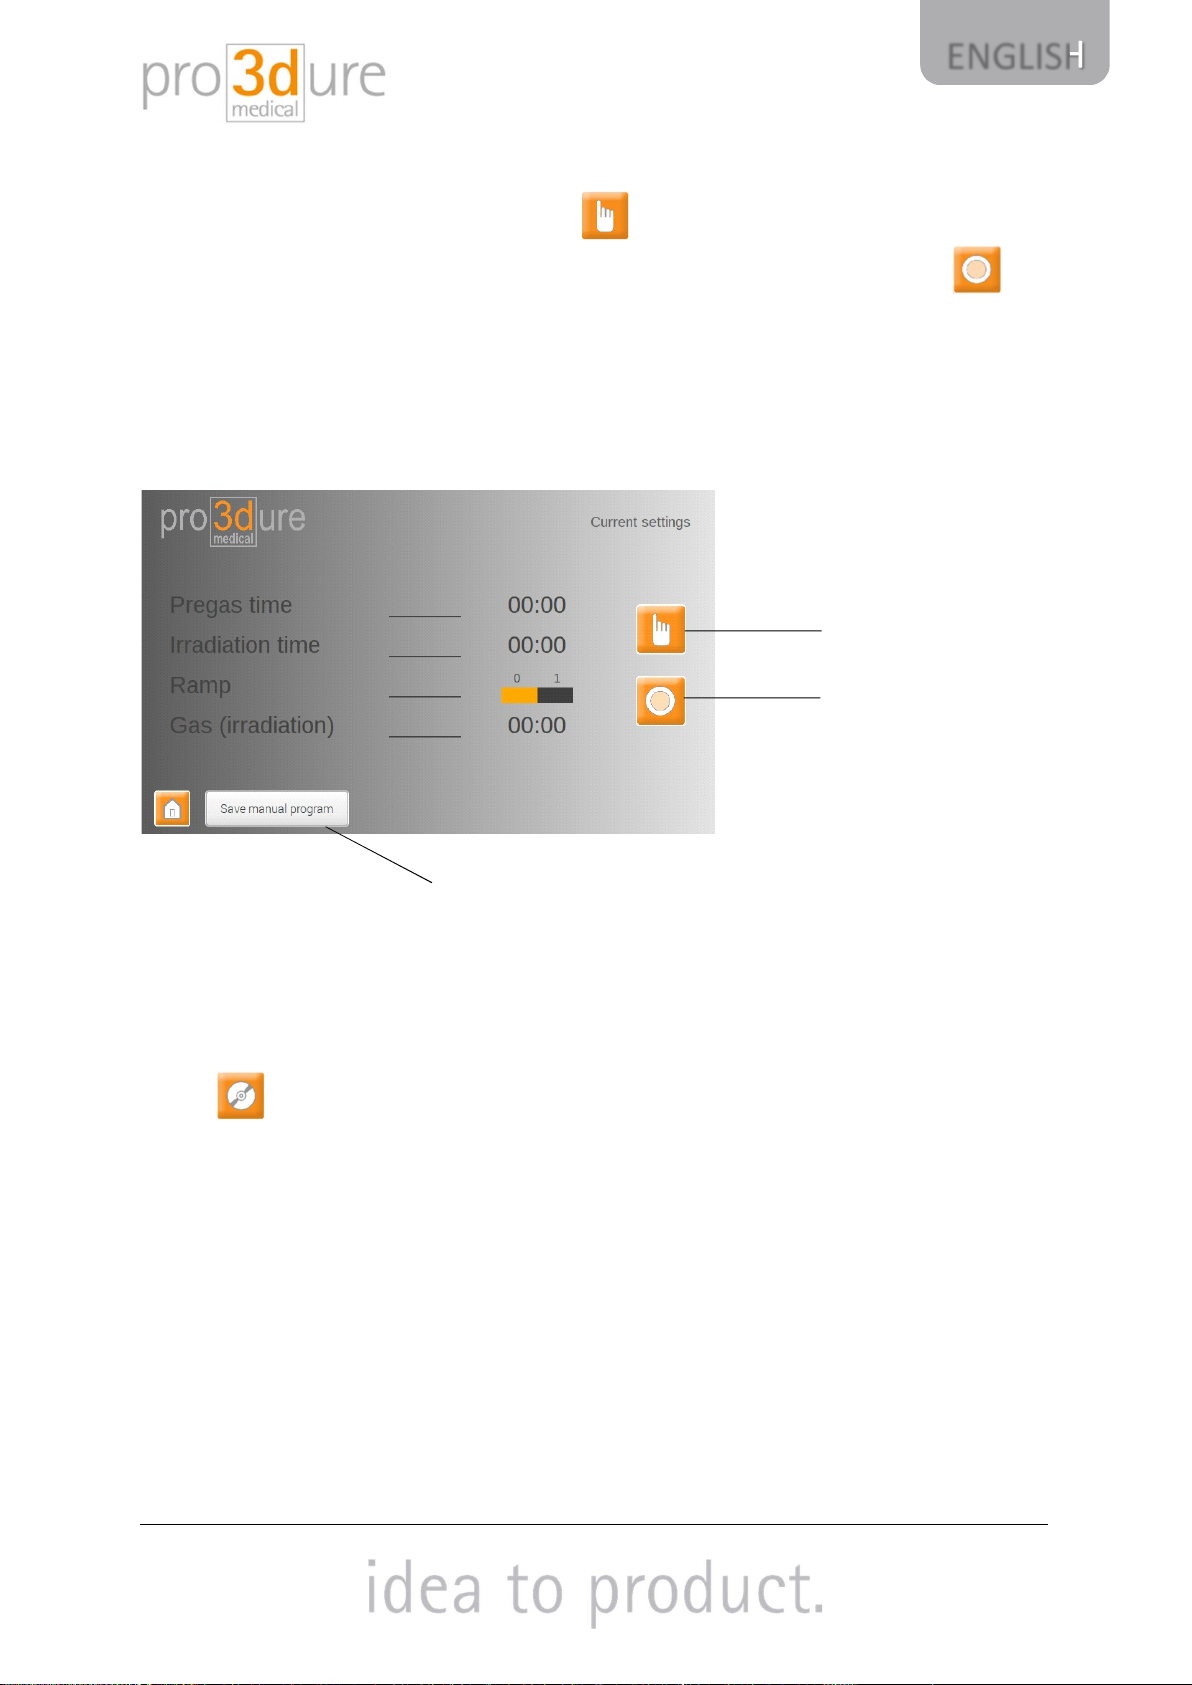
Start irradiation
To start the irradiation push open program. The current program will open and the
display shows the parameters of this program. Push the start button to irradiate.
Info: The lid must be closed and the gas must be turned on.
Saving a program
Press the Save manual program button to save the current setting. It is possible to store
different programs and name them manually. To access saved programs, press the programs
button in the main menu.
edit program
start irradiation
save current settings
7
ENGLISH
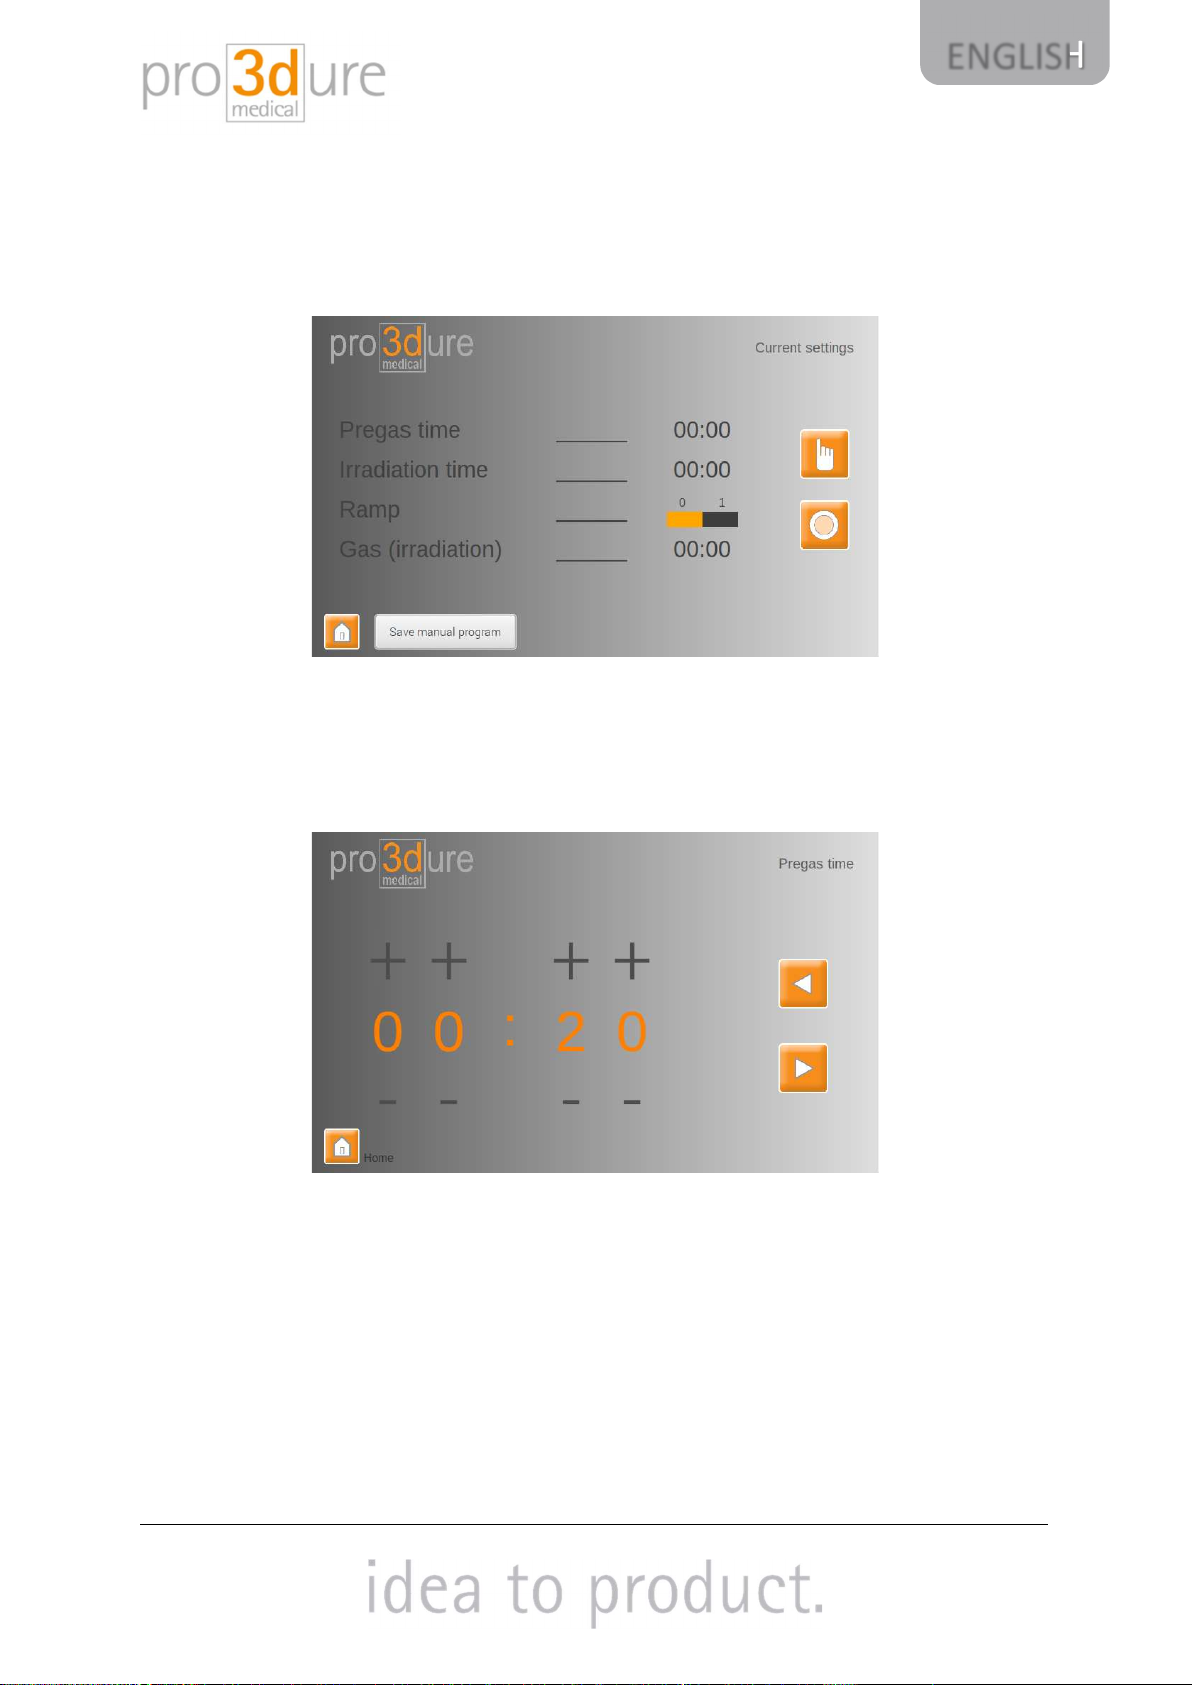
Editing a program
For generating a program or editing a program push the program button. A new screen
opens and program 1 to 24 can be chosen. Click on the program which should be programed
or edited. Then click on edit program.
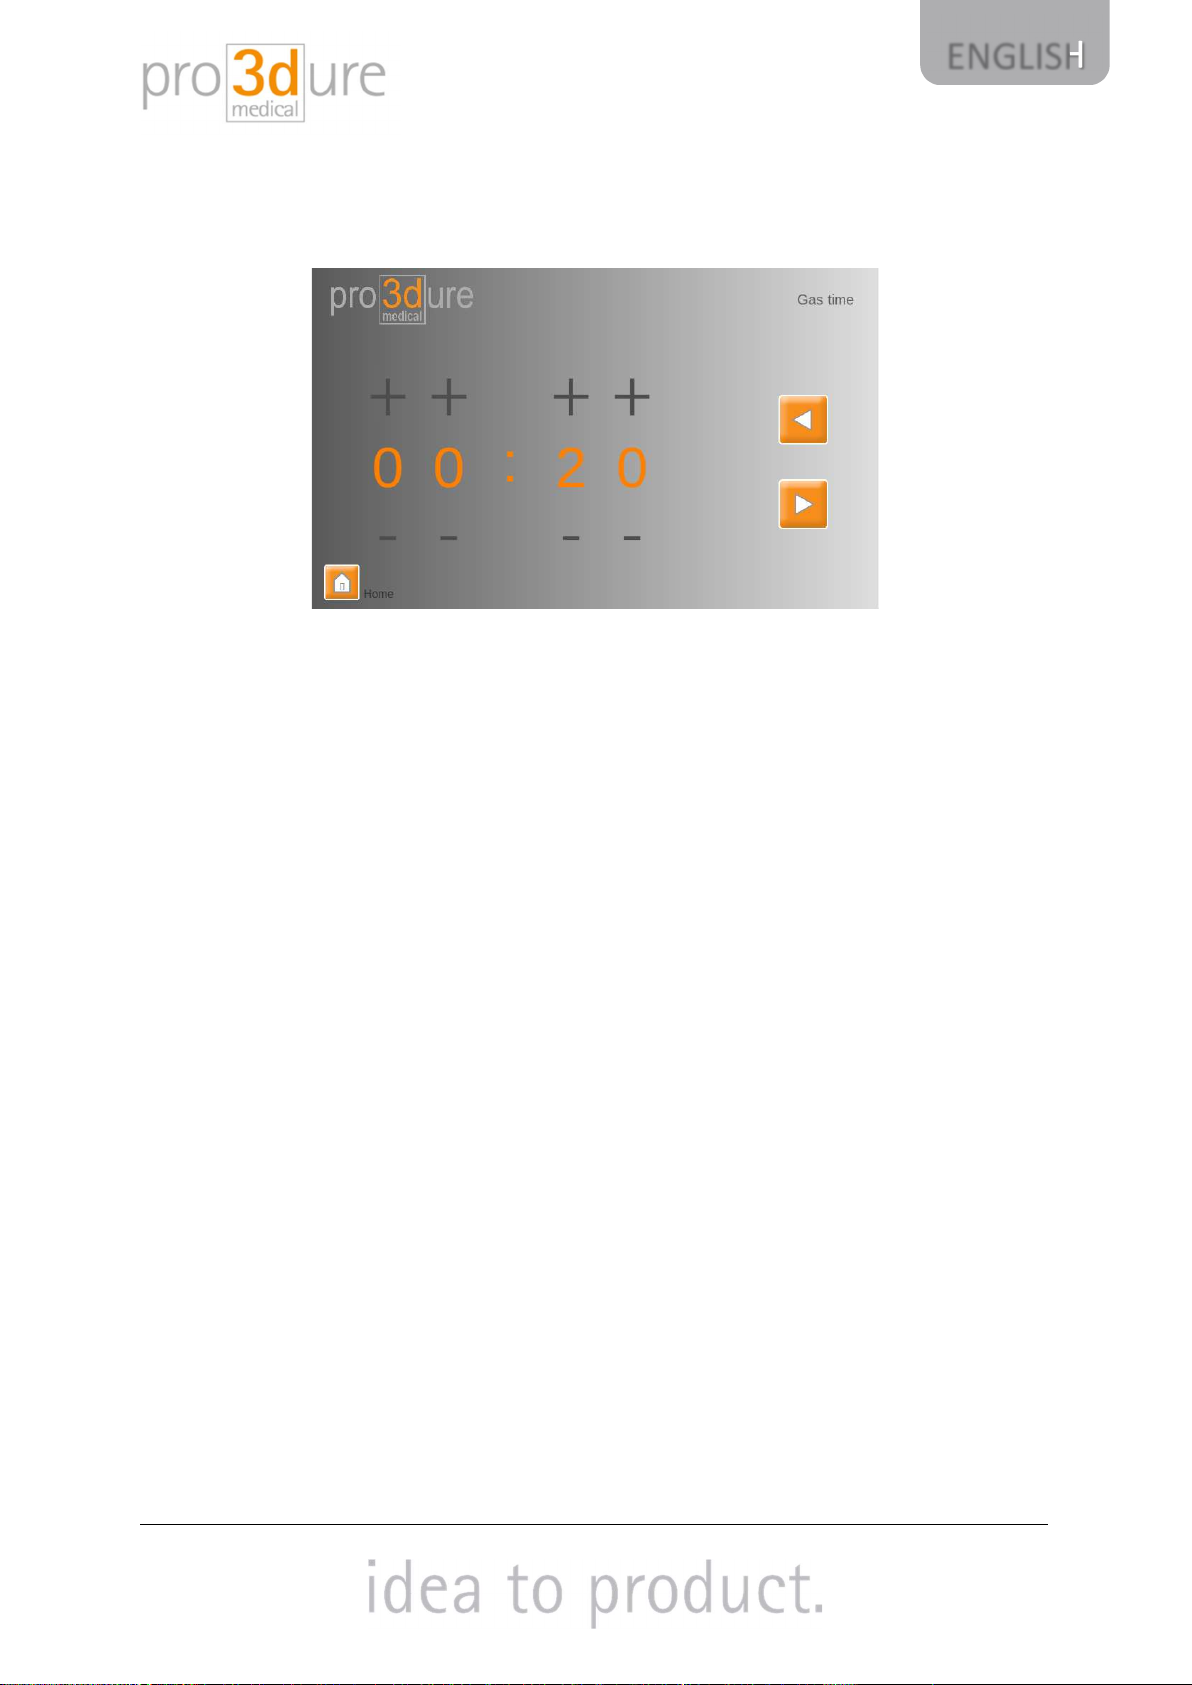
At first the pregas time can be set. This is necessary to replace oxygen with nitrogen gas. A
pregas time from 00:00 minutes to 59:59 minutes can be set. Use plus and minus to extend
or reduce the time. The CD-2 will not exposure during this timer. To proceed push forward.
Recommendation: 00:20 minutes
8
ENGLISH
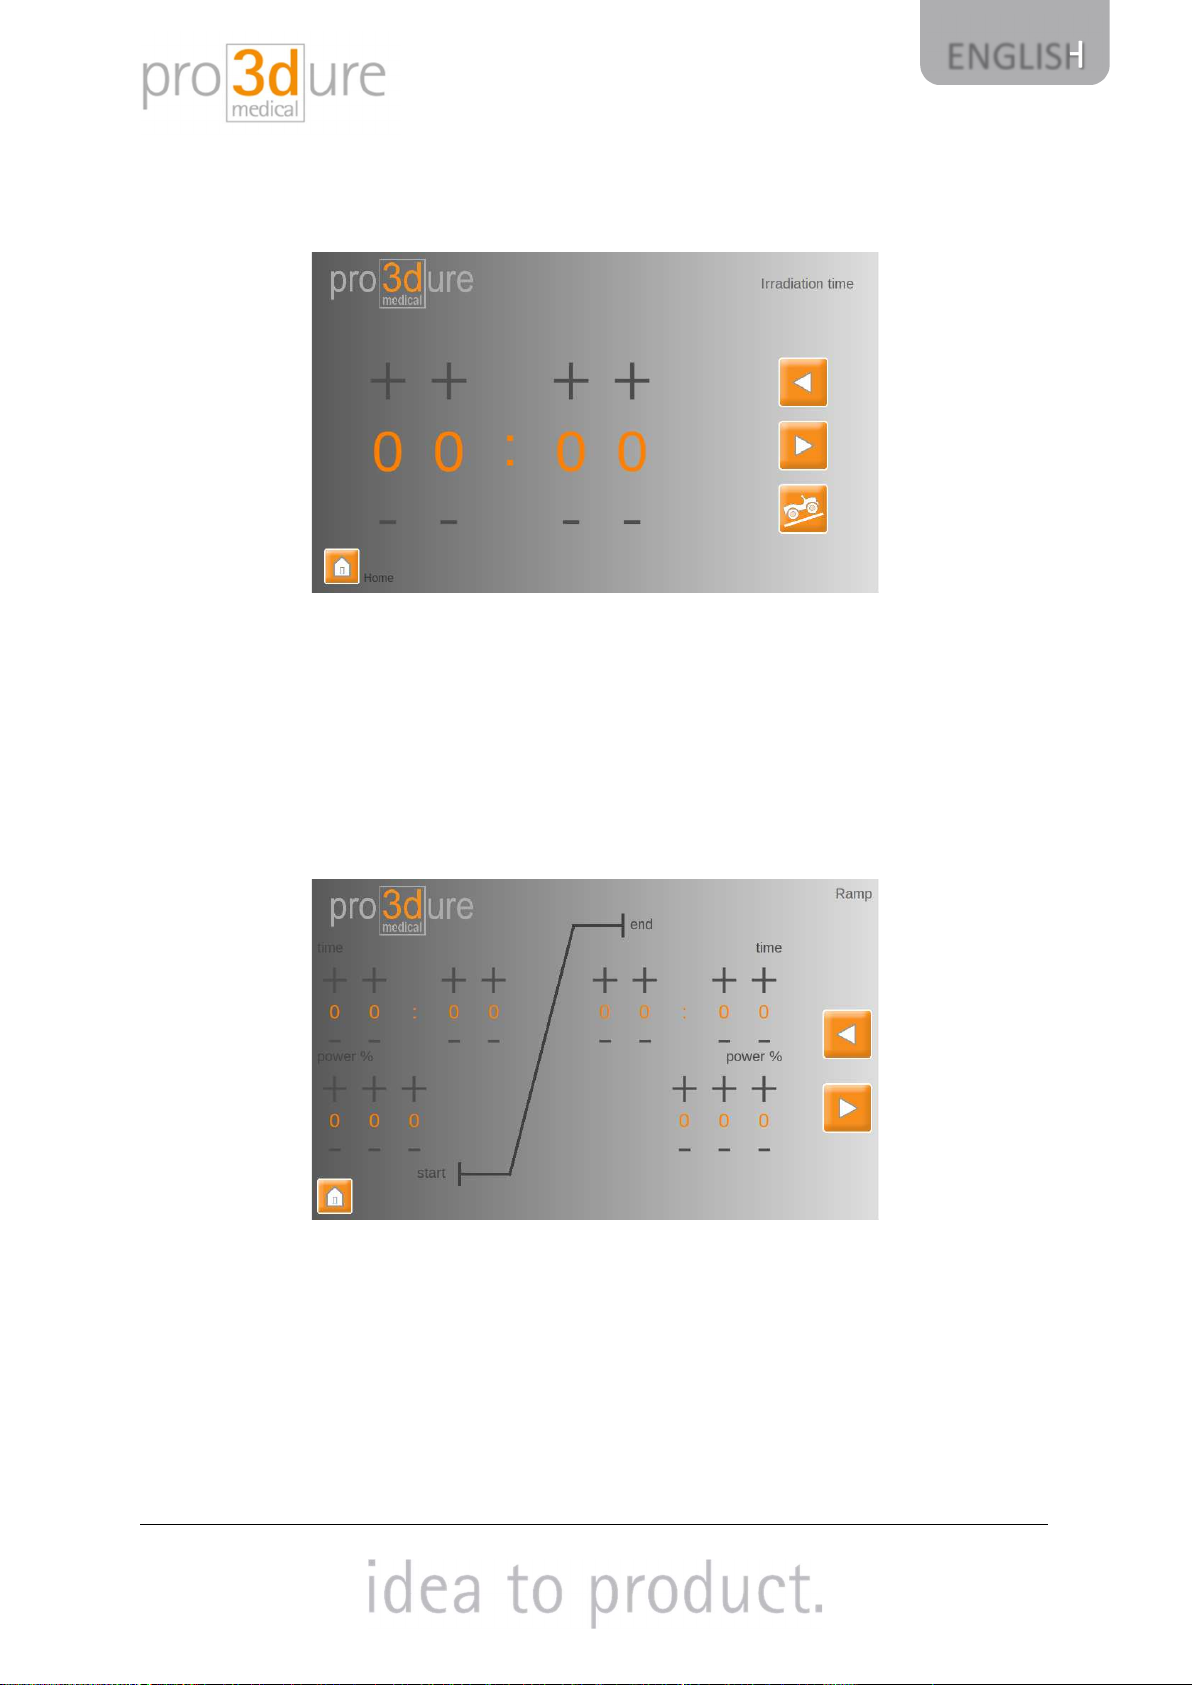
The next step is to set the irradiation time. An irradiation time from 00:00 minutes to 59:59
minutes can be set. Use plus and minus to extend or reduce the time and move then
forward.
In the next step a ramp can be configured. Set a start time when the CD-2 should increase
the LED power. By power the LED power can be configured. Up to the start time the CD-2
will exposure with the set power. Then it starts to increase the LED power step by step to the
end LED power and end time. Off the end time the CD-2 exposures with the set end LED
power for the rest of the irradiation time. When the program is configured completely the
overview of the program shows an activated ramp. The register shows position 1. When no
ramp is configured the register is on position 0 and the LED power is set for the hole
exposure time on 100%.
9
ENGLISH
At last the gas during the irradiation time can be configured. Push forward to rename the
program.
Recommendation: 00:20 minutes
If it is desired a name for this generated program can be set. Push on the program name and
a virtual keyboard will open. An individual name can be set now. When this is finished push
forward to finish the generation of this program. An overview of the settings will be shown
and the irradiation can be started.
10
ENGLISH
status update
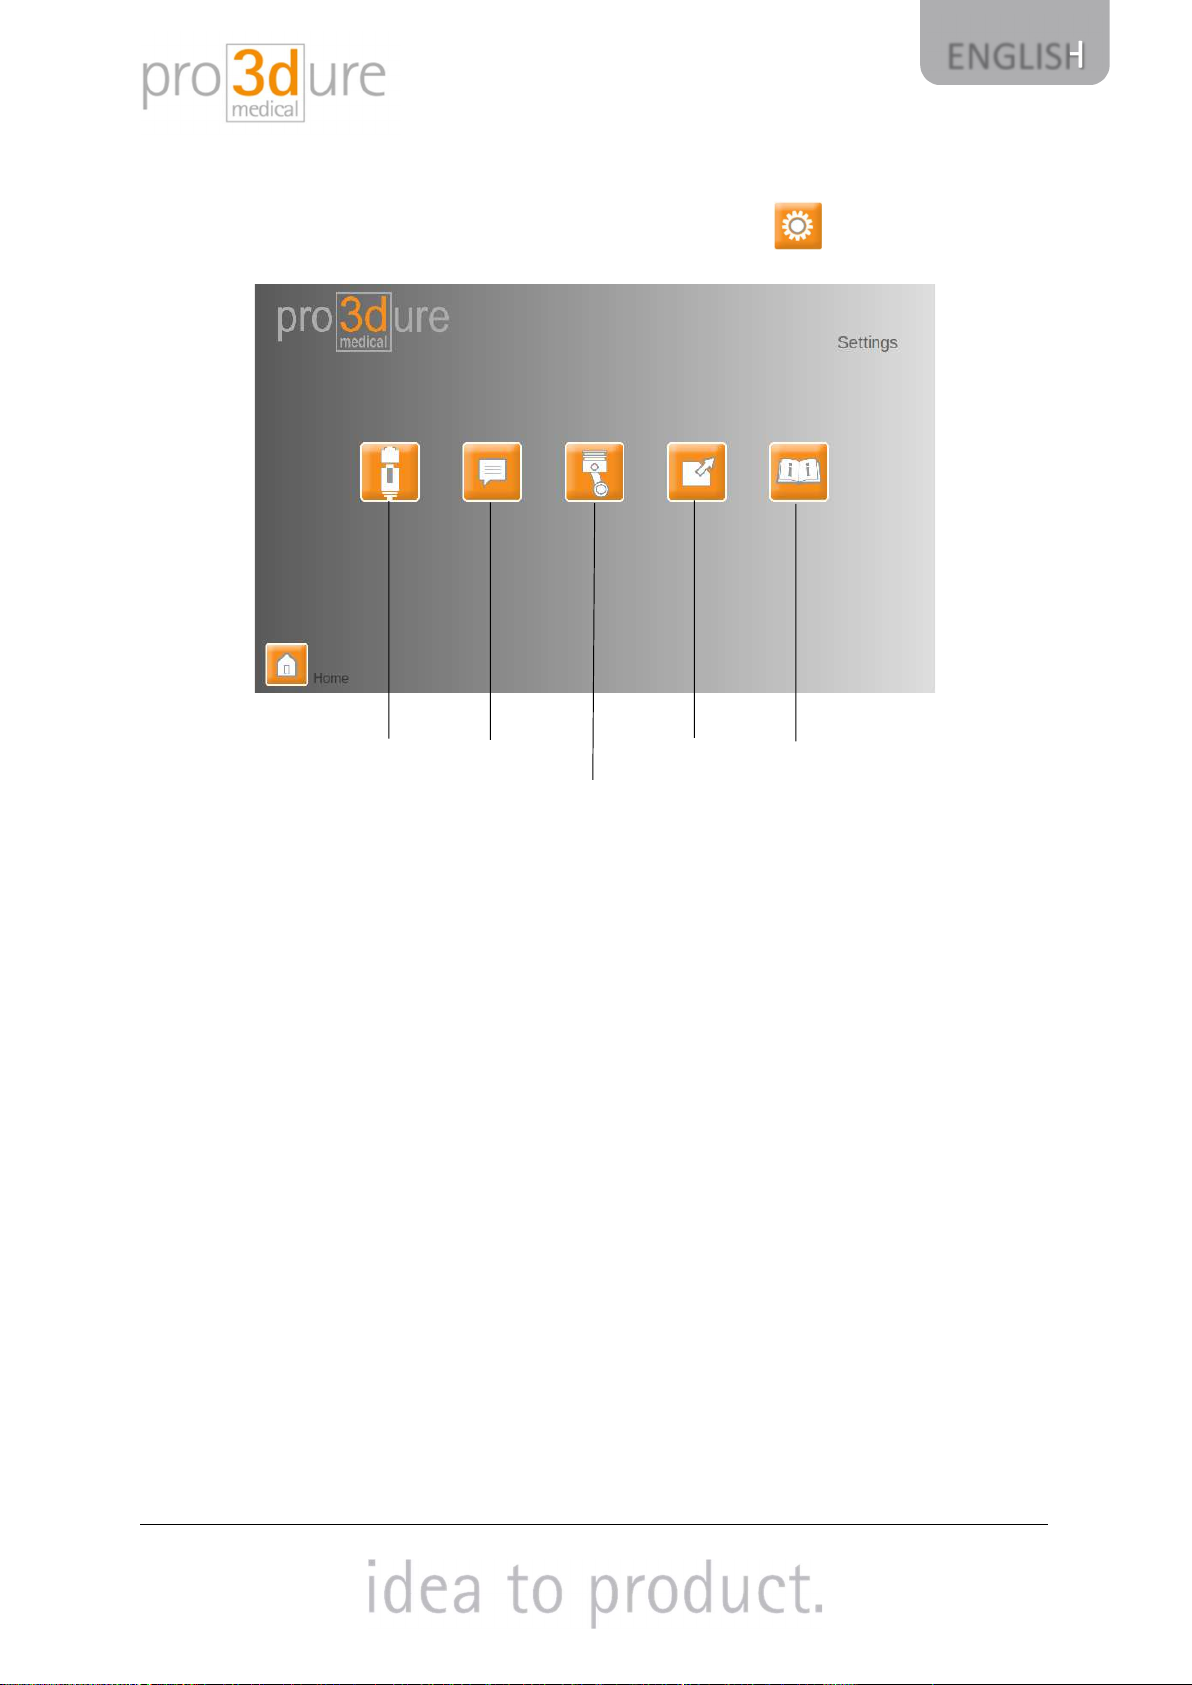
Settings
To open the settings menu of the CD-2 press the settings button in the main menu. A
new menu will open
Network: The CD-2 is network compatible. When a network cable is connected you can
configure the local IP address, the mask and your gateway.
Info: For normal use the access to the internet is not necessary. It is only needed to update
the curing device if updates are available.
Language: For changing the language push the language button. By pushing on “English” or
“German” the language can be selected. The language will change immediately. No restart is
necessary.
Machine information: In this menu you will find the machine information shown.
Updates: In the updates menu is the current version shown. If the CD-2 is connected to the
internet there will be also shown if an update is available and the version number of the new
version. The update can be started by pushing the play button.
Working instructions: Under working instructions the manual of the CD-2 will be shown.
machine information
Language
network

11
ENGLISH
Care and maintenance
Disconnect the unit mains supply before executing care and maintenance. Cleaning is
effected with a mild cleaning liquid. Clean it regularly with a humid piece of cloth. Cleaning
liquids must not get into the unit.
General notes
Repairs on the CD-2 are only to be executed by experts. Disconnect the unit from main
supply at any rate. Pro3dure is only responsible for safety, reliability and performance of the
unit, if the unit is exclusively used for the corresponding application, operation is only to be
carried out by trained personal.
-the unit is used in accordance with these working instructions
-extensions, new adjustment, changes or repairs are executed by persons authorized by the
company.
As we permanently develop our products, we reserve the right for technical changes.
Table of contents
Popular 3D Printer manuals by other brands

Stef's Engineering
Stef's Engineering Prusa I3 MK3 Build instructions

TierTime
TierTime UP BOX user manual

Creality
Creality CR-30 user guide

Geeetech
Geeetech Duplicator 5 Assembly manual

Phrozen
Phrozen SONIC MIGHTY 8K manual

TRAK
TRAK Airwolf EVO-T Installation, Printing, Maintenance & Troubleshooting Manual


