Probasics RLAB8BL User manual

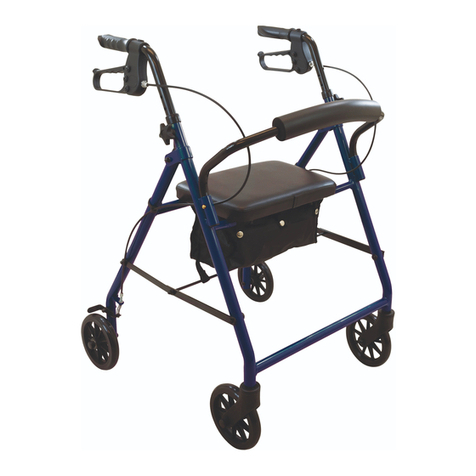
Bariatric Rollator
Andador Rollator de bariátrico
Déambulateur bariatrique
RLAB8BL
RLAB8BG

2
WARNING
DEALER
USER
BEFORE TRANSFERRING OWNERSHIP
OF THE PRODUCT TO A DIFFERENT USER
ALWAYS HAVE A DEALER INSPECT THE
PRODUCT FOR ANY DAMAGE. IF ANY DAMAGE
IS FOUND, DO NOT USE THE PRODUCT.
PRODUCT MUST ALWAYS BE ACCOMPANIED
WITH THESE INSTRUCTIONS AND WARNINGS.
FAILURE TO HEED INSTRUCTIONS AND
WARNINGS INCREASES RISK OF INJURY.
This manual MUST be given to
the user of the product
BEFORE using this product, read this manual
and save for future reference.

3
ROLLATOR DIAGRAM
Andador Rollator/Déambulateur
WARNING
English Español Français
1Brake handle Manija de freno Poignée de freinage
2Brake handle
receptacle
Receptáculo de la
manija de freno
Réceptacle de la
poignée de freinage
3Height adjustment
knob
Perilla de ajuste de
altura
Bouton de réglage
de la hauteur
4Pouch Bolsa Sachet
5Seat Asiento Siège
6Backrest Respaldo Dossier
7Caster Rueda Roulette
THIS ROLLATOR HAS A WEIGHT CAPACITY OF
400 LB/181 KG. ALWAYS OBSERVE THE WEIGHT
LIMIT ON THE LABELING OF YOUR ROLLATOR.
5
1
3
4
7
6
2

4
Inspect all parts for shipping damages before use.
If there is shipping damage–DO NOT USE. Contact your
dealer/distributor immediately for further instructions. If
there are any problems with your rollator, DO NOT attempt
to repair it yourself. Contact your dealer/distributor that you
purchased the rollator from for any needed parts or repairs.
Compass Health Brands assumes no responsibilities for any
damage or injury caused by improper installation, assembly,
or use of this product.
INSTALL HANDLE BARS AND ADJUST HEIGHT
1. Open your rollator. Pull open the folding
hinges on either side until straight to secure
the unit in the proper position (Fig. A).
2. Place a brake handle with the pre-
assembled loop lock in the corresponding
brake handle receptacle and adjust to the
desired height (Fig. B).
3. To estimate the optimal height for your
rollator, start by standing straight with
footwear on. Allow your hands to hang
naturally at your sides. Measure from the
crease in your wrist to the oor. If possible,
ASSEMBLY INSTRUCTIONS
A
B
INDICATIONS FOR USE
Congratulations on purchasing a quality ProBasics rollator.
Our rollators are lightweight walking aids and conveniently
provide stability and balance for those who have limited
mobility. The included seat can be used to rest for those
who experience fatigue while ambulating.
Rollators with 6” wheels or less are recommended for
indoor use only. Rollators with 7” wheels or greater are
ideal for both indoor & outdoor use.
READ ALL INSTRUCTIONS AND
WARNINGS PRIOR TO ASSEMBLY
AND USE. IF YOU DO NOT UN-
DERSTAND THESE INSTRUCTIONS,
CONTACT A HEALTH PROFESSION-
AL BEFORE ATTEMPTING TO USE.

5
choose a walking aid that can adjust one adjustment above and
below this estimated optimal measurement. Consult with a
healthcare professional to ensure optimal rollator height.
4. Use the height adjustment knobs to fasten
the handle bars in this position (Fig. C).
DO NOT use excessive force when
installing any parts. Make sure knobs are
FULLY tightened and are at equal heights.
ALWAYS test for stability before applying
weight to hand grips.
5. Test and adjust the brake mechanism
tension to ensure proper and secure
locking BEFORE use (Fig. D and E).
See “Brake Operation and Adjustment”
section for further guidance.
6. Insert backrest into frame receptacles until
snap buttons engage. An audible click will
be heard on each side.
C
D
E
OPERATING INSTRUCTIONS
FOLDING UP YOUR ROLLATOR
1. If in use, ensure items in the pouch have been removed.
The rollator can easily fold from the user’s side by pulling the
nylon strap under the seat up. The rollator will begin to fold
as the cord is pulled.
UNFOLDING YOUR ROLLATOR
1. With all wheels touching the ground, gently pull the frame
apart until the folding hinge is completely straightened on
both sides (Fig. A).
Ensure the rollator is fully opened, the seat is down and the
backrest is locked in BEFORE use.
BRAKE OPERATION
1. To engage the parking brake (lock the brakes), press down
on the brake handle until the handle locks in place. (Fig. E).
2. To release and/or engage the brakes, squeeze the brake
handle up towards the hand grip (Fig. D).
DO NOT use the hand brake as a primary stopping tool. It
may be used if needed but is primarily designed to maintain
a stopped stance.
Brakes and tires are non-durable components which will
require maintenance through the life of the rollator. Brakes
MUST be adjusted so that the wheels do not turn while

6
the brake is applied or when the brake lock/parking brake
is engaged. If wheels turn while the brake is applied and/
or when the brake lock is engaged, DO NOT continue
to use the rollator. Return to your dealer/distributor for
adjustment, repair, or replacement.
BRAKE ADJUSTMENT
1. Hold the top nut rmly in place. DO NOT turn the top nut.
2. To loosen the brake adjustment, turn the bottom nut
(closest to the bar securing the brake to the rollator)
counterclockwise. The nut will move away from the frame.
3. To tighten the brake adjustment, turn the nut clockwise.
The nut will move toward the frame.
4. Refer to below visual guide for further assistance.
INSTRUCTIONS TO ADJUST THE
HAND BRAKE SYSTEM
POUCH INSTALLATION
1. With rollator in unfolded position, lift
seat up to rest against the backrest.
2. Unsnap all buttons on nylon pouch.
3. Hang the pouch between the front
and back frame tubes, looping each
of the snap tabs over the bars, then
secure with snap buttons. Ensure
ALL snap buttons are attached to the
frame.
G
HOLD FIRMLY IN PLACE.
DO NOT TURN
TO TIGHTEN THE HAND
BRAKE ADJUSTMENT,
TURN THE NUT CLOCKWISE
TO LOOSEN THE HAND
BRAKE ADJUSTMENT,
TURN THE NUT
COUNTER CLOCKWISE

7
WALKING WITH THE ROLLATOR
SITTING IN THE ROLLATOR
1. Standing behind the rollator, slowly roll forward so that the
rear wheels are a few inches IN FRONT of your feet.
2. Step forward and place your foot IN LINE with the rear
wheels, but slightly inside of the wheels.
3. Maintaining a steady roll forward, place your other foot
IN LINE with the rear wheels.
4. Determine a safe gait to keep your feet IN LINE with the
rear wheels.
BE AWARE of your surroundings when operating the rollator.
Look for hazards and avoid them. Avoid streets and surfaces
with water, sand, gravel, dirt, leaves, and other debris. Wet,
slick, uneven, and/or rough surfaces may impair traction and
contribute to possible accidents. Loose cords and unsecured
rugs may move suddenly and cause a loss of balance.
DO NOT use a rollator in mud, ice, or puddles.
NEVER use near steps, sloped driveways, hills, and/or ramps
with a steep incline (NEVER greater than 15 degrees).
DO NOT walk backwards down a slope.
DO NOT use stairs or escalators while using the rollator.
DO NOT use near swimming pool areas.
ALWAYS take additional care and move slowly when moving
from carpeted to hard surface oors or cracks/separations in
walk way surfaces; avoid bumps, drainage gates, and sudden
surface changes. Rollator may abruptly stop if a wheel
becomes wedged.
ALWAYS wear protective footwear while using the rollator.
ALWAYS keep shoelaces, loose clothing and/or accessories
clear of the wheels and handlebars during use.
1. ALWAYS Engage parking brakes (refer to Brake Operation
section on pg. 5).
2. Gently ease into the seat of the rollator by using the
handgrips for support while lowering body into the rollator.
Apply weight evenly across both handgrips.
3. To stand, use the handgrips for support and safely come
to an upright position. Apply weight evenly across both
handgrips.
4. Disengage parking brakes before resuming use of the
rollator.
DO NOT sit on the rollator if it is parked on a slope. Only use
the seat on level ground.

8
DO NOT “plop” and/or drop all body weight immediately
into the rollator. Ease gently into the seat.
DO NOT use the backrest bar to support your weight.
Leaning back while seated on the rollator may cause the
device to tip.
ALWAYS engage both parking brakes before sitting in the
rollator. DO NOT move or scoot while seated in the rollator.
Parking brakes MUST remain engaged at all times while
seated. Ensure the front wheels are in the forward position
before transferring into or out of the seat. DO NOT use the
rollator as a wheelchair or transport device. This is a walking
aid ONLY. NEVER scoot, roll, or propel device while seat is
occupied.
DO NOT attempt to reach objects that are out of your
immediate reach while seated on the rollator. DO NOT lean
forward, backward, or to either side while seated on the
rollator.
MAINTENANCE
• Wipe rollator frame with a clean, soft cloth at least once a
week. All metal parts can be cleaned with auto wax or similar
products. If exposed to moisture, dry immediately
• Wipe the hand grips with cold water and a clean towel.
NEVER use ammonia-based cleaning solutions or soap on
the hand grips. This may cause them to loosen or slide off
the frame.
NEVER use organic solvents, abrasive cleaners or scouring
pads on any part of the rollator.
ALWAYS INSPECT ROLLATOR PRIOR TO USE. Properly
inspecting and maintaining your rollator can reduce the risk
of injury. Make sure that all parts are secure and are in good
working order. ALWAYS check the fasteners, wheels, brakes,
and seat for tightness prior to use. Make sure the parking
brakes are working, and the rollator wheels cannot turn with
the brakes on. If rollator is not in good working order or
fasteners cannot be tightened, DISCONTINUE USE OF THE
ROLLATOR and replace.
To ensure the best service from your product, ONLY use
ProBasics replacement parts. Accessories designed by other
manufacturers have not been tested by Compass Health
Brands and are not recommended for use with this product.
Although parts should be replaced as needed, to maintain
optimal performance, it is recommended that non-durable
components such as wheels and brakes are purchased and
replaced at least every 18 MONTHS or BETWEEN PATIENT
USE. Contact your authorized dealer for more information.

9
• This rollator should NEVER be used inside a moving vehicle
as a walking aid or seat.
• ALWAYS INSPECT ROLLATOR PRIOR TO USE. Properly
inspecting and maintaining your rollator can reduce the risk
of injury. Make sure that all parts are secure and are in good
working order. ALWAYS check the fasteners, wheels, brakes,
and seat for tightness prior to use. Make sure the parking
brakes are working, and the rollator wheels cannot turn with
the brakes on. If rollator is not in good working order or
fasteners cannot be tightened, DISCONTINUE USE OF THE
ROLLATOR and replace.
• ALWAYS wear protective footwear while using the rollator.
ALWAYS keep shoelaces, loose clothing and/or accessories
clear of the wheels and handlebars during use.
• ALWAYS make sure the rollator is fully opened and the
folding bar is locked in the down position before use.
• ALWAYS maintain good posture while using the rollator.
When walking with the rollator, keep your feet in line with the
rear wheels, and DO NOT let the rollator get too far in front
of you. When sitting on the rollator, keep both feet in contact
with the oor and DO NOT lean out of the seat.
• BE AWARE of your surroundings when operating the rollator.
Look for hazards and avoid them. Avoid streets and surfaces
with water, sand, gravel, dirt, leaves, and other debris. Wet,
slick, uneven, and/or rough surfaces may impair traction and
contribute to possible accidents. Loose cords and unsecured
rugs may move suddenly and cause a loss of balance.
DO NOT use a rollator in mud, ice, or puddles.
• NEVER use near steps, sloped driveways, hills, and/or ramps
with a steep incline (NEVER greater than 15 degrees).
DO NOT walk backwards down a slope.
• DO NOT use stairs or escalators while using the rollator.
DO NOT use near swimming pool areas.
• ALWAYS take additional care and move slowly when moving
from carpeted to hard surface oors or cracks/separations in
walk way surfaces; avoid bumps, drainage gates, and sudden
surface changes. Rollator may abruptly stop if a wheel
becomes wedged.
• DO NOT use the rollator to pull yourself up from a chair or
other seated position. Use the arms of the chair to support
your weight as you stand.
• DO NOT sit on the rollator if it is parked on a slope. Only use
the seat on level ground.
• DO NOT “plop” and/or drop all body weight immediately
into the rollator. Ease gently into the seat.
WARNINGS

10
• DO NOT use the backrest bar to support your weight.
Leaning back while seated on the rollator may cause the
device to tip.
• ALWAYS engage both parking brakes before sitting in the
rollator. DO NOT move or scoot while seated in the rollator.
Parking brakes MUST remain engaged at all times while
seated. Ensure the front wheels are in the forward position
before transferring into or out of the seat.
• DO NOT use the rollator as a wheelchair or transport device.
This is a walking aid ONLY. NEVER scoot, roll, or propel
device while seat is occupied.
• DO NOT attempt to reach objects that are out of your
immediate reach while seated on the rollator. DO NOT lean
forward, backward, or to either side while seated on the
rollator.
• ALWAYS have all wheels in contact with the oor/ground
while using this device. Failure to maintain wheel contact
could result in improper balance of the rollator and injury or
damage.
• DO NOT hang anything from the rollator handles or frame.
Items may only be carried in the provided pouch/basket.
• DO NOT climb, kneel, or stand on the rollator.
• This is not a toy. DO NOT let children play on the rollator.
• DO NOT use while under the inuence of mind-altering
drugs, alcohol, or while suffering from dizziness.
• DO NOT store in directly sunlight or outdoors. Exposure to
extreme temperatures (heat, cold, moisture, etc.) may make
surfaces (seat, hand grips, etc.) hot to the touch, weak or
brittle. Ensure hand grips DO NOT twist and skin contact
surfaces are cool to the touch before use.
• To ensure the best service from your product, ONLY use
ProBasics replacement parts. Accessories designed by other
manufacturers have not been tested by Compass Health
Brands and are not recommended for use with this product.
Although parts should be replaced as needed, to maintain
optimal performance, it is recommended that non-durable
components such as wheels and brakes are purchased and
replaced at least every 18 MONTHS or BETWEEN PATIENT
USE. Contact your authorized dealer for more information.

11
THIS PRODUCT SHOULD NOT BE USED
WITHOUT THE INSTRUCTION OF A
HEALTHCARE PROFESSIONAL. FAILURE TO
USE COMMON SENSE AND HEED THE ABOVE
WARNINGS FURTHER INCREASES RISK OF
SERIOUS INJURY. USE AT YOUR OWN RISK AND
WITH APPROPRIATE AND SERIOUS ATTENTION
TO SAFE OPERATION. USE CAUTION.

Andador
Rollator de
bariátrico

13
ADVERTENCIA
DISTRIBUIDOR
USUARIO
ANTES DE TRANSFERIR LA PROPIEDAD DEL
PRODUCTO A OTRO USUARIO, SIEMPRE HAGA
QUE UN DISTRIBUIDOR INSPECCIONE EL
PRODUCTO EN BUSCA DE CUALQUIER DAÑO.
SI SE ENCUENTRA ALGUN TIPO DE DAÑO, NO
USE EL PRODUCTO. EL PRODUCTO SIEMPRE
DEBE ESTAR ACOMPAÑADO DE ESTAS INSTRUC-
CIONES Y ADVERTENCIAS. NO SEGUIR LAS
INSTRUCCIONES Y ADVERTENCIAS MENCIONA-
DAS AUMENTA EL RIESGO DE LESIONES.
Este manual DEBE ser entregado al
usuario del producto.
ANTES de usar este producto, lea este manual
y guárdelo para referencias futuras.

14
DIAGRAMA DEL ANDADOR
Andador Rollator/Déambulateur
ADVERTENCIA
English Español Français
1Brake handle Manija de freno Poignée de freinage
2Brake handle
receptacle
Receptáculo de la
manija de freno
Réceptacle de la
poignée de freinage
3Height adjustment
knob
Perilla de ajuste de
altura
Bouton de réglage
de la hauteur
4Pouch Bolsa Sachet
5Seat Asiento Siège
6Backrest Respaldo Dossier
7Caster Rueda Roulette
ESTE ANDADOR TIENE UNA CAPACIDAD DE PESO
DE 400 LB / 181 KG. OBSERVE SIEMPRE EL LIMITE
DE PESO EN LA ETIQUETA DE SU ANDADOR.
5
1
3
4
7
6
2

15
Antes del uso, revise que no haya daños de envío. Si hay
daños de envío: NO UTILICE EL PRODUCTO. Comuníquese
con su distribuidor o proveedor de manera inmediata para
obtener más instrucciones. Si hay algún problema con su
andador, NO intente repararlo usted mismo. Comuníquese
con el distribuidor o proveedor a quien le compró el andador
si necesita reemplazar o cambiar alguna pieza.
Compass Health Brands no asume ninguna responsabilidad
por cualquier daño o lesión causada por instalación,
ensamblaje o uso incorrectos de este producto.
INSTALACIÓN DE LAS BARRAS DE
EMPUÑADURA Y AJUSTE DE LA ALTURA
1. Abra su andador. Abra las bisagras
plegables de ambos lados hasta que
estén rectas para asegurar la unidad en la
posición correcta (Fig. A).
2. Coloque una manija de freno con seguro
preensamblado en forma de bucle en el
receptáculo correspondiente de la manija
de freno y ajuste a la altura deseada (Fig. B).
3. Para estimar la altura óptima de su andador,
párese con el calzado puesto. Deje que
INSTRUCCIONES DE
ENSAMBLAJE
A
B
INDICACIONES DE USO
Felicitaciones por la compra de un andador ProBasics de
calidad. Nuestros andadores son ayudas ligeras para caminar
y proporcionan estabilidad y equilibrio para aquellos que
tienen movilidad limitada. Aquellos que experimentan fatiga
mientras se desplazan pueden usar el asiento incluido para
descansar.
Se recomienda que los andadores con ruedas de 6 in o menos
solo se usen en interiores. Los andadores con ruedas de 7 in o
más son ideales para usar en interiores y al aire libre.
LEA TODAS LAS INSTRUCCIONES
Y ADVERTENCIAS ANTES DEL
ENSAMBLAJE Y USO. SI NO EN-
TIENDE ESTAS INSTRUCCIONES,
COMUNÍQUESE CON UN PROFE-
SIONAL DE LA SALUD ANTES DE
INTENTAR USAR EL PRODUCTO.

16
sus manos cuelguen de manera natural a
sus costados. Mida desde el pliegue de su
muñeca hasta el piso. Si es posible, elija un
dispositivo de ayuda para caminar en el que
pueda realizar un ajuste por encima y por
debajo de esta medida óptima estimada.
Consulte con un profesional de atención
médica para garantizar la altura óptima del
andador.
4. Use las perillas de ajuste de altura para jar
las barras de empuñadura en esta posición
(Fig. C).
NO use fuerza excesiva al instalar las piezas.
Asegúrese de que las perillas estén
TOTALMENTE ajustadas y a la misma
altura. SIEMPRE pruebe la estabilidad
antes de aplicar peso a las empuñaduras.
5. Pruebe y ajuste la tensión del mecanismo de freno para
garantizar que el bloqueo sea correcto y seguro ANTES de
su uso (Fig. D y E).Consulte la sección “Funcionamiento y
ajuste de los frenos” para obtener más información.
6. Inserte el respaldo en los receptáculos de la estructura hasta
que los botones de presión se acoplen. Se escuchará un
sonido de “clic” en cada lado.
C
D
E
INSTRUCCIONES DE USO
PLEGAR SU ANDADOR
1. Si está en uso, asegúrese de que no haya artículos en la
bolsa. El andador se puede plegar de manera fácil desde
el lado del usuario al tirar de la correa de nylon, que se
encuentra debajo del asiento, hacia arriba. El andador
comenzará a plegarse a medida que se tire de la correa.
DESPLEGAR SU ANDADOR
1. Cuando todas las ruedas toquen el suelo, separe con
cuidado la estructura hasta que las bisagras plegables estén
completamente rectas en ambos lados (Fig. A).
Asegúrese de que el andador esté completamente abierto,
el asiento esté abajo y el respaldo esté bloqueado ANTES
de usarlo.
FUNCIONAMIENTO DE LOS FRENOS
1. Para activar el freno de estacionamiento (bloquear los
frenos), presione la manija de freno hacia abajo hasta se
asegure en su lugar. (Fig. E).
2. Para liberar o activar los frenos, apriete la manija de freno
hacia la empuñadura (Fig. D).

17
NO utilice el freno de mano como herramienta principal de
frenado. Puede utilizarlo si es necesario. Sin embargo, está
diseñado principalmente para mantener una postura de
frenado.
Los frenos y los neumáticos son componentes no duraderos
que requerirán mantenimiento durante la vida útil del
andador. Los frenos DEBEN ajustarse para que las ruedas
no giren cuando se aplique el freno o cuando el freno de
estacionamiento/bloqueo de freno esté activado. Si las
ruedas giran cuando se aplica el freno o cuando el bloqueo
del freno está activado, NO continúe usando el andador.
Devuélvalo a su distribuidor o proveedor para que sea
ajustado, reparado o reemplazado.
AJUSTE DE LOS FRENOS
1. Sostenga la tuerca superior de manera rme en su lugar.
NO gire la tuerca superior.
2. Para ajustar el freno, gire la tuerca inferior (la más cercana
a la barra que sujeta el freno al andador) en sentido
antihorario. La tuerca se alejará de la estructura.
3. Para apretar el ajuste de los frenos, gire la tuerca en sentido
horario. La tuerca se moverá hacia la estructura.
4. Consulte la siguiente guía visual para obtener más ayuda.
INSTRUCCIONES PARA AJUSTAR
EL SISTEMA DE FRENO DE MANO
INSTALACIÓN DE LA BOLSA
1. Con el andador en posición
desplegada, levante el asiento para
apoyarlo contra el respaldo.
2. Desabroche todos los botones de la
bolsa de nylon.
G
SOSTÉNGALO DE
MANERA FIRME EN SU
LUGAR. NO GIRE.
PARA APRETAR EL
FRENO DE MANO,
GIRE LA TUERCA EN
SENTIDO HORARIO.
PARA AFLOJAR EL
AJUSTE DEL FRENO DE
MANO, GIRE LA TUERCA
EN SENTIDO ANTIHO-
RARIO.

18
1. De pie, detrás del andador, llévelo lentamente hacia adelante
para que las ruedas traseras estén unas pulgadas DELANTE
de sus pies.
2. Avance y coloque su pie EN LÍNEA con las ruedas traseras,
pero ligeramente hacia dentro en relación a ellas.
3. Manteniendo un movimiento constante hacia adelante,
coloque su otro pie EN LÍNEA con las ruedas traseras.
4. Determine un modo de andar seguro para mantener sus pies
EN LÍNEA con las ruedas traseras.
SEA CONSCIENTE de sus alrededores cuando utilice el
andador. Advierta los peligros y evítelos. Evite las calles
y supercies con agua, arena, grava, tierra, hojas y otros
desechos. Las supercies húmedas, resbaladizas, irregulares
o muy rugosas pueden poner en peligro la tracción y generar
posibles accidentes. Los cables sueltos y las alfombras que
no son jas pueden moverse repentinamente y causar una
pérdida de equilibrio.
NO use el andador en barro, hielo o charcos de agua.
NUNCA lo use cerca de escalones, calles inclinadas, colinas
o rampas con una pendiente pronunciada (NUNCA más de
15 grados).
NO camine hacia atrás por una pendiente.
NO use escaleras ni escaleras mecánicas mientras usa el
andador.
NO lo use cerca de áreas de piscinas.
SIEMPRE tenga más cuidado y camine despacio cuando
pase de un piso alfombrado a pisos de supercie dura o
grietas o separaciones en supercies de calzada; evite los
baches, rejillas de drenaje y cambios bruscos de supercie.
El andador puede detenerse bruscamente si una rueda
queda atrapada.
SIEMPRE use calzado protector mientras usa el andador.
SIEMPRE mantenga los cordones de los zapatos, la ropa
suelta o los accesorios lejos de las ruedas y barras de
empuñadura durante su uso.
CAMINAR CON EL ANDADOR
3. Cuelgue la bolsa entre los tubos de la estructura frontal y
posterior, pase cada una de las pestañas a presión sobre las
barras y asegúrelas con los botones de presión. Asegúrese
de que TODOS los botones de presión estén sujetos a la
estructura.

19
1. SIEMPRE active los frenos de estacionamiento (consulte la
sección “Funcionamiento de los frenos” en la pág. 5).
2. Siéntese cuidadosamente en el asiento del andador
utilizando las empuñaduras como apoyo mientras baja el
cuerpo hacia el andador. Ponga su peso de manera uniforme
en ambas empuñaduras.
3. Para pararse, use las empuñaduras como apoyo y colóquelas
de manera segura en posición vertical. Ponga su peso de
manera uniforme en ambas empuñaduras.
4. Desactive los frenos de estacionamiento antes de reanudar el
uso del andador.
NO se siente en el andador si está estacionado en una
pendiente. Solo use el asiento en una supercie nivelada.
NO “deje caer” ni apoye todo el peso corporal de manera
repentina sobre el andador. Siéntese cuidadosamente en el
asiento.
NO use la barra del respaldo para soportar su peso.
Inclinarse hacia atrás mientras está sentado en el andador
puede hacer que el dispositivo se incline.
SIEMPRE active ambos frenos de estacionamiento antes de
sentarse en el andador NO se mueva ni se deslice mientras
esté sentado en el andador. Los frenos de estacionamiento
DEBEN permanecer activados en todo momento mientras
esté sentado. Asegúrese de que las ruedas delanteras
estén en la posición delantera antes de trasladarse hacia o
desde el asiento. NO use el andador como silla de ruedas
o dispositivo de transporte. Este es SOLO un dispositivo de
ayuda para caminar. NUNCA se deslice, ruede o impulse el
dispositivo cuando el asiento esté ocupado.
NO intente alcanzar objetos que están fuera de su alcance
inmediato mientras esté sentado en el andador. NO se
incline hacia delante, hacia atrás o hacia los lados mientras
está sentado en el andador.
• Limpie la estructura del andador con un paño limpio y suave
al menos una vez a la semana. Todas las piezas metálicas se
pueden limpiar con cera de auto o productos similares. Si se
expone a la humedad, séquelo inmediatamente.
• Limpie las empuñaduras con agua fría y una toalla limpia.
NUNCA utilice soluciones de limpieza a base de amoníaco
o jabón en las empuñaduras. Esto podría provocar que se
aojen o deslicen fuera del marco.
SENTARSE EN EL ANDADOR
MANTENIMIENTO

20
•
Este andador NUNCA debe usarse dentro de un vehículo en
movimiento como ayuda para caminar o asiento.
• SIEMPRE INSPECCIONE EL ANDADOR ANTES DE
USARLO. Inspeccionar y realizar el mantenimiento de su
andador de manera adecuada puede reducir el riesgo de
lesiones. Asegúrese de que todas las piezas estén seguras y
en buen estado de funcionamiento. SIEMPRE compruebe
que los elementos de jación, las ruedas, los frenos y el
asiento se encuentren correctamente ajustados antes de
su uso. Asegúrese de que los frenos de estacionamiento
funcionen y que las ruedas del andador no giren con los
frenos activados. Si el andador no se encuentra en buen
estado de funcionamiento o los sujetadores no pueden
ajustarse, DEJE DE UTILIZARLO y reemplácelo.
• SIEMPRE use calzado protector mientras usa el andador.
SIEMPRE mantenga los cordones de los zapatos, la ropa
suelta o los accesorios lejos de las ruedas y barras de
empuñadura durante su uso.
NUNCA utilice disolventes orgánicos, limpiadores abrasivos
o esponjas sobre ninguna parte del andador.
SIEMPRE INSPECCIONE EL ANDADOR ANTES DE
USARLO. Inspeccionar y realizar el mantenimiento de su
andador de manera adecuada puede reducir el riesgo de
lesiones. Asegúrese de que todas las piezas estén seguras y
en buen estado de funcionamiento. SIEMPRE compruebe
que los elementos de jación, las ruedas, los frenos y el
asiento se encuentren correctamente ajustados antes de
su uso. Asegúrese de que los frenos de estacionamiento
funcionen y que las ruedas del andador no giren con los
frenos activados. Si el andador no se encuentra en buen
estado de funcionamiento o los sujetadores no pueden
ajustarse, DEJE DE UTILIZARLO y reemplácelo.
Para garantizar el mejor servicio de su producto, SOLO
utilice las piezas de repuesto ProBasics. Compass Health
Brands no ha probado los accesorios diseñados por otros
fabricantes y no se recomienda usarlos con este producto
Aunque las piezas deben reemplazarse, según sea necesario,
para mantener un rendimiento óptimo, se recomienda que
los componentes no duraderos, como las ruedas y los frenos,
se compren y reemplacen cada 18 MESES o ENTRE EL USO
DEL PACIENTE. Comuníquese con su proveedor autorizado
para obtener más información.
ADVERTENCIAS
This manual suits for next models
1
Table of contents
Languages:
Other Probasics Mobility Aid manuals

Probasics
Probasics PB7035 User manual

Probasics
Probasics PB6074 Installation guide

Probasics
Probasics CNQSB User manual

Probasics
Probasics RLS6BL User manual

Probasics
Probasics BSCWB User manual

Probasics
Probasics RLS6BL-KD User manual

Probasics
Probasics 8035 Assembly instructions

Probasics
Probasics KNEE WALKER 1030 User manual
Popular Mobility Aid manuals by other brands

Graham Field
Graham Field Lumex RJ4400 manual

aidapt
aidapt VM947A Usage and maintenance instructions

NRS Healthcare
NRS Healthcare S23472 User instructions

Vitea Care
Vitea Care MOBILUS LITE Instructions for use

Zippie
Zippie ZM-310 owner's manual

Golden Technologies
Golden Technologies Companion I owner's manual