PROEL STARPOINT 575CN User manual

Rev. 09/2006
MANUALE UTENTE –USER’S MANUAL
STARPOINT 575CN
PLIS575CN

2
INDICE
SPECIFICHE TECNICHE........................................................3
FUNZIONI...............................................................................3
INSTALLAZIONE.....................................................................3
CONSIGLI PER L’USO............................................................4
MANUTENZIONE....................................................................4
RISOLUZIONE PROBLEMI .....................................................5
SCHEMA DELLA CONSOLEDI COMANDO...........................6

3
INTRODUZIONE
Grazie per aver scelto lo STARPOINT 575CN. Se è la prima volta che si
utilizza l’apparecchio, leggere e seguire attentamente le istruzioni
riportate su questo manuale.
SPECIFICHE TECNICHE
Alimentazione:230 V 50 Hz o a richiesta 120 V 60Hz
Lampada:HMI 575GS Osram
Codice:PLLPHMI575GS
Dimensioni:(380×1000×230) mm
Peso:36 Kg
Iris:10-100%
Effetti:5 colori + bianco; filtri correzione temperatura
3200K, 5200K, effetto dimmer 0-100%. Blackout.
Protezione:IP20
FUNZIONI
•Conforme agli standard di sicurezza, livello di protezione IP 20.
•Sistema di cambio colori veloce, preciso, stabile e silenzioso.
•Circuito di protezione contro il surriscaldamento e la sovracorrente.
•Raffreddamento ad aria tramite due ventole di raffreddamento.
INSTALLAZIONE
Alimentazione
Assicurarsi che il tipo di alimentazione sia compatibile con le specifiche
tecniche dell’apparecchio onde evitare seri danneggiamenti sia alla rete
che al proiettore.

4
Connessioni
Accertarsi che l’apparecchio sia collegato a terra.
CONSIGLI PER L’USO
Accensione / spegnimento
La lampada installata nel proiettore è una lampada a scarica. Questo tipo
di lampadanon èadattoad un uso intervallato da accensioni e
spegnimenti. Perciò ogni volta che l’apparecchio viene spento, la
lampada deve poter raffreddarsi per almeno 20 minuti prima che sia
possibile riaccenderla, altrimenti potrebberopresentarsi, con il lungo
andare, problemi alla lampada e al circuito elettronico.
Pericolo di incendio.
Materiali infiammabili come carta devono essere tenuti lontano
dall’apparecchio ed evitare di ostruire le aperture delle ventole di
raffreddamento.
Installazione e rimozione della lampada
Prima di procedere, assicurarsi che l’apparecchio sia disconnesso
dall’alimentazione e che la lampada si sia raffreddata completamente.
Svitare la due viti sul lato frontale del pannello superiore (sopra la
console comandi) e inserire la lampada con cautela facendo attenzione a
non toccarne il bulbo. Una volta posizionata nel supporto, stringere le
apposite viti e chiudere il coperchio superiore.
MANUTENZIONE
Pulire con regolarità l’apparecchio, le lenti e la console dei comandi.
Controllare il serraggio di viti e dadi regolarmente.
Utilizzare sempre lampade che rispondano alle specifiche del prodotto.

5
RISOLUZIONE PROBLEMI
La lampada non si accende
•Controllare che il fusibile non sia interrotto e accertarsi che
l’alimentazione sia di 230 V in AC.
•La lampada non si è raffreddata sufficientemente. Lasciare che si
raffreddi.
•La lampada si è spenta a causa di un surriscaldamento interno
dell’apparecchio. Controllare che le prese esterne e i condotti
interni di areazione non siano otturati.
•Assicurarsi che la lampada non si sia danneggiata o che risponda
alle specifiche tecniche dell’apparecchio.
•Controllare l’accenditore. Verificare la solidità dei contatti e del
cablaggio elettronico dell’accenditore.
•Controllare che il ballast non sia danneggiato.
I motori non funzionano correttamente
•Controllare che il fusibile non sia interrotto e accertarsi che
l’alimentazione sia di 230 V in AC.
•Controllare se i cavi di rete o i connettori si siano rovinati o
staccati.
•Controllare se le viti per il serraggio della flangia del motori si
siano allentate o se vi sono corpi estranei all’interno.
•Verificare che le prese o gli elementi del circuito integrato siano
ben fissati e che non abbiano preso colpi.

6
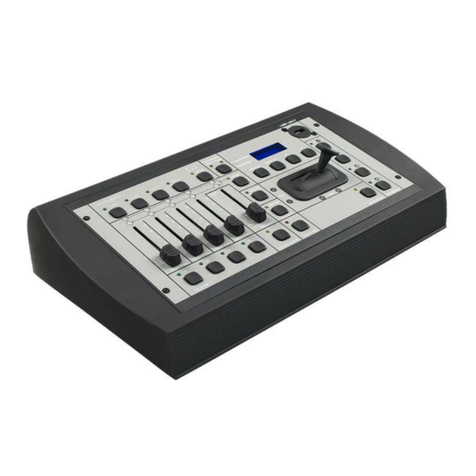
SCHEMA DELLA CONSOLEDI COMANDO
WHITE:Luce bianca senza nessun filtro.
RED:Filtro colore rosso.
BLUE:Filtro colore blu.
YELLOW:Filtro colore giallo.
GREEN:Filtro colore verde.
MAUVE:Filtro colore viola.
BLURRY:Luce attenuata.
3200K:Filtro temperatura 3200K.
5200K:Filtro temperatura 5200k.
QUICK SHOT:Cambio rapido colori.
SLOW SHOT:Cambio lento colori.
SMALL IRIS:Apertura minima dell’iris.
LARGE IRIS:Apertura massima dell’iris.
OPEN/CLOSE:Attivazione / disattivazione blackout.

7
TABLE OF CONTENTS
TECHNICAL SPECIFICATION................................................8
FUNCTIONS...........................................................................8
INSTALLATION.......................................................................9
ATTENTIONS FOR USE.........................................................9
MAINTENANCE....................................................................10
TROUBLE SHOOTING.......................................................... 10
PANEL SKETCH MAP OF THE BUTTON..............................11

8
WELCOME
Thank you for choosing the Follow Spot STAPPOINT 575CN. Prior to
use, we suggest you to read carefully the instructions.
TECHNICAL SPECIFICATION
Power supply:230 V 50 Hz or 120 V 60Hz on request
Lamp:HMI575S Osram
Code:PLLPHMI575GS
Dimensions:(380×1000×230) mm
Weight:36 Kg
Iris:10-100%
Effects:5 colors + white; correction temperature
filters 3200K, 5200K, dimmer 0-100%.
Blackout.
Housing Protection:IP20
FUNCTIONS
•Safety standard compatible, IP 20 protection level.
•Quick, accurate, stable and noiseless color switching system,
free of the problems in mechanical color switch.
•Embedded with overheat protection and high voltage line
protection.
•Double flow fans for cooling optimised internal air duct
design.

9
INSTALLATION
Power up
Make sure the power supply is sufficient for the power consumption of
the lamps before power up. Otherwise the power lines and the
projectors might be damaged.
Connection
The insulation resistance of all the installation equipments and the
electrical lines shall be up to the safety standard and the machine crust
shall be well grounded.
ATTENTIONS FOR USE
Power On/Off
This unit is equipped with a discharge lamp. The gas discharge lamps
shall not be used in an on and off manner. Each time the lamps are
turned off, the lamps shall be cooled for at least 20 minutes before the
lamps are turned on again. Otherwise, high voltage discharge short
circuit or interference toperiphery equipment might arise.
Fire warning.
Flammables materials are not allows to fall in the lamps or the air duct.
Otherwise, the high temperature lamps in the lamps might cause fire. In
case of unusual smell or take fire, turn off the power immediately and
have the case properly handled before turning on the lamps again.
Installation and removal of lamps
Make sure the power is cut and the lamp is cooled before the operation.
You just unscrew the screw of the top panel which is on the front side of
the control console and replace the lamp slightly. When replacing the

10
lamp do not touch the lamp globe. The lamp shall be firmly planted to
avoid bad connection and damage to the circuit.
MAINTENANCE
Clean the machine, lens, machine interior and computer board regularly.
Fasten the screws and nuts in the hoisting parts and the racks regularly.
Replace lamps according to the actual situation. Do not use inferior
quality lamps.
TROUBLE SHOOTING
The lamp does not work
•Check whether the power supplied is 230 V AC and whether the
fuse is burnout.
•The lamp is not cool enough. Let it cooled down.
•The lamp is in over heat protection status due high interior
temperature. Check whether the fan and the air duct are blocked.
•Inferior or aged lamp. Replace the lamp.
•Igniter degradation or poor contact. Replace according to the original
circuit.
•Ballast damaged.
The motors do not work correctly
•Check whether the power supplied is 230 V AC and whether the use
is blown.
•Check whether the motor lines or connecting lines are degraded or
broken.
•Check whether the small flange screws for mechanical fastening is
loose, poor in contact, aged or blown.
•Check whether the output voltage of the transformer is normal.

11
PANEL SKETCH MAP OF THE BUTTON
WHITE:White light without any filter..
RED:Red filter.
BLUE:Blue filter.
YELLOW:Yellow filter.
GREEN:Green filter.
MAUVE:Light violet.
BLURRY:Soft light.
3200K:Temperature filter 3200K.
5200K:Temperature filter 5200k.
QUICK SHOT:Quick color changer.
SLOW SHOT:Slow color changer.
SMALL IRIS:Minimum iris opening.
LARGE IRIS:Maximum iris opening.
OPEN/CLOSE:Blackout on / off.

PROEL S.p.A.
(World Headquarters –Factory)
Via alla Ruenia 37/43
64027 Sant’Omero (TE) –Italy
Tel. +39 0861 81241
Fax. +39 0861 887862
e-mail: info@proelgroup.com
www.proelgroup.com
This manual suits for next models
2
Table of contents
Languages:
Other PROEL Dj Equipment manuals

PROEL
PROEL MINIPEGASUS PLMP1200 User manual

PROEL
PROEL SDJ J-JWASH400 User manual

PROEL
PROEL PLSS Series User manual

PROEL
PROEL MATISSE PLMAT User manual

PROEL
PROEL PLMN User manual

PROEL
PROEL PLC64TR User manual

PROEL
PROEL DREAMLIGHT 1200 ECLIPSE WASH User manual

PROEL
PROEL MACARENA User manual

PROEL
PROEL PLBR8DJ User manual

PROEL
PROEL PLJO25SEL User manual