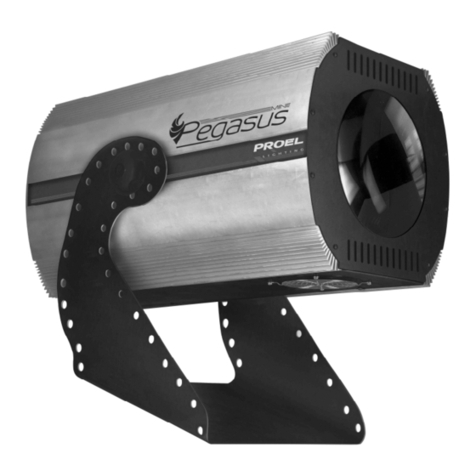
PROEL PLC64TR User manual

MANUALE UTENTE – USER’S MANUAL
Rev 07/2006
PAR MULTICOLOR
PLC64TR

2
SOMMARIO
1. INTRODUZIONE........................................................................................................... 3
2. AVVERTENZE.............................................................................................................. 3
3. INFORMAZIONI PER LA SICUREZZA......................................................................... 3
4. CARATTERISTICHE PRINCIPALI................................................................................ 4
5. CONTROLLI.................................................................................................................. 4
6. GUIDA OPERATIVA..................................................................................................... 5
6.1 REGOLAZIONE COMPLESSIVA DELL’INTENSITÀ.................................................. 6
6.2 MODALITÀ MASTER / SLAVE................................................................................... 6
6.2.1 Modalità MASTER.................................................................................................... 6
6.2.2 Modalità SLAVE....................................................................................................... 7
7. CARATTERISTICHE TECNICHE................................................................................. 9

3
1. INTRODUZIONE
Congratulazioni per aver scelto il PAR MULTICOLOR PLC64TR.
PAR MULTICOLOR PLC64TR è un effetto a colori a 3 canali DMX. Con l’uso di una
centralina DMX, l’unità può creare più di 16 milioni di colori e, come opzione, impostarne
le relative intensità. L’unità è fornita di un display LED a 4 cifre per facilitare le
regolazioni di impostazione e l’indirizzamento DMX.
Leggere con attenzione questo manuale contenente le informazioni riguardanti le
funzionalità, l’uso e la manutenzione dell’apparecchio. Conservare il manuale per un
eventuale uso futuro.
2. AVVERTENZE
- Una volta tolto l’imballo, controllare che l’apparecchio non sia danneggiato. In caso
affermativo contattare immediatamente il venditore più vicino.
- Tutti i diritti sono riservati. È vietata la riproduzione senza autorizzazioni di questo
manuale o parte di esso.
3. INFORMAZIONI PER LA SICUREZZA
- Questo prodotto deve essere collegato a terra.
- Disconnettere l’apparecchio prima di iniziare l’operazione di cambio lampada.
- Durante il normale funzionamento, si possono raggiungere temperature elevate.
Evitare il contatto con persone o materiali.
- Disconnettere l’alimentazione dopo che si è spento l’apparecchio ed aspettare
almeno 10 minuti.
- Evitare l’esposizione diretta agli occhi.
- Questo prodotto è progettato esclusivamente per l’uso al coperto.
- Evitare di esporre l’apparecchio ad alte temperature o in zone umide per evitare
pericolo di incendio e di scosse elettriche.

4
4. CARATTERISTICHE PRINCIPALI
- Sistema RGB per mixare i colori.
- Dimmer a 3 canali incorporato.
- Potenza massima 1800W.
- 9 programmi di preimpostati.
- Tre lampade da 575W.
- Regolazione della velocità di esecuzione dei programmi e del tempo didissolvenza.
- Mixaggio colori tramite un unico canale DMX
- Sistema mixer colori avanzato con un massimo di 16 milioni di colori.
5. CONTROLLI
1. Connettore XLR per ingresso DMX.
Connettore adibito alla ricezione del segnale DMX.
2. Connettore XLR per uscita DMX.
Connettore adibito all’invio del segnale DMX.
3. Pulsante MODE.
Permette di selezionare le diverse modalità di funzionamento.

5
4. Pulsante UP.
Permette di incrementare i valori delle singole funzioni e, utilizzato con il pulsante
MODE, di selezionare le relative opzioni.
5 Pulsante DOWN.
Permette di diminuire i valori delle singole funzioni e, utilizzato con il pulsante
MODE, di selezionare le relative opzioni.
6. LED segnale DMX.
Lampeggia quando l’unità riceve un segnale DMX.
7. LED AUTO/MANUAL.
Lampeggia quando è attivata la modalità AUTO. Rimane acceso quando si è nella
modalità MANUAL.
8. LED RGB.
È acceso quando si è nella modalità RGB.
9. LED C&B.
È acceso quando si è nella modalità C&B.
10. LED COLOR.
È acceso quando si è nella modalità COLOR.
11. Display digitale.
Mostra il menu, le funzioni attive e l’indirizzo attuale.
6. GUIDA OPERATIVA
Note
LED - display Informazione
A: XXX Indirizzo DMX
d: XXX Livello del Dimmer
1: XXX Intensità del canale 1
2: XXX Intensità del canale 2
3: XXX Intensità del canale 3
P: XXX Programma
SP: XXX Velocità di esecuzione del
programma
F: XXX Tempo di dissolvenza

6
6.1 REGOLAZIONE COMPLESSIVA DELL’INTENSITÀ
Prima di iniziare l’operazione di regolazione, accendere l’apparecchio.
Tenere premuto il pulsante MODE fino a quando sul display appare la scritta d:XXX.
XXX indica l’attuale livello complessivo di intensità che può essere impostato da 50 a
100.
È possibile scegliere il livello desiderato premendo i pulsanti UP e DOWN.
6.2 MODALITÀ MASTER / SLAVE
Tenendo premuto il pulsante MODE, premere UP e DOWN contemporaneamente per
scegliere tra la modalità MASTER o SLAVE.
6.2.1 Modalità MASTER
Eseguita l’operazione sopra indicata, si può entrare nella modalità MASTER. Quindi
premere il pulsante MODE per scegliere tra la modalità manuale (MANUAL) o
automatica (AUTO).
Modalità MANUAL
1. Premere MODE per selezionare la modalità manuale. La modalità MANUAL è
segnalata dal led AUTO/MANUAL in stato sempre acceso.
2. In questa modalità, le uscite dei canali 1, 2 e 3 (rispettivamente blu, rosso e verde)
possono essere controllate manualmente.
1. Tenendo premuto il pulsante MODE, premere UP oppure DOWN per entrare in uno
dei sotto menu seguenti: 1:XXX , 2:XXX , 3:XXX.
2. Tali sotto menu regolano rispettivamente l’intensità dei canali 1, 2 e 3 (con una
variazione da 1 a 100). Si può scegliere il livello desiderato premendo i tasti UP e
DOWN.
Modalità AUTO
1. Nella stessa maniera sopra indicata premere MODE per entrare nella modalità
automatica. La modalità MANUAL è segnalata dal led AUTO/MANUAL in stato
lampeggiante.
2. Tenendo premuto il pulsante MODE, premere UP oppure DOWN una sola volta per
entrare in uno dei sotto menu seguenti: P:XX , SP:XX , F:XXX.
3. Questi sotto menu sono rispettivamente per la selezione dei programmi (disponibili
da 1 a 10 programmi e una sequenza di 10 programmi), regolazione della velocità di
esecuzione (con percentuale da 1 a 99) e regolazione del tempo di dissolvenza (da
0 a 100%). È possibile regolare i relativi parametri premendo i tasti UP o DOWN.
7
6.2.2 Modalità SLAVE
Una volta entrati nella modalità SLAVE, può essere selezionato il relativo ingresso DMX
tra 1 e 512. È possibile selezionare a piacimento le modalità RGB, COLOR & BRIGHT o
COLOR premendo il pulsante MODE.
1. Quando si è nella modalità
SLAVE, il display mostra
l’indirizzo DMX attuale. Se è
presente un segnale DMX il led
del DMX lampeggia.
2. Premere i tasti UP/DOWN per
selezionare l’indirizzo DMX
desiderato da 001 a 512.
6.2.2.2 Modalità RGB / COLOR & BRIGHT / COLOR
Modalità RGB
1. Premere più volte il pulsante
MODE fino a quando si accende il
led RGB.

8
2. Nella modalità RGB, l’unità
funziona come un dimmer DMX a
3 canali dove il blu è controllato
dal canale 1, il rosso è controllato
dal canale e il verde è controllato
dal canale 3.
Modalità COLOR & BRIGHT
1. Premere più volte il pulsante MODE
fino a quando si accende il led
C&B.
2. Nella modalità COLOR & BRIGHT,
l’unità funziona come un dimmer a 2
canali DMX dove il canale 1
controlla i colori mentre il canale 2
regola l’intensità della luminosità.

9
Modalità COLOR
1. Premere più volte il pulsante MODE
fino a quando si accende il led
COLOR.
2. Nella modalità COLOR è possibile
utilizzare un canale DMX per
selezionare il colore desiderato tra
quelli disponibili.
7. CARATTERISTICHE TECNICHE
Modello: PLC64TR
Lampada 3 lampade da 575W
Fusibile di carico: F3.15A 250V 5×20mm
Fusibile interno: F0.315A 250V 5×20mm
Alimentazione: AC 230V / 50Hz ~ 60Hz
Ingresso / Uscita DMX: Presa femmina / maschio a 3 pin
Dimensioni: 258x220x458 mm.
Peso: 4,7 kg circa

10
TABLE OF CONTENTS
1. INTRODUCTION......................................................................................................... 11
2. NOTICE INFORMATION ............................................................................................ 11
3. WARNING................................................................................................................... 11
4. MEAN FEATURES...................................................................................................... 12
5. CONTROL AND FUNCTIONS.................................................................................... 12
5. OPERATION GUIDE................................................................................................... 13
5.1 OVERALL INTENSITY ADJUSTMENT..................................................................... 14
5.2 MASTER / SLAVE MODES ...................................................................................... 14
5.2.1 MASTER MODE .................................................................................................... 14
5.2.2 SLAVE MODE........................................................................................................ 15
6. TECHNICAL SPECIFICATION................................................................................... 17

11
1. INTRODUCTION
Thanks for your purchase of our product PAR MULTICOLOR PLC64TR. This is a 3 DMX
channel stage colour lighting. With the use of a DMX controller, this unit can create up to
16 millions colours, and relevant intensity can be adjusted optionally. For added
convenience, the unit comes with 4-digit led display for function settings and easy DMX
addressing. To optimise the performance of this product, please read these operating
instructions carefully to familiarize yourself with the basic operation regarding the use
and maintrnance of this unit. Please keep this manual for future.
2. NOTICE INFORMATION
- When unpacking, please check that the unit is not damaged. If something wrong
happens to this product, please do not use it, and contact the local dealer without
hesitation.
- All rights reserved. No parts of this manual included with this product can be
reproduced or transmitted in any means for any purpose without authorized
permission.
3. WARNING
- This product must be earthed.
- Disconnect the fixture before re-lamping.
- Intense heat. Avoid contact by persons and materials.
- Disconnect mains power after turning off the fixture and waiting for at least 10
minutes.
- Avoid direct eye exposure.
- This product is intended for indoor use only.
- To prevent fire and shock hazard, do not expose this product under high
temperature or moisture area.

12
4. MEAN FEATURES
- RGB color mixing system.
- Built-in 3 channel dimmer
- 1800 watts maximum output.
- 9 preset Chase program built-in.
- 575W×3 lamp with 15,000 lumen each.
- Chase speed adjustment & fade time adjustment.
- Preset col our mixing by one DMX channel.
- Advanced color-mixing with a maximum of 16 millions colours.
5. CONTROL AND FUNCTIONS
1. XLR DMX Input.
This connector is used to receive DMX input signal.
2. XLR DMX Output.
This connector is used to send the input signal through to the next DMX device.

13
3. MODE button.
This button is used to select different function modes as user’s requirement.
4. UP Button.
This button is used to increase relevant values or used to help selecting relative
options with the MODE button.
5 DOWN Button.
This button is used to decrease relevant values or used to help selecting relative
options with the MODE button.
6. DMX signal LED.
This LED will flash repeatedly when the unit is receiving a DMX signal.
7. AUTO/MANUAL LED.
When this LED flashes, it just means the unit is in AUTO mode. While the LED is on
that means the units is in MANUAL mode.
8. RGB LED.
When this LED is lit, the unit is in RGB mode.
9. C&B LED.
When this LED is lit, the unit is in C&B mode.
10. COLOR LED.
When this LED is lit, the unit is in COLOR mode.
11. Digital Display.
This 4-digit LED display shows the menu and operative functions which user can
choose from. It also shows the unit’s current address.
5. OPERATION GUIDE
Note
LED - display Informazione
A: XXX DMX Address
d: XXX Dimming level
1: XXX Intensity of Channel 1
2: XXX Intensity of Channel 2
3: XXX Intensity of Channel 3
P: XXX Program
SP: XXX Speed of Program
F: XXX Fade Time

14
5.1 OVERALL INTENSITY ADJUSTMENT
Turn on the main power before starting your operation. Press and hold down MODE
button until the segment display will show you: d:XXX.
The XXX on the display just means the current overall intensity level and relevant level
can be adjusted within the range of 50% - 100%.
User can select wanted level by pressing the UP or DOWN button, each tap will increase
or decrease relevant level once.
5.2 MASTER / SLAVE MODES
While holding down the MODE button, press simultaneously UP or DOWN buttons, user
can then switch between the SLAVE mode and the MASTER mode availably.
5.2.1 MASTER MODE
Do as the above operation guide says, user can enter the MASTER mode. Then press
the MODE button to switch between MANUAL and AUTO mode.
MANUAL mode
1. Push MODE button to select and enter into MANUAL mode (AUTO/MANUAL led
blinks).
2. In this mode, the output of Channel 1, Channel 2 and Channel 3 (blue, red , green)
can be controlled manually.
3. While holding down MODE button, press UP or DWN buttons simultaneously, user
can enter one of the next submenus: 1:XXX , 2:XXX , 3:XXX.
4. These sebmenus are respectively for the intensity adjustment of channel 1, channel
2 and channel 3 (within the range of 001 – 100). And user can adjust relevant levels
by pressing UP or DOWN button. Each tap will change the level once.
5. Channels and relevant colour lighting control list as below:
Channel 1 : BLUE Channel 2: Red Channel 3 :GREEN
AUTO mode
1. In the same manner as above, press MODE button to enter the AUTO mode
(AUTO/MANUAL led is lit).
2. While holding down MODE button, press UP or DOWN button at one time, user can
enter one of the next submenus: P:XX , SP:XX , F:XXX.
3. These submenus are respectively of Chase program select (1-10 programs & a
sequence of 10 programs available), Chase Speed adjustment (1-99 Chasing rates
available) and Fade Time adjustment (Fade time 0 – 100% available).
4. User can ad just relevant parameter by pressing UP or DOWN button. Each tap will
change relevant level once.

15
5.2.2 SLAVE MODE
After having entered this Slave Mode, relevant DMX Address can be changed within the
range of 001 – 512. The function modes of RGB / COLOR&BRIGHT / COLOR can be
selected by pressing the MODE button as user’s desire.
1. When being in the Slave mode,
the segment display will show
you the current DMX address.
The DMX SIGNAL LED will flash
when a DMX signal is present.
2. Press UP/DOWN button to select
your desired DMX address from
001 to 512.
5.2.2.2 RGB / COLOR & BRIGHT / COLOR Modes
RGB Modes
1. Tap MODE button more times until
RGB LED is lit.

16
2. In RGB mode, this unit serves as
a 3 DMX channel dimmer, blue
light is controlled by Channel 1,
Red lighting by Channel 2 and
Green lighting by Channel 3. User
can adjust Red, Green or Blue
lighting by 3 DMX Channel for
desired colour.
COLOR & BRIGHT Modes
1. Tap MODE button more times until
C&B led is lit.
2. In COLOR & BRIGHT mode, this
unit serves as a 2 DMX channel
dimmer. The colours are controlled
by channel 1 and related brightness
is controlled by channel 2.

17
COLOR Mode
1. Tap MODE button more times until
COLOR LED is lit.
2. IN COLOR mode, user can use one
DMX channel to select desired
colour availably.
6. TECHNICAL SPECIFICATION
Model: PLC64TR
Lamp: 3 lampade da 575W
Loading Fuse: F3.15A 250V 5×20mm
Internal Fuse: F0.315A 250V 5×20mm
Power Input: AC 230V / 50Hz ~ 60Hz
DMX In / Out: 3 pin female & male XLR socket
Dimensions: 258x220x458 mm.
Weight: 4,7 kg circa

18
APPENDIX
SETUP MENU
PHOTOMETRIC DATA

19
RGB COLOUR AND DMX VALUE

PROEL S.p.A.
(World Headquarters – Factory)
Via alla Ruenia 37/43
64027 Sant’Omero (TE) – Italy
Tel. +39 0861 81241
Fax. +39 0861 887862
www.proelgroup.com
Table of contents
Languages:
Other PROEL Dj Equipment manuals

PROEL
PROEL STARPOINT 575CN User manual

PROEL
PROEL MATISSE PLMAT User manual

PROEL
PROEL DREAMLIGHT 1200 ECLIPSE WASH User manual

PROEL
PROEL PLML575E User manual

PROEL
PROEL SG HDBEAM User manual

PROEL
PROEL SDJ J-JWASH400 User manual

PROEL
PROEL MACARENA User manual

PROEL
PROEL Blackmoon 575 wash User manual

PROEL
PROEL AMADEUS 1200 User manual

PROEL
PROEL PLJO25SEL User manual