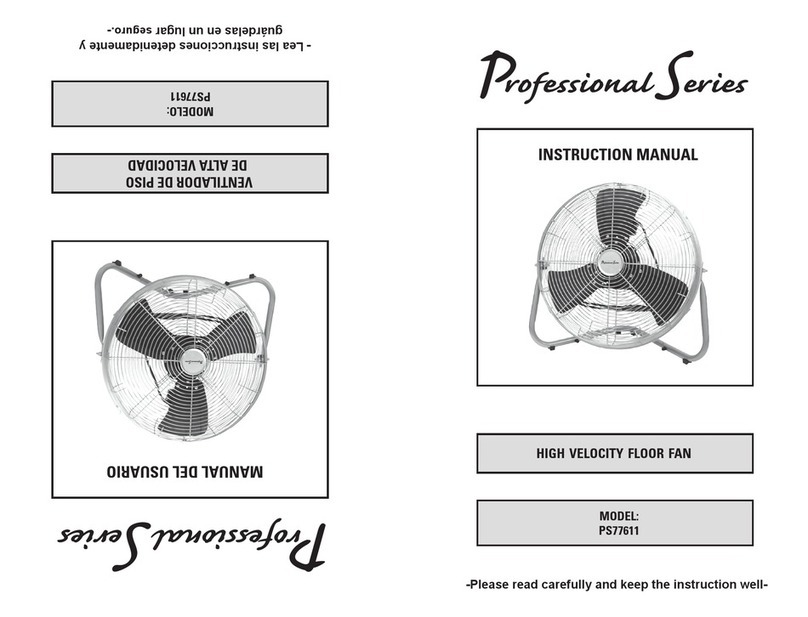
Professional Series PS-ISF229 User manual


2
2
Intended Use:
This product is intended for indoor residential, office, industrial,
or other commercial applications. Use only with electrical wiring
that is in good working order and that meets applicable codes
and ordinances. If you have any questions whether your wiring is
adequate, consult a qualified electrician.
While using your fan, you should follow the IMPORTANT
INSTRUCTIONS listed below. As part of those instructions, we
have used the word "WARNING" to indicate the level of hazard:
WARNING indicates a hazard which, if not avoided, could result
in injury or death.
IMPORTANT INSTRUCTIONS
As with all electrical appliances, basic safety precautions should
always be followed to reduce the risk of electric shock, fire, or
injury to persons, including the following precautions:
• Read all the instructions before using this fan.
• Use this fan only as described in this manual. Any other use not
recommended by the manufacturer may cause electrical shock,
fire or injury to persons.
• Do not operate the fan with a damaged power cord or after the
fan malfunctions or has been dropped in any manner.
• Use of extreme caution is necessary when any fan is used by or
near children, disabled persons or pets and whenever the fan is
left operating unattended.
• Do not place the fan on a small, unlevel, uneven or any surface
which might allow fan to tip or fall.
• For proper operation, fan should be placed on a smooth,
non-combustible, level surface.
• Always unplug fan when not in use, when moving from place
to place, when assembling or disassembling parts, and before
cleaning.
• The use of attachments, not recommended or sold by the
manufacturer, may cause hazards.
• Do not use outdoors.
• Do not use fan in window. Rain may cause electrical hazard
(for non-window models).
• Do not operate the fan with blade guards or any safety device
removed.
• Avoid the use of extension cords due to risk of fire. If an
extension cord must be used, the cord must be minimum
14 AWG and rated not less then 1875 watts.
• Do not run power cord under carpeting. Do not cover cord with
throw rugs, runners or the like. Arrange cord away from traffic
area where it will not be tripped over.
• Do not insert or allow any object to enter any openings on the
fan. Doing so may cause electric shock and/or fire hazard.
Avoid contact with moving parts.
• This appliance is not intended for use by persons (including
children) with reduced physical, sensory or mental capabilities
or lack of experience and knowledge, unless they have
been given supervision or instruction concerning use of the
appliance by a person responsible for their safety.
• Children should be supervised to ensure they do not play with
the appliance.
READ & SAVE THESE
INSTRUCTIONS
WARNING: Shock Hazard
Use your fan only in dry environments. This fan is not intended
for use in a bathroom, laundry area, or similar locations, or near
sinks, washing machines, swimming pools or other sources of
water. Never locate fan where it may fall into a bathtub or other
water receptacle. Do not use in damp environments such as
flooded basements.
Hot Surfaces
Do not touch fan motor when in use. This motor is hot when in
use, to avoid burns, do not let bare skin touch hot surfaces.
WARNING: Fire Hazard
Fans have arcing or sparking parts inside. Do not use near
combustible materials or flammable gases or sources of heat.
DO NOT USE in areas where gasoline, paint or flammable
materials are used or stored. To prevent a possible fire, do not
block air intakes or exhaust in any manner. Do not insert or allow
foreign objects to enter any ventilation or exhaust opening as this
may cause an electric shock, fire, or damage the fan.
WARNING: Electrical Shock Hazard
Do not use with damaged cord or plug. Use with adequate
electrical system that is up to code.
CAUTION: to Prevent Electric Shock, this product
has a three prong grounded plug that must be inserted into a
matching properly grounded outlet to reduce the risk of electrical
shock. Do not attempt to defeat this safety feature.
WARNING: to Reduce the Risk of Fire or Electric
Shock, do not use this product with any solid-state speed
control device.
DO NOT operate any fan with a damaged cord or plug or after
fan malfunctions, has been dropped or damaged in any manner.
Do not operate fan with a broken blade, safety cage or any visual
imperfections. Disconnect power before servicing.
DO NOT run power cord under carpeting. DO NOT cover cord
with throw rugs, runners or the like. Arrange cord away from
traffic area where it will not be tripped over. Avoid the use of
extension cords due to risk of fire. If an extension cord must
be used, the cord must be minimum 14 AWG and rated not
less then 1875 watts. Do not use an extension cord unless the
plug can be completely inserted into its receptacle. Unplug
the fan when not in use. Do not operate fan with its ventilation
obstructed.
CAUTION: This fan is equipped with an automatic reset
limit control. If fan overheats for any reason this limit control will
open and will stop the fan.
WARNING:
Uso previsto:
Este producto es para uso residencial interior, oficina, industria,
u otros usos comerciales. Utilice la unidad únicamente con
cableado que esté en buenas condiciones de funcionamiento
y que cumpla las ordenanzas y los códigos aplicables. Si tiene
alguna pregunta acerca de si su cableado es adecuado, consulte
a un electricista calificado.
Mientras use su ventilador, debe seguir las INSTRUCCIONES
IMPORTANTES enumeradas a continuación. Como parte de esas
instrucciones, hemos utilizado la palabra "ADVERTENCIA" para
indicar el nivel de peligro: ADVERTENCIA indica un peligro que,
si no se evita, podría causar lesiones o la muerte.
INSTRUCCIONES IMPORTANTES
Al igual que con todos los electrodomésticos, se deben tomar
siempre precauciones básicas de seguridad para reducir el
riesgo de descarga eléctrica, incendio o lesiones personales,
incluidas las siguientes precauciones:
• Lea todas las instrucciones antes de utilizar este ventilador.
• Use este ventilador solo como se describe en este manual. Cualquier
otro uso no recomendado por el fabricante podría producir descarga
eléctrica, incendio o lesiones personales.
• No encienda este ventilador con un cable de alimentación dañado o
después de que el ventilador haya presentado un mal funcionamiento
o se haya caído de alguna manera.
• Se necesita tener máxima precaución cuando mascotas, niños o
personas inválidas utilizan o están cercan de un ventilador, y siempre
que el ventilador quede funcionando sin vigilancia.
• No coloque el ventilador en un lugar pequeño, desnivelado, irregular o
en cualquier superficie que pueda causar que el ventilador se incline
o se caiga.
• Para el funcionamiento adecuado, el ventilador debe colocarse en una
superficie regular, no combustible.
• Siempre desenchufe el ventilador cuando no este en uso, cuando lo
ponga en otro lugar, cuando se arma o desarma, y antes de limpiarlo.
• El uso de accesorios no recomendados o vendidos por el fabricante
podría causar peligro.
• No usarlo afuera.
• No use el ventilador en ventanas. La lluvia podría causar un peligro
eléctrico. (Para modelos no para ventanas).
• No encienda el ventilador con protectores de aspas o sin haber
quitado cualquier dispositivo de seguridad.
• Evite el uso de cables de prolongación por el riesgo de incendio. Si
se debe utilizar un cable de prolongación, el cable debe ser como
mínimo de 14 AWG y de no menos que 1875 vatios.
• No pase el cable de alimentación debajo de las alfombras. No cubra
el cable con tapetes, alfombras de pasillo o cubiertas similares.
Disponga el cable lejos de la zona de tránsito, donde no pueda
provocar tropiezos.
• No inserte ni permita que algún objeto ingrese en las aberturas del
ventilador. Esto podría provocar una descarga eléctrica y/o peligro de
incendio. Evite contacto con partes en movimiento.
• Este aparato no es para uso de personas (incluyendo niños) con
discapacitaciones reducidas físicas, de capacidad mental o de
sentidos o falta de experiencia y conocimiento, a menos de que hayan
recibido supervisión o instrucción sobre el uso del aparato por una
persona responsable de su seguridad.
• Los niños deben ser supervisados para estar seguro de que no
jueguen con el aparato.
LEER Y GUARDAR ESTAS
INSTRUCCIONES
ADVERTENCIA: Peligro de descarga
Utilice su ventilador solo en entornos secos. Este ventilador no
está diseñado para utilizarse en baños, áreas de lavandería o
lugares similares ni cerca de lavaplatos, lavarropas, piscinas u
otras fuentes de agua. Nunca coloque el ventilador donde pueda
caerse en una bañera o en otro recipiente de agua. No lo use en
entornos húmedos, tales como sótanos inundados.
ADVERTENCIA: Superficies calientes
No toque el motor del ventilador cuando esté en uso. Este motor
está caliente cuando está en uso, para evitar quemaduras, no
deje que la piel descubierta toque las superficies calientes.
ADVERTENCIA: Peligro de incendio
Los ventiladores tienen piezas internas que producen
arcos eléctricos o chispas. No lo utilice cerca de materiales
combustibles o gases inflamables ni fuentes de calor. NO LO
USE en áreas donde se utilicen o se almacenen gasolina, pintura
o materiales inflamables. Para evitar posibles incendios, no
bloquee las tomas ni el escape de aire de ninguna manera. No
inserte ni permita que ingresen objetos extraños en ninguna
apertura de ventilación o de escape, ya que esto podría causar
una descarga eléctrica o un incendio, o dañar el ventilador.
ADVERTENCIA: Peligro de descarga ELÉCTRICA
Do not use with damaged cord or plug. Use with adequate
electrical system that is up to code.
PRECAUCION: para evitar choque electrico,
este artefacto tiene un enchufe macho con toma a tierra de tres
clavijas que debe introducirse en un tomacorriente con toma a
tierra que coincida de forma correcta para disminuir el riesgo de
choque eléctrico. No suprima esta función de seguridad.
ADVERTENCIA: para reducir el riesgo de
incendio o choque eléctrico, NO use este producto con
cualquier aparato de estado sólido de control de velocidad.
NO encienda ningún ventilador con un cable o enchufe
dañado o después de que el ventilador haya presentado un mal
funcionamiento, se haya caído o dañado de alguna manera.
No encienda el ventilador con un aspa, armazón de seguridad
roto o cualquier imperfección visual. Desconecte la electricidad
antes de servicio de reparo. Para las reparaciones cubiertas
bajo la garantía, consulte la declaración de garantía.
NO pase el cable de alimentación debajo de las alfombras.
NO cubra el cable con tapetes, alfombras de pasillo o cubiertas
similares. Disponga el cable lejos de la zona de tránsito,
donde no pueda provocar tropiezos. Evite el uso de cables
de prolongación por el riesgo de incendio. Si se debe utilizar
un cable de prolongación, el cable debe ser como mínimo de
14 AWG y de no menos que 1875 vatios. No use un cable de
prolongación a menos que se pueda insertar totalmente el
enchufe en su receptáculo. Desenchufe el ventilador cuando
no esté en uso. No encienda el ventilador con su ventilación
obstruida.
PRECAUCION: Este ventilador está equipado con un
control de límite de reajuste. Si el ventilador se sobre calienta por
algún motivo,éste control de límite se abrirá el ventilador.
2

3
3
Operating Instructions:
1. Adjust the desired speed by rotating the switch:
0--Stop, 1--Low, 2--Medium, 3--High.
2. Adjust the tilt angle by rotating the guard. Loosen the knobs
before rotating and tighten after rotation is set.
Assemble Instructions:
1. Align the screw hole on the side of the fan head, with the
rubber ring, and the hole on the support frame, then insert the
screw knob to tight them up. Same operation to the other side
of the fan head (fig.1,2.)
2. Loosen the screws, nuts and washers on A and B on the
clamping support (fig.3,4)
CAUTION: Read and follow all instructions before
operating fan. Do not use fan if any part is damaged or missing.
WARNING:
1. To reduce the risk of fire or electric shock, do not use this fan
with any solid state speed control device.
2. This appliance has a ground plug which is intended to fit
in an outlet only one way. If this does not fit outlet contact
a qualified electrician. Do not attempt to by-pass this
procedure.
3. This product is used for indoor.
4. Unplug from electrical supply source before cleaning.
5. If the power cord is damaged, contact your local service
centre or a qualified electrician to install an appropriate
replacement cord to prevent any injury or damage.
6. This appliance is not intended for use by persons (including
children) with reduced physical, sensory or mental
capabilities, or lack of experience and knowledge, unless they
have been given supervision or instruction concerning use of
the appliance by a person responsible for their safety.
7. Children should be supervised to ensure that they do not play
with the appliance.
Rules for Safe Operation:
1. Never insert fingers, pencils, or any other object through
the guard when fan is running.
2. Disconnect the fan when moving from one location to
another.
3. Disconnect the fan when removing grilles for cleaning.
4. Be sure fan is on a stable surface when operating to avoid
overturning.
5. DO NOT use fan in window. Rain may create electrical
hazard.
6. The fan is for commercial use only.
7. Do not leave the fan running unattended.
3. Insert the end with screw holes of the inner pole into the
clamping support. Align the holes on the clamping support
and the inner pole.(fig.5,6)
4. Insert the screw through the holes on the clamping support
and inner pole with washers. Tight up with the nut.
After step 4, you can get a fan head assembled like fig. 8.
5. Insert the end of the outer pole into the base hole.
(fig.9, 10)
6. Align the hole on the base with the one on the clump weight.
Then insert the L-shape screw bolt through the holes with the
big washer. (fig.11,12)
7. Insert the decorating cap through the outer pole
(fig.13)
8. Insert the inner pole into the outer pole. And tight up the
screw on the plastic holder (fig.14) IMPORTANT: THERE
IS A SPRING COIL INSIDE THE OUTER HOLE. DONOT TAKE
IT OUT DURING ASSEMBLING.
9. Loosen the screw knob on the inner pole and adjust the fan
to the height you want, then tight up the screw knob.
(fig.15)
▶
Fig.1
screw hole rubber ring
support frame
screw knob
Fig.2
▶
Fig.3 Fig.4
A
B
nut screw
washer
▶
inner pole
clamping support
Fig.5 Fig.6
.
▶
Fig.7
screw
washer
nut
washer
Fig.8
▶
Fig.9
base
outer pole
Fig.10
▶
Fig.11 Fig.12
clump weight
big washer
L-shape
screw bolt
Fig.13 Fig.14 Fig.15
outer pole
decorating cap
plastic
holder
inner
pole
outer
pole
inner
pole
outer
pole
3
3
Operating Instructions:
1. Adjust the desired speed by rotating the switch:
0--Stop, 1--Low, 2--Medium, 3--High.
2. Adjust the tilt angle by rotating the guard. Loosen the knobs
before rotating and tighten after rotation is set.
Assemble Instructions:
1. Align the screw hole on the side of the fan head, with the
rubber ring, and the hole on the support frame, then insert the
screw knob to tight them up. Same operation to the other side
of the fan head (fig.1,2.)
2. Loosen the screws, nuts and washers on A and B on the
clamping support (fig.3,4)
CAUTION: Read and follow all instructions before
operating fan. Do not use fan if any part is damaged or missing.
WARNING:
1. To reduce the risk of fire or electric shock, do not use this fan
with any solid state speed control device.
2. This appliance has a ground plug which is intended to fit
in an outlet only one way. If this does not fit outlet contact
a qualified electrician. Do not attempt to by-pass this
procedure.
3. This product is used for indoor.
4. Unplug from electrical supply source before cleaning.
5. If the power cord is damaged, contact your local service
centre or a qualified electrician to install an appropriate
replacement cord to prevent any injury or damage.
6. This appliance is not intended for use by persons (including
children) with reduced physical, sensory or mental
capabilities, or lack of experience and knowledge, unless they
have been given supervision or instruction concerning use of
the appliance by a person responsible for their safety.
7. Children should be supervised to ensure that they do not play
with the appliance.
Rules for Safe Operation:
1. Never insert fingers, pencils, or any other object through
the guard when fan is running.
2. Disconnect the fan when moving from one location to
another.
3. Disconnect the fan when removing grilles for cleaning.
4. Be sure fan is on a stable surface when operating to avoid
overturning.
5. DO NOT use fan in window. Rain may create electrical
hazard.
6. The fan is for commercial use only.
7. Do not leave the fan running unattended.
3. Insert the end with screw holes of the inner pole into the
clamping support. Align the holes on the clamping support
and the inner pole.(fig.5,6)
4. Insert the screw through the holes on the clamping support
and inner pole with washers. Tight up with the nut.
After step 4, you can get a fan head assembled like fig. 8.
5. Insert the end of the outer pole into the base hole.
(fig.9, 10)
6. Align the hole on the base with the one on the clump weight.
Then insert the L-shape screw bolt through the holes with the
big washer. (fig.11,12)
7. Insert the decorating cap through the outer pole
(fig.13)
8. Insert the inner pole into the outer pole. And tight up the
screw on the plastic holder (fig.14) IMPORTANT: THERE
IS A SPRING COIL INSIDE THE OUTER HOLE. DONOT TAKE
IT OUT DURING ASSEMBLING.
9. Loosen the screw knob on the inner pole and adjust the fan
to the height you want, then tight up the screw knob.
(fig.15)
▶
Fig.1
screw hole rubber ring
support frame
screw knob
Fig.2
▶
Fig.3 Fig.4
A
B
nut screw
washer
▶
inner pole
clamping support
Fig.5 Fig.6
.
▶
Fig.7
screw
washer
nut
washer
Fig.8
▶
Fig.9
base
outer pole
Fig.10
▶
Fig.11 Fig.12
clump weight
big washer
L-shape
screw bolt
Fig.13 Fig.14 Fig.15
outer pole
decorating cap
plastic
holder
inner
pole
outer
pole
inner
pole
outer
pole

4
4
To Clean Fan Blade or Grill:
Unplug from electrical supply source before cleaning.
1. Clean the blade by using a soft, damp cloth then wipe with
dry cloth. Please be caution around the motor housing area.
2. Do not allow the motor or other electrical components to be
exposed to water. Reassemble after cleaning by reversing
above procedure.
3. Do not bend the blades.
4. Put several drops of sewing machine oil into the oil ways on
the front and rear shells at regular intervals.
5. Recommendation: every 3 months with 24 hour use or every
6 month with regular use
Lubrication: The motor is pre-lubricated at the factory and
requires no additional oil.
Care and Maintenance
Cleaning: CAUTION-Before cleaning the fan be sure to
disconnect power cord from the plug. Clean the grille surface
with a clean damp cloth. Do not use harsh chemical or abrasive
cleaners. DO NOT IMMERSE THE FAN OR ANY WIRES IN
WATER. Replace front grille before fan use. Allow fan to dry
completely before use. Periodic grille cleaning with a vacuum will
prevent dust build up. The motor is sealed and does not require
any interior maintenance, cleaning or lubrication.
Maintenance: The Internal motor bearings are permanently
lubricated at the factory and do not require any additional
lubrication.
Repair: DO NOT OPERATE THE FAN WITHOUT THE GRILLE IN
PLACE. DO NOT USE THE FAN IF IT HAS MALFUNCTIONED OR
BECOME DAMAGED IN ANY WAY.
Storage: Keep original carton for storage of the fan. Coil and tie
the power cord to avoid damage during storage.
This product employs overload protection (fuse). A blown fuse
indicates an overload or short-circuit situation. If the fuse blows,
unplug the product from the outlet. Replace the fuse as per the
user servicing instructions (follow product marking for proper
fuse rating) and check the product. If the replacement fuse
blows, a short-circuit may be present and the product should
be discarded or returned to an authorized service facility for
examination and/or repair.
Fuse Replacement:
1. Grasp plug and remove from the receptacle or other outlet
device. Do not unplug by pulling on cord.
2. Open fuse cover by sliding open fuse access cover on top of
attachment plug towards blades. See Fig. 2.
3. Remove fuse carefully. Use a small tool to pry the end of the
fuse from holder cavity. Be careful not to break glass window.
4. Replace fuse. WARNING: Risk of fire. Replace fuse only with
identical 2.5 or 5.0 Amp, 125 Volt fuse (3.6mm x 10mm).
Be sure fuse is properly seated within its cavity.
5. Close fuse cover by sliding it back to its original closed
position.
Fig 1 Fig 2 Fig 3
Slide Cover to Open
Fig 1 Fig 2 Fig 3
Deslice la cubierta
para abrir
Cuidado y mantenimiento
Limpieza y precaución: antes de limpiar el ventilador
asegúrese de desconectar el cable de alimentación del enchufe.
Limpie la superficie de la rejilla con un paño húmedo limpio. No
utilice químicos fuertes ni limpiadores abrasivos. No sumerja
el ventilador ni ningún cable en el agua. Reemplace la rejilla
delantera antes de usar el ventilador. Deje que el ventilador se
seque por completo antes de usar. La limpieza periódica de la
rejilla con una aspiradora evitará la formación de polvo. El motor
está sellado y no requiere mantenimiento, limpieza ni lubricación
interior.
Mantenimiento: los cojinetes internos del motor se lubrican
de forma permanente en la fábrica y no requieren una lubricación
adicional.
Reparaciones: NO ENCIENDA EL VENTILADOR SIN LA
REJILLA EN SU LUGAR. NO UTILICE EL VENTILADOR SI
PRESENTA UN MAL FUNCIONAMIENTO O SE HA DAÑADO DE
ALGUNA MANERA.
Almacenamiento: conserve la caja original para almacenar
el ventilador. Enrolle y ate el cable de alimentación para evitar
daños durante el almacenamiento.
Este producto emplea una protección contra sobrecarga (fusible).
Un fusible quemado indica una sobrecarga o un cortocircuito.
Si se quema el fusible, desenchufe el producto desde otro
tomacorriente. Reemplace el fusible según las instrucciones de
mantenimiento para el usuario (siga el marcado del producto
para obtener la corriente adecuada del fusible) y verifique el
producto. Si el reemplazo del fusible se quema, puede ocurrir
un cortocircuito y se debe desechar o devolver el producto
a una instalación de servicio autorizado para su examen y/o
reparación.
Reemplazo del fusible:
1. Sujete el enchufe y quítelo del receptáculo u otro dispositivo
de tomacorriente. No desenchufe tirando del cable.
2. Abra la cubierta del fusible al deslizar la cubierta de acceso
en la parte superior del enchufe hacia las aspas. Consulte la
Fig. 2.
3. Quite el fusible cuidadosamente. Utilice una pequeña
herramienta para levantar el extremo del fusible haciendo
palanca desde la cavidad de sostén. Tenga cuidado de no
romper la ventana de vidrio.
4. Reemplace el fusible. ADVERTENCIA: riesgo de incendio.
Reemplace el fusible únicamente con un fusible idéntico
de 2,5 o 5,0 amperios y 125 vatios (3,6 mm x 10 mm).
Asegúrese de que el fusible se encuentre debidamente
ubicado en su cavidad.
5. Cierre la cubierta del fusible deslizándola a su posición de
cierre original.
Para limpiar el aspa o la rejilla del ventilador:
Desenchúfelo de la fuente de alimentación antes de limpiarlo.
1. Limpie las aspas con un trapo suave y húmedo, y luego
séquelo con un trapo seco. Tenga cuidado al trabajar
alrededor del área de la carcasa del motor.
2. No permita que el motor u otros componentes eléctricos
se expongan al agua. Vuelva a montarlo luego de limpiarlo
mediante el procedimiento inverso.
3. No mezcle las aspas.
4. Coloque varias gotas de aceite para máquina de coser en las
vías de aceite de las capas delantera y trasera en intervalos
regulares.
5. Recomendación:cada 3 meses con un uso de 24 horas o
cada 6 meses con un uso regular
Lubricación: El motor se lubrica previamente en fábrica y no
requiere más aceite.
4
Other Professional Series Fan manuals
Popular Fan manuals by other brands

Kichler Lighting
Kichler Lighting POLA instruction manual

RITE-HITE
RITE-HITE Revolution HVLS Fan owner's manual

Pacific International Fans
Pacific International Fans EM-E installation manual
Maico
Maico EVN 22 Mounting & operating instructions
Kampmann
Kampmann 3.24 EC Installation, use and maintenance manual

Hunter
Hunter 21100 Parts guide
