manuals.online logo
Brands
  1. Home
  2. •
  3. Brands
  4. •
  5. Profile
  6. •
  7. Accessories
  8. •
  9. Profile PLI-190 User manual

Profile PLI-190 User manual

SPOT 2 x 75 W
+ movement sensor
EN - 1
PLI-190 / PLI-192
Thank you for the purchase of this Profile product. Note:
It is important that you read this manual carefully before
using the product and be sure to save this manual for
possible use later.
Note
Check if building regulations apply to your area because
of which you must have the spot installed by an
accredited electrician. n electrician can give you
information about correct wiring. Never install the fitting
outside in rainy weather.
SWITCH OFF THE POWER BEFORE YOU INST LL
THE SPOT.
Correct inst ll tion
 With installation outside preferably choose a sheltered
area.
 Do not place the sensor head in direct or reflected
sunlight. The spot may then switch on when not
required. The sensor works best with diagonal
movement through the sensor's detection field.
 Connect the spot to a circuit with wall switch.
 Unscrew the stainless steel bolts on the side to take
the mounting plate from the fitting.
 Unscrew the stainless steel screws at the top to
remove the fitting from the mounting plate.
 Pull the power supply wires through the through-feed
opening with the rubber packing.
 Fix the mounting plate to the wall with screws. ( rrow
on the inside of the mounting plate must point upwards
because of the waterproofness of the bracket) When
doing this, take the following safety precautions into
account:
 Install the bracket at least 2.5 m above ground. .
 Keep at least 100 cm distance between the bracket
and the object to be lit.
 Do not affix the mounting plate to an inflammable base.
 Connect the electrical wiring according to figure 1.
Fig. 1
Fig. 2
 Other uses than described above can cause damage
to the product and increase the risk of short-circuit,
fire, electric shocks, etc.
 The product may not be adapted as a whole. The
safety instructions must be strictly observed.
S fety instructions
 The importer accepts no responsibility for damage
claims with respect to objects or persons that result
from incorrect use or non-compliance with the safety
instructions. ny damage claims in such cases will
be declared null and void.
When replacing the lamp the spot must first have
cooled before the lamp is replaced. lso disconnect
the power supply. Do not exceed the maximum
wattage of 75W for each lamp. To open and close
the bracket see figure 2.
 C UTION: Never touch the bulb with your fingers.
 Touching the bulb with your fingers can reduce the
life of the bulb.
 lways replace cracked or broken glass by glass
with the same properties as the original glass.
Technic l inform tion
 Working voltage: 230V C (50/60 Hz)
 Maximum lamp power: 2 x 75W.
 Maximum current strength: 10/16 .
 Dustproof and splash proof: IP44.
 Passive infrared sensor (PIR).
 Sensor angle: 150°.
 Sensor range: 10 meters at 25°C.
 Lighting time: +/- 5 sec. – 8 min.
Setting the functions
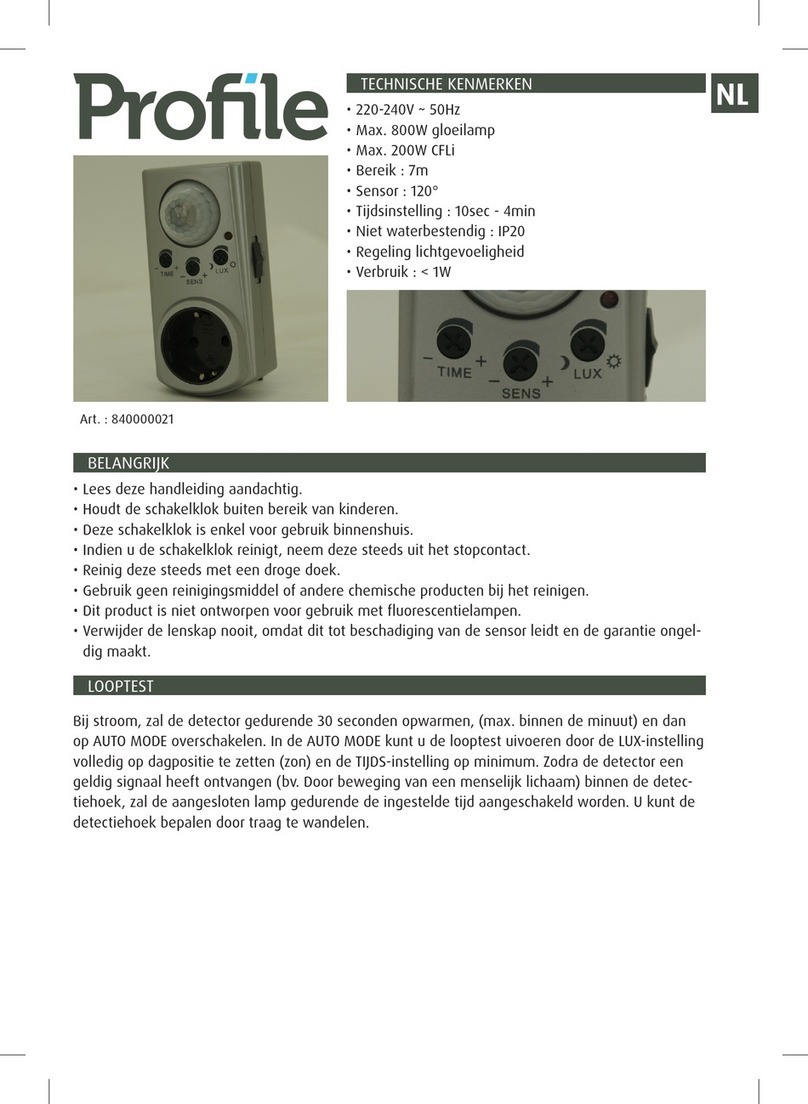
1) Setting the lighting time (TIME)
With this adjusting knob you can set the period of the
light staying on after switching on. You can set the
time from 5 sec. to 8 min.
2) Setting the light intensity (LUX)
With the LUX Switch you adjust the activity of the
sensor to match the intensity of the ambient light.
If the arrow is pointing to the sun the sensor responds
in both daylight and at night. If the arrow is pointing to
the moon the sensor will only respond at night. In
between the sensor responds in half-light.
Continuous function
With this function you can allow the lamp to stay on
continuously (the sensor then no longer works).
To do this, turn on the switch to which the fitting is
connected, on-off-on for 1 second. The lamp will now
stay on continuously. To turn off the continuous
function, turn the switch on which the fitting is
connected to, off for 30 seconds and then on again.
*
L = phase
* = earthing
* N
= neutral wire
SPOT 2 x 75 W
+ movement sensor
EN - 2
PLI-190 / PLI-192
M inten nce
 Only use a dry, soft cloth for cleaning the spot. nd
make sure that the lamp has first cooled down.
 Never immerse the lamp in water.
 Maintenance and repairs may only be carried out by
technicians who are familiar with all applicable
regulations.
Gu r ntee conditions
The guarantee period for PLI-190 / PLI-192 is two years
and commences on the date of purchase. During the
guarantee period ELTR nv will repair any defects
attributable to material or production faults. ELTR NV
may choose to either repair or replace a defective
appliance.
ELTR NV is not obliged to repair or replace appliances
if they have become defective as a result of damage,
improper use or modifications or adaptations made after
the purchase date.
Take any defective appliance together with the original
receipt back to the shop where the appliance was sold.
lways add a note with a description of the problem.
D m ge
ELTR NV can under no circumstances whatsoever be
held responsible for damage of whatever nature if the
appliance was not correctly installed according to the
specified installation instructions, nor for damage as a
result of unforeseen circumstances such as natural
disasters, a bolt of lightning, etc. ll such resulting costs
are consequently at the expense of the buyer and are not
covered by the guarantee conditions.
www.profile.eu
Eltra nv, Pachtgoedstraat 2, 9140 Temse, BELGIUM
Eltra DIYeuronet, Frontstraat 14, 5405 M Uden,
THE NETHERL NDS

This manual suits for next models

1

Other Profile Accessories manuals

Profile ADAGIO PAC-312 User manual

Profile

Profile ADAGIO PAC-312 User manual

Profile FUGA PAC313 User manual

Profile

Profile FUGA PAC313 User manual

Profile CAMBIARE PAC-353 User manual

Profile

Profile CAMBIARE PAC-353 User manual

Profile BRILLANTE PAC-325 User manual

Profile

Profile BRILLANTE PAC-325 User manual

Profile 010200016 User manual

Profile

Profile 010200016 User manual

Profile PCF-300 User manual

Profile

Profile PCF-300 User manual

Profile LONTANO User manual

Profile

Profile LONTANO User manual

Profile 840000021 User manual

Profile

Profile 840000021 User manual

Popular Accessories manuals by other brands

Campbell PT100/3 user manual

Campbell

Campbell PT100/3 user manual

DURKOPP ADLER 367 - INSTRUCTIONS FOR FITTING FOR KIT 0367... instructions

DURKOPP ADLER

DURKOPP ADLER 367 - INSTRUCTIONS FOR FITTING FOR KIT 0367... instructions

BEA FALCON DR user guide

BEA

BEA FALCON DR user guide

Emos P0072 manual

Emos

Emos P0072 manual

turck High-End Series Instructions for use

turck

turck High-End Series Instructions for use

BroadLink SP3 installation guide

BroadLink

BroadLink SP3 installation guide

LG LRM2060ST - Countertop Microwave Oven installation instructions

LG

LG LRM2060ST - Countertop Microwave Oven installation instructions

Numatic RSU150 NX manual

Numatic

Numatic RSU150 NX manual

Mantracourt T24-DWS quick start guide

Mantracourt

Mantracourt T24-DWS quick start guide

BEA CONDOR user guide

BEA

BEA CONDOR user guide

IFM PN01 A Series operating instructions

IFM

IFM PN01 A Series operating instructions

Scott WORKS FILM SYSTEM 50 quick start guide

Scott

Scott WORKS FILM SYSTEM 50 quick start guide

Meade Zero Image-Shift Microfocuser operating instructions

Meade

Meade Zero Image-Shift Microfocuser operating instructions

Banner L-GAGE LH Series instruction manual

Banner

Banner L-GAGE LH Series instruction manual

Elko iNELS RFDSC-71 manual

Elko

Elko iNELS RFDSC-71 manual

SMC Networks PFM5 Series Installation & maintenance manual

SMC Networks

SMC Networks PFM5 Series Installation & maintenance manual

Palram Applications SIERRA 2.3x2.3m/7'5" instructions

Palram Applications

Palram Applications SIERRA 2.3x2.3m/7'5" instructions

Honeywell RPWL100A owner's manual

Honeywell

Honeywell RPWL100A owner's manual

manuals.online logo
manuals.online logoBrands
  • About & Mission
  • Contact us
  • Privacy Policy
  • Terms and Conditions

Copyright 2025 Manuals.Online. All Rights Reserved.