Profile CR60 User manual

CR60 Operating Instructions
CR60 Bruksanvisning
CR60 Manual de instrucciones

1
Contents
Introduction 2
What to do with your new CR60 2
Applications of the new CR60 2
Part Identification 2
Electrical connection 3
To operate the CR60 3
Preparation for treatment 4
Taking the treatment 4
After the treatment 5
Sterilisation 5
Care of your CR60 6
Servicing 6
Accessories and spare parts 6
Filter changes 7
Service manuals/wiring diagrams 7
Fault finding 7
Technical specification 8
Fuse changes 8
Guarantee 8
Standards compliance 8

2
Applications of the CR60
The CR60 compressor can be used
to power most nebulizers available.
The CR60’s high flow is capable of
nebulizing bronchodilators and similar
viscosity drugs, and can deliver the
more viscous antibiotic drugs as well
as powering many humidifiers.
Parts Identification
Having carefully removed the packaging
you will find the new CR60 unit, and
Bacteria filter (part No. 1214). We
strongly advise that before using CR60
for treatment, you familiarize yourself
with the accessories and equipment.
Introduction
The CR60 is a high flow compressor which
is designed for use with a nebulizer.
The CR60 is for medical treatment and
should only be used by prescription or under
the direction of a Doctor.
We are constantly improving and modifying
the equipment you purchase from Profile
Respiratory Systems, therefore the
information contained in this publication may
not exactly match the parts supplied. The
alternative parts will always offer significant
improvements in performance or ease of use.
What to do with the CR60
1. Carefully unpack the CR60 (keep the box
and its packaging as this may be required
when returning it for servicing).
2. Complete and return the reply paid card.
3. Read the operating instructions carefully.
4. Observe our recommendations regarding
accessories.

3
Electrical Connection
The CR60 should be connected to a
230V ~ *50 Hz power supply. The mains
fuse located in the electrical inlet
connection, is T1.0 amp. The mains plug
is fitted with a 3 amp fuse.
The AC power supply cable is supplied with
the CR60 and is fitted with a plug
for connection via the fused electrical
connector on the rear panel of the
compressor. Ensure that the plug is
pushed fully into the machine.
Caution: Before switching on the CR60
ensure that the air vents on the front and
back of the machine are not obstructed, to
allow cooling air to circulate.
Power cable connections are colour coded in
line with British standards.
Brown – Live
Blue – Neutral
~ * Stands for alternating current.
To operate the CR60
First connect the machine to the mains supply
via the fused electrical connector at the rear of
the CR60. Ensure that the plug is pushed fully
into the machine. The CR60 is now ready to
be switched on at the ON/OFF switch
(position I is on and position O is off) once the
High Pressure Duratube is connected.
Refer to “Preparation for treatment”.
Air will be drawn into the CR60 via the inlet
filter on the front panel above the ON/OFF
switch. (Please refer to section on “Filter
changes”). Compressed air will be forced out
of the compressor pressure outlet nozzle
below the ON/OFF switch.
Caution: When the unit is switched on the
air vents must not be obstructed.

4
Preparing for treatment
Caution: It is important to understand that
the drug prescribed may have to be diluted
with distilled water or normal saline. If you
are in any doubt about the amount to be
dispensed per treatment, or the diluted factor
to be used, please consult the doctor.
1. Dispense the prescribed drug directly into
the top of the Sidestream nebulizer (drug
chamber), or into the base by unscrewing
the chamber.
Note: It is important that a Sidestream
nebulizer is used to gain maximum
performance from your CR60.
2. Connect one end of the High Pressure
Duratube to the inlet on the bottom of the
Sidestream nebulizer (drug chamber) and
the other to the bacteria filter attached to
the compressor pressure outlet. (It is
essential to use a bacteria filter (part no.
1214) fitted to the air outlet of this unit).
3. Connect either a mask (part no.1100A
adult or 1120A child) or mouthpiece (part
no. 1601A or 1605A durable) to the
Sidestream nebulizer.
The mouthpiece is provided for those who
prefer this type of delivery system.
Mouthpieces are generally considered to be
more effective than masks. They avoid
aerosol irritating the eyes and keep the face
dry. Some patients may find a mask more
comfortable as it can be strapped to the
head with the strap provided. A child’s mask
is also available for the younger patient.
Taking the treatment
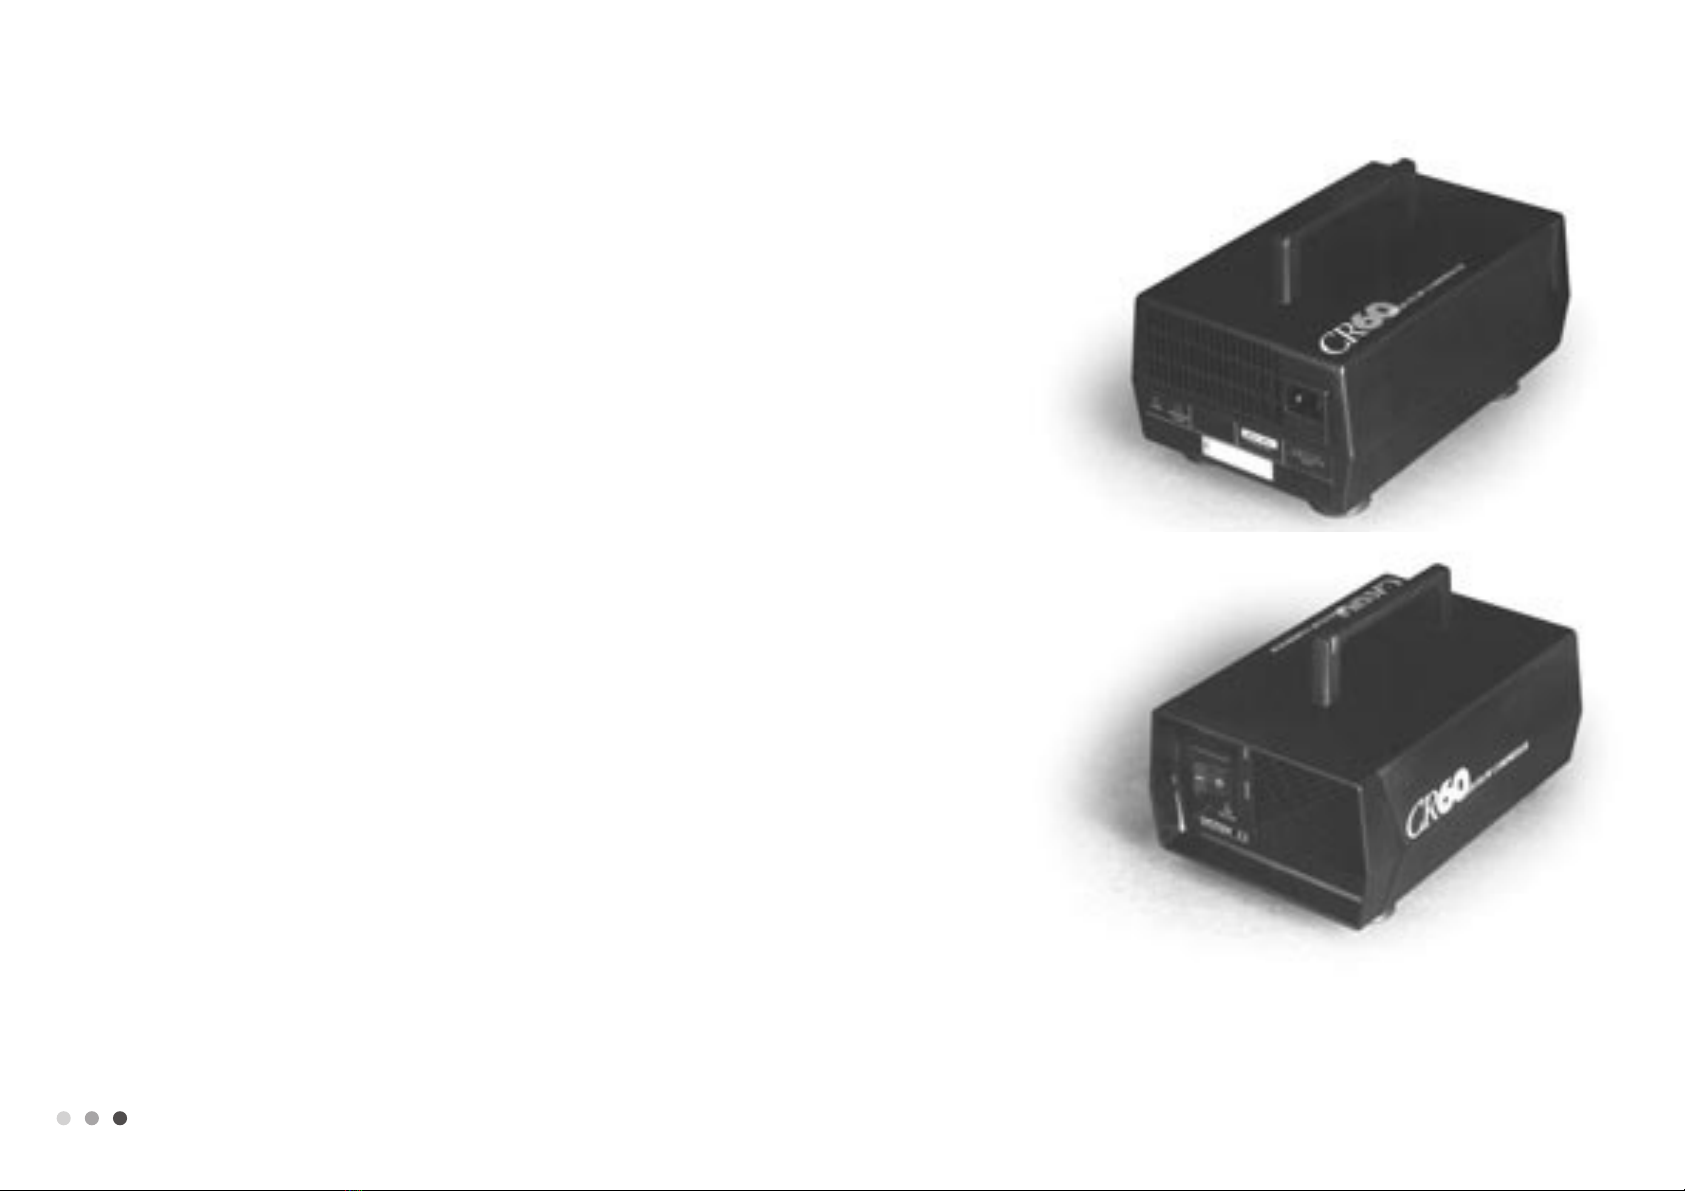
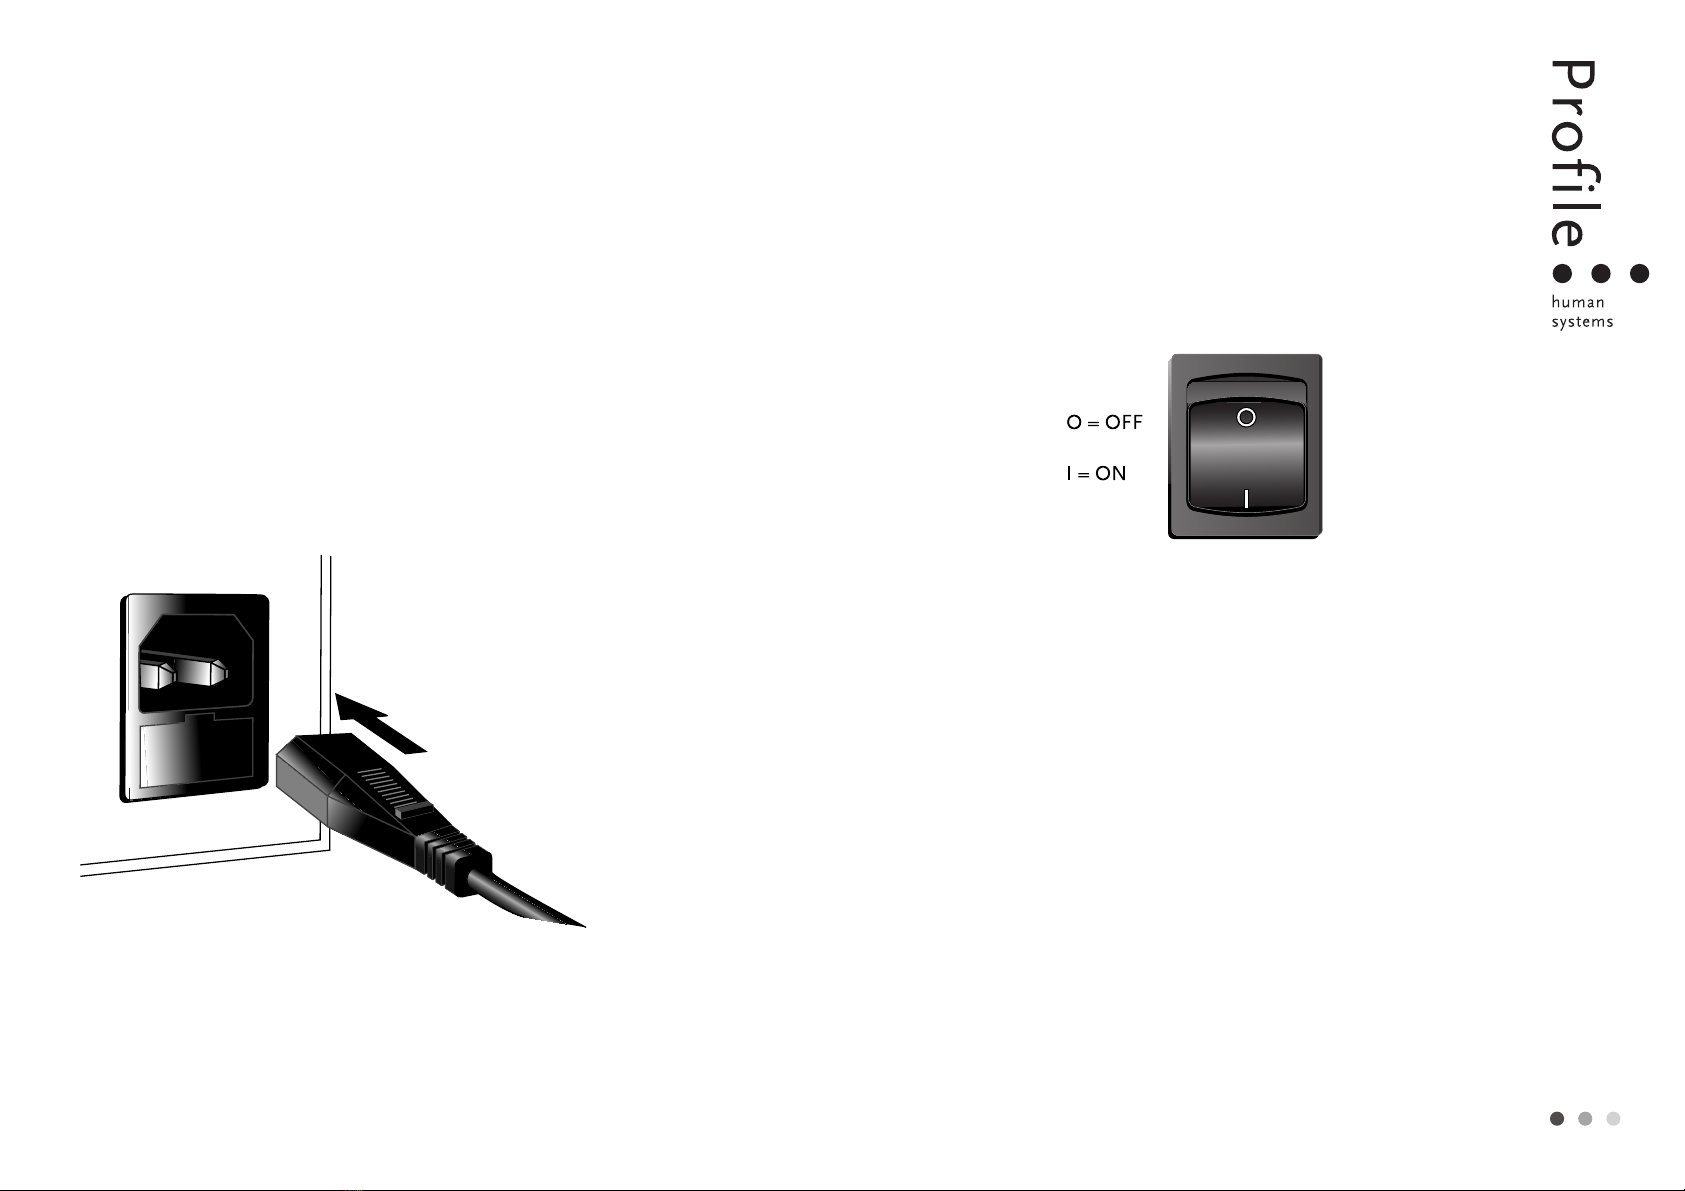
Turn on the CR60 at the on/off switch and
the Sidestream will produce a fine mist.
In order to get the best out of the CR60 it is
necessary for the user to be instructed how
to take nebulizer treatments. This is best
done by your Doctor, Asthma Clinic or
Physiotherapy Department at your hospital.
As a guide, it is suggested that if you are as
relaxed as possible, you will find it easier to
gain the maximum benefit from the
treatment. Sit upright and be well supported
in a chair or, if in bed, be well supported
with pillows as near to upright as possible.
It is also suggested that two or three deeper
breaths are interspersed with gentle lower
chest breathing. Do not try and breathe
quickly. Some patients find it convenient to
turn the machine off during the treatment
and take a short rest.
When the nebulizer begins to work
intermittently and ‘spits’, then the treatment
has finished. There is no need to try and
nebulize every drop of your medication as
there will always be a small amount left in
the chamber.

5
After the treatment
Disconnect the Sidestream nebulizer from the
High Pressure Duratube by gently twisting
the tubing anticlockwise. Rinse out the
Sidestream and refill with a little clean water.
Reconnect the High Pressure Duratube and
run the Sidestream with the CR60 for a few
seconds to flush out any drug that has
become trapped in the nebulizer jets.
Disconnect the Sidestream from the High
Pressure Duratube again gently twisting it
anticlockwise. Run your CR60 for a further
15 seconds without the Sidestream to dry
out any condensation in the High Pressure
Duratube. Disassemble the Sidestream which
comes apart in three pieces and, together
with the mask or mouthpiece, thoroughly
wash all the parts in warm soapy water and
let them dry.
Sterilisation
Once each week your durable Sidestream
should be boiled in water with 2 drops of
washing up liquid for 5 to 10 minutes.
Caution: When cleaning the Sidestream
nebulizer (drug chamber), take great care not
to damage the jet holes. Do not use a
cleaning brush as this damages the centre
baffle and seriously affects the performance
of the Sidestream. UNDER NO
CIRCUMSTANCES should you put paper
clips or needles into the jet holes.
Caution: Do not immerse the High Pressure
Duratube or the inlet filter in any solution.
TOP CENTRE BAFFLE BASE

6
Care of CR60
The CR60 can be cleaned occasionally by
wiping the outside of the case with a damp
cloth. DO NOT wipe the inlet filter. (Refer
also to the section on sterilisation).
Servicing
It is not possible to recommend a standard
time between routine servicing for CR60 units
as one patient may use the machine more
than another. However as this medical device
is to be relied upon for some years, we
recommend that it is serviced by ourselves or
by a qualified technician at least once a year.
This will allow us to check the performance of
the compressor, recalibrate it if necessary, and
allow us to check the electrical integrity of the
entire unit.
To assist you, we have listed possible
problems (see “Fault finding”).
Accessories and spare parts
Accessories should be replaced regularly.
It is recommended that all accessories are
changed at least once a year, especially the
Sidestream and High Pressure Duratube if
the CR60 is being used three or more times
a day.
The filter should be replaced every three
months (see ‘filter changes’).
If you cannot solve a problem or would like
to order any spare parts, then contact our
Customer Service Department and have the
following information ready:
1. Unit Serial No. (The Serial No. is located
at the back of the compressor).
2. Type of drug used and the frequency of
treatment.
Profile Respiratory Systems,
Heath Place, Bognor Regis, West Sussex, PO22 9SL, United Kingdom
International Department:
Telephone: +44 (0) 870 770 3500
Facsimile: +44 (0) 870 770 3501

7
Filter Changes
The inlet filter is intended to filter or clean
the air. In doing this the filter will get dirty
and eventually blocked. The filter should be
changed before it’s performance and that of
the CR60 deteriorates. The time span
between changes varies according to the
conditions the machines are used in. As a
general rule as soon as the filter discolours
from its normal white colour, it should be
changed.
If you notice that the machine is slowing
down, or it is taking longer to deliver the
prescribed solution, simply remove the filter
temporarily, and if the machine speeds up
again, it is an indication that a new filter
should now be fitted.
The filter is simply changed by unscrewing
the clear filter dome, removing the old filter
element and replacing with a new (Part
no.2153A). Insert the new filter element
into the filter holder on the machine and then
replace the dome. Dispose of the old filter.
Filter changes will be required more
frequently if the machine is used in a
household where the occupants smoke.
The bacteria filter requires replacing once it
starts to discolour (part no 1214). Dispose of
the old filter.
Service manuals/wiring diagrams
Full service manuals/wiring diagrams are
available to enable suitably qualified
personnel to service the machines
(part no 2069).
Fault Finding
Problem Possible Solutions
Unit does not run Replace fuse in plug
Switch does not light Replace fuse in the electrical inlet connection,
(disconnect unit from AC power supply before removing
fuse). Push electrical connector firmly into inlet.
Switch lights, Unit runs slowly. Check filter – Part No. 2153A
Switch lights, Unit does not run. Return Unit for service.
Unit runs, nebulizer makes Thoroughly clean Nebulizer by boiling in water with
poor or no mist 2 drops of washing up liquid for 5 to 10 minutes.
Do not use a cleaning brush. Replace nebulizer with
new one.
Nebulizer bubbles but makes Disassemble and clean the nebulizer as per above
no mist. instructions. Reassemble.
If any of the faults occur and the remedies have been tried to no avail, please contact our
Customer Services.

8
Technical specification
Part no. CR60
1750
Voltage 230V~*
Frequency 50Hz
Power Consumption 200VA
Fuse 1 x T1.0 amp
(5 x 20mm)
Filter part no. 2020
Nominal dynamic 8.5 lpm
flow*
Weight 2.8kg
Compressor wobble ‘Ultra-clean’
Dimensions:
Height 150mm
Width 155mm
Depth 225mm
Type Class II
BF
Rating Continuous
~Stands for Alternating Current.
*Flow through Sidestream Nebulizer Jet.
Inlet Filter-Porous Polyethylene.
Fuse Changes
The mains fuse located in the electrical inlet
connection, are T1.0 amp.
To gain access to the mains fuse, insert a
small screwdriver into the slot on the
electrical inlet connection and twist to
release the door (see diagram).
The mains plug is fitted with a 3 amp fuse.
Guarantee
The CR60 is guaranteed against defects in
materials and workmanship for one year
from the date of purchase.
Only Profile Respiratory Systems approved
parts may be used to service this equipment.
Use of non-approved parts may invalidate
the Test Certificate issued for the CR60
nebulizer compressor.
This guarantee does not affect your statutory
rights.
Standard compliance
The CR60 high flow is manufactured to
the requirements of IEC601-1 for class II
Type BF equipment. The CR60 meets
EN 60601-1-2:1993 Medical Electrical
Equipment, General Reqiurements for Safety:
Electromagnetic Compatibility.
Transport & storage at:–
An ambient temperature of +10˚C to +40˚C.
A relative humidity range of 30% to 75%.
An atmospheric pressure range of 700hPa
to 1060hPa.
Symbols
Attention, consult accompaning
documents.
0120

1
Innhold
Innledning 2
Hva du gjør med CR60 2
Bruksområde for CR60 2
Oversikt over delene 2
Elektrisk tilkobling 3
Bruke CR60 3
Klargjøring for behandling 4
Behandlingen 4
Etter behandlingen 5
Rengjøring 5
Vedlikehold av CR60 6
Service 6
Tilbehør og reservedeler 6
Utskifting av filter 7
Servicehåndbok/koblingsskjemaer 7
Problemløsning 7
Teknisk spesifikasjon 8
Utskifting av sikring 8
Garanti 8
Samsvar med standarder 8

2
Innledning
CR60 er en kompressor med høyt trykk og
høy flow som er laget for bruk sammen med
et forstøverbeger.
CR60 er beregnet for medisinsk behandling
og må bare brukes etter anbefaling av en
lege.
Det foretas stadig forbedringer og endringer av
utstyret du kjøper fra Profile Respiratory
Systems. Derfor kan det være at informasjonen
i denne bruksanvisningen ikke stemmer helt
over ens med delene som følger med. De nye
delene vil alltid ha betydelige forbedringer i
ytelse eller brukervennlighet.
Hva du gjør med CR60
1. Pakk forsiktig opp CR60.
2. Les bruksanvisningen nøye.
3. Legg merke til våre anbefalinger om
behandling av og utskifting av utstyr.
Bruksområde for CR60
Vi anbefaler at CR60 brukes sammen
med Medic-Aid’s egne forstøverbeger.
CR60 kan brukes til å forstøve de aller
fleste medikamenter som er beregnet for
bruk i forstøverbeger. Hvis man er i tvil,
ta kontakt med behandlende lege.
Oversikt over delene
Når du har fjernet emballasjen, finner du
CR60-enheten sammen med delene
(garnityret). Vi anbefaler deg at du gjør
deg kjent med tilbehøret før du begynner
å bruke CR60.

Elektrisk tilkobling
CR60 må koples til en strømforsyning på
230 volt ~ 50 Hz. Sikringen som sitter i
strøminntaket, er T3,15A.
Nettledningen som leveres sammen med
CR60, passer til strøminntaket på baksiden
av CR60. Pass på at kontakten er skjøvet
helt inn.
Forsiktig: Før du starter CR60, må du påse
at luftehullene foran og bak på maskinen
ikke er tildekket.
Bruke CR60
Stikk pluggen på nettledningen godt inn i
strøminntaket på CR60. Stikk deretter
støpselet inn i stikkontakten på veggen.
CR60 kan nå startes med AV/PÅ-bryteren på
forsiden av apparatet.
Luft blir sugd inn i CR60 via
luftinntaksfilteret over AV/PÅ-bryteren.
Komprimert luft kommer ut av luftuttaket
under AV/PÅ-bryteren.
Forsiktig: Når maskinen går, må ikke
luftehullene tildekkes.
3
O = AV
I = PÅ

Klargjøring for behandling
Viktig: Følg nøye den veiledning du har fått
orn hvordan medisinen skal brukes.
1. Sett den ene enden av luftslangen på
luftinntaket som sitter på bunnen av
Sidestream forstøverbeger. Sett den andre
enden av luftslangen på luftuttaket på
fronten av CR60.
2. Hell den foreskrevne medisinen direkte inn
i toppen av Sidestream forstøverbeger, eller
i bunnen ved først å skru av toppen.
Merk: Det er viktig at Medic-Aid’s egne
forstøverbeger brukes for å oppnå best
mulig ytelse.
3. Sett enten maske eller munnstykke på
toppen av forstøverbegeret.
Medic-Aid anbefaler bruk av munnstykke der
dette er mulig. Munnstykke blir generelt
ansett for å være mer effektivt enn maske.
Det forhindrer også at damp irriterer øynene.
Noen legemidler bør kun tas med
munnstykke. Følg legens anvisning.
Behandlingen
Start CR60 med AV/PÅ-bryteren, og
Sidestream vil produsere en fin “tåke”.
For å få best mulig resultat er det viktig at
man følger opplæringen man har fått.
Opplæring kan man få av lege, sykepleier
eller fysioterapeut.
Vær mest mulig avslappet. Det anbefales at
du sitter oppreist i en stol eller seng.
Pust dypt inn to eller tre ganger, og pust
deretter normalt. Pust ikke fort.
Behandlingen skal ikke være anstrengende.
Dersom du skulle bli andpusten under
behandlingen, skyldes dette antagelig at du
puster for fort. Dersom en kort pause er
nødvendig, kan du slå av CR60.
Behandlingen er ferdig når forstøverbegeret
begynner å “spytte/fuske”. Det vil alltid være
en liten mengde medisin igjen i bunnen av
forstøverbegeret.
4

5
Etter behandlingen
Slå av CR60. Fjern luftslangen og maske
eller munnstykke fra forstøverbegeret. Skyll
Sidestream forstøverbeger i rent vann. Legg
aldri luftslangen i vann. Sett luftslangen på
forstøverbegeret igjen, og la CR60 gå i noen
sekunder for å fjerne medisin som eventuelt
måtte sitte igjen.
Fjern luftslangen fra forstøverbegeret. Ta
forstøverbegeret fra hverandre i tre deler.
Vask disse delene sammen med munnstykke
eller maske. Skyll delene i rent vann og la de
tørke.
Rengjøring
En gang i uken bør Sidestream forstøverbeger
(topp – midtstykke – bunn) kokes i 6–10
minutter i vann tilsatt 2–3 dråper
oppvaskmiddel. Ta forstøverbegeret fra
hverande før det kokes. Skyll delene i rent
vann og la de tørke.
Forsiktig: Vær forsiktig når du renser
Sidestream forstøverbeger slik at
strålehullene ikke blir skadet. Bruk aldri
oppvaskbørste, binders eller nål i
strålehullene. Dette vil skade forstøverbegeret
TOPP MIDTSTYKKE BUNN

Vedlikehold av CR60
Rengjør CR60 en gang i blant ved å tørke
den utvendig med en fuktig klut.
Luftinntaksfilteret må ikke tørkes (se også
avsnitt om rengjøring).
Service
Fordi CR60 skal gi en medisinsk behandling
og skal være pålitelig i flere år, anbefaler vi
årlig ettersyn. På den måten kan man sjekke
ytelsen på kompressoren og de elektriske
delene inne i apparatet
Det er kun personell som er godkjent
medisinsk teknisk reparatør eller personell
med opplæring fra NorMed AS eller Profile
Respiratory Systems. som skal reparere
apparatet.
Tilbehør og reservedeler
Tilbehør bør skiftes ut regelmessig. Det
anbefales at dette skiftes ca. en gang i året,
særlig Sidestream forstøverbeger dersom
CR60 brukes tre ganger daglig eller mer.
Luftinntaksfilteret bør skiftes når det er
misfarget ( etter ca. 3 måneders bruk).
Se “Utskifting av filter”.
Hvis det er problemer du ikke klarer å løse
eller ønsker å bestille reservedeler, kan du ta
kontakt med NorMed AS.
6
Normed AS,
PO Box 410, N-1471 Lørenskog, Norway
www.normed.no
Phone: +47 67 980100
Fax: +47 67 980101

7
Utskifting av filter
Luftinntaksfilteret renser luften du bruker
under behandlingen og blir skittent etter en
tid. Hvis filteret går tett, vil CR60 ikke
fungere som den skal. Apparatet kan gå
saktere, og behandlingstiden kan bli lengre.
Så snart filteret ikke er hvitt og rent (etter ca.
3 måneder) skal det skiftes. Hvis det røykes
der CR60 brukes, blir filteret fortere skittent.
Skifting av filteret skjer ved å skru løs
plasthetten. Ta ut det gamle filteret og sett
inn et nytt. Skru plasthetten på plass igjen.
Kast det gamle filteret.
Servichåndbok/koblingsskjema
Servicemanual er tilgjengelig fra NorMed AS
og Medic-Aid Ltd. Varenr. 2069.
Problemløsning
Problem Mulig løsning
AV/PÅ-bryteren lyser ikke Sjekk sikringen som sitter i strøminntaket.
CR60 går sakte Sjekk om luftinntaksfilteret er skittent. Varenr. 2153.
Knapp lyser, enheten går sakte Kontroller filter – delenummer 2153.
AV/PÅ-bryteren lyser, men CR60 Send apparatet på service.
går ikke
CR60 går, men forstøveren lager Rengjør forstøverbegeret ved å koke det ifølge
ingen “tåke” bruksanvisninggen. Bytt eventuelt til et nytt.
Det bobler i forstøverbegeret, Rengjør forstøverbegeret ifølge bruksanvinsingen.
men ingen “tåke” Bytt eventuelt til et nytt.
Dersom forslagene til løsninger ikke fungerer, kan du ta kontakt med de som har gitt deg
apparatet (hjelpemiddelsentralen i ditt fylke) eller ringe NorMed AS.

Teknisk spesifikasjon
Spenning 230V~50Hz
Strømstyrke 200VA
Sikring 1 x T1,0 amp (5 x 20mm)
Dynamisk flow 8.5 l/min
Vekt 2.8kg
Kompressor ‘Ultraren’
klaffkompressor
Høyde 150mm
Bredde 155mm
Dybde 225mm
Type Klasse II
BF
Utskifting av sikring
Sikringen sitter i strøminntaket på baksiden
av CR60, T1,0A. Bruk en liten skrutrekker
for å løsne panelet og skift sikring (se
tegning nedenfor).
Garanti
CR60 har et års garanti mot fabrikasjonsfeil.
Garantien gjelder ikke dersom apparatet er
tilsølt eller misbrukt.
Garantien gjelder ikke det medfølgende
forstøverbeger, maske og munnstykke eller
lignende forbruksmateriell. Bare deler
godkjent av NorMed AS eller Medic-Aid Ltd.
kan brukes ved service på utstyret.
Denne garantien påvirker ikke dine
lovbestemte rettigheter.
Samsvar med standarder
CR60 High Flow kompressor produseres
i henhold til IEC601-1-utstyr av klasse II,
type BF.
CR60 produseres i henhold til EN 6060
1-12: 1993 Medisinsk elektrisk utstyr,
generelle krav for sikkerhet: elektromagnetisk
kompabilitet.
Transport og lagring skal skje
i omgivelsestemperatur mellom +10ºC
og +40ºC. Relativ fuktighet mellom
30% og 75%.
Atmosfærisk trykk mellom 700hPa
til 1060hPa.
Oppmerksomhet
Konsulter akkompagnerende
dokument.
8
Sikring
0120

1
Índice
Introducción 2
¿Qué es lo que debe hacer con el nuevo CR60? 2
Aplicaciones del nuevo CR60 2
Identificación de las piezas 2
Conexión eléctrica 3
¿Cómo funciona el CR60? 3
Preparación para el tratamiento 4
Administración del tratamiento 4
Después del tratamiento 5
Esterilización 5
Mantenimiento de su CR60 6
Servicio 6
Accesorios y piezas de repuesto 6
Cambio de los filtros 7
Manuales de servicio/diagramas del cableado 7
Solución de problemas 7
Especificaciones técnicas 8
Cambio del fusible 8
Garantía 8
Cumplimiento de las normas 8

2
Introducción
El CR60 es un compresor de alto flujo que
está diseñado para su uso junto con un
nebulizador.
El CR60 es para tratamiento médico y debe
utilizarse únicamente con prescripción
facultativa y bajo la supervisión de un
médico.
Estamos mejorando y modificando
constantemente el material de Profile
Respiratory Systems, por lo que puede que la
información que aparece en este manual no
coincida exactamente con ciertas piezas de su
aparato. Las piezas alternativas supondrán
siempre una mejora significativa de su
funcionamiento o una mayor sencillez de uso.
¿Qué es lo que debe hacer con el
CR60?
1. Saque con cuidado el CR60 (guarde la
caja y el envoltorio, ya que podrían
pedírselos al remitir el equipo para su
servicio).
2. Lea detenidamente el manual de
instrucciones.
3. Cumpla nuestras recomendaciones
en cuanto al mantenimiento y al
recambio de los accesorios.
Aplicaciones del CR60
El compresor CR60 sirve para activar
la mayoría de los nebulizadores
disponibles. El elevado flujo del CR60
puede nebulizar broncodilatadores y
otros medicamentos de viscosidad
parecida. Asimismo, puede administrar
los antibióticos más viscosos y activar
muchos humectadores.
Identificación de las piezas
Una vez que haya quitado todo el
envoltorio, encontrará el nuevo CR60 y
el filtro antibacteriano (pieza nº 1214).
Le aconsejamos encarecidamente que
antes de utilizar el CR60 como
tratamiento se familiarice con los
accesorios y con el equipo.

Conexión eléctrica
El CR60 debe estar conectado a un
suministro de energía de 220/240 voltios
~*50 Hz. El fusible de la red general
situado en la conexión de admisión eléctrica
es de T1,0 amp. El enchufe de la red
general lleva un fusible de 3 amp (aplicable
sólo al R.U.).
El CR60 incluye el cable para el suministro
de energía de CA. En la parte posterior del
compresor lleva un enchufe de conexión a
través del conector eléctrico con fusible.
Asegúrese de que el enchufe esté totalmente
metido en la máquina.
Precaución: Antes de encender el CR60,
asegúrese de que las salidas de aire delante
y detrás de la máquina no estén obstruidas,
para que circule el aire enfriador.
Los cables de conexión eléctrica siguen el
código de colores conforme a las normas
británicas.
Marrón: activo
Azul: neutro
~* significa corriente alterna.
¿Cómo funciona el CR60?
Primero enchufe la máquina a la red general
a través del conector eléctrico con fusible en
la parte posterior del CR60. Asegúrese de
que el enchufe esté totalmente metido en la
máquina. Una vez conectado el Duratube de
alta presión, podrá encender
el CR60 con el interruptor de ON/OFF (la
posición I indica que está encendido y la
posición O apagado.) Vea “Preparación para
el tratamiento”.
El aire entrará en el CR60, a través del filtro
de admisión situado en el panel delantero
encima del interruptor ON/OFF. (Vea el
apartado “Cambio de los filtros”.) El aire
comprimido será expulsado por la boquilla
de salida del compresor situada debajo del
interruptor de ON/OFF.
Precaución: Cuando esté el aparato
encendido las salidas de aire no deberan
estar obstruidas.
3
O= APAGADO
I= ENCENDIDO
Table of contents
Languages:
Popular Air Compressor manuals by other brands

Hamron
Hamron RCP-C43L operating instructions

Craftsman
Craftsman 921.152100 owner's manual

GEA
GEA HGX7 R134a Assembly instructions

Bitzer
Bitzer 4FC-3.2 Series technical information

Gardner Denver
Gardner Denver APEX25-30B Operating and service manual

dbx
dbx AutoVelocity™ Dynamics and the dbx 160SL White paper