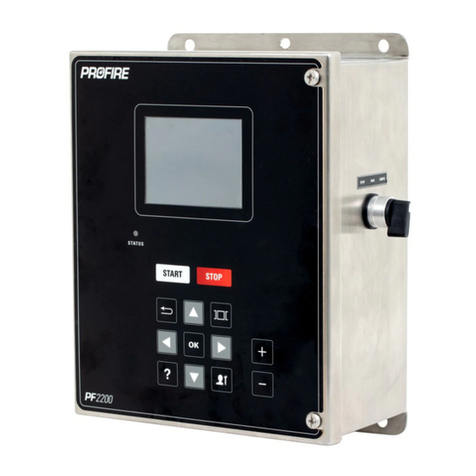
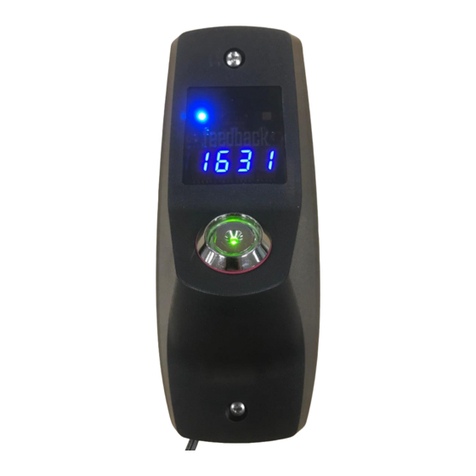
ProFire PF2100 User manual

PF2100 USER MANUAL
For Firmware E1.8.217 Rev. 1.0

TABLE OF CONTENTS
PF2100 MANUAL For Firmware E1.8.217 Rev. 1.0
1 INTRODUCTION
1.1 Important Safety Information
1.2 HW & FW Versioning
1.3 Approvals
1.4 Available Models
1.5 Included Components
1.6 Common Applications & Optional Hardware
1.7 System Diagram
1.8 Terminal Card Descriptions
2 INSTALLATION
2.1 Installation Warnings
2.2 Mounting Considerations
2.3 Terminal Card Diagram
2.4 Wiring
3 USER INTERFACE & SETTINGS
3.1 User Interface
3.2 Menu Navigation
3.3 Menu Map
3.4 Initial System Settings
3.5 Optional Settings
3.6 System Operation
4 SYSTEM BEHAVIOR
4.1 System Behavior
4.2 Process Control
4.3 Contact Behavior
5 EXPANSION CARDS
5.1 4-20mA Expansion Card
5.2 Modbus Expansion Card
6 TROUBLESHOOTING
6.1 Common Issues & Solutions
6.2 Shutdown Messages
6.3 Alarm Codes
6.4 Warning Messages
6.5 Flame Detection Troubleshooting Guide
6.6 Thermocouple Troubleshooting Guide
APPENDICES
A PID Tuning Procedure
B Field Calibration
C Resetting to Defaults

54
1 | INTRODUCTION
The PF2100 BMS (Burner Management System) is an electronic control and monitoring system designed
for use on a wide array of natural draft burner industrial applications. It provides electronic pilot ignition,
flame detection, temperature control, and remote monitoring. In addition to being an extremely useful
tool, it improves safety by preventing the flame from being lit under unsafe conditions.
1.1 | Important Safety Information
Installation and use must conform to the directions in this manual.
System must be properly connected to earth-ground for effective operation of flame detection circuitry.
Electrical devices connected to the controller must meet certain electrical standards and be within
voltage limits.
Replacement fuses must be ceramic and of correct rating.
Avoid unauthorized replacement of the fuse.
WARNINGS
This equipment is suitable for use in class 1, division 2, groups abcd or non-hazardous locations only.
Do not service unless area is known to be non-hazardous.
Do not open when energized.
EXPLOSION HAZARD
Do not disconnect while circuit is live unless area is known to be non-hazardous or equivalent.
Substitution of components may impair suitability for class 1, division 2.
FOR ANY QUESTIONS PLEASE VISIT OR CALL US.
www.profireenergy.com | 1.855.PRO.FIRE
!
1.2 | HW & FW Versioning
This version of the manual was written for use with PF2100 systems that have the following hardware
and firmware versions.
ITEM HW VERSION FW VERSION
Door Card v1.71 E1.8.217
Terminal Card v2.4.2 E1.8.217
4-20mA Card v3.0 v4.1
Modbus Card v2.0 v4.4
4-20mA Repeater Card v1.2 v4.1
Data Logging Card v2.4 v5.1
System hardware and firmware versions can be found printed on separate labels inside of the enclosure
on each circuit board.
1.3 | Approvals
CSA C22.2 No. 199, 3rd Edition
ANSI Z21.20, 15th Edition
UL 372, 6th Edition
Class I, Zone 2,
AEx, nA IIC, T4, IP66
Ex nA IIC T4 IP66
CSA C22.2 No. 0-M91
CSA C22.2 No. 0.4-04
CSA C22.2 No. 94-91
CSA C22.2 No. 213-M1987
CSA E60079-0:2007
CSA C22.2 No. 60079-15:12
ANSI-ISA-12.12.01-2007
UL No. 60079-0, Ed. 6
UL No. 60079-15, Ed. 4
#248705
1.4 | Available Models
The PF2100 is available in two configurations: Base Model and Internal Coil Model.
The Base Model is for use with externally mounted ignition coils. This is useful when the controller
must be mounted more than 5m (15ft) away from the burner. An external ignition coil can be purchased
separately from Profire for use with this model.
The Internal Coil Model includes a built-in ignition coil and can be used whenever the controller can be
mounted less than 5m (15ft) away from the burner.
Optional expansion cards are also available:
4-20mA Repeater Expansion Card (1PS166)
(PFP- 210BGY) Modbus Expansion Card
(PFP-210BHZ) Data Logging Expansion Card (210BKZ)

76
BASE MODELS
MODEL # MODEL DESCRIPTION
E0000 Base Model
E0400* Base Model with 4-20mA Repeater Expansion Card
E0R00 Base Model with 4-20mA Repeater Expansion Card
E0M00 Base Model with ModBus Expansion Card
E04M0* Base Model with 4-20mA Repeater Expansion Card and Modbus Expansion Card
E04M0 Base Model with 4-20mA Repeater Expansion Card and Modbus Expansion Card
INTERNAL COIL MODELS
MODEL # MODEL DESCRIPTION
EC000 Internal Coil Model
EC400* Internal Coil Model with 4-20mA Repeater Expansion Card
ECR00 Internal Coil Model with 4-20mA Repeater Expansion Card
ECM00 Internal Coil Model with Modbus Expansion Card
EC4M0* Internal Coil Model with 4-20mA Repeater Expansion Card and Modbus Expansion Card
ECRM0 Internal Coil Model with 4-20mA Repeater Expansion Card and Modbus Expansion Card
*Discontinued model
1.5 | Included Components
CODE DESCRIPTION E0000 E0400 E0M00 E04M0 EC000 EC400 ECM00 EC4M0
A PF2100 • • • • • • • •
B Mounting Brackets & Screws • • • • • • • •
C Installation Guide • • • • • • • •
D Internal Coil • • • •
E Ferrules (2) • • • •
F Straight Silicone Boots (2) • • • •
G Ignition Cable (20ft) • • • •
H 4-20mA Repeater Expansion Card • • • •
I Modbus Expansion Card • • • •
EXPANSION CARDS
F
A
E
I
G
B
D
H
C
GENERAL FEATURES
Designed for use with natural draft fire tube heaters
Meets or exceeds all relevant codes and standards
Easy installation with clearly marked component I/O
Easily accessible removable terminal connections
Rapid 3 second shut-down on flame-out
Electronic spark ignition
Low-power operating mode to accommodate solar panel or TEG applications
Auto-relight or manual operation
Transient protected and fail-safe circuits
All solid state circuit components
CSA compliant for Class I, Division 2 locations
Certified for use on B.149 compliant valve trains
Optional internal or external ignition coil
INPUTS & OUTPUTS
Digital inputs for safety interlock device connections (6)
Digital outputs (5)
4-20mA output (1)
Flame-rod input (1)
Thermocouple inputs (3)
TECHNICAL SPECIFICATIONS
TEMPERATURE RATINGS MIN MAX
Operating Range -40˚C (-40˚F) +55˚C (+130˚F)
Storage Range -40˚C (-40˚F) +80˚C (176˚F)

98
POWER CONSUMPTION 12V 24V
Controller only, display ON 2.6 W 2.9 W
Controller only, display OFF 1.1 W 1.2 W
Maximum Total Current Draw 5A 5A
Maximum Valve Current Draw 2A 2A
Ignition Voltage (Internal Coil) up to 20 kV up to 40 kV
TERMINAL BLOCKS VALUE
Maximum Wire Gauge 12 AWG
STATUS CONTACT VALUE
Type Dry
MAX Voltage 40VDC
MAX Continuous Current 250mA
Impedance (When Closed) 15Ω
PHYSICAL DIMENSIONS VALUE
Width 30.9 cm (12.15 in)
Height 23.4 cm (9.23 in)
Depth 13.4 cm (5.28 in)
WEIGHT VALUE
E0000 Model 4.0lbs / 1.8kg
E0400 Model 4.5lbs / 2.0kg
E0M00 Model 4.5lbs / 2.0kg
EC000 Model 6.0lbs / 2.6kg
E0R00 Model 4.5lbs / 2.0kg
FUSES VALUE
Main Fuse Rating 5A / 250 V Ceramic, Fast Blow
Status Contact Fuse Rating 250mA / 125V Ceramic, Fast Blow
Replacement Main Fuse LittelFuse 0314005.HXP
Replacement Status Contact Fuse LittelFuse 0453.250 or 0451.250
1.6 | Common Applications & Optional Hardware
Below are examples of some of the many applications that the PF2100 can be used in.
Line Heater
Dehydrator
Combustor
Tank Heater
Separator
Treater
Gas Production Unit
Amine Reboiler
Thermal Oxidizer
Depending on your installation type, other components may be required. Commonly requested hardware
includes:
Mounting Hardware
Channel Bar
Conduit Ports
Liquid Tight Ports
Rubber Grommets
Wire
Ignition Wire
Thermocouple Wire
Rods And Connectors
Kanthal Ignition Rods (Various Lengths)
Valves
DC Solenoids
Safety Valves with Proof of Closure
Proportional Valves
Thermocouples
Single, Type K
Dual Element, Type K
Pilot Assembly
Nozzles
Brackets
Mixers
Orifices
Autonomy
Batteries
Solar Chargers
Solar Panels
Accessories
Modbus Expansion Cards
4-20mA Repeater Expansion Cards
Data Logging Expansion Cards
External Ignition Coil
Please contact Profire Sales for further information.
1.7 | System Diagram

1110
(door to terminal)
F2
SP
AREFUSE
Status+
Status-
Start+
Start-
ESD+
ESD-
Proofof Closure+
Proofof Closure-
HighPressure+
HighPressure-
LowPressure+
LowPressure-
Level+
Level-
HighTemp_TC+ (Yellow)
HighTemp_TC- (Red)
Process_TC+(Yellow)
Process_TC-(Red)
AUX_TC+(Yellow)
AUX_TC-(Red)
HighFire+/Main+
4-20mAOut-
4-20mAOut+
EarthGround
Common
12/24VDC
Coil-
Coil+
Ion+
Ion-
HighFire- / Main-
LowFire+
LowFire-
Pilot+
Pilot-
1
2
3
6
5
4
XXXXXX-XXXXX
XXX-2.3.0
XXXXXX
SPAREFUSE
RESET
E
v1.8.005
4-20mA REPEATER CARD
INTERNAL COIL
MODBUS or DATALOGGING CARD
RIBBON CABLE
FW VERSION LABEL
KEYPAD FLEX CABLE
HW SERIAL / VERSION LABEL
TERMINAL CARD
DOOR CARD
(optional)
(optional)
(optional)
DOOR & KEYPAD
SERIAL / MODEL LABEL
ENCLOSURE
1.8 | Terminal Card Descriptions
This table provides connection details and a brief description of each terminal.
TERMINAL EXPECTED CONNECTIONS DESCRIPTION
12/24VDC Input power from a DC source Input power 10VDC- 28VDC, 5A MAX
Common Ground back to DC source Internally connected to EGND
EGND Earth Ground
4-20mA Out + Proportional Valve positive terminal or PLC
4-20mA positive input
This output can be used for either Proportional
Valve Control or echoing the Process
Temperature to a PLC.
A resistance of 120Ω to 250Ω is expected.
4-20mA Out - Ground return for the 4-20mA output
HighTemp_TC + (YELLOW) High Temp Thermocouple positive lead “TYPE K” thermocouple must be connected
between the “+” and “-” terminals and must
not be electrically connected to ground.
An uninterrupted connection using “TYPE K”
thermocouple wire is required for an accurate
reading.
HighTemp_TC - (RED) High Temp Thermocouple negative lead
Process_TC + (YELLOW) Process Thermocouple positive lead
Process_TC - (RED) Process Thermocouple negative lead
AUX_TC + (YELLOW) Aux Thermocouple positive lead
AUX_TC - (RED) Aux Thermocouple negative lead
TERMINAL EXPECTED CONNECTIONS DESCRIPTION
High Fire/Main + High Fire / Main Valve positive terminal Solenoid valves must be connected between
the “+” and “-” terminals. The negative
terminal is not directly connected to ground so
a common return wire for the High Fire, Low
Fire and Pilot valves cannot be used.
Maximum continuous current is 2A. If Low
Power mode is enabled, a peak load of 4A is
permitted.
High Fire/Main - High Fire / Main Valve negative terminal. Do not
connect to ground.
Low Fire + Low Fire Valve positive terminal
Low Fire - Low Fire Valve negative terminal. Do not connect
to ground.
Pilot + Pilot Valve positve terminal
Pilot - Pilot Valve negative terminal. Do not connect to
ground.
Ion + Flame Detection positive input. Connect to flame
rod or external coil Ion terminal (depending on
configuration)
A Kanthal rod should be placed directly in
the pilot flame and connected to this input.
The pilot assembly must be grounded for the
flame detection to function properly. Input
is protected from high voltage and can be
connected in series with the high voltage
terminals of an external ignition coil, allowing
a single flame rod to be used for both ignition
and flame detection.
A 65VAC signal is applied to the flame rod.The
source impedance is very high so there is no
danger of sparking.
Ion - Flame Detection negative input. Connect to
ground screw on pilot assembly or burner
housing.
Ground return for flame detection.
Coil + Driver for the low voltage primary of the ignition
coil.
The primary of the ignition coil should be
connected to this terminal. The 12/24VDC
input power will be applied for 1 ms and
turned off for 50 ms while sparking.
This output is protected by a 250mA thermal
fuse.
Coil - Ground return for the ignition coil.

1312
TERMINAL EXPECTED CONNECTIONS DESCRIPTION
Status + Connect to PLC positive input contact or other
alarm device.
The status “+” and “-” contacts will be closed
when the system is running and opened when
the system is shutdown. Dry contact output to
indicate system status to an external device.
ie. PLC. Note that the contacts are DC only
and are not internally connected to power or
ground.
40VDC, 250mA, 15Ω
Status - Connect to PLC negative input contact or other
alarm device.
Start + Remote start input from an external device. ie.
PLC.
Dry contact switch is expected.The input
is internally pulled up to 9VDC via a 3.75kΩ
resistance. Jumper “+” and “-” if not used.
All input contacts can use a single common
ground return if desired.
Start - Ground
ESD + External Shutdown input, typically plant ESD loop.
ESD - Ground
Proof of Closure + Proof of Closure from main valve(s).
Proof of Closure - Ground
High Pressure + Input from a mechanical High Pressure switch.
High Pressure - Ground
Low Pressure + Input from a mechanical Low Pressure switch.
Low Pressure - Ground
Level + Input from a float-switch mounted in the bath. Dry contact switch is expected.The input
is internally pulled up to 9VDC via a 3.75kΩ
resistance. Jumper “+” and “-” if not used.
All input contacts can use a single common
ground return if desired.
Level - Ground
2 | INSTALLATION
The PF2100 can be used with many different systems. Before you begin installation, identify which
system the BMS will be used to control. In addition to this document, Profire has an Installation Guide
and several installation specificWhitepapers available describing common scenarios. These can be found
at www.profireenergy.com.
The steps provided here are general and can help you to identify questions that need to be answered to
complete the installation process. If you are new to the PF2100, you should read this whole section and
follow the instructions closely.
Steps
1. Review all installation warnings
2. Install the system
3. Connect the required wiring including Power, Valves,
Thermocouples, and Ignition Coil / Flame Detection wiring
4. Connect any additional wiring as required for your specific
application. Commonly used lines include the Status Contact,
Dry Contact Inputs, 4-20mA Temperature Output, and
Expansion Cards
To know which options are required, you should consult the engineer or technician who designed the
site. You should also be familiar with the local electrical and gas code for the site.
2.1 | Installation Warnings !
Before installing the PF2100, please review the following list of warnings. Failure to consider these
warnings may result in death, electrocution, property damage, product damage, and/or government fines.
1. The PF2100 is not intended for use on burners greater than
12.5 MMBtuh. It is against code in many locations.
2. To use the PF2100 on burners greater than 5 MMBtuh, it is
recommended that the low fire feature with two safety shutoff
valves be used. At least one of these valves should use Proof
of Closure. This is required in many locations.
3. Failure to properly ground the pilot assembly back to the
PF2100’s Ion terminal may result in accidental electrocution,
product damage, or simply failure to ignite the pilot.
4. The PF2100 generates 20kV - 40kV at its high voltage output
terminal which can cause cardiac arrest. Do not touch or
place any object near the ignition coil’s high voltage terminal
or connected ignition wire while the product is operating.
Even without making physical contact with the terminal, it is
possible to draw a spark from several inches away, especially
if the pilot bracket is not properly grounded.
5. Never leave the PF2100 running unattended without the
door screws securely tightened down.This is to prevent
moisture from getting inside of the enclosure and damaging

1514
the product. Moisture damage to the internal circuitry is not
covered by the product warranty if the door has been left
open.
6. All conduit ports drilled into the PF2100 enclosure must be
CSA/NEMA Type 4 rated and be sealed in order to maintain the
Type 4 rating.
2.2 | Mounting Considerations
The PF2100 is typically mounted near the burner it is controlling or in another location that is both safe
and easily accessible. The recommended mounting height is 1.5m (5ft) above the ground or platform for
the comfort of the operators.
PLEASE CONSIDER THE FOLLOWINGWHEN CHOOSING AN INSTALL LOCATION:
Accessability
The system should be easily accessible so that the operator can change settings and observe
its operation. It is preferable that the system be mounted facing away from the sun to make
it easier to read the display and LED indicators on the front panel.
Security
In some situations, it may be desirable to mount the system in a location not accessible to
the general public to prevent accidental or intentional tampering.
Operator Safety
Avoid placing the system in locations that are dangerous to the operator. Examine the area
surrounding the potential installation site and look for such things as nearby open flames or
close proximity to tanks that might overflow, and other harmful situations.
Performance
Choose a mounting location that allows ground and ignition wires to be kept as short as
possible. This ensures the best ignition and flame detection.
Product Protection
To protect the system from being damaged, it should not be mounted:
1. Where chemicals may splatter or bubble over from a tank onto
the system. Chemicals on the keypad may interfere with an
operator’s ability to control the product or view the display and
LED indicators.
2. Directly to a heated tank where excessive heat may damage
the product. Refer to the maximum operating temperature
listed in this document.
3. On anything that may tip over due to wind or snow. Some
examples include poles not set properly into the ground or
tripods not secured with anchor bolts or guy wires.
4. In locations that may be prone to flooding.
CONDUIT AND CABLE CONSIDERATIONS
1 8 5 5 PR O FI R E
NHAZARD
ECTWHILECIRCUITISLIVE UNLESSAREAISKNOWN
HAZARDOUSOREQUIVALENT
RTISSEMENT:RISQUED’EXPLOSION
NEPASDEBRANCHERTANTQUELE CIRCUIT EST SOUSTENSION, A
MOUNSQU’ILNES’AGISSED’UNEMPLACEMENT NON DANGEREAUX
WARNING:EXPLOSIONHAZARD
SUBSTITUTIONOFCOMPONENTSMAYIMPAIR SUITABILITY FOR
CLASSI,DIVISION2.
AVERTISSEMENT:RISQUED’EXPLOSION
LASUBSTITUTIONDECOMPOSANTS PEUT RENDURE CEMATERIEL
INACCEPTABLEPOURLESEMPLACEMENTSDECLASSE I, DIVISION 2
UCTIVE
EINCLASSI, DIVISION 2,
DOUSLOCATIONSONLY.
1101-009-E0000Rev3.0
FLAME
MC#248705
1 85 5 PRO F I R E
WARNING:EXPLOSIONHAZARD
DONOTDISCONNECTWHILE CIRCUIT IS LIVE UNLESS AREA ISKNOWN
TOBENON-HAZARDOUS OR EQUIVALENT
AVERTISSEMENT:RISQUED’EXPLOSION
NEPASDEBRANCHERTANT QUELE CIRCUITESTSOUS
TENSION,A
MOUNSQU’ILNE S’AGISSED’UN EMPLACEMENT NON DANGEREAUX
WARNING:EXPLOSIONHAZARD
SUBSTITUTIONOFCOMPONENTS MAYIMPAIR SUITABILITY FOR
CLASSI,DIVISION 2.
AVERTISSEMENT:RISQUED’EXPLOSION
LASUBSTITUTIONDE COMPOSANTS PEUT RENDURE CE MATERIEL
INACCEPTABLEPOURLES EMPLACEMENTSDE CLASSE I, DIVISION 2
CSA22.2No. 199-2007
ANSIZ21.20-2007
UL1998-2004
Class1,Div 2, Grp ABCD
IP54
T4A,NEMAType4X
INPUT: 12VDC,2.6WDisplayON
12VDC,1.1WDisplayOFF
24VDC,2.9WDisplayON
24VDC,1.2WDisplayOFF
OUTPUT: 12VDC,5AmaxINDUCTIVE
24VDC,5AmaxINDUCTIVE
AMBIENT: -40˚C- +55˚C
THISEQUIPMENTIS SUITABLE FOR USE IN CLASS I, DIVISION 2,
GROUPSABCDOR NON-HAZARDOUS LOCATIONS ONLY.
1101-009-E0000Rev3.0
SERIALNO.
MODELNO.
1PS21-E0000
DEMO
BURNER
MANAGEMENTSYSTEM
2100
DETERMINE DRILL LOCATIONS
CONDUIT AND CABLES AS REQUIRED
MOUNTING INSTRUCTIONS
1. Remove the included bag of components taped to the
mounting brackets.
2. Attach the two mounting brackets to the back of the PF2100
enclosure using the 4 provided screws.
3. Determine the best location to drill holes in the product
enclosure for the wires to enter. It is recommended that these
holes be drilled on the bottom of the enclosure (as shown).
4. Install grommets or conduit ports as required.

1716
5. Securely mount the enclosure to a pole, structure or building
as indicated by the site engineer or technician.
2.3 | Terminal Card Diagram
F2
SPAREFUSE
Status+
Status-
Start+
Start-
ESD+
ESD-
Proof of Closure+
Proof of Closure-
HighPressure+
HighPressure-
LowPressure+
LowPressure-
Level+
Level-
HighTemp_TC+ (Yellow)
HighTemp_TC- (Red)
Process_TC+ (Yellow)
Process_TC- (Red)
AUX_TC+ (Yellow)
AUX_TC- (Red)
High Fire+ / Main+
4-20mA Out-
4-20mA Out+
Earth Ground
Common
12/24VDC
Coil-
Coil+
Ion+
Ion-
High Fire- / Main-
Low Fire+
Low Fire-
Pilot+
Pilot-
1
2
3
6
5
4
XXXXXX-XXXXX
XXX-2.3.0
XXXXXX
SPAREFUSE
RESET
E
v1.8.005
INTERNAL COIL
IGNITIONTERMINALS
STATUS CONTACT OUTPUT
HW SERIAL / VERSION LABEL
EXPANSION CARD SLOT
FLAME DETECTIONTERMINAL
STATUS CONTACT FUSE
LEVEL DRY CONTACT INPUT
PRESSURE DRY CONTACT INPUTS
MISC. DRY CONTACT INPUTS
4-20mA OUTPUT
FW VERSION LABEL
THERMOCOUPLE INPUTS
MAIN FUSE
SPARE MAIN FUSE
SPARE STATUS CONTACT FUSE
DOOR CARD CONNECTOR
POWERTERMINALS
(optional expansion)
VALVE OUTPUTS
2.4 | Wiring
The wiring precautions in this section are important for all PF2100 installations. Please set up your
installations accordingly.
NOTE: If you have not wired a PF2100 system, please refer to the PF 2100 Install Guide for detailed
wiring instructions. Skipping or performing any steps in the guide incorrectly can result in the PF2100 not
functioning properly.
POWER
The PF2100 can be powered from 12VDC or 24VDC. The maximum current that the PF2100 can safely
handle without blowing the main fuse is 5A. The system on its own draws about 100mA.The rest of the
current is used by additional hardware such as valves. Make sure that you select a power supply that is
rated appropriately for the total amount of current that will be consumed by all devices attached to it.
VALVES
There are four valve control outputs on the PF2100: Pilot, Low Fire, 4-20mA Output, and High Fire/Main.
Ensure that each valve has a separate return wire. Multiple valves sharing common return wires will not
function properly.
Pilot Valve
The Pilot valve is required and must be wired for all installations.
Low Fire Valve
The Low Fire valve may also be required by local code or for proper operation of your
particular application. Low Fire is often used on high Btuh burners (burners that exceed 5
MM Btuh) to establish a draft before opening the High Fire valve. Failure to do this on high
Btuh burners can cause the burner to starve itself of oxygen which puts out the flame.
4-20mA Output
The 4-20mA Output can be used to control a proportional valve designed for a 4-20mA
current loop. Using a proportional valve allows for finer control of the burner’s temperature as
opposed to the 2 or 3 levels possible with normal valves. Typically the 4-20mA Output is used
in conjunction with a normal valve.The 4-20mA Output also supports low fire.
High Fire/Main Valve
The High Fire valve is required and must be wired for all installations. This valve is sometimes
called the Main Valve, especially when Low Fire is not used.
NOTE: It is possible to connect multiple valves to the same control output in parallel or series. If you do
this, be sure that the configuration you are using meets local codes and does not exceed the total current
rating of the PF2100.
NOTE: The negative valve control wires are NOT connected directly to ground. Therefore, you cannot use
a common return wire for all valves.
THERMOCOUPLES
The High Temp and Process thermocouple inputs are mandatory and must be connected to a Dual
Element thermocouple. The Auxiliary thermocouple is only needed when a second process temperature
(such as the outlet temperature on a line heater) must be monitored. Otherwise, the Auxiliary
thermocouple terminals can be left unconnected.
All thermocouples are cold junction compensated. For this reason, it is important to make sure that
Type-k thermocouple wire and connectors are used exclusively.The temperature compensation is done
using an ambient temperature sensor located on the terminal card near the thermocouple terminals.
Process Thermocouple
This thermocouple is normally used on the primary temperature control device. The system
shuts down if an open circuit is detected on this thermocouple. It should be placed in the
same thermowell as the HighTemp thermocouple using a dual element thermocouple.

1918
High Temperature Thermocouple
This thermocouple is used for the high-temp shutdown. The system shuts down if an open
circuit, short-circuit or short-to-ground is detected on this thermocouple. It should be placed
in the same thermowell as the Process thermocouple using a dual element thermocouple.
AUX Thermocouple
This thermocouple is optional and can be enabled in menu 5. It can be used to monitor stack
temperature or to control a secondary process temperature. The system shuts down if an
open circuit is detected and the AUX thermocouple is enabled.
All Thermocouples Must Be:
Isolated from ground
Isolated from power
Type-k thermocouples
Connected with 20 AWG or larger Type-k extension wire
Placed a safe distance from high voltage lines and shielded when necessary
STATUS CONTACT
The status contact is a dry contact output containing a solid state relay. It acts as a switch that the
PF2100 controls. Neither contact is internally connected to power or ground so these connections must
be provided externally as required. When the system is running, the contacts are internally connected
together and when the system is not running, the contacts are open circuited. These contacts are often
used for monitoring the PF2100’s status remotely. An alarm, siren, trouble lamp, or PLC are examples of
devices that might use this contact.
THE STATUS CONTACTS ARE RATED FOR DC ONLY so it is important to observe the correct polarity
when attaching a device. The positive status contact terminal should always be at a voltage potential
greater than or equal to the negative terminal. Do not exceed the voltage and current ratings which are
40VDC, 250mA. The impedance when closed is15Ω. There is a fuse on the status contact to protect it. A
spare fuse is also included.
DRY CONTACT INPUTS
There are 6 dry contact inputs on the PF2100. The expected connection to each of these is a switch.
These contacts must all be closed (shorted) in order for the system to start. Jumpers are provided for
each of these by default. If you need to use a particular contact for your application, simply remove the
associated jumper and connect a switch in its place.
Start Contact
The Start Contact can be used to attach a remote start/stop switch. This is often connected
to a PLC dry contact output. When the contact is open, the system is stopped. For safety
reasons, a double action is required to start the system remotely via this contact. This is
accomplished by closing the switch, opening it, and then closing it again. Once the system is
running, open the switch again to stop it.
ESD Contact
The ESD Contact can be used to attach an emergency shutdown switch. This is often
connected to a mushroom switch mounted on a remote panel or to a PLC dry contact output.
When the contact is open, the system is stopped.The system cannot be started via this
contact but this contact must be closed in order to start the system.
Proof of Closure Contact
The Proof of Closure Contact can be used to receive the feedback signal from a Main Valve
that has a Proof of Closure output. If multiple main valves with Proof of Closure outputs are
used, these can be wired together in series. Before the system attempts to light the pilot, it
will check that the Proof of Closure Contact is closed. If it is open, it will not light the pilot.
High Pressure Contact
The High Pressure Contact can be connected to a High Pressure Switch installed in the fuel
train. Typically, this switch is placed immediately after the Main valve in the fuel train. See the
4-20mA Expansion Card section for more details.
Low Pressure Contact
The Low Pressure Contact can be connected to a Low Pressure Switch installed in the fuel
train. Typically, this switch is placed immediately before the Main valve in the fuel train.
The Low Pressure Contact operates using averaged time to help reject brief fluctuations
in gas pressure. The contact must be open continuously for 2 or 6 seconds (depending on
the “Pressure/Level Delay” setting) before the system will shut down. If “Auto Restart” is
enabled, the system restarts automatically when the Low Pressure Contact re-closes. See
the 4-20mA Expansion Card section for more details.
IGNITION COIL / FLAME DETECTION
This section provides some tips to set up the system for reliable ignition and flame detection.
Internal vs. External Coil
If less than 5m (15ft) of ignition wire is required to connect the PF2100 to the burner
housing, the internal coil configuration can be used. Otherwise the external coil configuration
must be used.
The PF2100 system is available with an internal coil or an external coil can be purchased with
or without a separate enclosure.
Wire Lengths
When wiring the ignition and flame detection circuits, the wire length must be carefully
considered. If the wire lengths are too long, the PF2100 may not be able to deliver enough
energy to the ignition rod to ignite the pilot. The PF2100 may also fail to receive a signal from
the flame rod for detecting flame.
Grounding
Properly grounding the pilot assembly back to the PF2100 is critical for proper ignition and
flame detection. A ground wire should run from the Ion- or EGND terminal of the PF2100 to
the pilot assembly. This wire can either be connected to a ground screw on the pilot bracket
or to the burner housing. If connected to the burner housing, use a multimeter to verify that
the burner housing has electrical continuity with the pilot assembly. If not, another wire must
be added to connect it.
Single Rod vs. Dual Rod
A single Kanthal rod can be used for both ignition and flame detection to save cost if desired.
This often results in a performance trade-off between ignition and flame detection. This
option is only available with external coils.

2120
Using two Kanthal rods (one for ignition and one for flame detection) allows for greater
flexibility in rod placement and often yields better performance.
Note that there are three possible ways to wire the ignition coil and flame detection circuit
with the PF2100 as illustrated in the table.
CONFIGURATION (COIL TYPE) SINGLE ROD DUAL ROD
Internal Coil •
External Coil • •
Single Rod Coil Wiring
Use this configuration when you want to save cost by using a single rod.
Ion +
Rod
Coil +
Coil -
2
5
3
4
External Coil, Black Baseplate
C
External Coil, Red Baseplate
B
Ion +
Bakelite
Connector
Coil +
Coil -
2
3
4
Rod
5
Distance Between 2100 and Pilot*
0 to 10 feet
10 to 25 feet
25 to 60 feet
Wire Size Hardware Version
14 to 16 Gauge
7mm Ignition Wire
7mm Ignition Wire
V 1.7 Te rminal Card
V 1.7 Te rminal Card
V 2.4 Te rminal Card
*For single rod installations, the distance is defined as the length 2 plus 5 as shown in the Single
*Rod Coil Wiring Diagram. Note that wire 5 should be no longer than 10 ft.
+
+
Ignition
Coil Straight
Silicone
Boot
PF2100 Pluggable
Header P6
Burner Housing
Ferrule Single
Rod
4
3
2
1
{
{
5
Coil
Ion
1/8” to 1/4”
Red
White
Black
Internal Coil, 3-Wire
A
Rod
Shielded Conduit
5
Ignition Wire
Ion +
Coil +
Coil -
2
3
4
Red
White
Black
Red
White
Black

2322
Dual Rod Coil Wiring
Use this configuration when you want greater flexibility for rod placement.
Rod Positioning
Rod positioning is important for proper ignition and flame detection.The ignition rod should
be positioned (by bending it if necessary) so that there is a ⅛” to ¼” gap between it and the
front of the pilot nozzle. The flame rod should be positioned (by bending it if necessary) such
that 2” to 3” of its length is within the pilot flame. Make sure the ignition rod and flame rod
are not directly in line with each other. Otherwise, the ignition rod may cast a shadow on the
flame rod and cause the system to determine that no flame is present at the flame rod.
Flame Anchoring
Flame anchoring refers to how much in contact the flame is with the pilot nozzle. Poor flame
anchoring causes poor flame detection. Poor flame anchoring can be caused when there
is too much gas pressure resulting in the flame burning primarily outside of the nozzle as
opposed to along the inside and outside surfaces of the nozzle. It can also be caused by wind
or draft from the main burner.
Using Extra Rods to Improve Flame Detection
In some challenging installations such as non-enclosed or high velocity burners, adding one
or two additional rods may be necessary. A second flame detection rod can help in cases
where the flame may blow away from the primary rod from time-to-time. The addition of a
ground rod positioned further away from the nozzle tip can assist with detecting flames that
are not well anchored.
Distance Between 2100 and Pilot*
0 to 10 feet
10 to 25 feet
25 to 60 feet
Wire Size Hardware Version
14 to 16 Gauge
7mm Ignition Wire
7mm Ignition Wire
V 1.7 Te rminal Card
V 1.7 Te rminal Card
V 2.4 Te rminal Card
*The distance is defined as the length of 2 as shown in the diagram.
Ion -
Ignition
Rod
Coil +
Coil -
1
5
3
4
External Coil, Black Baseplate
C
External Coil, Red Baseplate
B
Ion -
Bakelite
Connector
Coil +
Coil -
1
3
4
Ignition
Rod
5
Red
White
Black
Internal Coil, 3-Wire
A
Ignition Rod
Shielded Conduit
5
Ignition Wire
Ion -
Coil +
Coil -
1
3
4
Red
White
Black
Red
White
Black
+
+
Ignition
Coil
2 x Straight Silicone Boot
PF2100 Pluggable
Header P6
2 x Ferrule
Burner Housing
Ignition Rod
Flame Rod
Ground
Screw
4
3
2
1
{
{
5
Coi
l
Ion
1
1/8” to 1/4”

2524
3 | USER INTERFACE & SETTINGS
The user interface has keys, indicator lights, and a display screen for the software interface (including
things such as menus and status screens).
3.1 | User Interface
The physical interface consists of three parts:
1. An illuminated display
2. Indicator lights
3. A keypad
DISPLAY
The screen on the PF2100 displays two lines of text which are used to show system status, warnings,
alarms, prompts, and menus. It is illuminated for ease of reading in both bright sunlight and darkness.
When the system first powers on, the display will show the system name and firmware version for a few
seconds, after this it will show the Home Screen.
KEYPAD DIAGRAM
FLAME
DISPLAY
UP KEY
MODE KEY
PILOT LIGHT
IGNITE LIGHT
DOWN KEY
AUTO LIGHT
MANUAL LIGHT
MAIN LIGHT
MAIN KEY
OK KEY
FLAME LIGHT
STOP KEY
IGNITE KEY
MENU KEY
PILOT KEY
INDICATOR LIGHTS
Flame Light
Indicates that the system is detecting the pilot flame.
Auto Light
Indicates that the system is running in auto mode.
Manual Light
Indicates that the system is running in manual mode.
Pilot Light
Indicates that the pilot valve is open.
Ignite Light
Indicates that the system is sparking to ignite the pilot.
Main Light
Indicates that he main valve is open.
KEYS
Stop Key
Used to stop the system immediately or in other words, turn off the burner.
Menu Key
Used to navigate through the menu.
Up Key
Used to adjust a setting upwards and to scroll up through lists.
Down Key
Used to adjust a setting downwards and to scroll down through lists.
OK Key
Used to enter a menu, acknowledge a prompt, save an edited setting, or return to the home
screen.
Mode Key
Used to toggle between Manual and Auto modes of operation.
Pilot Key
Used in Manual Mode to test the Pilot Valve.
Ignite Key
Used in Manual Mode to test the Ignition Circuit.
Main Key
Used in Manual Mode to test the Main Valve.

2726
3.2 | Menu Navigation
The software user interface is shown on the PF2100 display. While the system is powered, the state of
the system is displayed on the screen. The user can also change settings via this interface. Below is a
diagram showing the various types of information that can be accessed through the interface. The default
system screen at startup and when idling is the Home Screen. Most items are accessed through the
Home Screen but some can be accessed from anywhere in the interface.
PF2100
Menus
Warning
M essag es
Firmware
Ve r si on
Screen
Quick
Se t p o i n t
A d j u st
Automat ic
Mode
Warning
M essag es
Firmware
Ve r si on
Screen
Shut down
M enu
Sy st e m
M enu
Rev i ew
M enu
M anu al
Mode
Certain settings can be viewed only in Manual Mode or only in Auto Mode.
MANUAL VS. AUTO MODE
When the system first powers on, it will normally be in Manual Mode. If the Auto Restart feature is
enabled and no alarm conditions are present, it may switch automatically to Auto Mode after power
up. Otherwise, the user must manually put the system into Auto Mode by using the Keypad, the Start
Contact, or the Modbus Expansion Card. See the System Start Up section for more details.
The main difference between these two modes is that all settings can be adjusted in Manual Mode and a
limited number of settings can be adjusted in Auto Mode. The following table illustrates the differences in
menu access.
ITEM MANUAL MODE AUTO MODE
User Can View and Adjust Menu Settings Yes* via Quick Setpoint
Adjust
User Can Access the Review Menu Ye s No
Process Control Can Be Running Ye s Ye s
System will try to Relight the Burner if the Pilot is Turned Off Due to Normal
Process Control
Ye s Ye s
System State Shown on the Home Screen Always During State Change
System will Attempt to Relight the Burner if the Flame Goes Out Unexpectedly No Ye s
Process Setpoint can be Easily Adjusted via the “Quick Setpoint Adjust” feature No Ye s
The System can be Controlled Manually via the Pilot, Ignite, and Main keys Ye s No
Manual Indicator Light On Ye s No
Auto Indicator Light On No Ye s
*Menus 1-3 only when process control is running, all menus when stopped.
HOME SCREEN
The Home Screen is shown on the display after power up, after waking the display from sleep, and after
the user acknowledges a shutdown message. It is the starting point for most user interaction with the
menu system. To return to the Home Screen from any point in the user interface, the user can press and
hold the “OK”key for three seconds.
On the Home Screen, the Process Temperature is always shown on the bottom line of the display. The
top line differs depending on mode. In Manual Mode, the top line shows the system state. In Auto Mode,
it shows the Process Setpoint instead.
The accessibility of other features from the Home Screen also differs depending on mode. For example,
the System Menus and Review Menu are only accessible in Manual Mode whereas the Quick Setpoint
Adjust feature is only available in Auto Mode. For more information on which features are available in
which modes, refer to the Adjust Settings & Review Status section.

2928
AVAILABLE FEATURES WITHIN OPERATIONAL MODES
MODE DISPLAY MENUS REVIEW SETPOINT ADJUST
Manual System State
Process Temperature
Ye s Ye s No
Auto Process Setpoint
Process Temperature
No No Ye s
SYSTEM STATE
The System State is the Process Control State of the system. It is shown on the display for a few
seconds before and after a state change. In Manual Mode, the top line of the Home Screen always
shows the System State. Go to the Process Control Settings section for a complete list of the Process
Control States.
QUICK SETPOINT ADJUSTMENT
The Quick Setpoint Adjust feature is only available on the Home Screen while running in Auto Mode. It
allows the user to quickly adjust the Process Setpoint using the up and down keys. The change takes
effect immediately and does not need to be saved by pressing ok. If password protection is enabled,
a password will need to be entered before this feature can be used. If the Pilot Off and/or Low Fire
Setpoints are enabled, this feature will also adjust them. In this case, each press of the up or down key
will adjust all of these setpoints by 1 degree up or down. All other setpoints are not affected by this
feature.
SYSTEM MENUS
The System Menus store all of the system settings in an organized fashion. These menus are also used
to show historical and system status information as well as to provide access to calibration features.
These menus cannot be accessed while the system is running in Auto Mode. Some menus can only be
accessed while the system is stopped. Some menus require a Level 2 password and others require an
optional Level 1 password.
REVIEW MENU
The Review Menu provides a quick way for an operator to check key setpoints and system status
(accessible only in Manual Mode).
FIRMWARE VERSION SCREEN
The Firmware Version Screen shows the firmware version of all cards in the system including the Door
Card, Terminal Card, and any installed Expansion Cards.
WARNING MESSAGES
When the system detects a warning condition, it will flash a warning message across the bottom line of
the Home Screen. Some messages can be dismissed by pressing the OK key (eg, “Unit restarted from
LVL event”). Others persist until the warning condition is resolved (eg, “LO Volt Warning”).
SHUTDOWN SCREEN
When the system shuts down as a result of an alarm condition, it will flash the word “SHUTDOWN” in
large text on the display alternately with a more detailed message explaining the reason that the system
shut down. The Shutdown Screen can always be dismissed by pressing “OK,” toggling the Start Contact,
or sending the Start Command via Modbus.
3.3 | Menu Map
For a complete description of each item, please refer to the menu definitions section. The debug
functions are not shown here; if needed they are located in the Field Calibration section of the manual.
NAVIGATION
1. Press MENU until you get to the desired menu.
(The Review menu is accessible by pushing the Down arrow.)
2. Press OK to select an option.
3. Press MENU until you get to the submenu option you want to
change/view.
4. Press or to adjust the selected setting.
5. Press OK to set the new value.
6. Press MENU to cancel changes.
7. Press OK to exit to the home screen.
Ready Proc Temp Menu 1
Setpoints
Menu 2
History
Menu 3
System Info
Pilot Off Setpoint Relights High Temp TC Reading
Review Menu Low Fire Setpoint Flame Fails Process TC Reading
ESD Setpoint Process Setpoint Resets 4-20 mA Output%
Process Setpoint Low Temp Alarm
Setpoint ESDs Ambient Temp
Low Fire Setpoint Deadband High Pressure ESDs Voltage Reading
Pilot Off Setpoint AUX Setpoint Low Pressure ESDs Commission Date

3130
4-20 High Level
Setpoint
PID – Proportional
Band Level ESDs Location
4-20 Low Level
Setpoint PID – Integral Thermocouple Errors
4-20 Pressure Setpoint PID – Derivative Terminal Errors
4-20 Low Pressure
Setpoint System Errors
Flame View Event Log
Aux Temp Clear History
4-20 Level Reading
4-20 Pressure Reading
Alarms
Menu 4
System Startup
Menu 5
Control Setup
Menu 6
Expansion Cards
Auto Restart High Temp ESD
Setpoint
4-20 Expansion Card
Enable
Purge Time Process Control In-put 4-20 Level Units
Pilot to Main Delay Low Fire Enable 4-20 Level Range
Restart Attempts Low to High Fire Delay 4-20 Level Offset
Level Event Restart Pilot off Enable 4-20 Level Low Setpoint
Pressure/Level Delay AUX Temp Mode 4-20 Level High Setpoint
Pressure Restart 4-20 Pressure Units
Alarm Mode 4-20 Output Mode 420 Pressure Range
Password Enable 4-20 Low Fire Setting 4-20 Pressure Low
Setpoint
Display Sleep 4-20 Pressure High
Setpoint
Pilot Valve Power
Setting
MODBUS
Enable/Address
Main Valve Power
Setting 4-20 Card FW Version
System Voltage Setting MODBUS
Card FW Version
Temperature Display
Units
Commission Date
Entry
Commission Location
Entry
Rest to Factory
Defaults
SETPOINTS (MENU 1)
This menu is used to adjust the Process Control Setpoints.
MENU MAP ON SCREEN BRIEF DESCRIPTION RANGE DEFAULT SETTING
Pilot Off Setpoint Pilot Off
Setpnt
Adjusts the temperature at which the
Pilot Valve will turn off when Pilot Off is
enabled.
1 to 1349˚C
34 to 2460˚F
85˚C
185˚F
Low Fire Setpoint Low Fire
Setpnt
Adjusts the temperature at which the
Low Fire Valve will turn off when Low
Fire is enabled.
2 to 1349˚C
36 to 2460˚F
Hidden, 85˚C
185˚F
Process Setpoint Proc
Setpnt
Adjusts the temperature at which the
High Fire/Main Valve will turn off
1 to 1349˚C
34 to 2460˚F
80˚C
176˚F
Low Temp Alarm Setpoint Low Temp Alarm
Setpnt
Adjusts the temperature where the
Status Contact will close, if enabled.
Disabled,
1 to 1349˚C
34 to 2460˚F
Disabled
Deadband Deadband Adjusts the Deadband. Used with the
Process Setpoint and sometimes Low
Fire and Aux Setpoints.
1 to 150˚C
1 to 240˚F
2˚C
3˚F
Aux Setpoint AUX Setpnt Adjusts the Auxiliary Setpoint 0 to 1350˚C
32 to 2462˚F
Hidden, 20˚C
68˚F
PID – Proportional Band PID
PB:
Expressed in percent, this is inversely
proportional to the PID controller’s
proportional gain.
0.0 to 999.9% 10.0%
PID – Integral PID
I:
Expressed in Minutes per Reset, this is
the amount of time required for the PID
integral term to yield the same output as
the proportional term.
0.0 to 999.9
min/rst
4.0 min/rst
PID – Derivative PID
D:
Expressed in Minutes, this causes
the PID to compensate based on the
changing error. Disabled by default
0.0 to 999.9
min
0.0 min
HISTORY (MENU 2)
This menu contains informational event counters and the event log.
MENU MAP ON SCREEN BRIEF DESCRIPTION RANGE DEFAULT SETTING
Relights Re-Lights Number of Pilot Relight attempts. 0 to 1000 N/A
Flame Fails Flame Fails Number of Shutdowns due to failure to
light the pilot.
0 to 1000 N/A
Resets Resets Number of power failures or manual
resets.
0 to 1000 N/A
ESDs ESDs Number of system shutdowns caused
by faults.
0 to 1000 N/A

3332
MENU MAP ON SCREEN BRIEF DESCRIPTION RANGE DEFAULT SETTING
High Pressure ESDs HPR ESDs Number of High Pressure Shutdowns. 0 to 1000 N/A
Low Pressure ESDs LPR ESDs Number of Low Pressure Shutdowns. 0 to 1000 N/A
Level ESDs LVL ESDs Number of Level Contact Shutdowns. 0 to 1000 N/A
Thermocouple Errors TC Errs Number of Thermocouple Shutdowns. 0 to 1000 N/A
Terminal Card Errors Term Errs Number of Terminal Card Shutdowns. 0 to 1000 N/A
System Errors Sys Errs Number of System Errors Shutdowns. 0 to 1000 N/A
View Event Log View Event Log? Log of recent events Yes/No No
Clear History Clear History? Clears all History and logged events Yes/No No
SYSTEM INFO (MENU 3)
This menu contains diagnostic information about the system.
MENU MAP ON SCREEN BRIEF DESCRIPTION RANGE DEFAULT SETTING
High Temp TC Reading Hi Temp TC Current High Temp Thermocouple
reading
-50˚C to
1350˚C
N/A
Process Temp TC Reading Proc TC Current Process Thermocouple reading -50˚C to
1350˚C
N/A
4-20mA Output Percent 4-20
Output
Current status of the 4-20mA Output 0 to 100% N/A
Ambient Temp Ambient Temp Current ambient temperature. Used
for thermocouple cold junction
compensation.
-55˚C to 65˚C
-70˚F to 150˚F
N/A
Voltage Reading System Voltage Current voltage applied to the system 8V to 35V N/A
Commision Date Commission
Date
Date that the system was commissioned
(if entered by user)
DD-MMM-
YYYY
N/A
Location Location The install location of the system (if
entered by user)
N/A N/A
Control State Control State Debug Information N/A Hidden
Terminal Card State Term Card Debug Information N/A Hidden
SYSTEM SETUP (MENU 4)
This menu contains various optional system settings. It cannot be accessed while the PF2100 is running.
MENU MAP ON SCREEN BRIEF DESCRIPTION RANGE DEFAULT SETTING
Auto Restart Auto
Restart
Enables system to restart from a power
failure or high voltage event.
On/Off Off
Purge Time Purge Time Adjusts the time from all valves closed
to Pilot relight attempts
10- 900 sec 30 sec
Pilot to Main Delay Pilot to Main
Delay
Adjusts the time from Pilot proven to
Main Valve opening
5- 600 sec 15 sec
Restart Attempts Restart
Attempts
Adjusts the number of Restart Attempts
after an unexpected flame failure before
a shutdown
0- 3 3
Level Event Restart Level Event
Restart
Enables recovery from a Low Level
event
On/Off Off
Pressure/Level Delay PRS/LVL
Delay
Pressure and Level shutdown delay On/Off Off
MENU MAP ON SCREEN BRIEF DESCRIPTION RANGE DEFAULT SETTING
Pressure Restart PRS Restart Allows the system to automatically
restart when a low pressure event
clears. Can also enable control of the
main valve based on the Low Pressure
Contact or Low Pressure Setpoint.
Enabled,
Disabled,
Main Control
Disabled
Alarm Mode Alarm Mode Adjusts the behaviour of Status Contact
relative to Start Contact
Alarm when
Off,
No Alarm
When Off
No Alarm when
Off
Password Enable Password Enable Password Protection (Menu 1-3) On/Off Off
Display Sleep Display Sleep Enable Sleep Mode for the Display Never, After
10 Min
Never
Pilot Valve Power Setting Pilot Solenoid
PWM
Adjusts the Pilot Valve PWM duty cycle Off, 80%,
60%, 40%,
20%
60%
Main Valve Power Setting Main Solenoid
PWM
Adjusts the Main Valve PWM duty cycle Off, 80%,
60%, 40%,
20%
60%
System Voltage Setting System
Voltage
Configures the expected input voltage
for the system
12V, 24V 12V
Temperature Display Units Temp Units Configures the temperature units
displayed by the system
Fahrenheit,
Celsius
Celsius
Commission Date Entry Commission
Date
Set the date that the system was
commissioned
DD-MMM-
YYYY
01-JUN-2012
Commission Location Entry Commission Loc Set the install location of the system. 14
Characters Max.
A-Z, 0-9,-./
Reset to Factory Defaults Rest to Factory
Defaults?
Restore all settings to the factory default Yes/No No
CONTROL SETUP (MENU 5)
This menu contains various optional Process Control settings. It cannot be accessed while the PF2100 is
running.
MENU MAP ON SCREEN BRIEF DESCRIPTION RANGE DEFAULT SETTING
High Temp ESD Setpoint High Temp
ESD SETPNT
Adjusts the High Temperature shutdown
setpoint
2 to 1350˚C
36 to 2462˚F
90˚C
194˚F
Process Control Input Process Control Configure the thermocouple used as the
Process Temperature
Process TC,
AUX TC
Process TC
Low Fire Enable Low Fire Enables Low Fire feature and setpoint Disabled,
on at Proc
Setpnt, on
at Low Fire
Setpnt
Disabled
Low to High Fire Delay Low to High Fire
Delay
Adjusts the time from Low Fire Valve
opening to High Fire Valve opening,
when Low Fire is enabled. Values set
above 255 seconds are automatically
set to the value minus 255 seconds. For
example, inputting 275 seconds sets the
actual delay to 20 seconds.
30- 300 sec Hidden, 30 sec
Pilot Off Enable Pilot Off Enables Pilot Off feature and setpoint Disabled,
Enabled
Enabled
Aux Temp Mode AUXTemp Mode Configures how the Auxiliary
Thermocouple is used.
Disabled,
Display Only,
Temp Main
Ctl, Temp ESD
Disabled

3534
MENU MAP ON SCREEN BRIEF DESCRIPTION RANGE DEFAULT SETTING
4-20 Output Mode 4-20 Out Mode Configures 4-20 Output mode Valve Control 1
Valve Control 2,
Temp Output
Disabled
4-20 Low Fire Setting 4-20 Out Lo Fire
Setting
Sets the minimum output for the
4-20mA Output when used for Valve
Control.
0 to 70% 40%
EXPANSION CARDS (MENU 6)
This menu contains settings relating to expansion cards.
MENU MAP ON SCREEN BRIEF DESCRIPTION RANGE DEFAULT SETTING
4-20 Input Card Enable 4-20 Input Card
Enabled
Enable the 4-20mA Expansion Card and
setpoints
No/Yes No
4-20 Level Units 4-20 LVL
Units
Adjusts the display units for the 4-20mA
Level Input
%, m3, BBL,
GAL,L
Hidden, m3
4-20 Level Range 4-20 LVL Range Adjusts Max Level of the tank High Setpoint-
1000
Hidden, 0-120m3
4-20 Level Zero Offset 4-20 LVL Zero
Offset
Adjusts the level reading corresponding
to a 4mA input
0 to Low
Setpoint
Hidden, 0m3
4-20 Level Low Setpoint 4-20 LVL Low
Setpnt
Adjusts 4-20 Low Level trip point 0 Offset- High
Setpoint
Hidden, 60m3
4-20 Level High Setpoint 4-20 LVL High
Setpnt
Adjusts 4-20 High Level trip point Low Setpoint-
Level Range
Max, Disabled
Hidden, 117m3
4-20 Pressure Units 4-20 PRS
Units
Adjusts the display units for the 4-20mA
Pressure Input
PSI, kPa,
inWC, oz, ksc
Hidden, 0-
30.0PSI
4-20 Pressure Range 4-20 PRS Range Adjusts Max pressure of the fuel train High Setpoint-
999.9
Hidden, 30.0 PSI
4-20 Pressure Low Setpoint 4-20 PRS Low
Setpnt
Adjusts 4-20 Low Pressure trip point 0-High
Setpoint
Hidden, 3.0 PSI
4-20 Pressure High Setpoint 4-20 PRS High
Setpnt
Adjusts 4-20 High Pressure trip point Low setpoint
– Max
Pressure.
Disabled
Hidden, 25.0 PSI
MODBUS Enable/Address Modbus Card Enable control and address for the
Modbus Expansion Card
Disabled,
1-254
Disabled
4-20 Card FW Version 4-20 FW Display Expansion Card FW Version N/A N/A
MODBUS Card FW Version MBUS FW Display Expansion Card FW Version N/A N/A
REVIEW MENU
This read only menu allows various commonly needed system settings and status parameters to be
reviewed while the system is running.
MENU MAP ON SCREEN BRIEF DESCRIPTION
ESD Setpoint ESD Setpnt Temp at which system will shutdown
Process Setpoint ProcSetpnt Temp at which High Fire / Main Valve will turn off
Low Fire Setpoint LF Setpnt Temp at which Low Fire Valve will turn off if Low Fire is enabled
Pilot Off Setpoint Pilot off Temp at which Pilot Valve will turn off if Pilot is enabled
4-20 High Level Setpoint HLV Level at which 4-20mA Output contacts will toggle
MENU MAP ON SCREEN BRIEF DESCRIPTION
4-20 Low Level Setpoint LLV Level below which the system will shutdown or wait if Level Event Restart is
enabled
4-20 High Pressure Setpoint HPR Pressure above which the system will shutdown after Main
4-20 Low Pressure Setpoint LPR Pressure below which the system will shutdown or wait if Auto Restart is
enabled
Flame Flame Current Flame Quality
Aux Temp AUX Temp Current Aux Temp reading
4-20 Level Reading LVL Current 4-20mA Level input reading
4-20 Pressure Reading PRS Current 4-20mA Pressure input reading
TC Debug Screen DH=ww TH=xx
TP=yy TA=zz
Shows the current readings of all temperature sensors simultaneously always
in degrees celsius regardless of the display unit setting
DH=Door Card High Temp, Thermocouple
TH=Termincal Card, High Temp Thermocouple
TP=Terminal Card Process Thermocouple
TA=Terminal Card Ambient Thermocouple
Alarms Alarms Lists up to 3 simultaneous alarm codes if any are present
3.4 | Initial System Settings
The following settings need to be modified for every installation.
1. Valve Modulation Settings (Pilot and Main)
2. System Voltage
3. Process Control Settings
4. Process Setpoints (High Temp ESD, Pilot Off, Process, Low
Fire, Low Alarm, Deadband)
VALVE MODULATION SETTINGS
The Pilot and Main Valve outputs can be modulated with a pulsed DC signal to conserve power using
Pulse Width Modulation (PWM). The duty cycle of the modulation can be adjusted independently for
each valve. Each can be set to 100%, 80%, 60%, 40%, or 20%. The 100% setting applies continuous
DC voltage (ie, no modulation) to the valve and is the highest power option. The 20% setting applies DC
voltage 20% of the time and is the lowest power option. Only valves that are compatible with modulation
should be used with a duty cycle of less than 100%. These valves are sometimes called “Low Power” or
“Peak-and-Hold” valves since they require only short periodic voltage pulses to hold the valve open. Do
not use a duty cycle of 100% with low power valves as this can damage them.
If a multimeter is used to measure the valve power, the measured voltage will be reduced proportionally
with the PWM setting.
The pilot and main valve power settings can be adjusted to match the needs of various applications.
Pilot Valve Power Setting (Menu 4)
Adjusts the PWM Duty Cycle of the Pilot Valve output.
Main Valve Power Setting (Menu 4)
Adjusts the PWM Duty Cycle of both the Low Fire and High Fire Valve outputs.

3736
SYSTEM VOLTAGE
The PF2100 is designed to operate with a nominal 12VDC or 24VDC Power Supply. The system will not
be damaged by applying any voltage in or near this range regardless of menu settings. Note that attached
valves are typically not designed to accept both 12VDC and 24VDC. If the valve voltage ratings are
exceeded, the valves may become damaged.
SystemVoltage Setting (Menu 4)
This setting defines voltage limits to protect and allow the proper operation of the attached
valves. If the PF2100 detects that the input voltage is getting close to these limits, it will
display a warning message. If the voltage exceeds these limits, the system will shut down
and cut power to the valves.
The following options are available:
VOLTAGE SETTING CHOOSE THIS OPTION WHEN…
12 V The Power Supply and all valves are 12 VDC
24 V The Power Supply and all valves are 24 VDC
The exact limits used are shown in the following table. Note that the high voltage limits also depend on
the Pilot Valve Power Setting and Main Valve Power Setting which can also be found in Menu 4.
V SETTING PILOT / MAIN VALVE PWM SETTING LOW V ALARM LOW V WARNING HIGH V WARNING HIGH V ALARM
12V At least one equal to 100% <= 8.4V <= 9.9V >= 14.6V >= 15.6V
12V Both less than 100% <= 8.4V <= 9.9V >= 16.1V >= 16.8V
24V At least one equal to 100% <= 17.9V <= 19.9V >= 28.6V >= 30.0V
24V Both less than 100% <= 17.9V <= 19.9V >= 33.1V >= 40.0V
PROCESS CONTROL SETTINGS
For the PF2100, Process Control refers to controlling the temperature of a process. This process usually
involves heating fluid in a tank or pipe. A primary temperature control signal is required for Process
Control. This is called the Process Temperature or Proc Temp. Optionally, an auxiliary temperature control
signal can also be accepted. This signal is called the Auxiliary Temperature or Aux Temp.
Note that these two signals are not necessarily the same as ProcTC and Aux TC which are the names of
the physical thermocouple inputs on the Terminal Card. The Aux Temp signal is only compared to the Aux
Setpoint, if enabled.
There are four settings that directly affect Process Control: Process Control Input, Low Fire Enable, Pilot
Off Enable, and AuxTemp Mode.
Note that changing any of these settings may cause the Process setpoints (High Temp ESD, Pilot Off,
Low Fire, Process, Low Temp Alarm, Deadband, and Aux) to reset to factory defaults. A warning message
will display if this occurs.
Process Control Input (Menu 5)
This setting selects which thermocouple inputs will be used as the primary and auxiliary
temperature control signals as shown in the following table.
SETTING PROC TEMP AUX TEMP
Proc TC Proc TC Aux TC
Aux TC Aux TC Proc TC
In previous firmware versions this could also be set to Disabled. In this case, Process Control
was disabled and the system allowed the burner to always be lit and running. The typical
use for this was to have an external device, such as a PLC, controlling the process.The
PLC would turn the system on and off using the Start contacts. This behaviour can still be
achieved by setting all Process Setpoints to maximum.
Low Fire Enable (Menu 5)
This setting is used to toggle the use of the Low Fire Setpoint for Primary Process Control.
Low Fire can be enabled in two different modes: “On at Proc Setpoint” and “On at Low
Fire Setpoint”. In the first case, the Low Fire Valve will close when it exceeds the Low Fire
Setpoint but will not reopen until it drops below the Process Setpoint minus Deadband. In
the second case, the Low Fire Valve will close when it exceeds the Low Fire Setpoint and will
reopen after it drops below the Low Fire Setpoint minus Deadband.
Pilot Off Enable (Menu 5)
This setting is used to enable/disable use of the Pilot Off Setpoint for Primary Process
Control.
Aux Temp Mode (Menu 5)
When this setting is set to Temp Main Ctl, Auxiliary Process Control is enabled. See the
Auxiliary Temperature Settings section for more details.
PROCESS SETPOINTS
There are seven Process Setpoints in total, four of which may be disabled (hidden from menus). The order
of the setpoints varies depending on the value of the Process Control Input setting.
The following diagrams illustrate the upper and lower bounds of each setpoint and their order. Setpoints
that are shaded may be disabled. When a setpoint is disabled, the upper and lower bounds of the
adjacent setpoints are adjusted accordingly.
Process Control Input Setting: PROC TC
LOW TEMP ALARM DEADBAND*
PROCESS SETPOINT
LOW FIRE SETPOINT
PILOT OFF SETPOINT
HIGH TEMP ESD SETPOINT
AUX SETPOINT
Setting can be hidden / disabled
Deadband Max = 150˚C
*
1350˚C
0˚C
1350˚C
0˚C
AUX TEMP
PROC TEMP
Process Control Input Setting: AUX TC
LOW TEMP ALARM DEADBAND*
AUX SETPOINT
PROCESS SETPOINT
LOW FIRE SETPOINT
PILOT OFF SETPOINT HIGH TEMP ESD SETPOINT
1350˚C
0˚C
1350˚C
0˚C
AUX TEMP
PROC TEMP
Setting can be hidden / disabled
Deadband Max = 150˚C
*

3938
For Process Control, the Proc Temp signal is the one compared to the Pilot Off, Low Fire,
Process, and Deadband setpoints.
High Temp ESD Setpoint (Menu 5)
This setting is used to protect the burner and other equipment from overheating. If either
the High Temp or Process thermocouple readings exceed this setpoint, the burner will
immediately shut down. This setting can be set to a maximum of 1350˚C. The minimum value
is 1˚C higher than the setpoint below it. Depending on which settings are enabled, this will
be the Pilot Off, Low Fire, or Process Setpoint.
Pilot Off Setpoint (Menu 1)
If the Process Temperature goes above this setting, the Pilot Valve will close and the system
state will change to “Waiting on Temp”.This is often done to conserve pilot gas when it is not
needed. This setting is hidden if Pilot Off in menu 5 is set to Disabled. This setting can be set
to a maximum of 1˚C below the HighTemp ESD Setpoint.The minimum value is the same as
the setpoint below it. Depending on which settings are enabled, this will be the Low Fire or
Process Setpoint.
Low Fire Setpoint (Menu 1)
If the Process Temperature goes above this setting, the Low Fire Valve will close and the
system state will change to “Pilot On”. This setting is hidden if Low Fire in menu 5 is set to
Disabled. This setting can be set to a maximum of 1˚C below the HighTemp ESD Setpoint or
the Pilot Off Setpoint if it is enabled. The minimum value is 1˚C above the Process Setpoint.
Process Setpoint (Menu 1)
If the Process Temperature goes above this setting, the Main Valve will close and the system
state will change to “Low Fire”. This setting can be set to a maximum of 1˚C below the High
Temp ESD Setpoint, the Pilot Off Setpoint if enabled, or 1˚C below the Low Fire Setpoint if
enabled. The minimum value is the Low Temp Alarm or Deadband (whichever is larger).
Low Temp Alarm Setpoint (Menu 1)
If the Process Temperature goes below this setting, the Low Temp Alarm will be asserted and
the status contact will open. This setting can be set to a maximum of the Process Setpoint
value. The minimum value is 1˚C. Set to 0˚C to disable the Low Temp Alarm.
Deadband (Menu 1)
The Deadband setting provides a temperature margin below the Process Setpoint. For the
main valve to open, the temperature must be below Process Setpoint minus the Deadband
setting.
The Deadband setting also provides a temperature margin below the Low Fire Setpoint when
the Low Fire Enable setting is set to “On At Low Fire Setpoint”. In this case, the Low Fire
valve will open when the Process Temperature is below the Low Fire Setpoint minus the
Deadband setting and will close when it is above the Low Fire Setpoint.
The Deadband setting also provides a temperature margin below the Aux Setpoint when the
Aux Temp Mode setting is set to “Temp Main Ctl”. In this case, the main valve(s) will open
when the AuxuliaryTemperature is below the Aux Setpoint minus the Deadband setting and
will close when it is above the Aux Setpoint.
This setting can be set to a maximum of 150˚C or the Process Setpoint, whichever is lower.
The minimum value is 1˚C.
AUX Setpoint (Menu 1)
This setpoint is enabled only if AuxTemp Mode in menu 5 is set to “Temp Main Ctl” or
“Temp ESD”. In the first case, if the Auxiliary Temperature goes above the Aux Setpoint, the
main valve(s) will close.The pilot will remain on until the Process Temp exceeds the Pilot
Off Setpoint (if Pilot Off is enabled). In the second case, the system will shut down if the
Auxiliary Temperature goes above the Aux Setpoint. This setting can be set to a maximum of
1350˚C.The minimum value is 0˚C.
3.5 | Optional Settings
4-20MA OUTPUT SETTINGS
The 4-20mA Output is built into the Terminal Card (not part of the 4-20mA Expansion Card). It can be used
to echo the process temperature to a PLC or control a proportional valve.
4-20 Output Mode (Menu 5)
Set the 4-20mA Output mode to Process Temperature, Valve Control 1, or Valve Control 2.
The 4-20mA Output is intended to drive a proportional valve. The signal is scaled such that
4mA = Valve Closed and 20mA = Valve Fully Open. A PID control loop based on Process
Temperature feedback is used to determine how much the valve should be open at any given
point in time. More details can be found in the PID Controller section.
The Valve Controls use a traditional safety solenoid valve connected to the PF2100’s Low Fire
outputs. The Low Fire setting must also be enabled by setting it to “On at Proc Setpoint.”
1. Process Temperature
In this mode, the 4-20mA Output will encode the Proc
Temp signal as a 4-20mA signal. Note that the Proc Temp
may correspond to either the Process Thermocouple or the
AUXThermocouple input depending on the Process Control
setting. The signal is scaled such that 4mA = 0C and 20mA =
the High Temp ESD Setpoint.
2. Valve Control 1
When the PF2100 enters Low Fire, the proportional valve
begins fully closed and linearly ramps so that it reaches the
4-20 Low Fire setting just as the Low to High Fire Delay
elapses. Once High Fire begins, the PID Controller adjusts the
valve accordingly.
3. Valve Control 2
When the PF2100 starts, the proportional valve idles at
the 4-20 Low Fire setting. Once High Fire begins, the PID
Controller adjusts the valve accordingly.
4-20 Low Fire Setting (Menu 5)
This setting is only available when the 4-20 Output Mode is set to Valve Control 1 or Valve
Control 2. It specifies the minimum value that the proportional valve will ever be open.This
is the starting position of the main valve each time it is turned on. It can be set to any value
from 0% to 70%.
ALARM / STATUS CONTACT SETTINGS
The Status Contact will always open if the system is shut down due to an alarm condition. There are two
settings that affect the behavior of the Status Contact: Alarm Mode and LowTemp Alarm Setpoint.
Other manuals for PF2100
2
Table of contents
Other ProFire Controllers manuals
Popular Controllers manuals by other brands

Moons'
Moons' LIN ENGINEERING Silverpak 17C user manual

Johnson Controls
Johnson Controls LN Series installation instructions
Rodix
Rodix FC-44-DC Plus quick start guide
Cisco
Cisco Cisco mds 9216 - fabric switch Configuration guide
RTK
RTK REact 60E Series manual
ZyXEL Communications
ZyXEL Communications Network Device NXC-8160s quick start guide
