1
3
2
www.PROFLO.com05/20/21 REV.B
Distributed Exclusively by Ferguson and Wolseley Canada
© 2018 Ferguson Enterprises, Inc. 0423 252402
2
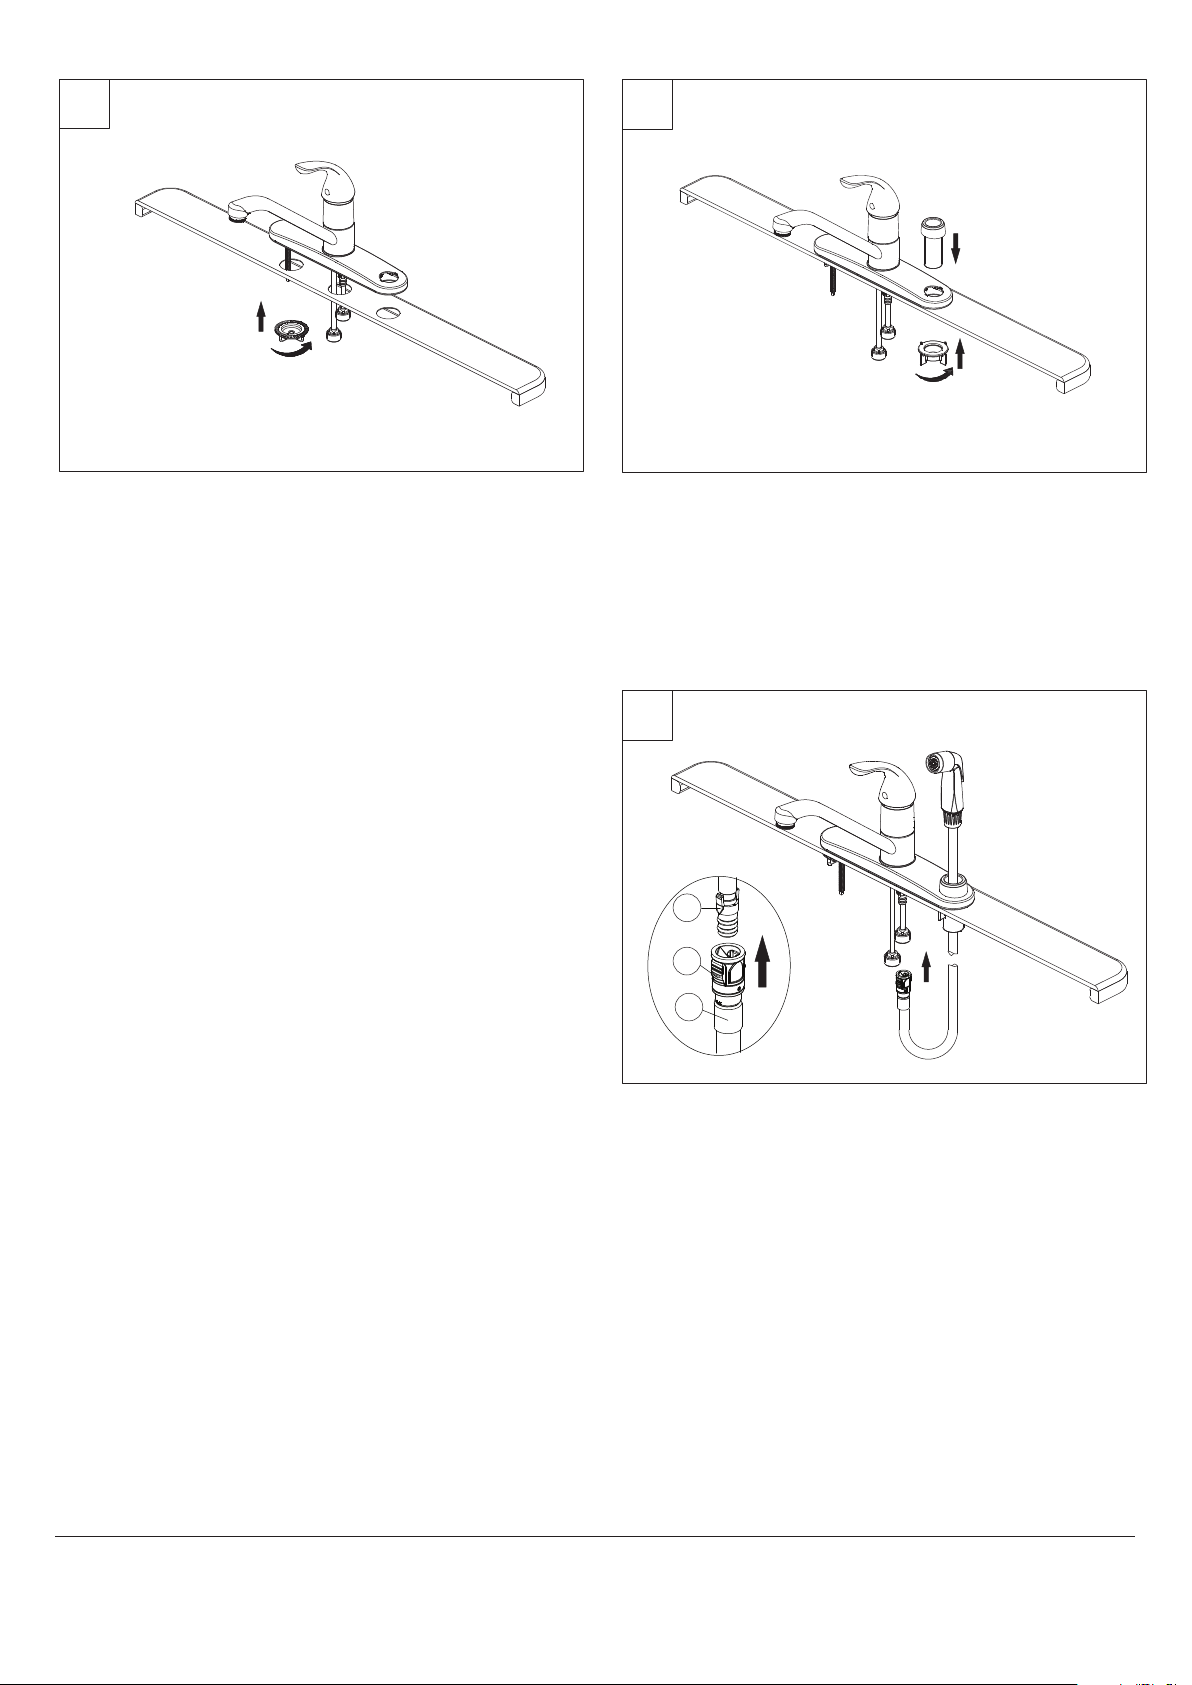
1
Shut off water supplies. Remove old faucet. Place faucet in position on sink. From
under sink, thread mounting nut onto faucet. Tighten mounting nut.
Note: If the sink surface is uneven or irregular, plumber’s putty or a silicone
sealant may be used to create a watertight seal. Plumber’s putty may have an
adverse reaction with plastic gaskets under the spout base so if your faucet has a
plastic gasket, use a high quality silicone sealant. Plumber’s putty also may have
an adverse reaction with some cultured marble or natural stone. In these cases a
high quality silicone sealant is recommended.
Insert spray support through far right hole on escutcheon. Screw nut onto shank
and hand tighten.
Inserta el soporte del rociador a través del orificio que está más a la derecha en la
placa protectora. Enrosca la tuerca al vástago y aprieta con la mano.
Insérez le porte-douchette dans le trou à l'extrémité droite de l'applique. Vissez
l'écrou sur la tige et serrez avec les doigts.
Cierrael suministro de agua. Retira el grifo viejo. Coloca el grifo en la posición que
irá en el lavamanos Desde debajo del lavamanos, enrosca la tuerca de montaje al
grifo. Aprieta la tuerca de montaje.
Nota: Si la superficie del lavamanos es irregular o está desnivelada, puede usarse
masilla de plomero o un sellador de silicona para dar hermeticidad. La masilla de
plomero puede tener reacción adversa con juntas plásticas debajo de la base del
caño. Si tu grifo tiene junta plástica, usa un sellador de silicona de alta calidad. La
masilla de plomero puede tener también un reacción adversa con algún mármol
cultivado o piedra natural. En estos casos se recomienda un sellador de silicona de
alta calidad.
Coupez l'alimentation en eau. Retirez l'ancien robinet. Placez le robinet en position
sur l'évier. À partir du dessous de l'évier, fixez l'écrou de montage au robinet.
Serrez l'écrou de montage.
Remarque : Si la surface du lavabo n'est pas uniforme ou est irrégulière, vous
pouvez utiliser du mastic de plomberie ou un scellant à la silicone pour créer un
joint étanche. Le mastic de plomberie peut réagir de manière indésirable avec les
joints en plastique sous la base du bec. Par conséquent, si le robinet présente un
joint en plastique, veuillez utiliser un scellant à la silicone de haute qualité. Le
mastic de plomberie peut également présenter une réaction indésirable avec
certains similimarbres ou certaines pierres naturelles. Dans de tels cas, il est
recommandé d'utiliser un scellant à la silicone de haut qualité.
2
3
Insert spray hose down through the support and sink. Align tabs (1) and tabs (2)
on quick connects (3). Push quick connector housing firmly upward and snap onto
receiving tube tab. Pull down moderately to ensure connection has been made. If it
is necessary to remove the quick connector, squeeze tabs on hose between index
finger and thumb, then pull down to disconnect.
IInserta la manguera del rociador a través del soporte y el lavamanos. Alinee las
lengüetas (1) con las lengüetas (2) en las conexiones rápidas (3). Presiona la
carcasa del conector hacia arriba hasta que encaje la pestaña del tubo receptor.
Hala ligeramente para asegurar que la conexión es segura. Si es necesario, retira el
conector, aprieta las pestañas de la manguera con el dedo índice y el pulgar, y hala
hacia abajo para desconectar.
Insérez le tuyau de la douchette dans le support et dans l'évier. Alignez les pattes
(1) et les pattes (2) des raccords rapides (3). Poussez fermement le connecteur à
branchement rapide vers le haut et enclenchez-le dans le tuyau récepteur. Tirez
modérément vers le bas pour vous assurer que le branchement a bien été fait. S'il
est nécessaire de retirer le connecteur à branchement rapide, appuyez sur les
languettes du tuyau avec l'index et le pouce et tirez pour débrancher.


