Profoto ProDaylight 800 Air User manual

ProDaylight 800 Air
ProBallast 800
User´s Guide
ProDaylight 800 Air
2
www.profoto.com

ProDaylight 800 Air
3
www.profoto.com
Thank you for choosing Profoto
Thanks for showing us your confidence by investing in a
ProDaylight unit. For more than four decades we have sought
the perfect light. What pushes us is our conviction that we
can offer even yet better tools for the most demanding
photographers.Beforeourproductsareshippedwehavethem
pass an extensive and strict testing program. We check that
each individual product comply with specified performance,
qualityandsafety.Forthisreasonourflashequipmentiswidely
usedinrental studios andrentalhouses worldwide,from Paris,
London,Milan,NewYork,Tokyo to CapeTown.
Some photographers can tell just from seeing a picture, if
Profoto equipment has been used.
Professional photographers around the world have come to
value Profoto’s expertise in lighting and light-shaping. Our
extensive range of Light Shaping Tools offers photographers
unlimitedpossibilitiesforcreatingandadjustingtheirownlight.
Everysinglereflectorandaccessorycreatesitsspeciallightand
theunique Profotofocusing system offersyou thepossibility to
create your own light with only a few different reflectors.
Enjoy your Profoto product!

ProDaylight 800 Air
4
www.profoto.com
SAFETY PRECAUTIONS!
Read and follow all safety instructions below carefully to avoid injuries or damages! Make sure that
Profoto Safety Instructions is always accompanied the equipment! Profoto products are intended for
professional use! The equipment is only intended for indoor photographic use. Do not place or use
the equipment where it can be exposed to moisture, extreme electromagnetic fields or in areas with
flammablegasesordust!Donot usetheequipmentinambienttemperaturehigherthan+35°C(+95°F).
Do not expose the equipment to dripping or splashing. Do not place any objects filled with liquids on or
near the equipment.Do not expose the equipment to hasty temperature changes in humid conditions as
thiscouldlead to condensationwater intheunit.Do not connectthisequipment to equipment fromother
brands.Only use ballast,lamps and light shaping tools as specified by Profoto. Do not use lamp without
supplied protective glass covers or protective grids. Do not stare directly at lamp while in operation.
Minimum distance to flammable surfaces is 400 cm in front of the lamp. Limit exposure in front of the
lamp if used at close distances.Glass covers shall be changed if it has become visibly damaged to such
an extent that their effectiveness is impaired, for example by cracks or deep scratches. Lamps shall be
changed if they are damaged or thermally deformed.When placing a lamp into the holder ensure not to
touch the bulb with bare hands. Equipment must only be serviced, modified or repaired by authorized
and competent service personnel!
WARNING – Electrical Shock – High Voltage!
The equipment shall always be connected to grounded mains power supply outlet! Only use Profoto
extensioncablesandmainscables!Donotopenordisassembleballastorlamphead!Equipmentoperates
with high voltage.Disconnect lamp head cable between ballast and lamp head when changing bulb!
Caution – Burn Hazard – Hot Parts!
Do not touch hot parts with bare fingers! Bulb,protective glass cover and certain metal parts emit strong
heatwhenused!Reflectorpartsmayreachatemperatureof+200°C(+392°F).Whenthelamphasbeen
inuse,wait 10minutesbeforeremovingtheprotectiveglasscover.Donotpointlamptooclosetopersons.
All lamps may on rare occasions explode and throw out hot particles!
NOTICE – Equipment Overheating Risk
Removetransportcap fromlampheadbefore use! Do notobstructventilation by placingfilters,diffusing
materials,etc.over inlets and outlets of the equipment ventilation or directly over protective glass cover.
Note about RF!
This equipment makes use of the radio spectrum and emits radio frequency energy. Proper care should
betakenwhenthedeviceisintegratedinsystems.Makesurethatallspecificationswithinthisdocument
arefollowed,especiallythoseconcerningoperatingtemperatureandsupplyvoltagerange.Makesurethe
device is operated according to local regulations.The frequency spectrum this device is using is shared
with other users.Interference can not be ruled out.
Final Disposal
Equipment contains electrical and electronic components that could be harmful to the environment.
EquipmentmaybereturnedtoProfotodistributorsfreeofchargeforrecyclingaccordingtoWEEE.Follow
local legal requirements for separate disposal of waste, for instance WEEE directive for electrical and
electronic equipment on the European market,when product life has ended!
Safety instructions

ProDaylight 800 Air
5
www.profoto.com
Table of Contents
System description ...................................................................................................7
Profoto Air ..................................................................................................7
Nomenclature...........................................................................................................8
Functionality ............................................................................................................9
Metal halide lamp .......................................................................................9
Glass cover .................................................................................................9
Reflector .....................................................................................................9
Light intensity .............................................................................................9
Remote control .........................................................................................10
Cooling system .........................................................................................10
Built-in timers ...........................................................................................10
ProBallast ...............................................................................................................11
Power supply ............................................................................................11
Power on/off .............................................................................................11
Frequency mode .......................................................................................11
Operating instructions ............................................................................................12
Stand mounting ........................................................................................12
Remove protecting cap .............................................................................12
Changing glass cover ...............................................................................12
Reflector mounting ...................................................................................13
Power connection .....................................................................................13
Radio settings ...........................................................................................13
Cooling setting ..........................................................................................14
Adjusting light intensity .............................................................................14
Read out firmware version and timer value ...............................................14
Changing settings in standby mode ..........................................................14
Turn unit off .............................................................................................14
Remote control ......................................................................................................15
Turn unit on/off ........................................................................................15
Light intensity setting ...............................................................................15
Maintenance ..........................................................................................................16
Changing lamp .........................................................................................16
Changing fuse ..........................................................................................16
Trouble shooting .....................................................................................................17
List of compatible Profoto Light Shaping Tools .......................................................18

ProDaylight 800 Air
6
www.profoto.com
Technical data ........................................................................................................19
ProDaylight 800 Air....................................................................................19
ProBallast 800...........................................................................................19
Warranty ................................................................................................................19
Regulatory information ..........................................................................................20
Declaration of Conformity – ProDaylight 800 Air ........................................20
Declaration of Conformity – ProBallast 800................................................21
Unites States and Canada.......................................................................................22
F.C.C. and Industry Canada ........................................................................22
Warning (Part 15.21)..................................................................................22
Japan .....................................................................................................................23

ProDaylight 800 Air
7
www.profoto.com
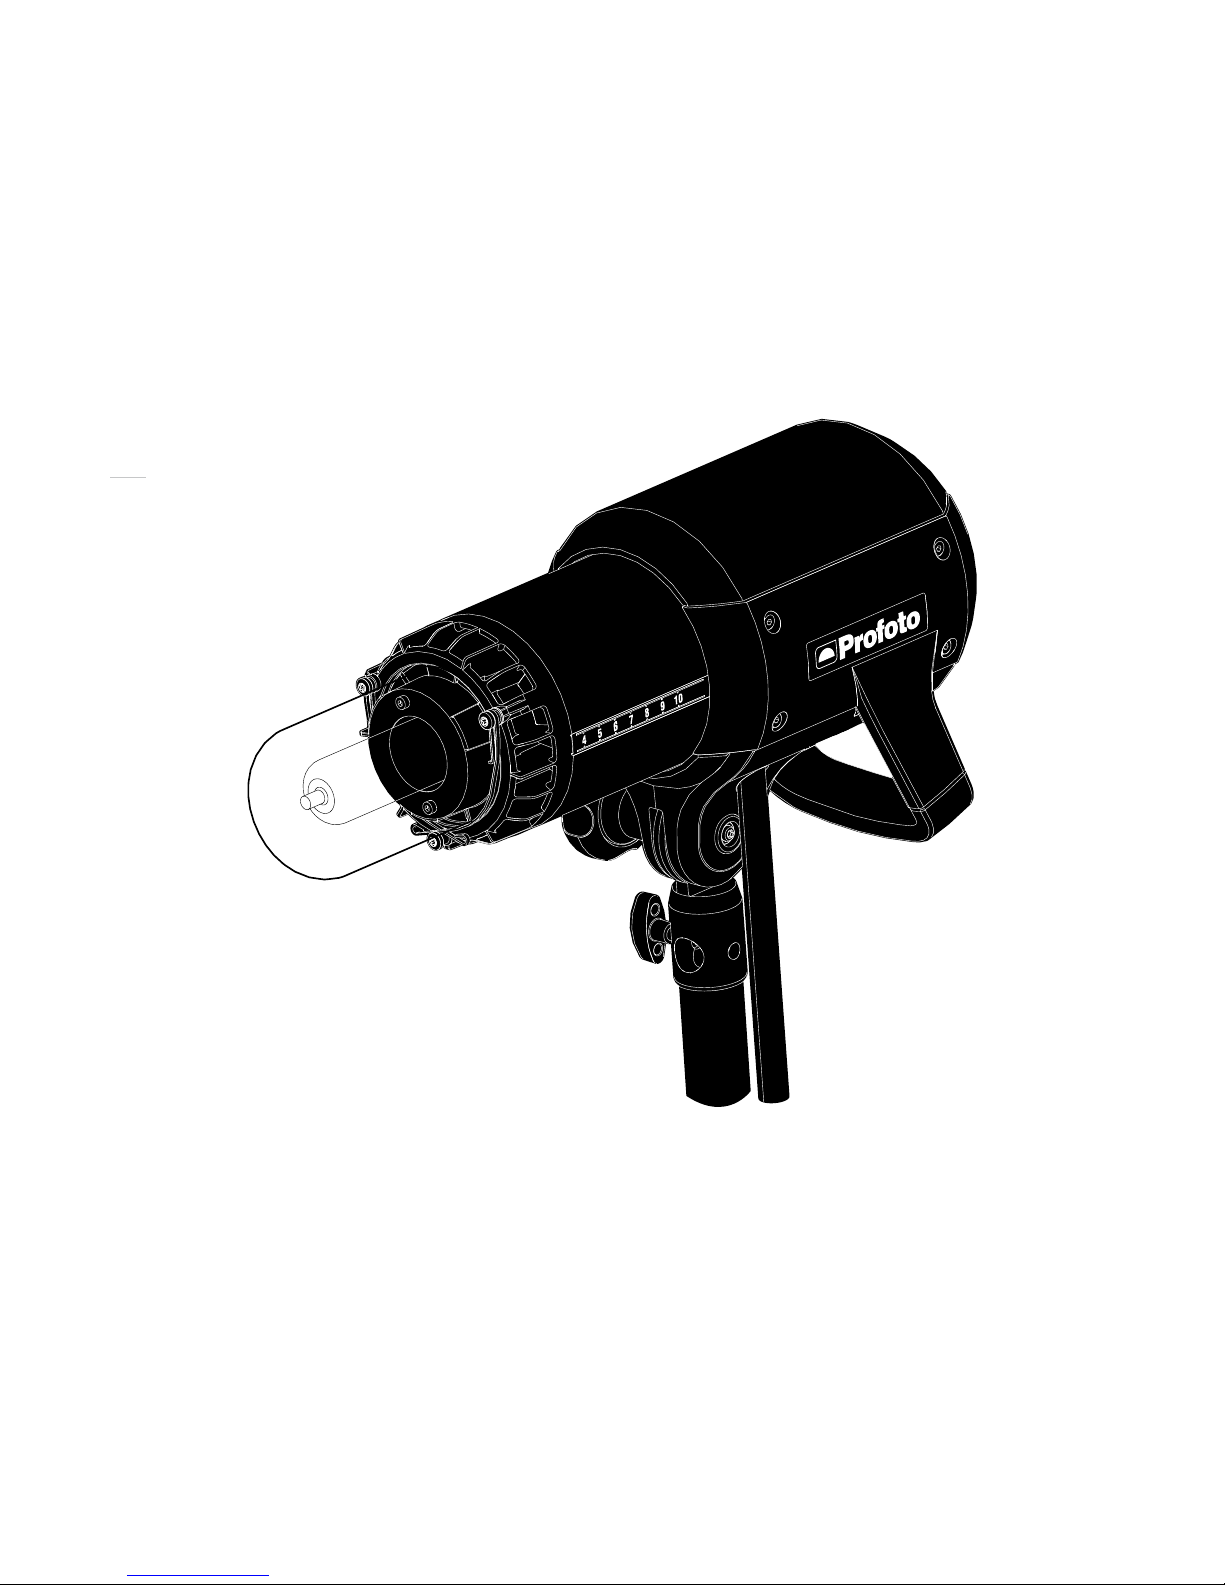
System description
ProDaylight 800 Air is a metal halide based (HMI type) continuous light source. The
powerful metal halide lamp provides daylight color temperature,which is ideal for many
photo and video shoots.
The ProDaylight 800 Air is designed for heavy-duty use. Its metal housing and all
components are solid, reliable and withstand even the most demanding shooting
situations.
The ProDaylight 800Air is powered from a flicker-free multi-voltage electronic ballast.
As a professional photographer or videographer, you have your own special style and
needs. Profoto’s Light Shaping Tools – including the new line of Light Shaping Tools for
Video Lights – fit perfectly with the ProDaylight 800 Air, enabling you to shape the light
your own way.
Profoto Air
ProfotoAirisasystemforconvenientremotecontrolofflashgeneratorsandstudiolamps.
The Profoto Air system is operating on one of eight selectable radio channels on the 2.4
GHz radio frequency band,for world wide use.ProfotoAir allows control of your light from
as far away as 300 m/1000 ft (free line of sight).
The ProfotoAir radio system is fully integrated in the ProDaylight 800Air.
Profoto Air Remote
The Profoto Air Remote device offers remote control of your ProDaylight 800 Air unit.
The device controls practically an infinite number of ProDaylight 800Air units in up to six
groups,either all at once in Master mode,or in individual groups.
Profoto Air USB
TheProfotoAirUSBdevice isaUSB 2.0transceiver,whichconnectsyourProDaylight 800
Air unit to your PC or Mac via a wireless connection.
Profoto Studio 3
Profoto Studio 3 is a software solution for both PC and Mac,which gives you full control of
allyourProDaylight800Airunitsfromyourcomputer.Youcancontroleachunitindividually
orgroupthem tocontrolmultiple units at onetime.Youcan savecustomer lightingsetups
for use at a later time.

ProDaylight 800 Air
8
www.profoto.com
Nomenclature
21 &22/,1*
&+$11(/6(75$',2
0$;
6,/(17
1
2
3
7
8
4
5
6
9
10
1. Display
2. POWER CONTROL
2a.On/Off Button
2b.Power Indicator
3. RADIO CONTROL
3a.Radio Button
3b.Radio Indicator
4. COOLING CONTROL
4a.Cooling Button
4b.Silent Indicator
4c.Max Indicator
5. Channel Set Button
6. Setting Knob
7. Handle
8. Lamp Cable
9. Locking Knob
10.StandAdapter
11.Protective glass cover
12.Zoom Scale
12
11

ProDaylight 800 Air
9
www.profoto.com
Functionality
Metal halide lamp
The ProDaylight 800 Air unit is equipped with a powerful metal halide lamp, providing
daylight color temperature.
SAFETY PRECAUTION!
Profoto only uses UV-doped CSR-lamps, which emit a fraction of the hazardous UV radiation compared to classic
HMI type lamps.Never use other types of lamps than the ones specified by Profoto.
A cold metal halide lamp does not immediately begin producing its full light capacity.The
warm up period can be a few minutes.During that time,the color of the light will vary.
If the ProDaylight 800 Air unit is turned off, it takes about two minutes before the warm
lampcanbeturnedonagain.Itisrecommendedtoletthelamprunforatleast 15 minutes
after turning it on,since turning the lamp on and off repeatedly considerably reduces the
life time of the lamp.
Glass cover
Metal halide lamps operate under high pressure and temperature and require special
safety measures.The ProDaylight 800 Air unit is equipped with a protective glass cover,
which protects from lamp shatter and UV radiation. Unless the glass cover is correctly
mounted (see page 13) it is not possible to turn on the ProDaylight 800Air unit.
SAFETY PRECAUTION!
A damaged (cracked or scratched) glass cover must never be used! The level of UV protection provided by the glass
cover is matched to the lamp type specified by Profoto. Only use Profoto specified lamps.
The protective glass cover is available in different versions; with frosted and clear glass
and with different coatings for distinctive color temperature adjustments.
Reflector
By mounting a reflector and placing it in different positions, using the Zoom Scale [12],
several light shapes can be created for each lighting purpose.The unique rubber collar
fastening system provides secure and rapid handling of the reflectors,also when hot.
Light intensity
The current light intensity is shown in the Display [1], in percent (%) of maximum light
output.
The Setting Knob [6] is used to adjust the light intensity,in 1% or 10% increments.

ProDaylight 800 Air
10
www.profoto.com
Remote control
The Profoto Air radio system is fully integrated in the ProDaylight 800 Air unit, allowing
wireless remote control.
With the Profoto Air Remote device, the ProDaylight 800 Air unit can be turned on/off
remotely and the light intensity can be adjusted. With the Profoto Studio Air software,
multiple lighting setups including numerous continuous lights and flash units can be
created and coordinated.
For more information about remote control, please refer to the User’s Guides for Profoto
Air Remote or ProfotoAir USB/Profoto StudioAir.
Cooling system
The ProDaylight 800 Air unit is equipped with an effective cooling system, designed for
optimal cooling without generating unwanted noise.
The cooling system includes automatic overheating protection. If the temperature of the
ProDaylight 800Air unit exceeds maximum set levels,the ProDaylight 800Air unit will be
turnedoff.Thisautomaticprotectionwillonlyinterfereunderextremeconditions,suchas
when the air vents are blocked.
Built-in timers
Thelamp has a built-in timer,whichcan beread outand reset instandby mode.Thetimer
feature is included to make it easier to keep track of lamp life.
Thereisalsoanothertimer,whichcannotberesetfromthepanelinterface.Thistimercan
only be read out and reset via the ProfotoAir system.

ProDaylight 800 Air
11
www.profoto.com
ProBallast
ProDaylight lamps require an electronic ballast to deliver the proper voltage and current.
The ProBallast 800 is a flicker-free electric ballast device dedicated for the ProDaylight
800Air unit.The ProBallast 800 has a passive cooling system for quiet operation.
A E
F
GDCB
A. On/Off Switch
B. Lamp Connector
C. Start Button
D. Stop Button
E. Power Connector
F. Fuse Holder
G. MODE CONTROL
G1.Mode Button
G2.Mode Indicator
Power supply
The ProBallast 800 can be connected to 95-265 VAC, 50-60 Hz. It automatically senses
and adapts to the supplied voltage and frequency. Only use fuses specified in section
Technical data.
Power on/off
The On/Off Switch [A] is used to turn on/off the ProBallast 800.
The Start Button [C] is used to turn on the ProDaylight 800Air unit.
The Stop Button [D] is used to turn off the ProDaylight 800Air unit.
Frequency mode
Thefrequencyof the outputvoltage is switchablebetweenSILENT (50 Hz),100Hz(flicker
free)and300Hz(highspeed).Ahigherfrequencywillallowhigherframerates(fps)during
videoshoots withoutflicker.The Mode Button [G1] is used to select the frequencysetting.
ProDaylight 800 Air
12
www.profoto.com
Operating instructions
Stand mounting
1. Mount and fasten the ProDaylight 800Air unit on the stand using the locking knob on
the StandAdapter [10].
2. Theunitcanbedirectedupwards/downwardswhentheLockingKnob[9]isloosened.
Fasten the Locking Knob [9] when the unit is correctly directed.
Remove protecting cap
1. Unlock the clasp on the protecting cap.
2. Gently remove the protecting cap from the ProDaylight 800Air unit.
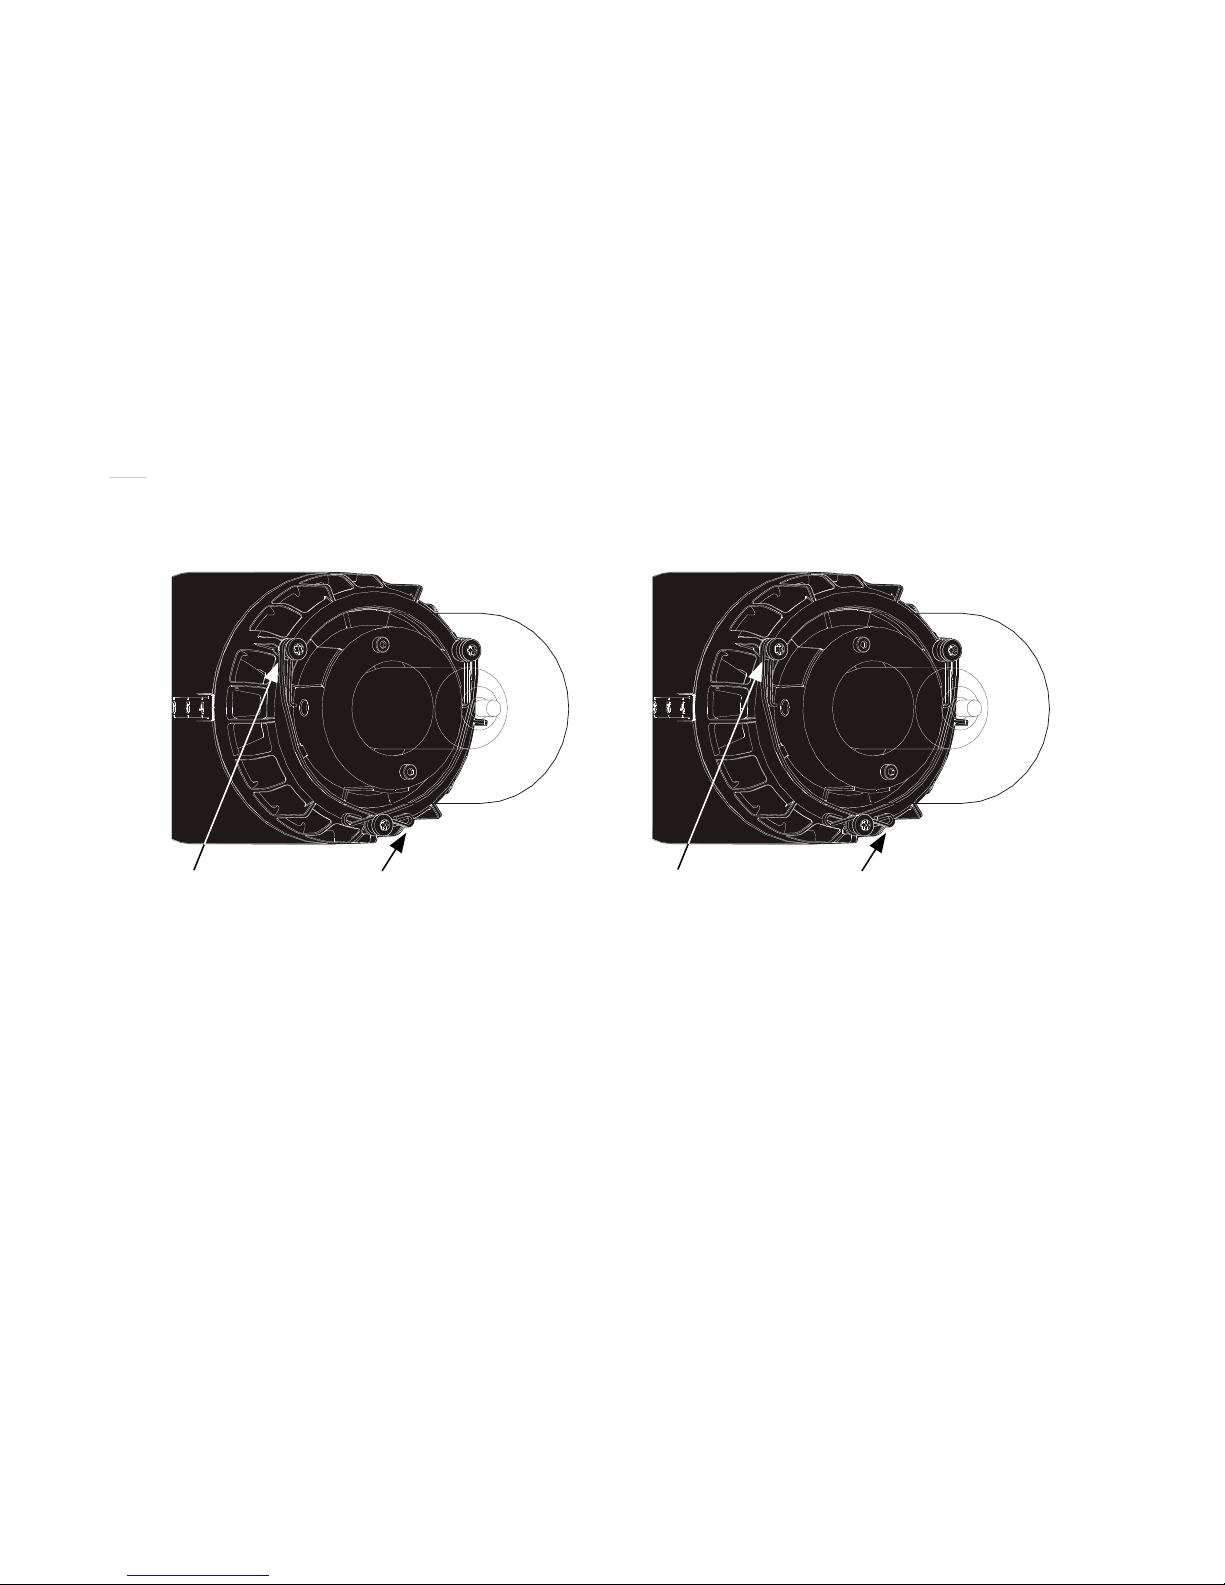
Changing glass cover
CHANGING GLASS COVER
Unlock glass cover
CHANGING GLASS COVER
Lock glass cover
1. Lift and remove the
safety pin to release.
3. Press down the
safety pin and fit
under the screw
to lock.
2. Pull the safety
pin out.
1. Fit the safety pins in
existing holes located
on the glass cover.
2. Push the safety pin in.
1. EnsurethattheProDaylight 800Airunit isturned offand thatthe LampCable [8]is not
connected.
2. If the ProDaylight 800 Air unit has been in use, wait for the unit to cool down or use
protective gloves.
3. Unlock the glass cover by lifting the safety pins and then pulling them one by one.
4. Gently remove the glass cover and fit the new glass cover in place.
5. Makesurethatthecircuitbreakerispresseddownandthatbothsafetypinsfitproperly
into the holes on each side of the glass cover.
6. Secure the glass cover by pressing the safety pins down and then pushing them one
by one under the top screw.

ProDaylight 800 Air
13
www.profoto.com
Reflector mounting
1. Unlock the clasp on the reflector.
2. Slide the reflector onto the ProDaylight 800Air unit.Use the Zoom Scale [12] to place
the reflector in the desired position.
3. Secure the reflector by locking the clasp.
Power connection
1. Connect the Lamp Cable [8] to the Lamp Connector [B] on the ProBallast 800 by
aligningthewhitedotsonthecableplugwiththewhitedotontheballastpanel.Secure
by turning the ring on the plug clockwise.
2. Connect the AC mains cable to the Power Connector [E] on the ProBallast 800 and to
the mains power supply outlet.
3. Use the On/Off Switch [A] to turn on the ProBallast 800.
4. ThePower Indicator [2b]on the ProDaylight800Air unit will be red,indicatingthatthe
unit is receiving power but is in standby mode.
5. Press the On/Off Button [2a] on the ProDaylight 800Air unit or the Start Button [C] on
the ProBallast 800to turn on the ProDaylight 800Air unit.
6. The Power Indicator [2b] on the ProDaylight 800Air unit will now be green.
Radio settings
1. Activatethe built-inradiotransceiverbypressing theRadioButton[3a]and verifythat
the Radio Indicator [3b] is illuminated (green).
2. PresstheChannelSetButton[5].TheDisplay[1]willstartflashing,showingthecurrent
radio channel number to the left and the radio group letter to the right.
3. While the Display [1] is flashing, turn the Setting Knob [6] clockwise to increase the
radio channel number (1to 8) and counter-clockwise to decrease the number.
4. While the Display [1] is flashing, press and hold down and turn the Setting Knob [6]
clockwise to increase the group letter (Ato F) and counter-clockwise to decrease the
letter.
5. Wait until the Display [1] stops flashing. (The Display [1] will now show the light
intensity.)

ProDaylight 800 Air
14
www.profoto.com
Cooling setting
The Cooling Button [4a] is used to select cooling mode:
• SILENT:“Normal”cooling.Inthismodethecoolingadaptstotheambientenvironment,
keeping the noise level to a minimum without risking overheating of the equipment.
• MAX: Maximum cooling is provided for lamp and accessories.This mode is intended
for use only when sound level is not an issue and the lamp is operated under extreme
temperature conditions.
Adjusting light intensity
Use the Setting Knob [6] to adjust the light intensity:
• TurntheSettingKnob[6]clockwisetoincreasethelightintensityin1%incrementsand
counter-clockwise to decrease.
• Press and hold down the Setting Knob [6] and turn the knob clockwise to increase the
energy in 10% increments and counter-clockwise to decrease.
Read out firmware version and timer value
To read out the firmware revision and timer value,the lamp must be in standby mode.
1. Press and hold the Setting Knob [6] for 1 second,then release the knob.
2. The timer value in hours will now be displayed.
3. Toggle between the timer value and the firmware revision by turning the Setting Knob
[6] clockwise and counter-clockwise.
4. Reset the timer value by pressing the Channel Set Button [5].
5. Return to standby by pressing the Setting Knob [6].
Changing settings in standby mode
All settings on the lamp can be reached and changed in standby mode.A short press on
the Setting Knob [6] will light up the settings and make it possible to change set values.
Turn unit off
1. Press the On/Off Button [2a] on the ProDaylight 800Air unit or the Stop Button [D] on
the ProBallast 800to turn off the ProDaylight 800Air unit.
2. ThePower Indicator [2b]on the ProDaylight800Air unit will be red,indicatingthatthe
unit is receiving power but is in standby mode.
3. Use the On/Off Switch [A] to turn off the ProBallast 800.
4. Disconnect theAC mains cable on the ProBallast 800 from mains power.

ProDaylight 800 Air
15
www.profoto.com
Remote control
For remote control using ProfotoAir Remote,the same radio channelandgroup havetobe
set on the ProDaylight 800Air unit and the ProfotoAir device.
Forremotecontrol usingProfotoAir USB and ProfotoStudioAir,the same radiochannel has
to be set on the ProDaylight 800Air unit and in the Profoto StudioAir program.
For radio channel and group settings on the ProfotoAir devices and the Profoto StudioAir
program,please refer to the corresponding User’s Guide.
Turn unit on/off
Use the Head or Model Buttons (1) and (0) on the Profoto Air Remote device to turn the
ProDaylight 800Air unit on and off.
Light intensity setting
Use the Energy Buttons (+) and (-) on the ProfotoAir Remote device to increase/decrease
the light intensity:
• Press the Energy Button < 2 seconds to increase/decrease in 1% increments.
• Press the Energy Button > 2 seconds to increase/decrease in 10% increments.

ProDaylight 800 Air
16
www.profoto.com
Maintenance
Changing lamp
1. Ensure that the ProBallast 800 is turned off and that the Lamp Cable [8] is not
connected.
2. If the ProDaylight 800Air unit has been in use,wait for the unit to cool down.
3. Unlock the glass cover by pressing the safety pins down and then pulling them one by
one,see figure on page 12.
4. Gently remove the glass cover.
5. Unscrew the two screws and remove the reflector plate.
The glossy side of
the reflector plate
shall face outwards.
6. Pull the lamp straight out of the socket.Always use protective gloves when doing this.
7. Insert a new modeling lamp,straight into the socket.Do not touch the lamp with bare
hands.
8. Fit the reflector plate in place, with the glossy side facing outwards.Tighten the two
screws.
9. Gently fit the fit the glass cover in place.
10.Makesurethatthecircuitbreakerispresseddownandthatbothsafetypinsfitproperly
into the holes on each side of the glass cover,see figure on page 13.
11.Secure the glass cover by pressing the safety pins down and then pushing them one
by one under the top screw.
Changing fuse
There is one exchangeable fuse in the ProBallast 800.
1. Disconnect the ProBallast 800 fromAC mains power.
2. Pull out the Fuse Holder [F] and remove the old fuse.
3. Gently push the new fuse all the way into the Fuse Holder [F].Only use fuses specified
in section Technical data.
4. Gently push the Fuse Holder [F] in place.
SAFETY PRECAUTION!
Do not touch bulb with bare hand. Cleaning
cloth is included with Profoto supplied bulb.

ProDaylight 800 Air
17
www.profoto.com
Trouble shooting
Symptom Diagnose Action
Power Indicator
[2b] not
illuminated
Bad connection to the
ballast orAC mains.
• Check that the Lamp Cable [8] and
theAC mains cable are correctly
connected.
Internal fuse defect. • Check the fuse on the ProBallast
800.If the problem remains after
replacing the fuse,contact your
nearest Profoto service station.
The ProDaylight
800Air unit
turns off
automatically
The unit is overheated • Ensure better ventilation.
• Wait until the temperature
decreases before the unit is
turned on again.
• If the problem remains please
contact your nearest Profoto
service station.

ProDaylight 800 Air
18
www.profoto.com
List of compatible Profoto Light Shaping Tools
The ProDaylight 800 Air can be used in combination with the following Profoto light
shapers:
• HR Softboxes
• HR Lanterns,except HR Lantern 1.7’ FLAT (Max 400W)
• ProCine reflector including lenses
• Softlight reflector
• Magnum reflector
• Zoom reflector
• Narrow beam reflector
• Narrow beam travel reflector
• Wide Zoom reflector
• Tele Zoom reflector
• ProTube
• Disc reflector
• ProFresnel Spot
• Profoto Giant reflectors (parabolic)
• Profoto Silver umbrellas (with ProCine reflector only).
• ProfotoTranslucent umbrellas (with ProCine reflector only).
The ProDaylight 800 Air 800 is not recommended to be used with the following Profoto
Light shapers:
• Profoto white umbrellas
• Grids
• Standard softboxes
• Hardbox
• ProBox
• Fresnel Small
• Spot Small
• ProGlobe
• Snoot
• Grid and filter holder

ProDaylight 800 Air
19
www.profoto.com
Technical data
ProDaylight 800 Air
Wattage 800W
Lamp type GE CSR 800/SE/HR/UV-C
Socket type G 22
Lamp life 750 hours
Nominal color temperature 5600 K
Dimensions 39 x 13 x 18 cm (15.4 x 5.1 x 7.1 in)
Weight 2.3 kg (5.1 lbs)
ProBallast 800
Lamp wattage 800W
Input voltage/frequency
Automatic sensing:95-265VAC,50/60 Hz
Fuse 10A,Fast acting type,5 x 20 mm
Power factor correction (PFC) Yes
Power factor 0.98
Dimming 50-100%
Cooling Passive
Lamp output 100 Hz (Flicker Free)
300 Hz (High speed)
Silent (50 Hz)
Dimensions 38 x 14 x 19 cm (15.0 x 5.5 x 7.5 in)
Weight 6.7 kg
All data are to be considered as nominal and Profoto reserves the right make changes without further notice.
Warranty
AllProfotoproductsareindividuallytestedbeforetheyleavethecompanyandguaranteed
for a period of two years with the exception of flash tubes,glass covers,modeling lamps,
batteries and cables. Profoto is not responsible for technical malfunctions created by
improperuseoraccessoriesmadebyothercompanies.Ifyouhaveanytechnicalproblems
please get in contact with an authorized Profoto service station.The Warranty is subject
to and shall be interpreted in accordance with the law of the country where the product
is purchased.

ProDaylight 800 Air
20
www.profoto.com
Regulatory information
Declaration of Conformity – ProDaylight 800 Air
TheProDaylight800AirhasbeendesignedtoconformtotherelevantpartsoftheEuropean
directives LowVoltage Directive (LVD) 2006/95/EC and EMC Directive 2004/108/EC.
The ProDaylight 800Air is a light armature for photographical purposes.The light source
is a metal halide discharge lamp of maximum 800W.The ProDaylight 800 Air is intended
for use with the ProBallast unit.
Manufacturer: ProfotoAB
Adress: Box 2021,128 21 SKARPNÄCK,Sweden
Product: ProDaylight 800Air
Type: ProDaylight 800Air 800Air
ProfotodeclaredthattheproductcomplieswiththeessentialrequirementsofLowVoltage
Directive (LVD) 2006/95/EC and EMC Directive 2004/108/EC.
Forthe evaluationofcompliance,applicablepartsofstandardSS-EN60598-1havebeen
applied.
Skarpnäck,January 2011
Bo Dalenius,VPTechnology and QA,
ProfotoAB
This manual suits for next models
1
Table of contents
Other Profoto Lighting Equipment manuals


Popular Lighting Equipment manuals by other brands


Hapton Bay
Hapton Bay DUVAL HDP11232 Use and care guide

Portfolio
Portfolio 895 brochure

PureEdge Lighting
PureEdge Lighting CCS-2-JBOX Series installation instructions

Stageline
Stageline INCREDIBLE instruction manual

Studio
Studio Valentina CORDLESS quick start guide

Lightolier
Lightolier Soli 48021ALU specification


