Profoto Pro-B3 1200 AirS User manual

Pro-B3 1200 AirS
User´s Guide

Pro-B3 1200 AirS
2
www.profoto.com

Pro-B3 1200 AirS
3
www.profoto.com
Thank you for choosing Profoto
Thanks for showing us your confidence by investing in a Pro-
B3 generator. For more than four decades we have sought the
perfect light. What pushes us is our conviction that we can offer
even yet better tools for the most demanding photographers.
Before our products are shipped we have them pass an
extensive and strict testing program. We check that each
individual product comply with specified performance, quality
and safety. For this reason our flash equipment is widely used in
rental studios and rental houses worldwide, from Paris, London,
Milan, New York, Tokyo to Cape Town.
Some photographers can tell just from seeing a picture, if
Profoto equipment has been used.
Professional photographers around the world have come to
value Profoto’s expertise in lighting and light-shaping. Our
extensive range of Light Shaping Tools offers photographers
unlimited possibilities for creating and adjusting their own light.
Every single reflector and accessory creates its special light and
the unique Profoto focusing system offers you the possibility to
create your own light with only a few different reflectors.
Enjoy your Profoto product!

Pro-B3 1200 AirS
4
www.profoto.com
SAFETY PRECAUTIONS!
Do not operate the equipment before studying the instruction manual and the accompanying safety. Make
sure that Profoto Safety Instructions is always accompanied the equipment! Profoto products are intended
for professional use! Generator, lamp heads and accessories are only intended for indoor photographic
use. Do not place or use the equipment where it can be exposed to moisture, extreme electromagnetic
fields or in areas with flammable gases or dust! Do not expose the equipment to dripping or splashing.
Do not place any objects filled with liquids, such as vases, on or near the equipment . Do not expose the
equipment to hasty temperature changes in humid conditions as this could lead to condensation water
in the unit. Do not connect this equipment to flash equipment from other brands. Do not use flash heads
without supplied protective glass covers or protective grids. Glass covers shall be changed if it has
become visibly damaged to such an extent that their effectiveness is impaired, for example by cracks
or deep scratches. Lamps shall be changed if they are damaged or thermally deformed. When placing
a lamp into the holder ensure not to touch the bulb with bare hands. Equipment must only be serviced,
modified or repaired by authorized and competent service personnel! Warning - The terminals marked
with the flash symbol are hazardous live.
WARNING – Electrical Shock – High Voltage!
Mains powered generator shall always be connected to a mains socket outlet with a protective earthing
connection! Only use Profoto extension cables! Do not open or disassemble generator or lamp head!
Equipment operates with high voltage. Generator capacitors are electrically charged for a considerable
time after being turned off. Do not touch modeling lamp or flash tube when mounting umbrella metal
shaft in its reflector hole. Disconnect lamp head cable between generator and lamp head when changing
modeling lamp or flash tube! The mains plug or appliance coupler is used as disconnect device. The
disconnect device shall remain readily operable. Batteries (battery pack or batteries installed) shall not
be exposed to excessive heat such as sunshine, fire or the like.
Caution – Burn Hazard – Hot Parts!
Do not touch hot parts with bare fingers! Modeling lamps, flash tubes and certain metal parts emit
strong heat when used! Do not point modeling lamps or flash tubes too close to persons. All lamps may
on rare occasions explode and throw out hot particles! Make sure that rated voltage for modeling lamp
corresponds with technical data of user guide regarding power supply!
NOTICE – Equipment Overheating Risk
Remove transport cap from lamp head before use! Do not obstruct ventilation by placing filters, diffusing
materials, etc. over inlets and outlets of the equipment ventilation or directly over glass cover, modeling
lamp or flash tube!
Note about RF!
This equipment makes use of the radio spectrum and emits radio frequency energy. Proper care should
be taken when the device is integrated in systems. Make sure that all specifications within this document
are followed, especially those concerning operating temperature and supply voltage range. Make sure the
device is operated according to local regulations. The frequency spectrum this device is using is shared
with other users. Interference can not be ruled out.
Final Disposal
Equipment contains electrical and electronic components that could be harmful to the environment.
Equipment may be returned to Profoto distributors free of charge for recycling according to WEEE. Follow
local legal requirements for separate disposal of waste, for instance WEEE directive for electrical and
electronic equipment on the European market, when product life has ended!
Safety instructions

Pro-B3 1200 AirS
5
www.profoto.com
Table of Contents
System description ...................................................................................................7
Profoto Air ...................................................................................................7
Pocket Wizard ..............................................................................................7
Nomenclature ......................................................................................................8
Functionality ......................................................................................................9
LiFe Batteries ..............................................................................................9
Power on/off ................................................................................................9
Battery Indicator ..........................................................................................9
Energy control ...........................................................................................10
Recycling time ...........................................................................................10
Modeling light ............................................................................................10
Sync signaling ...........................................................................................11
Radio operation .........................................................................................11
Channel selection – Profoto Air ..................................................................12
Channel and Zone selection – Pocket Wizard .............................................12
Audible and visible signals .........................................................................12
Test function ..............................................................................................13
Flash before ready .....................................................................................13
Safety functions .........................................................................................13
Reliability testing – the R-test ....................................................................13
Color temperature......................................................................................13
Flash duration ............................................................................................14
Operating instructions .............................................................................................15
Lamp head connection ..............................................................................15
Turn on generator ......................................................................................15
Settings .....................................................................................................15
Sync via cable ...........................................................................................15
Sync via Photocell......................................................................................15
Sync via radio – Profoto Air ........................................................................16
Sync via radio – Pocket Wizard ..................................................................16
Turn off generator ......................................................................................16
Maintenance ....................................................................................................17
Battery replacement ..................................................................................17
Battery charging ........................................................................................18
Changing battery fuse................................................................................18

Pro-B3 1200 AirS
6
www.profoto.com
Accessories ....................................................................................................19
Technical data ....................................................................................................20
Regulatory information – Profoto Air .......................................................................21
World-wide Usage of Radio Spectrum ........................................................21
EU Declaration of Conformity ..................................................................................22
Unites States and Canada .......................................................................................23
F.C.C. and Industry Canada .....................................................................................23
Japan ....................................................................................................24
Regulatory information – Pocket Wizard ..................................................................25
Operating frequencies ...............................................................................25
Unites States .............................................................................................25

Pro-B3 1200 AirS
7
www.profoto.com
System description
The Pro-B3 1200 AirS Li generator is a portable flash generator with a performance
surpassing many studio generators. The Pro-B3 features an eight f-stop range in 1/2
or 1/10 step adjustments, asymmetrical or symmetrical power distribution, recycling in
0.04-1.8 seconds, very short flash durations from 1/2200 – 1/7400 second, continuous or
timer controlled modeling light up to 250 W and built in radio sync. Despite its professional
performance, the Pro-B3 is a quite small and lightweight unit that measures just
24x17x23cm and weights 8,8kg including battery. The Pro-B3 generator is the top-of-
the-line battery generator from Profoto.
All actual Pro-B, ProHead, ProTwin, ProRing and ProRing2 flash heads a fully compatible
with the Pro-B3.
The Pro-B3 product family includes the following flash generators:
• Pro-B3 1200 AirS LiFe
• Pro-B3 1200 AirS Li (344MHz) LiFe
• Pro-B3 1200 AirS Li (433MHz) LiFe
Profoto Air
Profoto Air is a system for convenient wireless synchronization and remote control of flash
generators. The Profoto Air system is operating on one of eight selectable radio channels
on the 2.4 GHz radio frequency band. The Profoto Air system can be used world-wide.
The Profoto Air radio functionality for wireless synchronization (not remote control) is
integrated in all Pro-B3 generators.
The Profoto Air Remote and Profoto Air Sync devices allow wireless synchronization of
practically an infinite number of Pro-B3 generators. For detailed information, please refer
to the User’s Guide for the Profoto Air Remote and Profoto Air Sync.
Pocket Wizard
Wireless flash synchronization is also possible with the Pocket Wizard system, which is
operating on either 344 MHz (USA) or 433 MHz (Europe). As rules and laws change all the
time, please check your local regulations for the legal version.
The Pro-B3 1200 AirS (344MHz) LiFe and Pro-B3 1200 AirS (433MHz) LiFe have a built-in
radio receiver compatible with all Pocket Wizard Transmitters and Transceivers working
on the corresponding frequency.
For detailed information about the Pocket Wizard Transmitters and Transceivers, please
refer to the Pocket Wizard manual.

Pro-B3 1200 AirS
8
www.profoto.com
Nomenclature
4
5
6
7
8
9
10
11
12
13
14
15
18
16
19
20
17
1
2
3
1. Lamp Head Socket A
2. SYM/ASYM Switch
3. Lamp Head Socket B
4. Battery Indicator
5. Charge Sockets
6. Photocell
7. Sync Sockets
8. Slave Button
9. Ready Lamp and Test Button
10. Sound Button
11. Recycling Button
12. Modeling Light Button
13. On/Off Button
14. Modeling Light Control
15. Profoto Air Antenna
16. Channel Button
17. Radio On/Off Button
18. Channel Indicator
19. Fine Energy Control
20. Energy Control

Pro-B3 1200 AirS
9
www.profoto.com
Functionality
LiFe Batteries
Profoto uses the most advanced and reliable rechargeable batteries: Lithium Ion Iron
Phosphate (LiFePO4), short – LiFe batteries. These batteries include sophisticated
electronics: A special constructed BMS board (Battery Monitoring System) controls and
adjusts their output to assure an optimal performance.
LiFe cells offer a very high capacity, are lightweight, stand high loads and are very safe and
reliable. The integrated electronics also protect the LiFe battery against deep-discharge
and overheating. On top they have a much longer life-time than lead acid batteries and can
be used in a wider temperature range. Because of their special construction it is possible to
apply the same chargers for LiFe and Pb (lead acid) batteries; this simplifies the combined
use of new and old battery generators and allows owners of previous Profoto battery
generators to update their packs with the new LiFe batteries.
The Pro-B3 generator is equipped with a LiFe battery. The generator cannot be used
without a battery in place.
The battery can be charged through the mains outlet using a Profoto Charger 2A or from the
car cigarette lighter using the Profoto Charger UPA. The battery can be charged separately
or with the battery in place in the generator. The generator can be used during charging.
The battery can be charged from any charge level, but should not be charged for longer
time than necessary. For a long battery life, the battery shall be fully recharged prior to
storage.
Defective batteries shall be returned to the dealer for recycling. For details about the
battery, see section Technical data.
Power on/off
The generator is normally turned on manually, by pressing the On/Off Button [13]. If a
sync signal from a camera is received via one of the Sync Sockets [7], the generator
automatically turns on.
The generator automatically turns off after 30 minutes when not in use. For manual power
off, press the On/Off Button [13] for more than three seconds.
Battery Indicator
The Battery Indicator [4] indicates the battery level. The indicator is updated when a flash
is triggered. At start up, all four lamps can lit up, and a flash should be triggered to get an
updated battery indication. Because of the discharge characteristics of the LiFe battery,
the Battery Indicator [4] will remain on max until it suddenly drops, when there is battery
capacity for just a few more flashes.

Pro-B3 1200 AirS
10
www.profoto.com
Energy control
The energy output is regulated over eight f-stops.
The energy can partly be adjusted with the Energy Control [20] in 1/2 f-stop increments,
from 1/1 down to 1/16 of the total energy (equivalent to five f-stops). Fine adjustment of
the energy is made with the Fine Energy Control [19] in 1/10 f-stop increments.
The energy is also partly adjusted with the SYM/ASYM Switch [2] and through the use of
one or two lamp heads:
One lamp head:
• If the lamp head is connected to Lamp Head Socket A [1], the total of the selected
energy is obtained if the SYM/ASYM Switch [2] is set to position “A1/1 (1/2)” and
half of the energy if the SYM/ASYM Switch [2] is set to position “A1/2”.
• If the lamp head is connected to Lamp Head Socket B [3], half of the selected energy
is obtained if the SYM/ASYM Switch [2] is set to position “B1/2”and a quarter of the
energy if the SYM/ASYM Switch [2] is set to position “B1/4”.
Two lamp heads:
• The selected energy can either be distributed evenly through the two lamp heads,
by setting the SYM/ASYM Switch [2] to position “B1/2, A1/1 (1/2)”.
• Alternatively, twice as much energy (equivalent to one f-stop ratio) will be output
through lamp head A, by setting the SYM/ASYM Switch [2] to position “B1/4, A1/2”.
Since the generator has auto dump functionality, there is no need to trigger a flash to
discharge the generator when the energy level is lowered.
Recycling time
The recycling time is controlled with the Recycling Button [11]. When the Recycling Button
[11] is released, the generator will recycle at normal speed; when the button is pushed
down, the recycling will be faster.
The recycling time also depends on the energy level setting. When a short recycling time
is required, the energy level shall be set as low as possible. For details on recycling times,
see section Technical data.
Modeling light
The modeling light is constant and does not vary with the selected energy level. The
maximum modeling light is 250 W. The modeling light is automatically dimmed down to
max 250 W if a 500W model lamp is used. Since the efficiency (output) is higher when using
a 100 or 250 W lamp head, we recommend using max 250 W heads.

Pro-B3 1200 AirS
11
www.profoto.com
The Modeling Light Button [12] is used to turn on/off the modeling light.
The Modeling Light Control [14] is used to select time controlled or continuous modeling
light:
• TIME: To save the battery, the modeling light is automatically turned off after 10
seconds or when a flash is triggered. By pressing the Modeling Light Button [12] two
or three consecutive times, the modeling light will stay on for 30 and 60 seconds
respectively. For every period of 20 seconds that the modeling light is turned on, the
battery capacity decreases by the equivalent of two flashes at full energy.
• CONT: The modeling light is continuously on, but the modeling lamp will
automatically dim down during recycling or when the energy output is changed. In
this position, the battery is drained within 20-60 minutes depending on the lamp
head used (100 or 250 W) and the number of flashes triggered.
If the former Pro-7 heads are used on the Pro-B3 we recommend to turn off the model light.
Sync signaling
The Pro-B3 generator can be synchronized with the camera in different ways; via cable,
photocell or via radio.
• The two Sync Sockets [7] allow the camera and a flash meter to be connected
simultaneously. The 5 meter sync cable can without restrictions be extended with
sync extension cords. Further sync connections can be made with the Profoto sync
interconnection cable or by so called “hard wiring”. A slave signal from the Photocell
[6] can be forwarded through this cable to another flash generator.
• The Photocell [6] will sense a flash release as well as signals from most IR sync
transmitters. The Photocell is enabled when the Slave Button [8] is pushed down.
The Photocell can also, via cable, trigger off an additional generator.
• The Profoto Air radio system is integrated in all Pro-B3 generators, meaning that the
generators can be synchronized via a Profoto Air Remote or Profoto Air Sync device.
• The Pro-B3 AirS 344MHz and the Pro-B3 AirS 433MHz generators have an
integrated radio receiver for synchronization via the Pocket Wizard device.
Always check the manuals of the camera and synchro device about the shortest possible
sync times before taking pictures!
Radio operation
The Profoto Air radio receiver is turned on/off with the Radio On/Off Button [17].
The Pocket Wizard radio receiver is always in operation while the generator is powered
on. When the Pocket Wizard system is used, it is recommended to turn off the Profoto Air
system.

Pro-B3 1200 AirS
12
www.profoto.com
For best radio operation (Profoto Air and Pocket Wizard), do the following:
• Keep power, sync and lamp head cords away from the antenna.
• Maintain line of sight between the transmitter (Profoto Air Sync/Remote or Pocket
Wizard) and the generator whenever possible.
• When hiding the generator from view, try to not hide it behind or against metal or
water filled objects as this affects radio range.
• For Pocket Wizard: keep the transmitter’s antenna parallel with the generator
antenna.
Channel selection – Profoto Air
Channel selection is used to select one of eight specific frequencies in the 2.4 GHz band.
The frequencies are evenly spread over the entire frequency band, to optimize reliable
functionality. The large number of radio channels makes it possible to select a channel
that is not interfered by other photographers using Profoto Air, or by WLAN and Bluetooth
devices and other radio equipment operating on the same widely used 2.4 GHz frequency
band.
Channel selection on the generator is made with the Channel Button [16]. The Channel
Indicator [18] corresponding to the selected radio channel (1-8) is illuminated.
Channel and Zone selection – Pocket Wizard
The Pocket Wizard radio receiver has a learning function, which means that during 30
seconds from power on it will try to detect a trigger signal on any of the 32 channels.
If a trigger signal is detected, the radio receiver will lock to that channel. If no trigger is
detected, the radio receiver will use the previously used channel. Actual photo shooting
with radio should not be performed during the 30 second learn period, since the result may
be unpredictable due to the channel learning process.
The Pocket Wizard radio receiver can also learn multiple zones on the Quad-Triggering
channels, 17 through 32. This provides the photographer with the convenience of
activating or deactivating the flash unit(s) wirelessly in four separately controllable zones
(ABCD), without leaving the camera position.
Example: The teaching Transmitter is set to channel 17 with zones A, B, and C selected.
If the generator is taught this combination it will trigger from any Transmitter set to
channel 17 with zones A, B, or C selected. It will not trigger if only zone D is selected on the
Transmitter. It will trigger if zones A and D are selected.
Audible and visible signals
The Ready Lamp [9] is illuminated when the generator is fully charged (100%) and ready
to flash. When the energy output is changed, the Ready Lamp [9] and the modeling lamp
will be turned off, indicating that dumping or charging of the energy is in progress.

Pro-B3 1200 AirS
13
www.profoto.com
When the recycling of the generator is completed, there will be a short audible “beep”
sound. If a flash is triggered before recycling or auto dumping (when the energy level has
been lowered) is completed, there will be a long “beep”, indicating an underexposed or
overexposed frame. Before the generator automatically turns of (after 30 minutes when
not in use), there will a number of short “beeps”. The audible sounds are enabled when the
Sound Button [10] is pushed down, and disabled when the button is released.
Test function
The Test Button [9] is used to test that all light settings are correct and that the functionally
is as expected. When the Test Button [9] is pressed, the generator will flash and the Ready
Lamp [9] will be turned off. When the recycle of the generator is completed, the Ready
Lamp [9] will be turned on again.
Flash before ready
The “Flash before ready” function makes it possible to flash before the recycling or auto
dumping of the generator is fully completed. When a flash is released before the generator
is 100% ready, there will be a long “beep”, indicating an incorrectly exposed frame.
Naturally the flash light may not correspond fully to the set value. The incorrect exposure
of the frame may be so small that it makes no significant difference and the frame may still
be usable if the catch of the moment was perfect.
Safety functions
If the generator overheats, the recycling will slow down or stop. After a while, when the
temperature has decreased sufficiently, the generator will start recycling as normal. The
generator automatically shuts down if the battery level is too low, to protect it from deep
battery discharge. There are three fuses on the battery cassette; one is for the charging
circuits and two for the battery. Furthermore the lamp connectors are short-circuiting
proof.
Reliability testing – the R-test
The Profoto R-test guarantees that all products leaving the factory meet the very high
standards required for professional equipment by professional photographers. After the
test, the equipment is examined to verify that all parts have kept a normal operating
temperature and are not malfunctioning in any way. All Profoto products are subject to the
R-test prior to shipping.
Color temperature
Since the color temperature is constant and reliable, the Pro-B3 is perfectly suited for
digital photography. By turning the Energy Control [20] from MAX to -4 and the Fine Energy
Control [19] from MAX to -1, the color temperature is changed nominally -250 K. Flash
to Flash color precision, ±50 °K. Optional glass covers are available for further color
temperature adjustments.

Pro-B3 1200 AirS
14
www.profoto.com
Flash duration
The full power short flash duration has more advantages than freezing a moving object, for
example to cut out exposure influence from indoor ambient light as well as direct sunlight.
Consult the camera manual for information about the shortest flash sync time.
The shortest flash duration (1/7400s) is achieved with both the Energy Control [20] and
the Fine Energy Control [19] set to MAX, the SYM/ASYM Switch [2] set to “B1/4, A1/2” and
with only one lamp head connected to Lamp Head Socket B [3].

Pro-B3 1200 AirS
15
www.profoto.com
Operating instructions
Lamp head connection
1. When connecting the lamp head plug to the Lamp Head Socket A [1] and/or Lamp
Head Socket B [2], align the white dots on the plug with the white dot on the
generator panel. Secure by turning the ring on the plug clockwise.
CONNECTING LAMP HEAD
Turn on generator
1. Press the On/Off Button [13].
2. The Ready Lamp [9] will be illuminated when the generator is ready.
If the generator is connected via a sync cord to a camera, it automatically turns on when
a sync signal is received.
Settings
• Use the Modeling Light Control [14] to select TIME or CONT. Press the Modeling Light
Button [12] to turn on the modeling light.
• Use the Energy Control [20], the Fine Energy Control [19] and the SYM/ASYM Switch
[2] to set the energy level.
• Push down the Recycling Button [11] for fast recycling; release for normal speed.
• Push down the Sound Button [10] to enable audible sounds; release to disable the
sounds.
Sync via cable
1. Connect a sync cord from the camera or a flash meter to one of the Sync Sockets [7].
Sync via cable + flash meter
1. Connect a sync cord from the camera to one of the Sync Sockets [7] on the
generator.
2. Connect another sync cable from the flash meter to the free Sync Socket [7].
Sync via Photocell
1. Connect an IR transmitter to the camera.
2. Push down the Slave Button [8].

Pro-B3 1200 AirS
16
www.profoto.com
Sync via radio – Profoto Air
1. Press and hold down the Radio On/Off Button [17] to turn on the Profoto Air receiver.
The Channel Indicator [18] of the previously used channel will be illuminated.
2. To change channel, press the Channel Button [16] until the desired Channel
Indicator [18] is illuminated.
3. The Pro-B3 generator is now ready to flash, with the selected radio channel.
Sync via radio – Pocket Wizard
The Pocket Wizard radio receiver is always in operation while the generator is powered on.
The previously used channel and zone is selected by default.
To change channel and zone:
1. Select the desired channel and zone on the Pocket Wizard device (Transmitter or
Transceiver).
2. Turn off the generator and wait 5 seconds.
3. Turn on the generator.
4. Within 30 seconds, press and hold the TEST button on the Pocket Wizard device
(up to 4 seconds) until flash triggers. If using a Sekonic meter with radio module as
transmitter, press the measure button repeatedly within the 30 second learning
period until the flash triggers.
Note: During channel and zone selection, other Pocket Wizard transmitters should refrain
from triggering to prevent the receiver from locking to the incorrect channel.
Turn off generator
The generator automatically turns off after 30 minutes when not in use.
1. To turn off the generator, press and hold down the On/Off Button [13] for more than
three seconds.

Pro-B3 1200 AirS
17
www.profoto.com
Maintenance
Battery replacement
1. Release the battery cassette by sliding the two handles towards the middle. Pull out
the battery.
2. Slide the two handles of the new battery towards the middle and push the battery all
the way into the generator.
3. Lock the battery cassette by sliding the handles away from each other.
Slide handles towards the middle when removing and refitting the battery.
Slide handles away from each other to lock the battery cassette.

Pro-B3 1200 AirS
18
www.profoto.com
Battery charging
The battery can be charged separately or with the battery in place in the generator, using
the Profoto Charger 2A or the Profoto Charger UPA. The charging time depends on the type
of charger, see section Technical data.
Charging the battery separately:
1. a) Connect the Profoto Charger 2A to the smaller battery charge socket the
battery.
b) Connect the Profoto Charger UPA to the larger charge socket on the battery.
Charging the battery in place in the generator:
1. a) Connect the Profoto Charger 2A to the smaller of the Charge Sockets [5] on the
generator.
b) Connect the Profoto Charger UPA to the larger of the Charge Sockets [5] on the
generator.
Changing battery fuse
There are three 40A fuses on the battery cassette.
1. Ensure that the Pro-B3 generator is turned off.
2. Pull out the fuse.
3. Gently push the new 40 A fuse all the way into the fuse holder.
Mains operation (charging while in use)
The optional Profoto Universal Power Adapter (UPA) can be used to increase the operating
time of a Pro-B3 in the studio seriously. On top the UPA operates as 12V/24V car charger
(adapter cable included).
IMPORTANT INFORMATION
Use original Profoto Pb or LiFe batteries only! Batteries made by other manufacturers can
lead to improper function and even damage the generator.
Malfunctions and defects created by the use of a third-party battery are not covered by
warranty.

Pro-B3 1200 AirS
19
www.profoto.com
Accessories
ProHead
ProTwin*
ProRing
ProRing2
Pro-B head
Profoto Charger 2A
Profoto Universal Power Adapter (UPA)
Pro-B protective bag
Please consult with your local dealer or distributor for specific information.
* If a ProTwin lamp head is connected to two Pro-B3 generators, 2400 Ws can be obtained.

Pro-B3 1200 AirS
20
www.profoto.com
Technical data
Energy 1200 Ws f-stop at 2 m with Magnum 50º reflector 90.3
Energy Control Over an eight f-stop range (down to 9 Ws), in 1/10 or 1/2 step
adjustments
Energy distribution Symmetric or Asymmetric (2:1 ratio)
Recycling time 0.06-1.8 s @ full (0,9 s at 600 Ws)
Flash duration 1/2200 – 1/7400 s (with Pro-Head and Pro-B head).
NOTE: ProTwin and two Pro-B3 generators on the same equivalent
power give half the recycling time and shorter flash duration.
No. of flashes per charge 300 @ full, > 30 000 @ min
Number of Lamp Head Sockets 2
Modeling light Up to 250W continuous or time controlled (max 60 s)
Auto Dumping Yes
Battery type 13.2 V, 11.5 Ah, LiFePo4
Battery charging time 5 h with Profoto Charger 2A
2.5 h with Profoto Universal Power Adapter UPA
Battery status indicator Yes
NOTE: Because of the discharge characteristics of the battery, the
indicator will remain on max until it suddenly drops when there is
capacity for just a few more flashes.
Battery life 1 200 charge cycles 80% capacity left
Battery operating temperature range -20 ºC to +50 ºC (-4 ºF to +120 ºF)
Battery storage temperature range -30 ºC to +60 ºC (-20 ºF to +140 ºF)
Radio Sync Profoto Air: range up to 300 m, channel selector on generator
Pocket Wizard: range up to 100 m, channel selector learn mode
Radio remote control No
Size (w) 17 x (d) 24 x (h) 28 cm (6.7x9.4x11 in) incl. handle.
Weight 6.4 kg (14.1 lbs), exclusive of battery
8.8 kg (19.0 lbs), including battery
Others Built in photocell, 2 sync sockets
All data are to be considered as nominal and Profoto reserves the right make changes
without further notice.
Table of contents
Popular Power Distribution Unit manuals by other brands

Xtreme Power Conversion
Xtreme Power Conversion XBDM User & installation manual

Gewiss
Gewiss 47 CVX 630K manual
Steelcase
Steelcase 98665-1 Installation
LSC
LSC POWERPOINT Installation and operation manual

Dawnco
Dawnco DIVINSUP-2-1X5A Installation and operation manual
Avocent
Avocent CYCLADES PM IPDU Installer/user guide
Tesla
Tesla TI4400 GPU-24 user manual
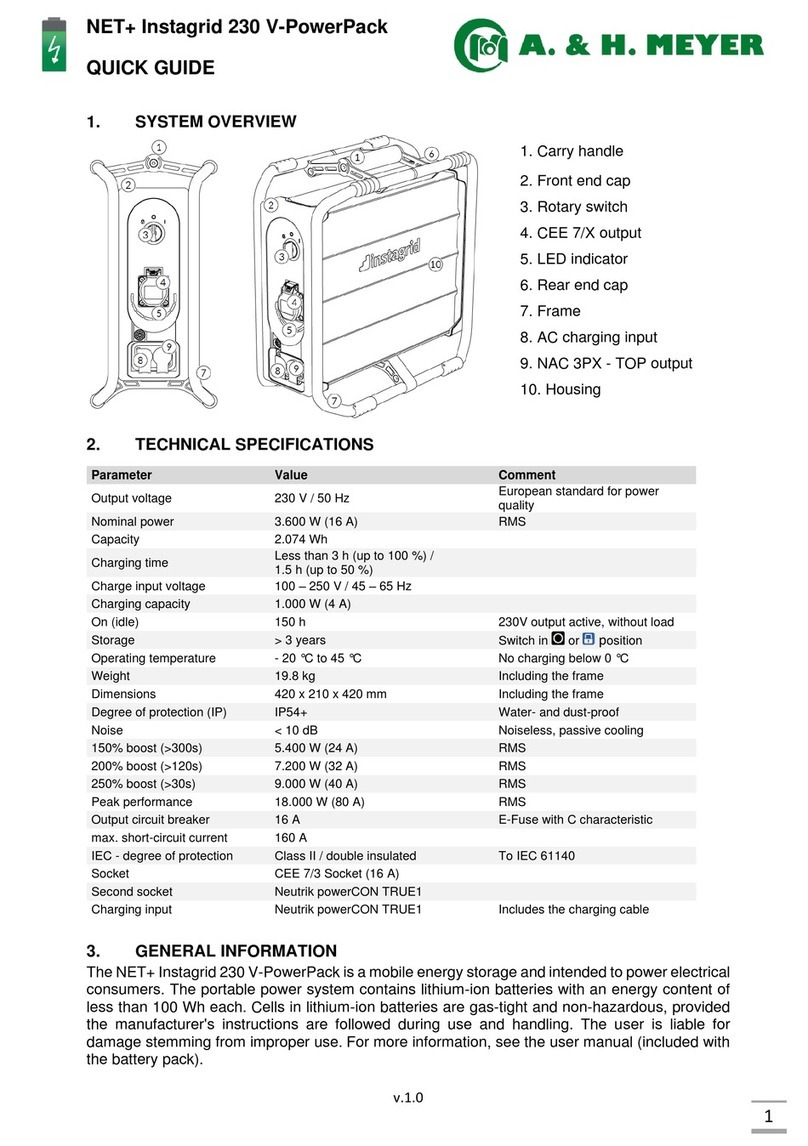
A. & H. Meyer
A. & H. Meyer NET+ Instagrid 230 V-PowerPack quick guide
SMAR
SMAR SI-700-EIA-232 user manual
Middle Atlantic Products
Middle Atlantic Products Protection Series instruction sheet
Liebert
Liebert MPH-NBV27NXXH30 user manual
Baumuller
Baumuller BUG 3 Technical description and operations manual
