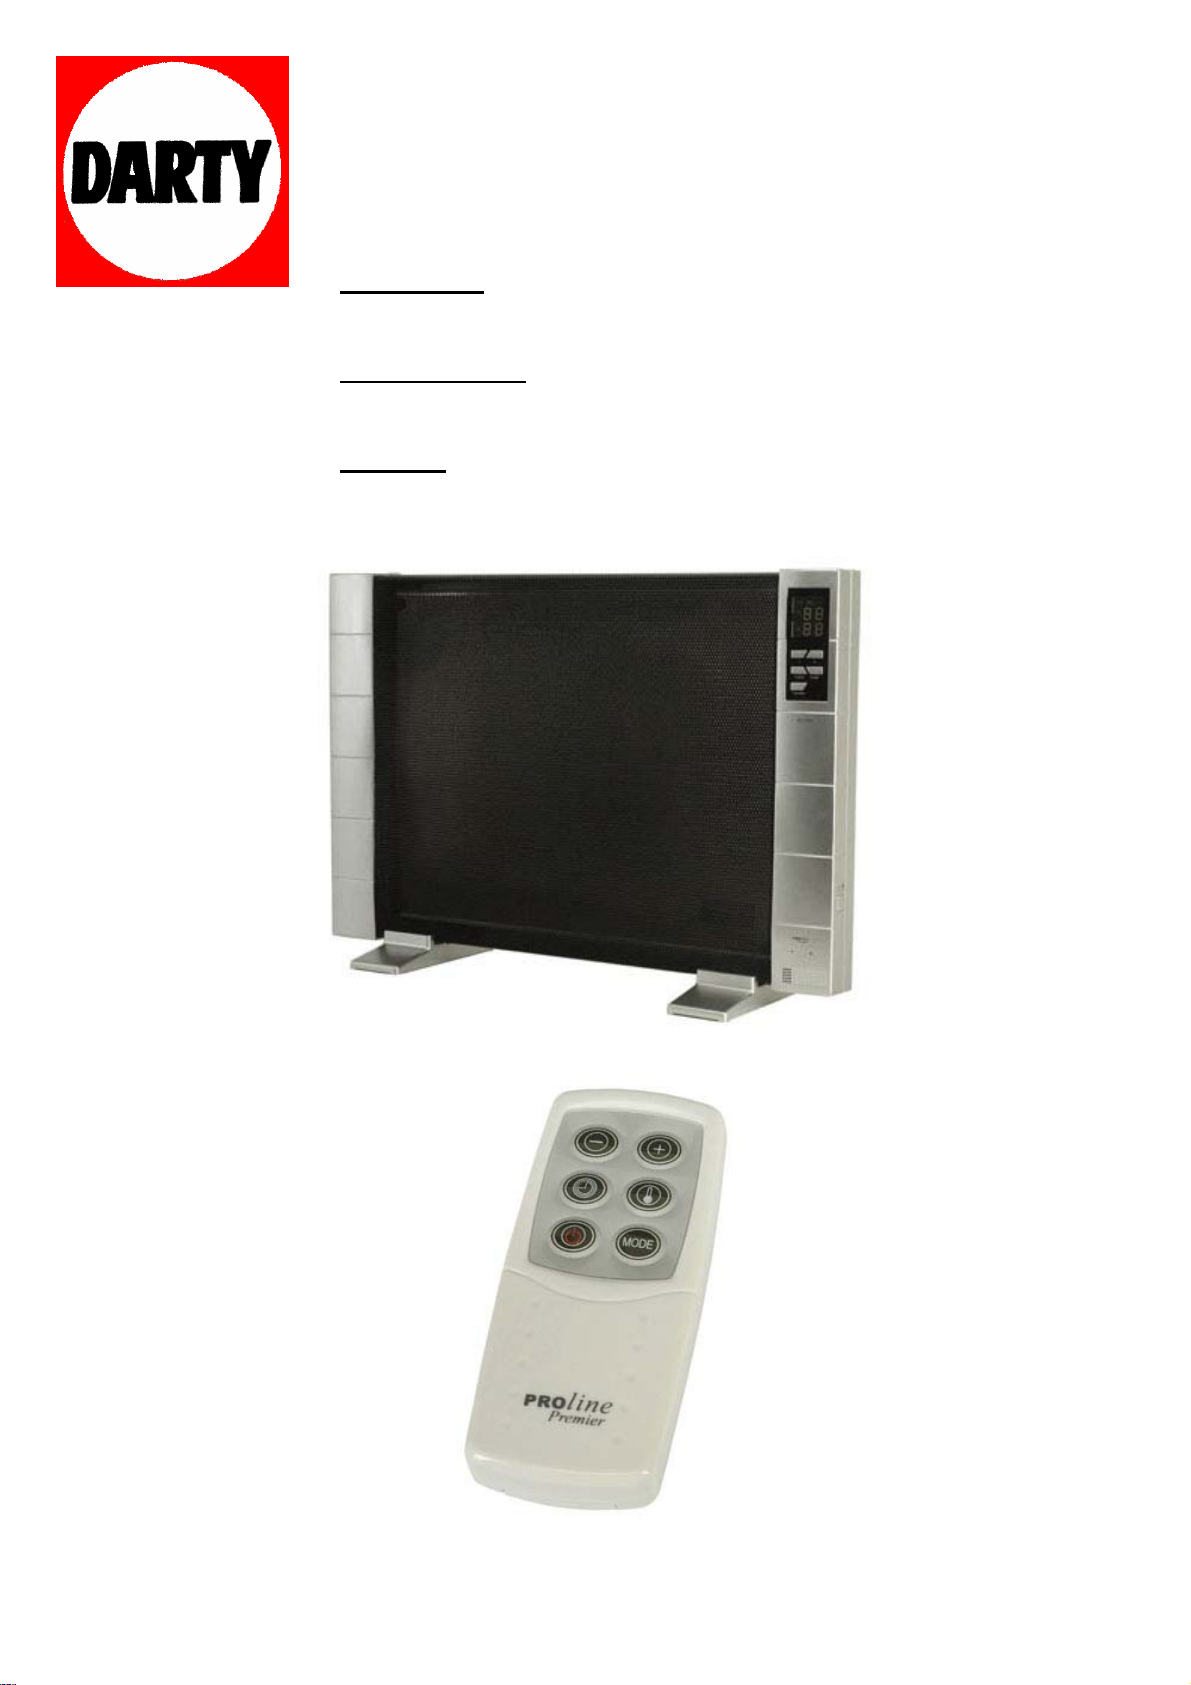
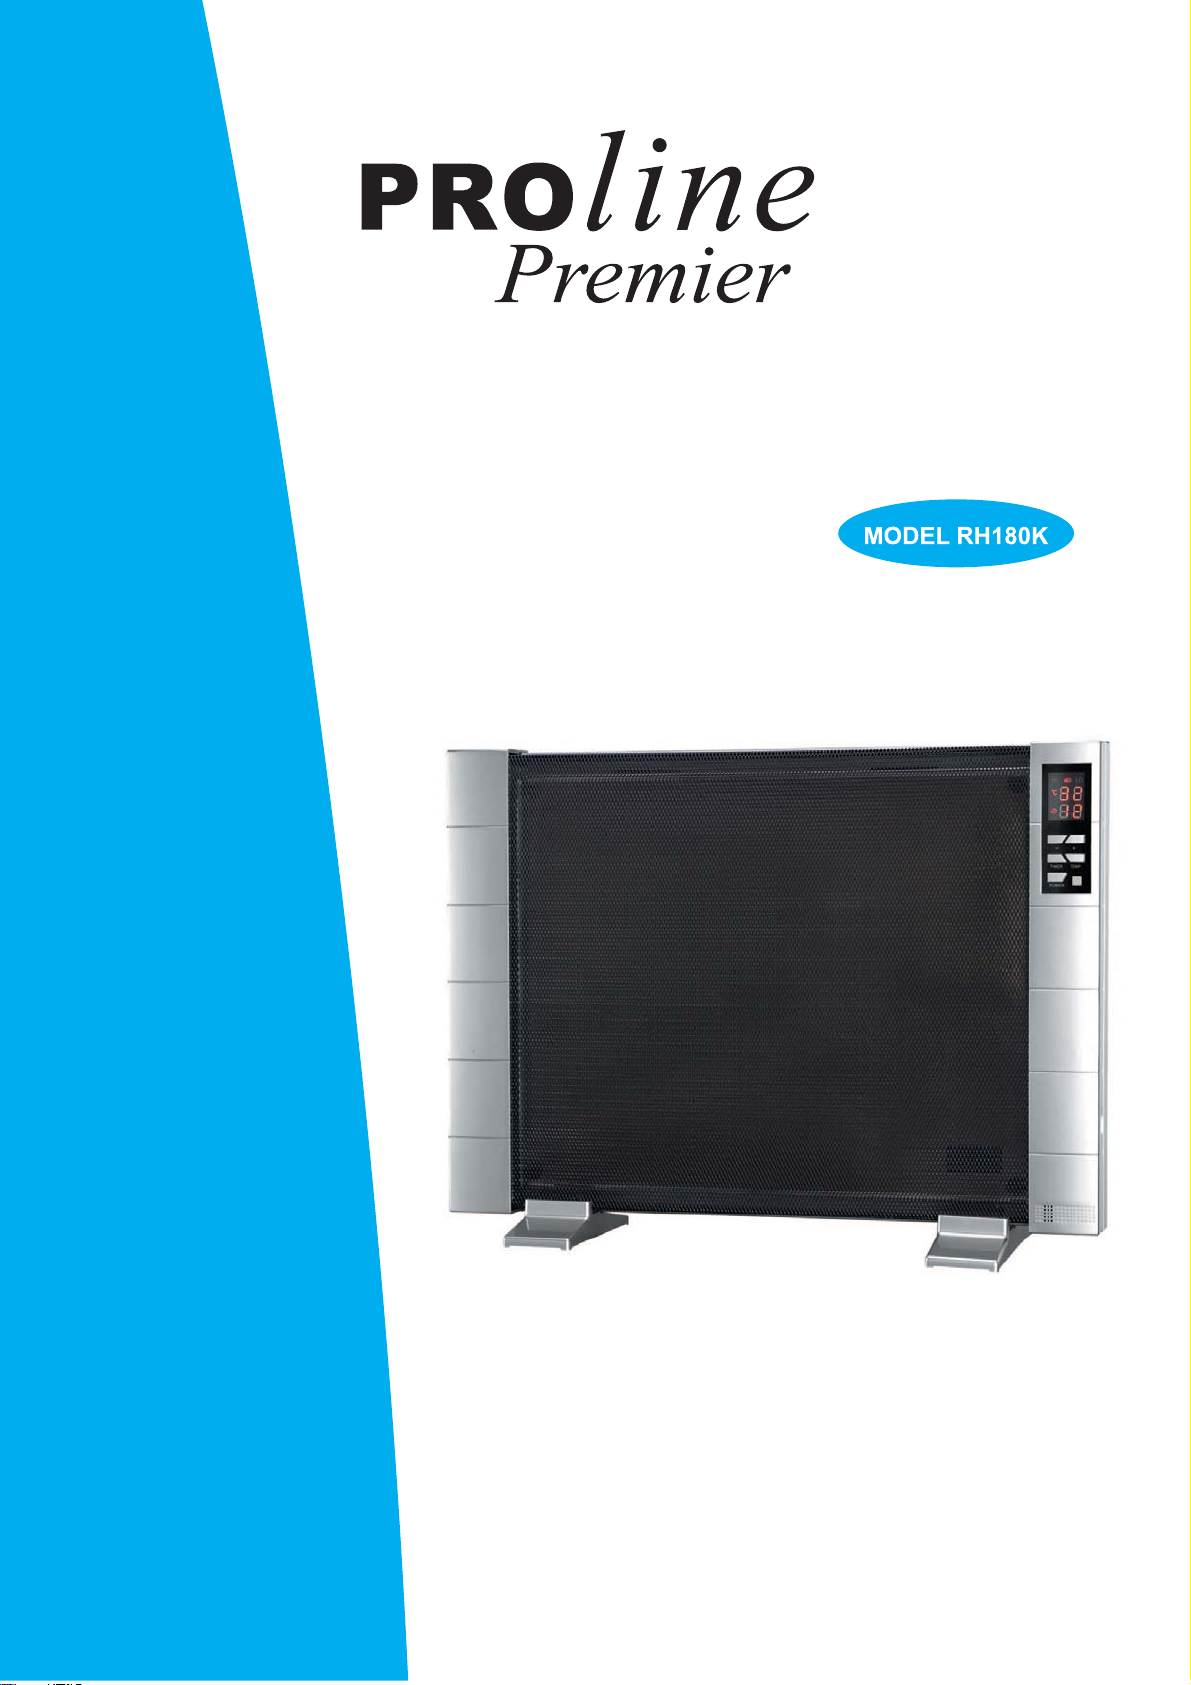
Proline Premier RH 108 K User manual
MARQUE: PROLINE
REFERENCE: RH 108 K
CODIC: 2480158
&+$8))$*(5$',$17
675$$/.$&+(/
Read these instructions carefully before use and save them for future reference
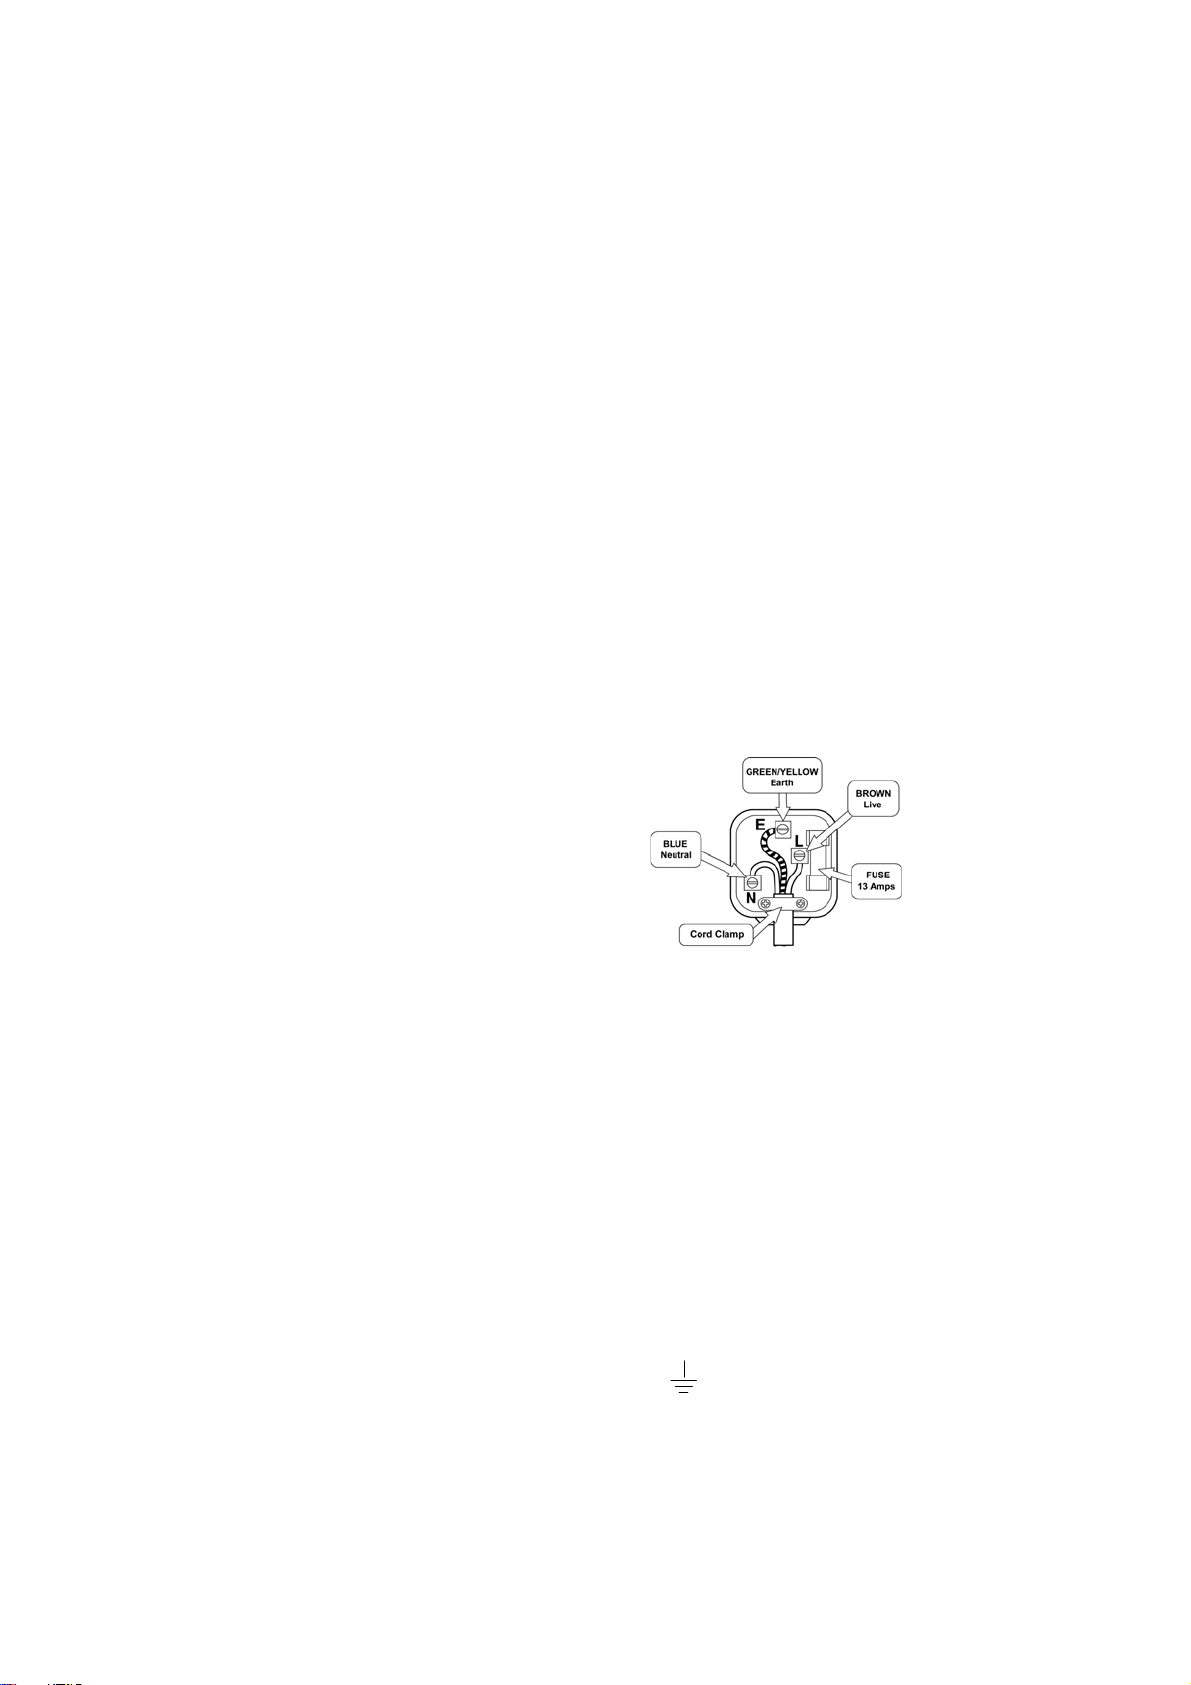
ELECTRICAL CONNECTION (UK ONLY)
For your safety please read the following information
Warning: This appliance must be earthed.
The appliance must be connected to a 220-240 volts 50 cycle AC supply by means of a
three pin socket, suitably earthed and should be protected by a 13 amp fuse in the plug
or a15 amp fuse in the consumer unit.
The appliance is supplied with a rewireable 13 amp 3 pin plug fitted with a 13 amp fuse.
Should the fuse require replacement, it must be replaced with a fuse rated at 13 amp
and approved to BS1362.
If the mains plug is unsuitable for the socket outlet in your home or is removed for any
other reason, then the cut off plug should be disposed of safely to prevent the hazard of
electric shock.
There is a danger of electric shock if the cut off plug is inserted into any 13-amp socket
outlet.
How to wire a 13 amp plug.
Important
The wires in the mains lead on this appliance are coloured in accordance with the
following code:
Green and Yellow - Earth
Blue – Neutral
Brown – Live
As the colours may not correspond with the markings identifying
the terminals in your plug proceed as follows.
The green and yellow wire must be connected to the terminal in the plug which is
marked with the letter E or with the earth symbol or coloured green and yellow.
The blue wire must be connected to the terminal marked N.
The brown wire must be connected to the terminal marked L.
1

IMPORTANT SAFEGUARDS
When using any electrical appliance, basic safety precautions should always be followed, including
the following:
1. To ensure familiarity with the controls, safety features, and operation of your heater - Read all
instructions before using.
2. To reduce hazard of injury due to electric shock
2.1 Danger of shock exists even when the appliance is switched off. ALWAYS unplug when not in
use.
2.2 A heater should never be used under conditions where it may be immersed, or come in contact
with water. Similarly do not plug in your heater if its surfaces are damp.
2.3 Do not insert foreign objects through the intake or discharge grilles.
2.4 Do not operate the heater with a damaged mains cord, or if it has been dropped, or damaged in
any manner. Return it to an Authorised Service facility for repair.
2.5 Close supervision is required when this appliance is used by or near children.
2.6 Disconnect the cord from the outlet and allow to cool before cleaning.
2.7 Unplug heater by grasping plug and pulling it from the outlet, do not pull the cord.
2.8 When storing your heater, keep it in a cool, dry place.
3. To reduce hazard of injury or property damage due to heat, fire, or explosion:
3.1 Position your heater away from furniture or loose hanging materials. Do not drape clothing or
towels, etc, over the heater to dry.
3.2 Keep the rear grille out from walls or drapes so as not to block the air intake.
3.3 If the supply cord is damaged, the manufacturer or its service agent or a similarly qualified
person must replace it in order to avoid a hazard. Do not use an extension cord as this poses a
tripping hazard and might be dangerous.
3.4 Do not use in the presence of explosive or flammable vapor.
3.5 Do not run in locations when the heater will be left unattended for long periods of time. (For
example - several weeks in an unoccupied summer cottage).
3.6 Use the heater on flat, dry surfaces only.
3.7 Loose connections between the heater plug and the electrical outlet may cause the plug to
overheat. Replace any worn electrical receptacles promptly.
3.8 Do not use this appliance outdoors.
3.9 Do not use the appliance on the same socket or electric circuit with other electrical appliances
so as to prevent the circuit from being overloaded, which may cause fire. Do not use a movable
socket outlet.
3.10 Route the cord so that it will not be walked on, or pinched by furniture.
Warning:
In order to avoid overheating. Do not cover the heater.
Do not use this heater in the surroundings of a bath, a shower or a swimming pool.
The heater must not be located immediately below a socket-outlet.
This product is intended for domestic household indoor use only. Any other use may
invalidate the warranty.
2
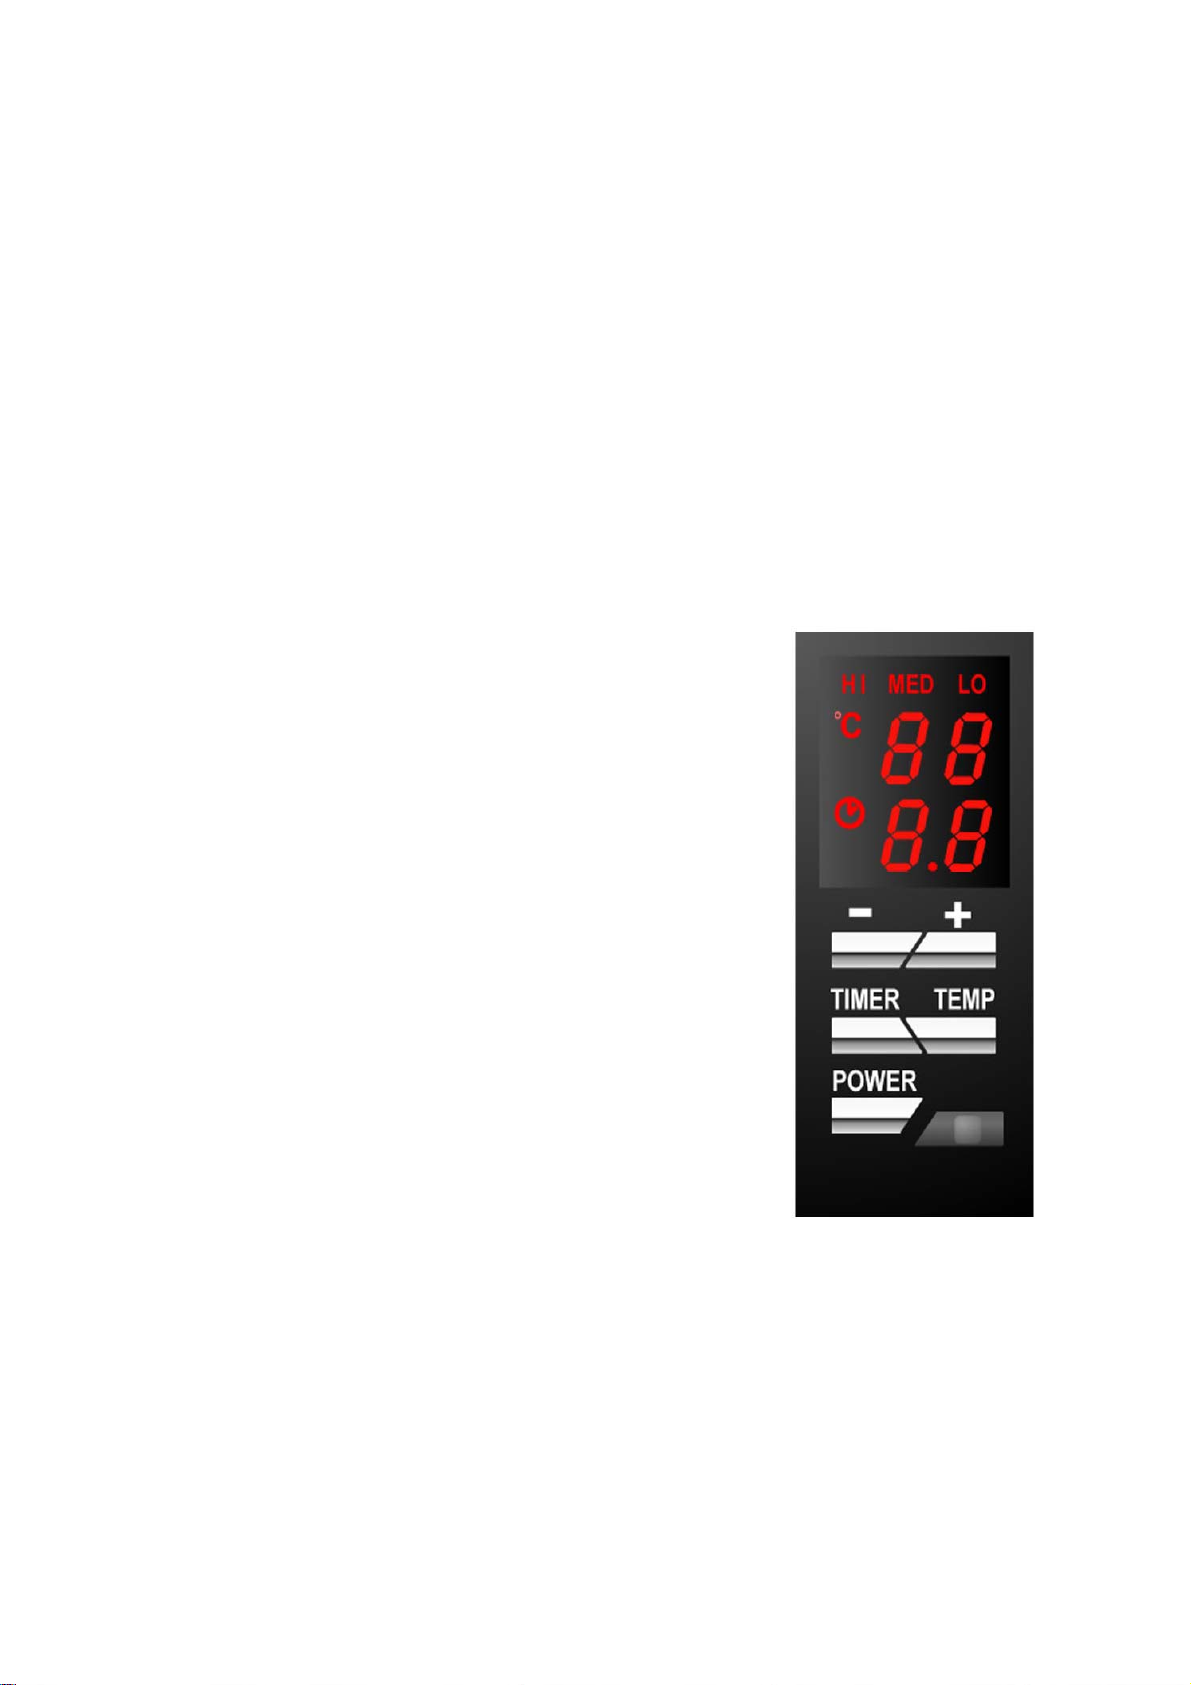
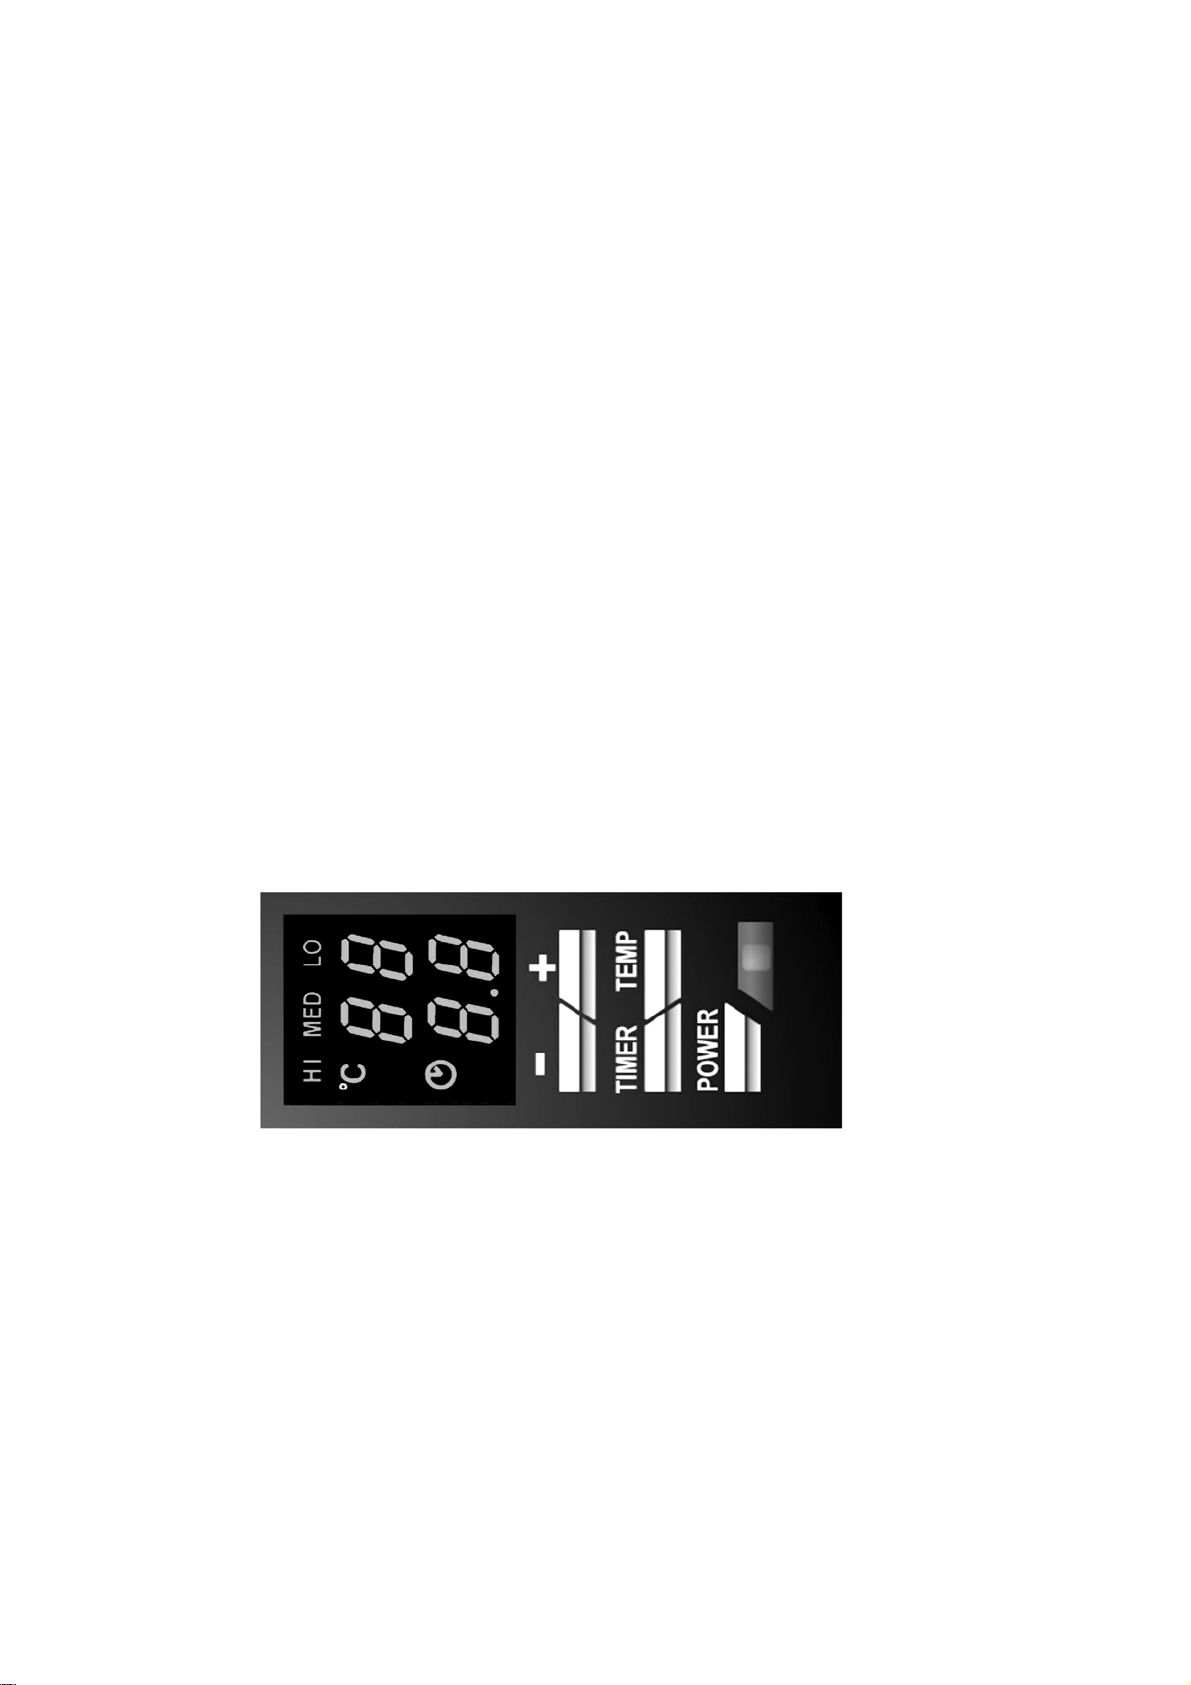
OPERATING INSTRUCTIONS
Plug into the wall socket and turn on with the main switch located on the left side of the heater.
Your heater is equipped with three heat settings.
LO 600 WATTS
MED 1200 WATTS
HI 1800 WATTS
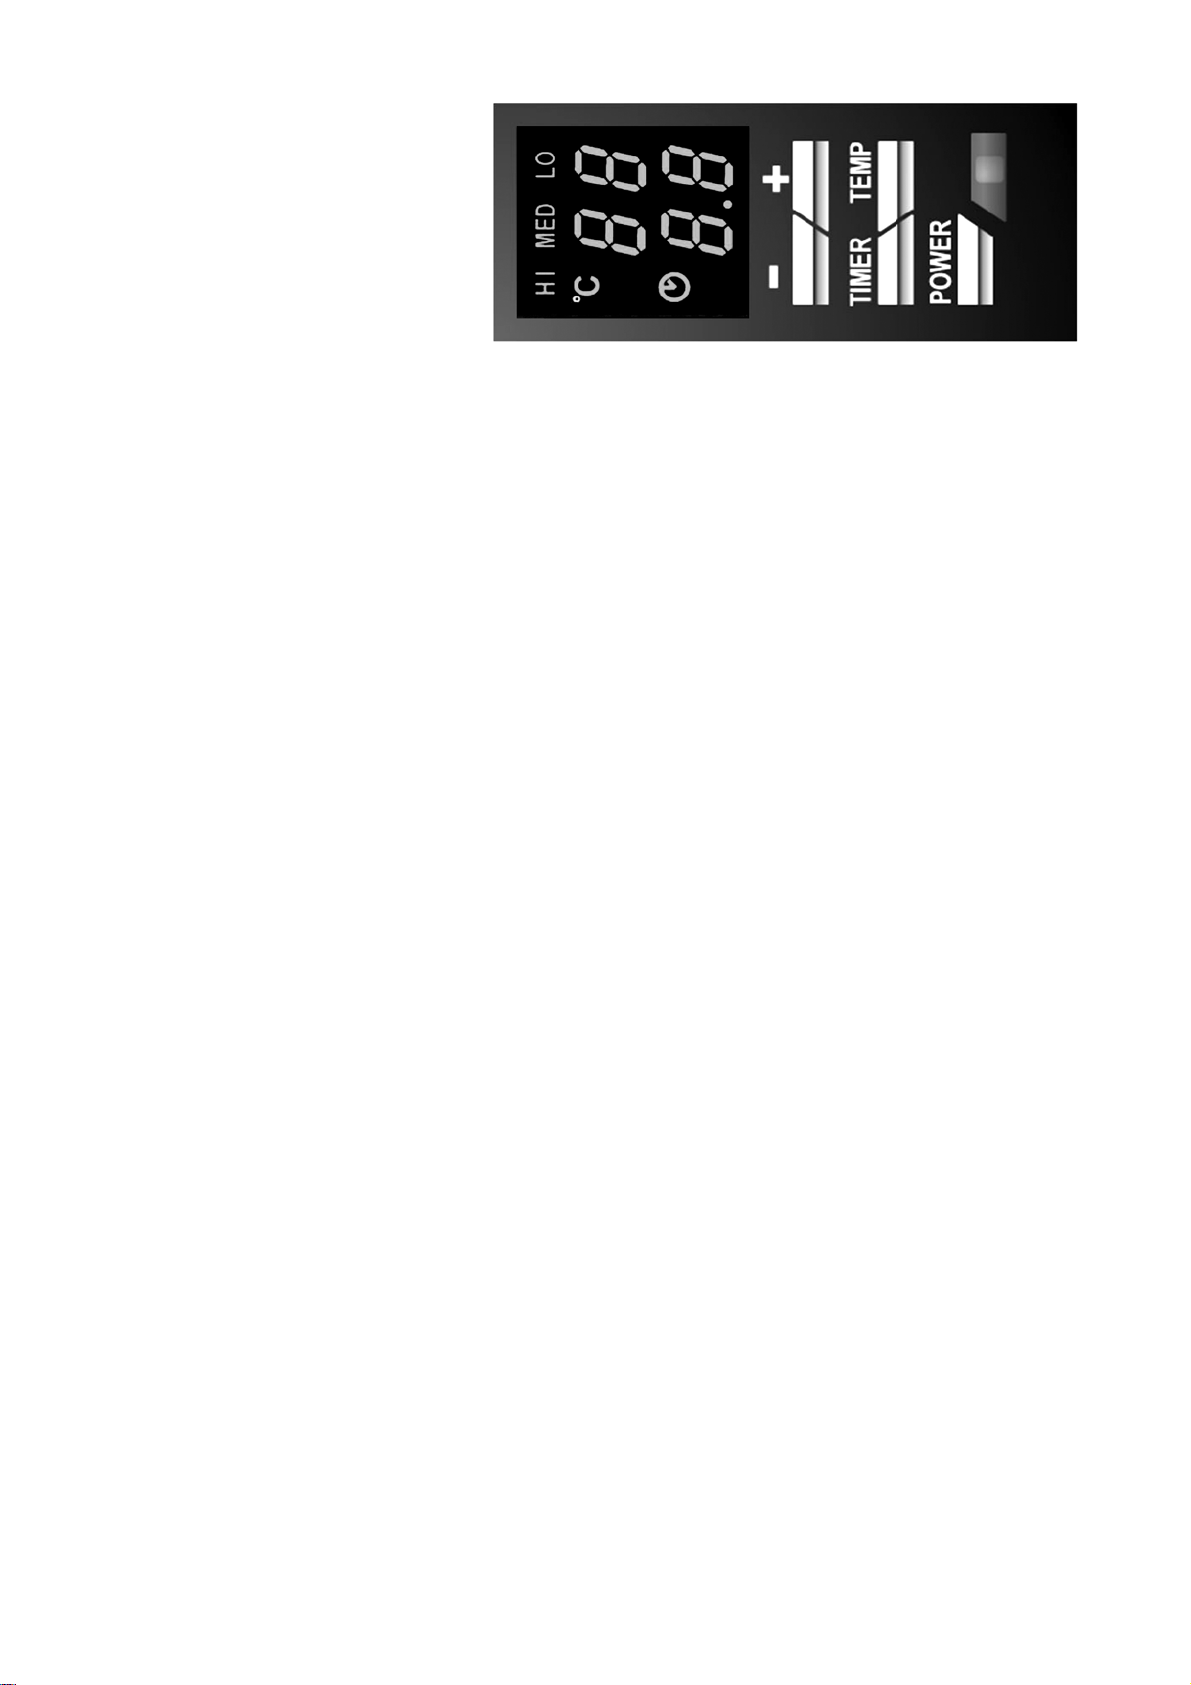
The working temperature needs to be set every time you switch on, (see “Power and temperature
selection”.). The default temperature is 18°C.
The “POWER” button works on a loop sequence “WAIT-HI-MED-LOW”, in the wait mode, the
display shows the room temperature and the pre-set on / off time ( if set ).
Set the heater to the “HI” setting, The heater will repeat a work cycle of 1800 Watts for roughly 8
minutes and 1200 watts for roughly 20minutes, switching automatically until the temperature
pre-set is reached. The display will flash the room temperature five times when this is achieved.
NOTE:
The heater will work for 2 minutes every time it is switched on,
irrespective of room temperature, after 2 minutes, If the room
temperature is higher than the pre-set working temperature, the
heater will turn off and the display will flash the room temperature 5
times.
The “MED” and “LO” settings are 1200 and 600 Watts constant heat
respectively.
Once the room is Comfortable, select a slightly lower temperature
setting to reduce electricity used and to prevent the room from
becoming too warm.
Press the temperature or timer button to set that option, then:
Change / set the values by pressing the “+” and “- “ buttons.
Power Selection
The heater gives out a beep when turned on, and the display shows
the room temperature. Press the “Power” button, the heater gives out another beep, each press of
the power button will cycle through the power settings “HI-MED-LOW” and the related indicator will
light accordingly.
Power can be preset under any operating status.
Temperature Setting
Press the “TEMP” button, the display will flash the current temperature setting (5ćWR35ć,
whilst the display is flashing, use the “+” and “-“ buttons to set the pre-set ( cut off )
temperature.
The display will return to the room temperature after a few seconds.
3
Timer functions
In “WAIT” mode, press the “TIMER” button and the hour digit opposite the clock symbol will
flash.
Use the “+” and “-“ buttons to set the ON time (E.g. 2), then wait for the display to stop flashing.
Press the “POWER” button, the heater turns ON.
Use the “+” and “-“ buttons to set the OFF time (E.g. 4), then wait for the display to stop flashing.
Press the “POWER” button repeatedly until the heater is in “WAIT” mode.
The timer is now set to come on in 2 Hours time and run for 4 Hours then turn OFF.
In “wait” mode, the time preset is the preset “ON” time, the appliance will operate at 1800W (HI)
mode, when the heater is “on” the time preset is the “OFF” time.
You can cancel the preset times by setting the preset time to “0” (operating mode keeps the
same as before); OR below to operations (operating mode changed):
4. To completely shut the appliance off, MECHANICAL POWER SWITCH on the left side of the
heater must placed in the OFF position.
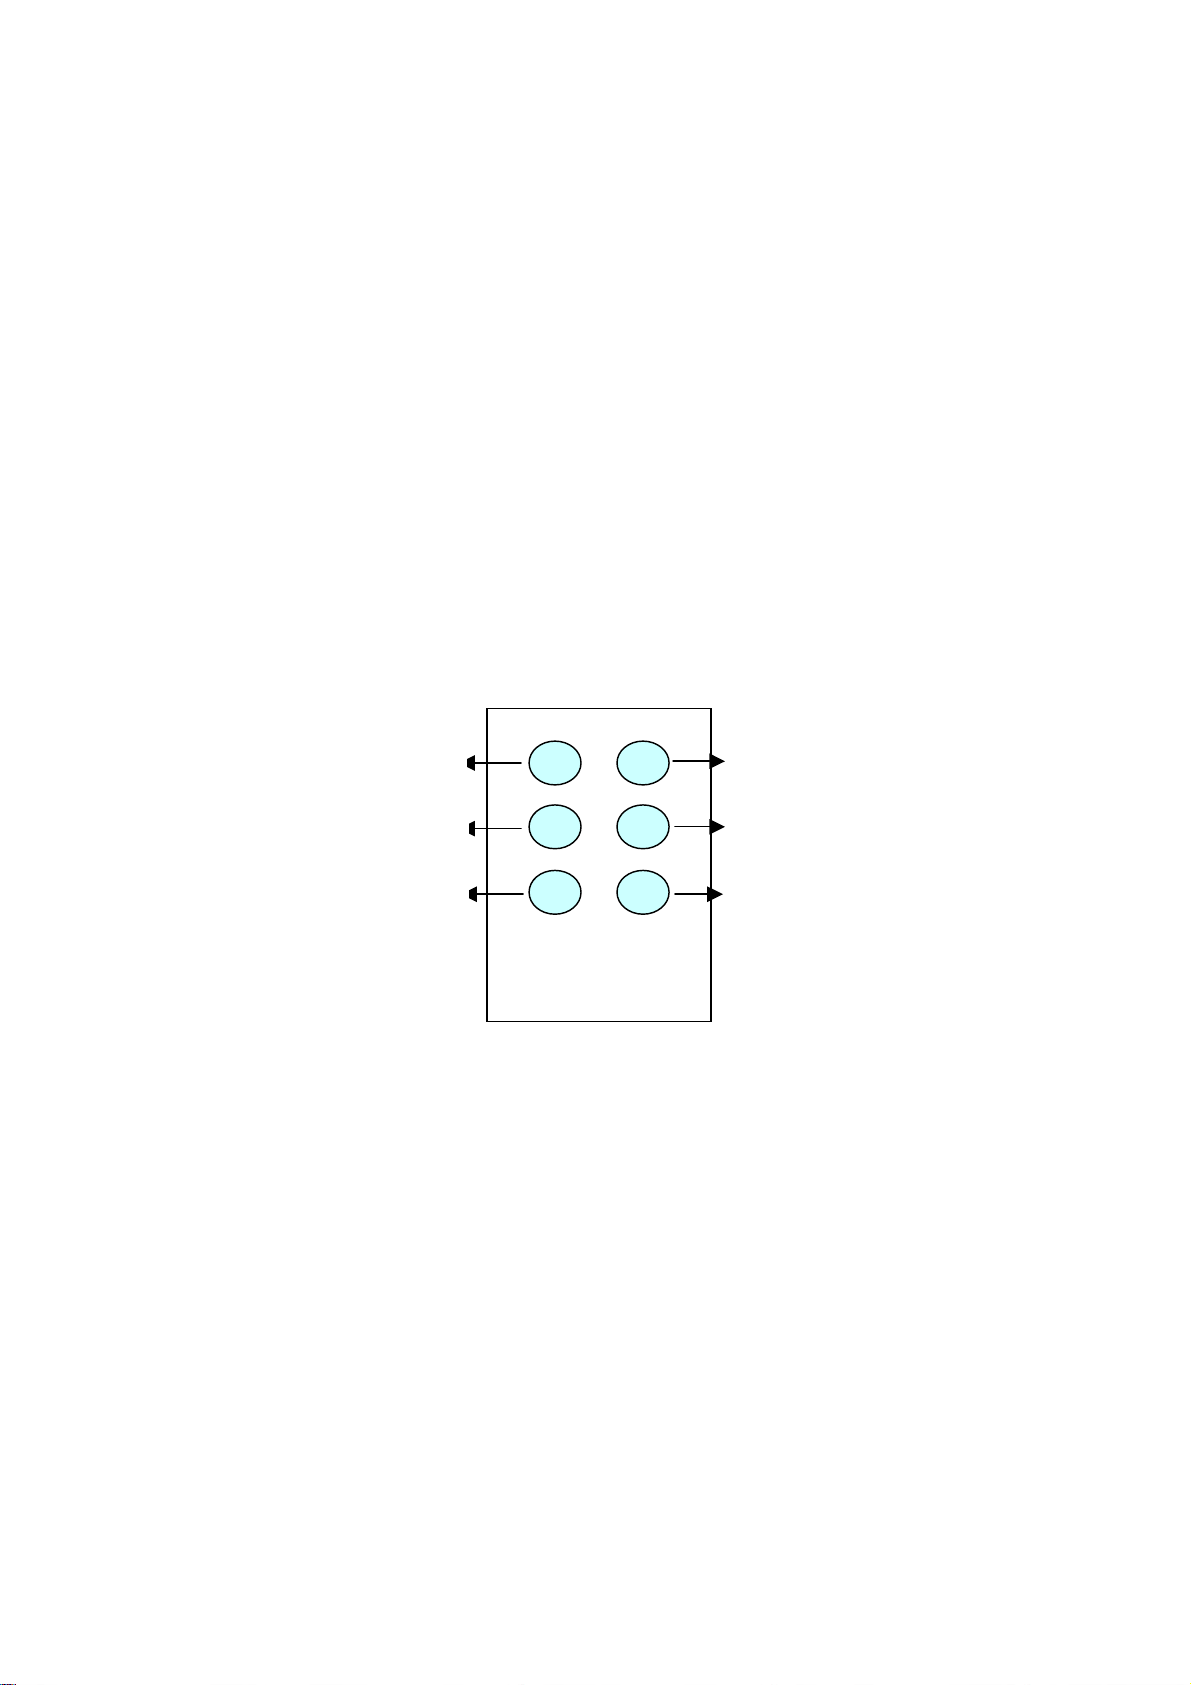
Remote control:
ˉ
TIMER
OFF
ˇ
TEMP
POWER
The remote control allows you to carry out all the operations listed above using the same buttons on
the remote as on the heater.
Note:
The “POWER” key of remote control only turns the heater OFF ( there is no ON function.)
The maximum distance from the remote to the heater should not be more than 5m and the angle
should be less than 45ÿ
SAFETY DEVICE:
Your heater is fitted with a safety device that Shuts off the heater by electronic control in the event
of overheating or malfunction. If the room temperature higher than 50ć, the heater will stop heating
and the heater will shut down after the display shows “FF” and flash 75s.
4
Note:
During the display is showing in 75s, the heater can not be turned on, and no buttons work.
If overheating or a malfunction continues, return the heater to a qualified Service Agent for
examination.
The most common cause of overheating is deposits of dust or fluff entering the heater, Ensure
these deposits are removed regularly by unplugging the unit and clean the air vents and front grille
with a vacuum cleaner.
MAINTENANCE
1. Always disconnect the cord from the electrical outlet when cleaning your heater.
2. Light accumulated dust may be removed from the heater with a soft cloth or vacuum cleaner.
Interior dust can often be removed by using a vacuum cleaner in its blower mode with a crevice tool
attachment.
3. Wipe the exterior surfaces of the heater occasionally with a cloth moistened (not wet) with a
solution of mild detergent and water. Dry the case thoroughly with a soft dry cloth before operating
the heater.
Wall Mounting
There is a wall mounting kit supplied with this heater, to mount it mark two points on the wall at the
required height exactly 415mm apart. Make sure the two points are level. These points represent
the center position of the large brackets. Using the screws provided attach the brackets to the wall
and hang the heater on the two brackets.
[-------------------------------------- 415mm -------------------------------------------]
. . Brackets . .
Then hook the two small brackets into the slots on the rear bottom of the heater and mark the screw
position through the hole in the bracket, repeat for the other side, again using the screws supplied
attach the brackets to the wall.
CAUTION: Do not allow water to run into the interior of the heater as this could create a fire or
electric shock hazard.
If service is required, send your heater to the nearest authorised service depot.
Store the heater in a clean dry place when not in use.
REMEMBER - portable electric heaters are designed for spot heating, or as a supplementary heat
source. They are not intended to be main sources of heat during the normal heating season.
Note: There may be trace of odor when unit is first operated. Do not be alarmed. This indicates that
deposits fell on the heating element during the manufacturing process. they will quickly evaporate
and should not re-occur.
5
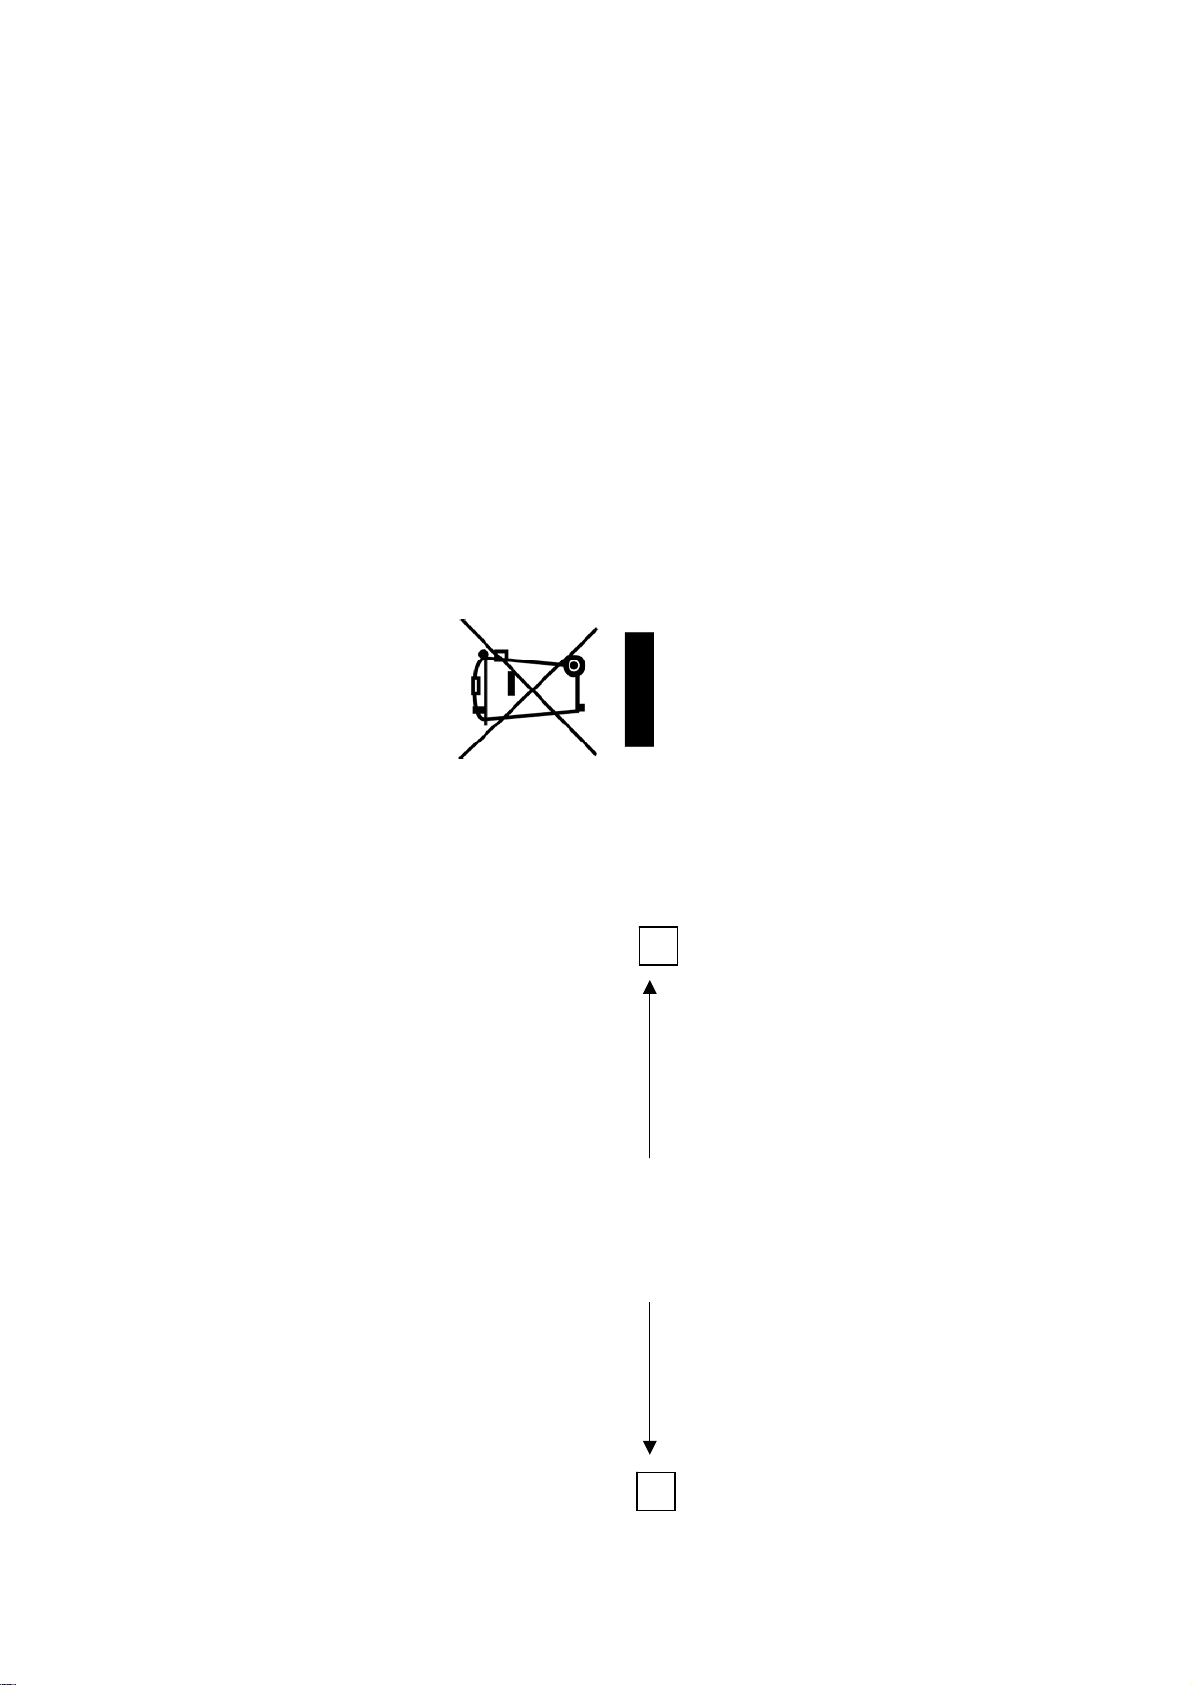
Disposal
Waste electrical and electronic products must not be disposed of with household waste.
Please refer to the retailer from whom you purchased this item for disposal instructions.
Batteries and packaging materials should be recycled using local facilities.
If something doesn't seem to work
If there is something about your appliance which you do not understand and you live in the UK you can
phone our help line during normal office hours on: 0113 2793520
Calls are charged at standard rates.
We apologise for any inconvenience caused by minor inconsistencies in these instructions,
which may occur as a result of product improvement and development.
6

RADIATEUR MICA
MANUEL D’INSTRUCTIONS
Lisez attentivement ces instructions avant toute utilisation et
conservez-les pour toute future référence.
PRECAUTIONS IMPORTANTES DE SECURITE
Lors de l’utilisation d’appareils électriques, les précautions de
sécurité suivantes doivent être prises en compte:
1. Lisez toutes les instructions avant l’utilisation afin de vous
familiariser avec les boutons de contrôle, les fonctions de
sécurité et le fonctionnement de votre radiateur.
2. Pour réduire les risques de blessures dues aux chocs
électriques
2.1 Le danger de choc électrique existe même lorsque l’appareil
est éteint. Débranchez-le TOUJOURS lorsqu’il n’est pas utilisé.
2.2 Un radiateur ne doit pas être utilisé s’il était immergé ou en
contact avec de l’eau. De même, ne branchez pas votre radiateur
à l’électricité si ses surfaces sont humides.
2.3 N’insérez aucun corps étranger à travers les grilles d’arrivée
et de sortie.
2.4 Ne faîtes pas fonctionner le radiateur avec un câble
d’alimentation endommagé ou si l’appareil est tombé ou s’il est
abîmé d’une manière ou d’une autre. Ramenez le radiateur à un
centre de réparations autorisé pour le faire réparer.
2.5 Une surveillance attentive est nécessaire lorsque la machine
est utilisée près ou par des enfants.
2.6 Déconnectez toujours le câble de la source d’alimentation et
laissez l’appareil refroidir avant de le nettoyer.
2.7 Débranchez le radiateur en tenant la prise et en la retirant de
la prise murale électrique, ne tirez pas sur le câble.
2.8 Lorsque vous rangez votre radiateur, stockez-le dans un lieu
frais et sec.
3. Pour réduire les risques de blessures ou de dommages
1
1 2
Modèle: R

matériels dus à la chaleur, aux incendies ou aux explosions :
3.1 Positionnez votre radiateur éloigné des meubles ou de tout
matériau suspendu. Ne placez pas de tissus ou serviettes etc.
au-dessus du radiateur pour les faire sécher.
3.2 Gardez la grille arrière éloignée des murs ou des rideaux
pour ne pas bloquer l’arrivée d’air.
3.3 Si le câble d’alimentation est endommagé, il doit être
remplacé par le fabricant, par son représentant ou par une
personne de qualification similaire afin d’éviter tout danger.
N’utilisez pas de câble d’extension car des personnes pourraient
trébucher dessus et causer un danger.
3.4 N’utilisez pas le radiateur en présence de vapeur explosive
ou inflammable.
3.5 Ne faîtes pas fonctionner le radiateur durant de longues
périodes s’il ne peut pas être surveillé (par exemple – plusieurs
semaines dans une maison de campagne).
3.6 Utilisez le radiateur uniquement sur des surfaces plates et
sèches.
3.7 Des connexions lâches entre la prise du radiateur et la prise
murale électrique peuvent causer une surchauffe de la prise.
Remplacez immédiatement toute prise électrique usée.
3.8 N’utilisez pas cet appareil à l’extérieur.
3.9 Ne branchez pas cet appareil à la même prise ou au même
circuit électrique que d’autres appareils pour ne pas que le circuit
ne soit trop surchargé, ce qui pourrait causer un incendie.
N’utilisez pas de prise électrique amovible.
3.10 Installez le câble de façon à ce qu’il ne soit pas piétiné par
des personnes ou écrasé par des meubles.
Avertissement:
Afin d’éviter toute surchauffe, ne couvrez pas le radiateur.
N’utilisez pas ce radiateur près d’une baignoire, d’une
douche ou d’une piscine.
Le radiateur ne doit pas être placé juste au dessous d’une
prise murale électrique.
Ce produit est conçu uniquement pour une utilisation
domestique en intérieur. Toute autre utilisation pourrait
annuler la garantie.
INSTRUCTIONS DE FONCTIONNEMENT
Branchez le câble de l’appareil à une prise d’alimentation et
mettez l’interrupteur situé sur le côté gauche du radiateur en
position de marche.
Votre radiateur offre trois réglages de chaleur.
LO (FAIBLE) 600 WATTS
MED (MOYEN) 1200 WATTS
HI (FORT) 1800 WATTS
La température de fonctionnement doit être réglée à chaque fois
que vous allumez le radiateur (voir “Sélection de puissance et de
température”.). La température par défaut est de 18°C.
Le bouton “POWER” (« PUISSANCE ») fait défiler les différents
réglages possibles “WAIT-HI-MED-LOW” (« EN
ATTENTE-FORT-MOYEN-FAIBLE »), en mode d’attente,
l’affichage indique la température ambiante et l’heure d’activation
/ de désactivation (si ces réglages ont été effectués).
Mettez le radiateur en position “HI” (« FORT »), le radiateur
2
3 4
répètera un cycle de fonctionnement à 1800 Watts durant
environ 8 minutes puis à 1200 watts durant environ 20minutes,
en alternant automatiquement ces puissances jusqu’à ce que la
température désirée soit atteinte. L’affichage fera clignoter cinq
fois la température ambiante une fois que l’opération est réalisée.
3
Le radiateur fonctionnera durant 2
minutes à chaque fois qu’il est mis en
marche, sans prendre en compte la
température ambiante puis, après 2
minutes, si la température ambiante
est plus élevée que la température
désirée, le radiateur s’éteindra et
l’affichage fera clignoter cinq fois la
température ambiante.
Les réglages “MED” (« MOYEN ») et
“LO” (« FAIBLE ») activent
respectivement les puissances de
1200 et 600 Watts de chaleur
constante.
Une fois que la température ambiante
est confortable, sélectionnez un
réglage légèrement inférieur pour
réduire l’électricité utilisée et pour éviter que la pièce ne devienne
trop chaude.
Appuyez sur le bouton de température ou du minuteur pour
régler cette option, puis :
Changez / réglez les valeurs en appuyant sur les boutons “+” et
“- “.
Sélection de puissance
Le radiateur fait entendre un bip sonore lorsqu’il est mis en
marche et l’affichage indique la température ambiante. Appuyez
sur le bouton “Power” (« Puissance ») et le radiateur émettra un
nouveau bip sonore, chaque pression sur le bouton fera défiler
les différents réglages de puissance entre “HI-MED-LOW”
(« FORT-MOYEN-FAIBLE »), et l’indicateur correspondant
s’allumera. La puissance peut être pré réglée sous n’importe quel
mode.
Réglage de température
Appuyez sur le bouton “TEMP”, l’affichage fera clignoter le
réglage de température en cours (5ćà 35ć). Alors que
l’affichage clignote, utilisez les boutons “+” et “-“ pour régler la
température (coupure).
L’affichage retournera à la température ambiante après quelques
secondes.
Fonctions du minuteur
En mode “WAIT” (« EN ATTENTE »), appuyez sur le bouton
“TIMER” (« MINUTEUR ») et les chiffres des heures face au
symbole de l’horloge clignoteront.
Utilisez les boutons “+” et “-“ pour régler l’heure de MISE EN
MARCHE (par exemple 2), puis attendez que l’affichage
s’arrête de clignoter.
Appuyez sur le bouton “POWER” (« PUISSANCE »), le
radiateur sera ACTIVE.
Utilisez les boutons “+” et “-“ pour régler l’heure d’ARRET (par
exemple 4), puis attendez que l’affichage s’arrête de clignoter.
5 6

Appuyez sur le bouton “POWER” (« PUISSANCE ») de
manière répétée jusqu’à ce que le radiateur soit en mode
“WAIT” (« EN ATTENTE »).
Le minuteur est maintenant réglé pour s’activer dans 2 heures
et pour fonctionner durant 4 heures puis s’arrêter.
En mode “wait” (« d’attente »), l’affichage indique l’heure
“ON” (« D’ACTIVATION »), l’appareil fonctionnera en mode
1800W (HI), lorsque le radiateur est “on” (« activé »),
l’affichage indique l’heure “OFF” (« DE
DESACTIVATION »), .
Vous pouvez annuler les réglages du minuteur en mettant
l’heure à “0” (le mode de fonctionnement restera le même que
précédemment) ; OU en réglant autrement votre radiateur
(changement du mode de fonctionnement) comme
ci-dessous :
4. Pour arrêter complètement le radiateur, l’INTERRUPTEUR
MECANIQUE situé sur le côté gauche du radiateur doit être mis
en position OFF (ARRET).
Télécommande :
4
La télécommande vous permet d’effectuer toutes les opérations
expliquées ci-dessus en utilisant les mêmes boutons que sur le
radiateur.
Remarque:
La touche “POWER” (“ALIMENTATION”) de la télécommande
peut mettre en marche et arrêter le radiateur et la touche “MODE”
contrôle les trois réglages “HI’,”MED”,”LO” (« FORT »,
« MOYEN », « FAIBLE »).
La distance maximum entre la télécommande et le radiateur ne
doit pas être de plus de 5 mètres et l’angle d’opération doit
être à moins de 45°.
MECANISME DE SECURITE :
Votre radiateur est équipé d’un mécanisme de sécurité qui éteint
le radiateur par contrôle électronique dans le cas d’une
surchauffe ou d’un dysfonctionnement. Si la température
ambiante est supérieure à 50°, le radiateur s’arrêtera de chauffer
et il s’éteindra après que l’affichage ait indiqué “FF” et clignoté 75
secondes.
Remarque:
Lors des 75 secondes de clignotement de l’affichage, le radiateur
ne peut pas être allumé et aucun bouton ne peut être activé.
Si la surchauffe ou le dysfonctionnement continue, emmenez le
radiateur à un technicien qualifié pour le faire examiner.
La cause la plus commune de surchauffe est le dépôt de
poussières ou de moutons entré dans le radiateur. Assurez-vous
d’enlever régulièrement ces dépôts en débranchant le radiateur
et en nettoyant les fentes d’aération et la grille avant avec un
aspirateur.
ˇ
ˉ
TEMP
MINUTEUR
MODE
ALIMENTATION
7 8
ENTRETIEN
1. Déconnectez toujours le câble de la prise murale électrique
avant de nettoyer votre radiateur.
5
2. Quelques poussières légères peuvent être enlevées du
radiateur avec un chiffon doux ou à l’aide d’un aspirateur en
mode soufflant avec un accessoire fendu.
3. Essuyez occasionnellement les surfaces externes du radiateur
avec un chiffon humidifié (non mouillé) d’une solution de
détergent doux et d’eau. Séchez ensuite le boîtier avec un chiffon
sec avant de faire fonctionner le radiateur.
ATTENTION: Ne laissez pas de l’eau couler à l’intérieur du
radiateur car cela pourrait créer un incendie ou un choc
électrique.
Si une réparation est nécessaire, envoyez votre radiateur au
centre autorisé de réparations le plus proche.
Rangez le radiateur dans un lieu propre et sec lorsqu’il n’est pas
utilisé.
SOUVENEZ-VOUS – que les radiateurs électriques portables
sont conçus pour chauffer une pièce ou utilisé comme source
supplémentaire de chaleur. Ils ne sont pas destinés à être utilisés
comme sources principales de chaleur durant l’hiver.
Remarque: Le radiateur peut émettre une légère odeur lorsqu’il
est utilisé la première fois. Ne vous alarmez pas. Cela indique
que des dépôts sont tombés sur l’élément chauffant durant la
fabrication. Cette odeur s’évaporera rapidement et ne se
reproduira plus.
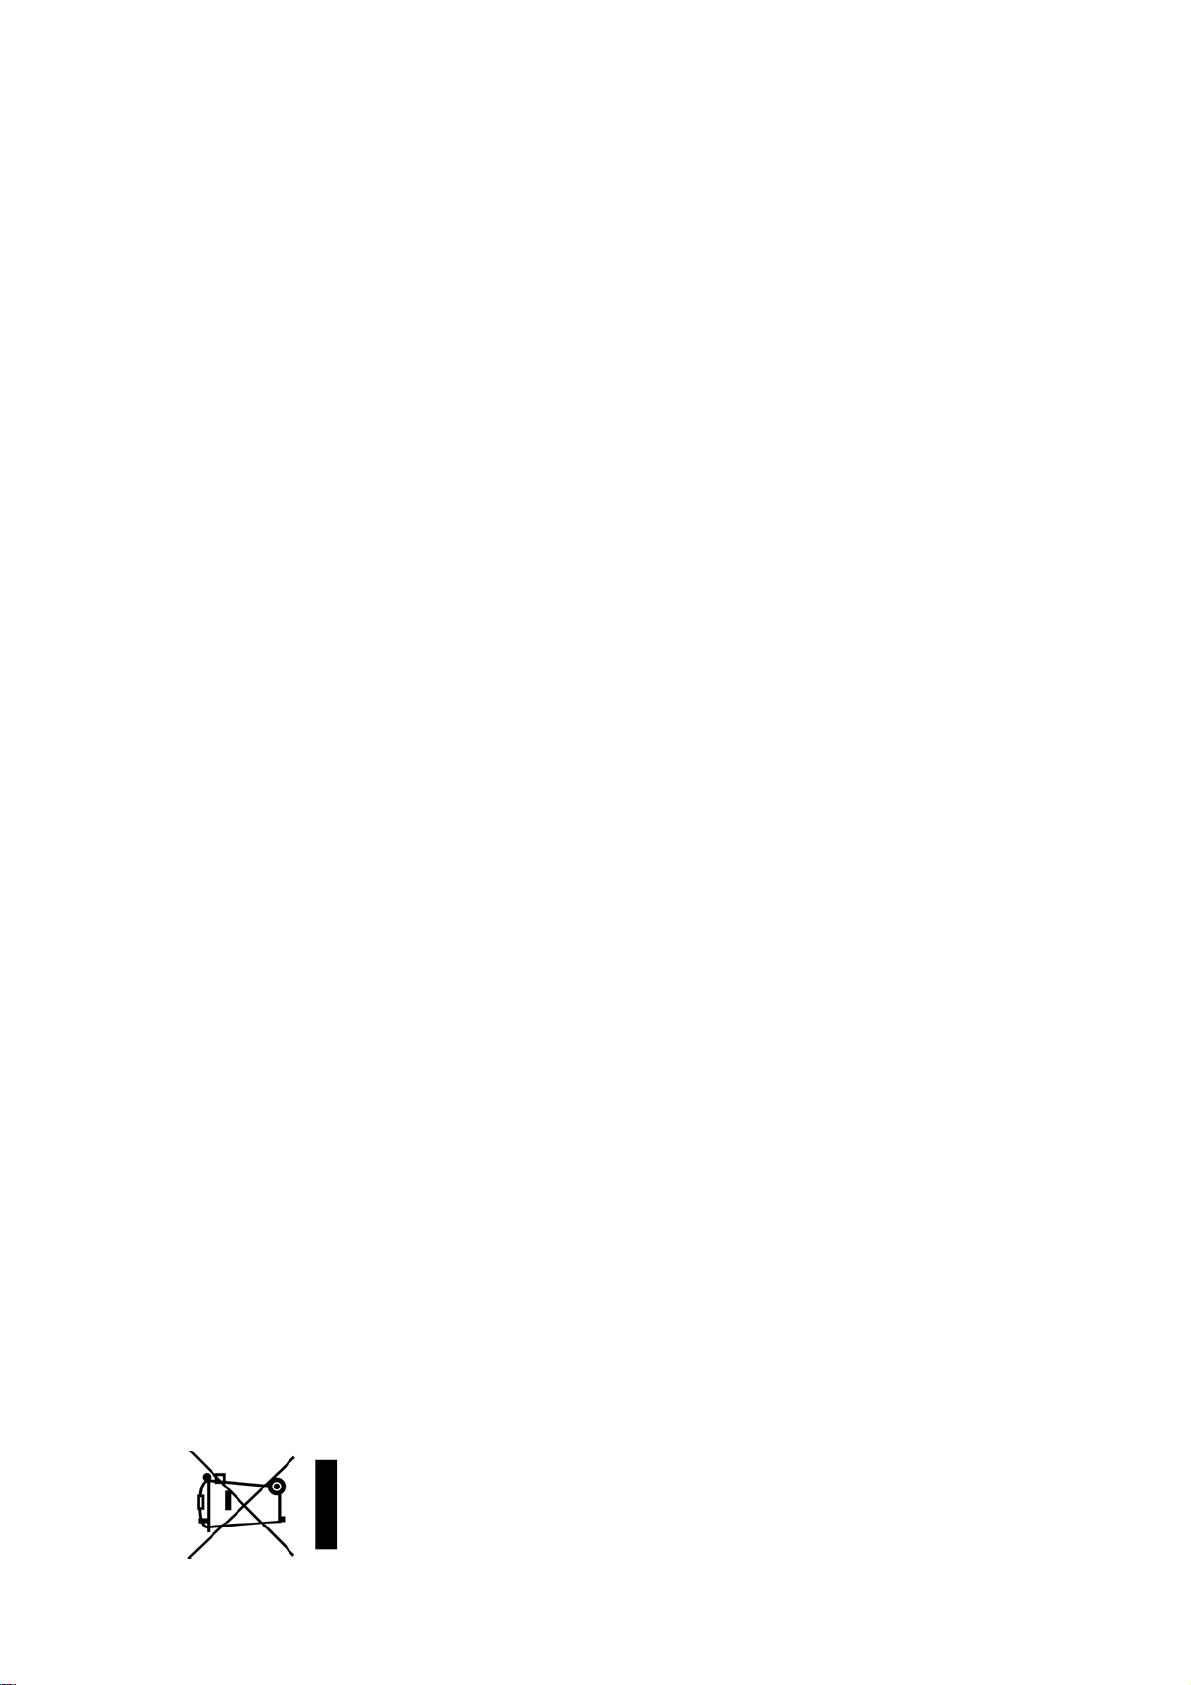
Traitement des déchets
Les produits électriques et électroniques
usagés ne doivent pas être jetés avec les
ordures ménagères. Renseignez-vous
auprès du revendeur où vous avez acheté ce
produit pour obtenir la marche à suivre en
matière de recyclage.
Les piles et les matériaux d’emballage doivent être recyclés en
utilisant les aménagements locaux.
Si un problème se produit dans le fonctionnement de votre
produit et que vous vivez au Royaume-Uni, vous pouvez appeler
notre ligne d’assistance durant les horaires normaux de bureau
au: 0113 2793520
Les appels sont facturés au tarif standard.
Nous nous excusons pour tout inconvénient causé par des
incohérences mineures dans ces instructions, pouvant se
produire dû à l’amélioration et au développement du produit.
9 10
Montage mural
Un kit de montage mural est fourni avec ce radiateur. Pour le
monter au mur, marquez deux point sur le mur à la hauteur désirée
écartés de 415mm exactement. Assurez-vous que les deux points
soient horizontaux. Utilisez les vis fournies pour fixer les attaches
au mur et accrocher le radiateur sur les deux attaches.
[-------------------------------------- 415mm -------------------------------------------]
. . Attaches . .
Puis fixez les deux petites attaches dans les fentes à l’arrière du
radiateur et marquez la position des vis à travers le trou de
l’attache. Répétez la procédure pour l’autre côté, en utilisant de
nouveau les vis fournies et fixez les attaches au mur.

MICA KACHEL
HANDLEIDING
R Lees deze instructies aandachtig voor het gebruik en bewaar ze om
in de toekomst na te kunnen slaan.
1
BELANGRIJKE VEILIGHEIDSAANWIJZINGEN
Wanneer een elektrisch apparaat gebruikt wordt, dienen altijd de minimale
veiligheidsvoorschriften nageleefd te worden, waaronder de volgende:
1. Om zeker te zijn van bekendheid met alle bedieningselementen,
veiligheidseigenschappen en werking van de kachel – lees alle instructies voor
gebruik goed door.
2. Om het risico op een verwonding door een elektrische schok te verminderen
2.1 Gevaar van een schok bestaat altijd, ook wanneer het apparaat is uitgeschakeld.
Ontkoppel ALTIJD het apparaat indien het niet gebruikt wordt.
2.2 Een kachel mag nooit gebruikt worden in situaties waarin het ondergedompeld of
in contact kan komen met water. Tevens mag de kachel niet ingeschakeld worden als
het oppervlak ervan vochtig is.
2.3 Stop geen vreemde voorwerpen door de inlaat of ontladingsribben.
2.4 Gebruik de kachel niet als het netsnoer beschadigd is, of als het gevallen is, of op
enige wijze beschadigd is. In dat geval brengt u het apparaat terug naar een
geautoriseerd servicepunt.
2.5 Streng toezicht is vereist wanneer dit apparaat door of nabij kinderen wordt
gebruikt.
2.6 Haal de stekker uit het stopcontact en laat het apparaat afkoelen alvorens het
schoon te maken.
2.7 Ontkoppel de kachel door de stekker vast te pakken en uit het stopcontact te
trekken, trek nooit aan het snoer.
2.8 Als u de kachel ergens opslaat, doe dat dan in een koele, droge ruimte.
3. Om het gevaar van een verwonding of schade aan eigendommen ten gevolge van
warmte, vuur of explosie:
3.1 Plaats de kachel weg van meubels of loshangende materialen. Leg geen kleding of
handdoeken, etc. op de kachel om deze te drogen.
3.2 Houd de achterkant weg van muren of gordijnen om zo de luchtinlaat niet te
blokkeren.
3.3 Als het stroomsnoer beschadigd is, dient het vervangen te worden door de
1 2
Model:
fabrikant of diens service agent, of een gelijkwaardig gekwalificeerd persoon om
gevaar te voorkomen. Gebruik geen verlengsnoer omdat hierover gestruikeld kan
worden en het gevaarlijk kan zijn.
3.4 Gebruik het apparaat niet in de buurt van explosieve of ontvlambare dampen.
3.5 Zet het apparaat niet aan op plekken waar de kachel voor langere tijd onbeheerd
achterblijft. (Bijvoorbeeld enkele weken in een onbewoond zomerhuisje).
3.6 Gebruik de kachel alleen op een vlakke, droge ondergrond.
3.7 Losse verbindingen tussen de stekker van de kachel en het stopcontact kunnen
ertoe leiden dat de stekker oververhit raakt. Vervang dergelijke versleten elektrische
aansluiting meteen.
3.8 Gebruik dit apparaat niet buitenshuis.
3.9 Gebruik het apparaat niet op hetzelfde stopcontact of elektrisch circuit met andere
elektrische apparaten om te voorkomen dat het circuit overbelast raakt, wat tot brand
kan leiden. Gebruik geen draagbare stekkerdoos.
3.10 Leg het snoer zo neer dat er niet op gelopen wordt of geraakt wordt door
meubels.
Waarschuwing:
Om oververhitting te voorkomen, leg niets over de kachel heen.
Gebruik deze kachel niet in de nabijheid van een bad, een douche of een
zwembad.
De kachel mag niet precies onder een stopcontact worden geplaatst.
Dit product is alleen bedoeld voor thuisgebruik binnenshuis. Elk ander gebruik
maakt dat de garantie kan komen te vervallen.
Bedieningsinstructies
Sluit het apparaat aan op het stopcontact en zet het aan met de hoofdschakelaar die
zich aan de linkerkant van de kachel bevindt. De kachel is uitgerust met drie
verwarmingsstanden.
LO 600 Watt
MED 1200 Watt
HI 1800 Watt
De bedrijfstemperatuur dient elke keer dat het apparaat wordt ingeschakeld te worden
ingesteld (zie: “Vermogen en temperatuurinstelling”). De standaardtemperatuur is
18°C.
De “Stroom” knop werkt in een zich herhalende volgorde: “WAIT-HI-MED-LOW”.
In de wachtstand geeft het scherm de kamertemperatuur en de vooraf ingestelde
aan/uit tijd (indien ingesteld).
Stel de kachel in op de “HI” stand. De kachel zal een
werkcyclus herhalen van 1800 Watt gedurende
ongeveer 8 minuten en 1200 Watt voor ongeveer 20
minuten, automatisch wisselend totdat de vooraf
ingestelde temperatuur wordt bereikt. Het scherm
toont de kamertemperatuur vijf keer knipperend
zodra dit is gebeurd.
Opmerking:
De kachel zal gedurende 2 minuten werken, elke keer
dat hij wordt ingeschakeld, onafhankelijk van de
kamertemperatuur. Na 2 minuten, als de
kamertemperatuur hoger is dan de vooraf ingestelde
bedrijfstemperatuur zal de kachel zichzelf
uitschakelen en het scherm toont de
kamertemperatuur vijf keer knipperend.
3 4

De “MED” en “LO” instellingen zijn respectievelijk 1200 en 600 Watt constant.
Wanneer de kamer comfortabel is, kies dan een iets lagere temperatuurinstelling om
het energieverbruik te beperken en te voorkomen dat de kamer te warm wordt.
Druk op de knop voor temperatuur of klok om die optie in te stellen, vervolgens:
verander of bevestig de waardes door de “+” en “-“ knoppen in te drukken.
Vermogen instelling
De kachel laat een piep horen als hij wordt ingeschakeld en het scherm toont de
kamertemperatuur. Druk op de “Power” knop, de kachel laat weer een piep horen.
Elke keer dat op de “Power” knop gedrukt wordt, verandert de instelling van het
vermogen via de cyclus “HI-MED-LOW” en de van toepassing zijnde indicator zal
oplichten. Het vermogen kan in elke bedrijfsstaat worden ingesteld.
3
Temperatuurinstelling
Druk op de “TEMP” knop, het scherm zal knipperend de huidige
temperatuurinstelling tonen (5°C tot 35°C).
Terwijl het scherm knippert, kunnen de “+” en “-“ knoppen gebruikt worden om de
vooraf ingestelde temperatuur (waarbij het apparaat afslaat) in te stellen.
Na een paar seconden zal het scherm de kamertemperatuur tonen.
Klok instellingen
In de “wacht” modus, druk op de “Timer” knop en het cijfer voor het uur tegenover
het kloksymbool zal knipperen.
Gebruik de “+” en “-“ knoppen om de AAN tijd in stellen (bijvoorbeeld 2), wacht
vervolgens tot het scherm stopt met knipperen.
Druk op de “Power” knop en het apparaat wordt ingeschakeld.
Gebruik de “+” en “-“ knoppen om de UIT tijd in te stellen (bijvoorbeeld 4), wacht
vervolgens tot het scherm stopt met knipperen.
Druk herhaaldelijk op de “Power” knop totdat de kachel in “Wait” modus staat.
De klok is nu ingesteld om over 2 uur aan te gaan en voor 4 uur te werken alvorens
UIT te schakelen.
In de “Wait” modus, is de vooraf ingestelde tijd de “AAN” tijd, het apparaat zal
werken op 1800W (HI) modus. Als de kachel “aan” is, dan is de ingestelde tijd de
“UIT” tijd.
De ingestelde tijden kunnen geannuleerd worden door de vooraf ingestelde tijd op “0”
te zetten (bedrijfswerking blijft hetzelfde als ervoor); OF onder werking
(werkingsmodus veranderd):
4. Om het apparaat geheel uit te schakelen dient de MECHANISCHE STROOM
SCHAKELAAR aan de linkerkant van de kachel in de UIT stand gezet te worden.
AFSTANDSBEDIENING:
Met de afstandsbediening kunnen dezelfde bewerkingen uitgevoerd worden als
hierboven angegeven, met behulp van dezelfde knoppen als op de kachel.
Opmerking:
De “POWER” toets op de afstandsbediening schakelt de verwarmer ON/OFF
(AAN/UIT), de “MODE” toets bestuurt de drie “HI”,”MED”,”LO” instellingen.
De maximale afstand van de afstandsbediening tot de kachel mag niet meer zijn dan
5m en de hoek moet minder dan 45 graden zijn.
ˇ
ˉ
TEMP
KLOK
MODUS
VOEDING
5 6
BEVEILIGING
De kachel is voorzien van een beveiliging die de kachel uitschakelt door middel van
een elektronische controle, in geval van oververhitting of storing. Als de
kamertemperatuur hoger is dan 50°C, zal de kachel stoppen met verwarmen en de
kachel zal zich uitschakelen nadat het scherm “FF” toont en 75s knippert.
Opmerking:
Terwijl het scherm 75s weergeeft, kan de kachel niet worden ingeschakeld en geen
van de knoppen werkt. Indien oververhitting of storing voortduurt, breng de kachel
dan terug naar een gekwalificeerde monteur voor inspectie.
De meest voorkomende reden van oververhitting zijn afzetting van stof en vuil dat de
kachel binnendringt. Zorg ervoor dat deze afzettingen regelmatig verwijderd worden
door het apparaat te ontkoppelen en de luchtsleuven en grille aan de voorkant schoon
te maken met een stofzuiger.
4
ONDERHOUD
1. Ontkoppel altijd het snoer van het stopcontact als de kachel wordt schoongemaakt.
2. Licht verzameld stof kan van de kachel verwijderd worden met een zachte doek of
een stofzuiger. Stof aan de binnenkant kan vaak verwijderd worden door een
stofzuiger in de blaasstand met een extra hulpstuk eraan bevestigd.
3. Wrijf de oppervlakten aan de buitenkant af en toe schoon met een vochtig (niet nat)
gemaakte doek met een oplossing van zacht schoonmaakmiddel en water.
WAARSCHUWING:
Laat geen water in de binnenkant van de kachel komen, omdat
dit een brand of risico op een elektrische schok kan veroorzaken.
Indien onderhoud nodig is, stuur de kachel dan op naar het dichtstbijzijnde
geautoriseerde servicecentrum.
Plaats de kachel in een schone, droge plaats indien deze niet in gebruik is.
7 8
[-------------------------------------- 415mm -------------------------------------------]
. . Bevestigingen . .
Haak vervolgens de twee kleine bevestigingen in de sleuven onderaan de achterzijde van
het verwarmingstoestel en markeer de schroefpositie doorheen de opening in de
bevestiging. Herhaal voor de andere zijde en gebruik nogmaals de meegeleverde
schroeven om de bevestigingen op de wand vast te maken.
Wandmontage
Wij hebben bij dit verwarmingstoestel een kit voor wandmontage meegeleverd. Markeer
twee punten op de gewenste hoogte op de wand, met precies 415 mm tussenbeide.
Controleer of de twee punten waterpas zijn. Deze punten staan voor de centrumpositie
van de grote bevestigingen. Gebruik de meegeleverde schroeven om de bevestigingen
op de wand vast te maken en hang het verwarmingstoestel op aan de twee bevestigingen.
ONTHOUD–
Draagbare elektrische kachels zijn bedoeld om een plek te verwarmen,
of als een aanvullende warmtebron. Ze zijn niet bedoeld om als voornaamste
warmtebron te dienen in tijden van normale verwarming.
Opmerking:
Er kan een kleine geur verspreid worden als het apparaat voor het eerst
wordt gebruikt. Wees niet ongerust. Dit geeft aan dat kleine restjes op het
verwarmingselement terecht zijn gekomen tijdens het fabricageproces. Ze zullen snel
verdampen en dit zal niet meer voorkomen.
5
9 10
VERWIJDERING
Elektronische afvalstoffen dienen niet weggegooid te worden met
het huisafval. Breng dit materiaal terug naar uw
electro-speciaalzaak voor een veilige verwerking, of indien dit niet
mogelijk is, naar het inname punt in uw gemeente.
Batterijen en verpakkingsmateriaal dienen gerecycled te worden
met behulp van lokale voorzieningen.
Indien iets niet lijkt te werken.
Indien er iets is met uw apparaat dat u niet begrijpt, en u woont in het V.K. kunt u
tijdens normale kantooruren onze helplijn bellen op 0113 2793520.
Gesprekken kosten het normale tarief.
Wij verontschuldigen ons voor enig ongemak dat veroorzaakt wordt door geringe
onsamenhangendheden in deze instructies, die zich voor kunnen doen als een gevolg
van productverbetering en ontwikkeling.
Table of contents
Other Proline Heater manuals

Popular Heater manuals by other brands

IRSAP
IRSAP The Radiator Company Ovali Fitting instructions

DeLonghi
DeLonghi DCH4530 instructions

Aerotech
Aerotech BT 400-46 Installation and operation maintenance

Fakir
Fakir WARMY user manual

Sunday Living
Sunday Living PTC-1500R user manual

Avenger
Avenger BLUE FLAME FDT1IR BLUE FLAME FDT2IR OWNER'S OPERATION AND INSTALLATION MANUAL


