manuals.online logo
Brands
  1. Home
  2. •
  3. Brands
  4. •
  5. Proline
  6. •
  7. Ventilation Hood
  8. •
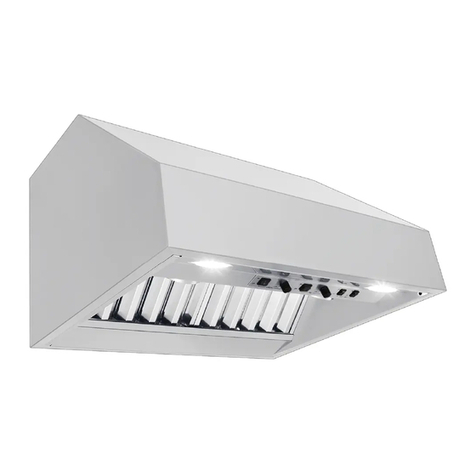
  9. Proline Island Pro User manual

Proline Island Pro User manual

Warranty Information
All of our range hoods have a three-year warranty. For the rst year, we cover
parts and labor. This doesn’t include installation.
For the second and third years of your warranty, we’ll cover parts only.
This warranty covers every part of your range hood besides the following:
• Range hood lters
• Range hood lights
• Any dents, dings, scratches, or other damage to the outside of the hood
If you’re outside of the warranty and your hood is not working properly, call
us at (877) 901-5530 and we’ll help you resolve your issue. We can typically
help x your Proline range hood at a reasonable price so you don’t have to
replace the whole thing.
Return Policy
If your range hood is damaged, we accept returns under certain conditions.
You can return the hood within 14 days after it was received. If you return the
hood inside this 14-day window, it doesn’t cost you anything unless the order
is undamaged freight. Then, you have to pay for shipping and a restocking
fee.
When you receive your hood, be sure to inspect it before the 14-day window
expires. Otherwise, you’ll be stuck with a damaged range hood.
After that 14 day period and up to 30 days after you receive your hood, you
can still return it. But you’ll be responsible for a 20% restocking fee as well as
the return shipping.
Do not install the hood if it is damaged. We don’t accept returns on
hoods that are already installed.
Outside of the 30-day period after you receive your hood, you can’t return it.
If you bought your hood for a renovation project that’s a few months out,
remember to inspect it within 14 days of delivery to make sure it’s in good
condition.
2179 300 W, South Salt Lake, UT 84115
Call (877) 901-5530
[email protected]
prolinerangehoods.com
Our Support team hours are: Mon-Fri 8:30 am - 5:00 pm MST
INSTALLATION GUIDE
Flush Range Hoods
Before the Installation
The installation of the 44" Flush Island Pro range hood is
meant for contractors or licensed installers only. Do not
install this island hood yourself. You risk costly damage to
the structural integrity of your home as well as injury.
1. Check the contents of your box.
They should include, depending on the specic model of your hood:
• Two 6” round outlet adapters
with dampers
• Two 6” round pipe
• Six 6x60mm expansion screw
• Eight 4x25mm self-tapping
screws
• Remote control
2. Inspect your range hood.
• Plug in and test controls, lights, and fan.
• Inspect for any damage caused during shipping.
• Within 14 days of receiving the hood, call us at (877) 901-5530 or email
[email protected] to report any damage.
NOTE: Do not install the hood if it’s damaged or you're unsatised
with it.
What You Will Need
• Pencil and tape measure
• Wire cutter or wire stripper
• Hammer
• Level
• Step ladder
• Wire nuts
• Pliers
• Saber saw or sawzall
• Screwdrivers
• 120 V/60 Hz outlet
• 15 or 20 amp breaker
• 2-wire cable with ground
• Properly grounded branch circuit
• Duct tape
• Wrench
• Keyhole saw
• Safety glasses
• Electric or battery-operated
drill and 1/8", 3/8" bits
• 10" round metal duct
• Metal snips
• Flashlight
Decide Where to Install Your Flush Island Hood
Build the Wood Frame
2179 300 W, South Salt Lake, UT 84115
(877) 901-5530
[email protected]
prolinerangehoods.com
Our support team hours are: Mon-Fri 8:30 am – 5:00 pm MST
Range Hood Lights
Before replacing your range hood lights, make sure that they are turned off
and the range hood is unplugged.
1. Open the front panels of the island range hood.
2. Carefully remove the LED lights from their connectors using a at tip
screwdriver or similar tool.
3. Carefully clip the new LED lights into place.
That wraps up your ush range hood installation!
Great work!
We are happy to help you with any questions or
concerns you may have. Please create a ticket, email us
at support@prolinerangehoods.com or call our support
line at (877) 901-5530 to talk to a live representative.
Safety Information
Ask a qualied professional such as a licensed general contractor to
install your range hood. Electrical wiring must be installed, insulated,
and grounded by a licensed electrician familiar with your local codes
and regulations. If you don’t have this background, do not install the
hood yourself. Poor installation or electrical work may result in an
injury.
• Range hoods can be heavy to mount, so always ask a friend for help.
• Wear protective gloves when handling the range hood and its lters. The
edges can be sharp.
• For residential use only. Do not install your hood in a restaurant or other
commercial environment. Our hoods do not abide by the rules and
regulations for commercial use.
• Do not use your hood to vent hazardous or explosive materials and
vapors. This is incredibly dangerous and may result in serious injury.
• When cleaning the unit, make sure the power is turned off.
• When troubleshooting or replacing the touch panel, circuit board, or
other electrical components, turn the range hood off.
• Check your local codes and regulations to see what type of ductwork is
required. Some codes require rigid metal ductwork. Do not use ex duct
for your range hood, as it can wear down quickly. Air may escape into
your walls or attic.
• Never vent your ducted hood into an attic, joists in your ceiling, or a
soft. Always vent the hood to the outside to keep grease, smoke, and
unwanted contaminants out of your home.
• Avoid electrical wiring when drilling a hole into your wall or ceiling for
ductwork.
• Clean or replace old ductwork with new rigid ductwork to prevent
potential grease res and increase the efciency of your range hood.
• Seal all joints in your duct system with aluminum tape to prevent air from
escaping in your walls or attic.
• Check your local regulations to determine if you need make-up air. When
a range hood vents air out of your home, that air has to be replaced. If
you operate a powerful range hood (600+ CFM) in a small kitchen, you
may need makeup air. We do not sell makeup air kits.
• Clean your range hood lters, grease trays, and the range hood every
few weeks. Heavy grease buildup shortens the life of your hood and it
may lead to a grease re.
• All Proline range hoods are ETL certied. They meet all industry
standards and regulations to ensure your safety.
• Use the high setting on your range hood to vent heavy smoke or heat in
case of emergency. Otherwise, use the lower settings to prolong the life
of your hood.
• While your range hood is on, do not leave your cooking area unattended.
• When cooking with oils, do not heat them past their smoke point. If oil
starts smoking, turn off the burner and discard any food that came into
contact with it. Do not use Extra Virgin Olive Oil in high heat, since it
starts to smoke at around 300º Fahrenheit.
In the event of a grease re:
• Smother the ames with a large lid, pan, or baking sheet. If the re is
small, smother it with baking soda or salt. For larger res, use a re
extinguisher.
• Turn off all burners.
• Do not touch a aming pan. This may result in serious burns.
• Keep all ammable materials away from the grease re. This may
include nail polish remover, our, rubbing alcohol, and hand sanitizer,
among other household items.
• Do not pour water on a grease re. Water will spread the oil around,
making the re more potent and dangerous. Wet towels and rags will
also spread the oil, so avoid using these as well.
• If you cannot contain the re, call the re department immediately.
The hood must be centered over the cooktop. Make sure there is enough
room in your ceiling for the 44” hood and its ductwork. For the best
performance, mount your hood between 36” and 72” above the cooktop. You
may need to cut the joists in your ceiling to make room for this frame.
Use joist-size lumber to build the range hood frame. At a minimum, the wood
frame must be able to support the weight of the island hood.
The wood frame must support its own weight plus the weight of the island
hood.
Install the Hood
1. Open the perimeter panels and remove the grease lters.
2. Remove the two interior panels by unscrewing eight screws
from each panel.
3. Install two 6" round outlet adapters to the hood with the
provided mounting screws.
4. Lift range hood into the ceiling opening. Ask a friend for help
so you don’t risk an injury. The range hood is quite heavy.
5. Use the lag bolts and washers to secure the wooden support
in place.
6. Adjust the support frame until the range hood is ush with
your ceiling.
7. Connect rigid ductwork to the range hood. Apply aluminum
duct tape to all joints to ensure the system is completely airtight.
8. Reinsert the two panels you removed in step two.
9. Reinstall the grease lters.
Operations
Power button
Press the power button to turn the hood on. When the hood is on, press the
button again to start a 15 minute timer. When the timer runs out, the hood will
turn off. Press the power button a third time to turn off the range hood.
When the range hood is off, press and hold the power button for three
seconds to adjust the clock. Use the plus and minus buttons to adjust the
hour.
Press the power button to cycle to the minutes and adjust them using the plus
and minus buttons.
Lights
Press the button with the lights icon to turn the lights on and off.
Speed Control Buttons
The plus button increases the range hood blower speed and the minus button
decreases the blower speed. These buttons adjust the clock after you press
and hold the power button for three seconds.
Remote Control Button
The small button near the digital display enables the remote control sensor.
The remote control receives an infrared signal from the sensor to operate the
range hood.

Other Proline Ventilation Hood manuals

Proline C5H9NO2 User manual

Proline

Proline C5H9NO2 User manual

Proline SHP60SS User manual

Proline

Proline SHP60SS User manual

Proline PLZI697 User manual

Proline

Proline PLZI697 User manual

Proline PLFW115 User manual

Proline

Proline PLFW115 User manual

Proline GF2X User manual

Proline

Proline GF2X User manual

Proline PROLINE INOX PHT60 User manual

Proline

Proline PROLINE INOX PHT60 User manual

Proline VHP62SS User manual

Proline

Proline VHP62SS User manual

Proline BOX602SS User manual

Proline

Proline BOX602SS User manual

Proline PLFW581 User manual

Proline

Proline PLFW581 User manual

Proline ProV Island User manual

Proline

Proline ProV Island User manual

Proline PLFI520 User manual

Proline

Proline PLFI520 User manual

Proline Hurricane PLJW User manual

Proline

Proline Hurricane PLJW User manual

Proline VHP60SS User manual

Proline

Proline VHP60SS User manual

Proline PLSI440 User manual

Proline

Proline PLSI440 User manual

Proline PROV Wall Hood User manual

Proline

Proline PROV Wall Hood User manual

Proline SHP65W-E User manual

Proline

Proline SHP65W-E User manual

Proline ProV30W-304 User manual

Proline

Proline ProV30W-304 User manual

Proline PLFIPROS User manual

Proline

Proline PLFIPROS User manual

Proline KECOM48 User manual

Proline

Proline KECOM48 User manual

Proline SHP65W2 User manual

Proline

Proline SHP65W2 User manual

Popular Ventilation Hood manuals by other brands

Gorenje OK-002/II BHP613E7X manual

Gorenje

Gorenje OK-002/II BHP613E7X manual

Jenn-Air 36inch AND 42inch (91.4 CM AND 106.7 CM) ISLAND CANOPY RANGE... Use & care guide

Jenn-Air

Jenn-Air 36inch AND 42inch (91.4 CM AND 106.7 CM) ISLAND CANOPY RANGE... Use & care guide

Fisher & Paykel HP60IDCHX2 installation instructions

Fisher & Paykel

Fisher & Paykel HP60IDCHX2 installation instructions

Broan QB130SS instructions

Broan

Broan QB130SS instructions

ELICA BLOOM-S Series Instruction on mounting and use

ELICA

ELICA BLOOM-S Series Instruction on mounting and use

THERMEx Caen GLOBE Installation, operating and maintenance instructions

THERMEx

THERMEx Caen GLOBE Installation, operating and maintenance instructions

GE Profile JVB37HBB Specification sheet

GE

GE Profile JVB37HBB Specification sheet

ROBLIN LINEAR 1200 MURALE Dimensions

ROBLIN

ROBLIN LINEAR 1200 MURALE Dimensions

Zanussi Professional Export 642014 Specifications

Zanussi

Zanussi Professional Export 642014 Specifications

Beko CWB 9930 X user manual

Beko

Beko CWB 9930 X user manual

FALMEC ISLAND LUX Mounting instruction

FALMEC

FALMEC ISLAND LUX Mounting instruction

JAGO FF Europe DUNSH02 Original instruction manual

JAGO

JAGO FF Europe DUNSH02 Original instruction manual

Broan ALLURE QS3 SERIES user manual

Broan

Broan ALLURE QS3 SERIES user manual

Beko CFB 6432 XGA user manual

Beko

Beko CFB 6432 XGA user manual

Raypak D-2 Power Vent Installation & operating instructions

Raypak

Raypak D-2 Power Vent Installation & operating instructions

Bertazzoni KT XT Series Installation and user manual

Bertazzoni

Bertazzoni KT XT Series Installation and user manual

Atag WS90 MG Instructions for use

Atag

Atag WS90 MG Instructions for use

Zephyr ZRC-7000 Use, care and installation guide

Zephyr

Zephyr ZRC-7000 Use, care and installation guide

manuals.online logo
manuals.online logoBrands
  • About & Mission
  • Contact us
  • Privacy Policy
  • Terms and Conditions

Copyright 2025 Manuals.Online. All Rights Reserved.