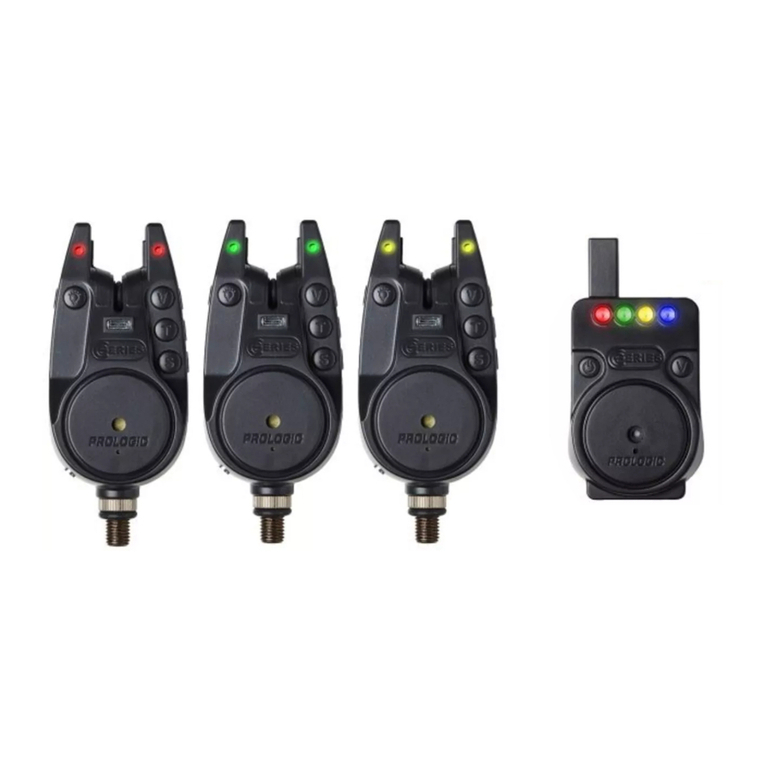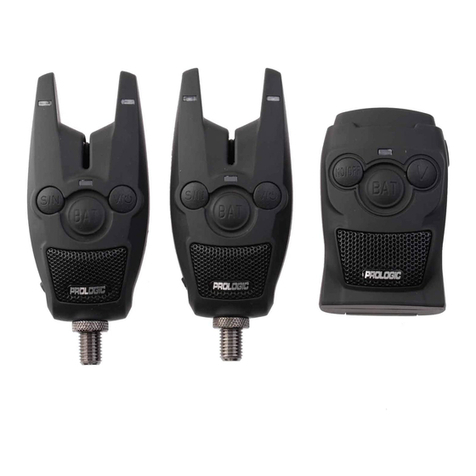
UK | PROLOGIC C-SERIES RECEIVER
Battery type: 3 1.5V AAA batteries
Operating Voltage: 4.5V
Standby current: 2mA
Working current: 20mA
OPERATING INSTRUCTIONS:
1. Hold power button to switch the receiver
ON or OFF.
2. Press V to adjust volume (including silent).
3. Long press V to turn vibration ON or OFF.
The tone of the receiver is synchronized with the
alarm it is paired with.
PAIRING UP THE RECEIVER WITH THE C-SERIES
ALARMS
1. Turn on all the alarms that need to be
paired.
2. Turn off the receiver, press and hold power
button and button V until the LED lights up.
3. Rotate the roller of the alarm you wish to
pairrst.Ifsuccessfullypaired,the
receiver will beep once, and the next LED
of the receiver will light up.
4. Rotate the roller of the next alarm until
the receiver beeps and the next LED
shows. Once 4 alarms are paired, the
receiver will turn off automatically.
5. If you only want to pair 2 or 3 alarms to the
receiver, once these alarms are paired,
press the button V until the LEDs of the
receiver go out.
The next time you switch on the receiver, it will still
be paired with your alarms. Please note: every time
the receiver enters pairing situation, the previous
setting will be deleted.
DE | PROLOGIC C-SERIES RECEIVER
Batterie-Typ: 3 1,5V AAA-Batterien
Betriebsspannung: 4,5V
Standby-Strom: 2mA
Arbeitsstrom: 20mA
BETRIEBSANLEITUNG:
1. Halten Sie die Power-Taste gedrückt, um den
Receiver ein- oder auszuschalten.
2. V-Taste drücken, um die Lautstärke einzustellen
(auch lautlos).
3. Langes Drücken von V-Taste schaltet die
Vibration EIN oder AUS.
Der Ton des Receivers wird mit dem Bissanzeiger
synchronisiert, mit dem er gekoppelt ist.
KOPPLUNG DES RECEIVERS MIT DEN BISSANZEI-
GERN DER C-SERIE
1. Schalten Sie alle Bissanzeiger ein, die gepaart
werden müssen.
2. Schalten Sie den Receiver aus, halten Sie die
Einschalttaste und die V-Taste gedrückt, bis die
LEDaueuchtet.
3. Drehen Sie das Rollrad des Bissanzeigers, den
Sie zuerst koppeln möchten. Wenn das Pairing
erfolgreich war, piept der Receiver einmal und die
nächste LED des Receivers leuchtet auf.
4. Drehen Sie das Rollrad des nächsten Bissanzeigers,
bisderReceiverpieptunddienächsteLEDaueuchtet.
Sobald 4 Bissanzeiger gepaart sind, schaltet sich
der Receiver automatisch aus.
5. Wenn Sie nur 2 oder 3 Bissanzeiger mit dem Re-
ceiver koppeln möchten, drücken Sie, sobald diese
Bissanzeiger gekoppelt sind, die Taste V, bis die
LEDs des Receivers erlöschen.
Wenn Sie den Receiver das nächste Mal einschalten, ist er
immer noch mit Ihren Bissanzeigern gepaart. Bitte beach-
ten Sie: Jedes Mal, wenn der Receiver in die Kopplungs-
situation kommt, wird die vorherige Einstellung gelöscht.
FR | CENTRALE PROLOGIC C-SERIES
Type de pile : 3 piles AAA 1,5V
Voltage : 4,5V
Tension en veille : 2mA
Tension en fonctionnement : 20mA
INSTRUCTIONS D’UTILISATION :
1. Maintenez le bouton d’alimentation pour allumer
ou éteindre le récepteur.
2. Appuyez sur V pour régler le volume
(y compris le mode silencieux).
3. Appuyez longuement sur V pour activer ou
désactiver la vibration.
La tonalité du récepteur est synchronisée avec l’alarme
à laquelle il est associé.
COUPLAGE DU RÉCEPTEUR AVEC LES
DETECTEURS DE LA SÉRIE C
1. Allumez toutes les détecteurs qui doivent être
couplées.
2. Eteignez le récepteur, appuyez et maintenez le
bouton d’alimentation et le bouton V jusqu’à ce
que la LED s’allume.
3. Tournez la roulette de l’alarme que vous
souhaitez appairer en premier. Si le jumelage est
réussi, le récepteur émet un bip et la LED
suivante du récepteur s’allume.
4. Tournez la roulette du détecteur suivante jusqu’à
ce que le récepteur émette un bip et que la LED
suivante s’allume. Une fois que 4 détecteurs sont
appariés, le récepteur s’éteint automatiquement.
5. Si vous ne voulez appairer que 2 ou 3 détecteurs
au récepteur, une fois ces détecteurs appairés,
appuyez sur le bouton V jusqu’à ce que les LED
du récepteur s’éteignent.
La prochaine fois que vous allumerez le récepteur, il
sera toujours apparié avec vos détecteurs. Attention :
chaque fois que le récepteur entre en situation
d’appairage, le réglage précédent est effacé.
PL | PROLOGIC C-SERIES CENTRALKA
Typ baterii: 3 baterie 1,5V AAA
Napięcie robocze: 4.5V
Prąd czuwania: 2mA
Prąd roboczy: 20mA.
INSTRUKCJAOBSŁUGI:
1. Naciśnijiprzytrzymajprzyciskzasilania,aby
włączyćlubwyłączyćcentralkę.
2. NaciśnijprzyciskV,abywybraćżądanypoziom
głośności(wtymtrybcichy).
3. NaciśnijiprzytrzymajprzyciskV,abywłączyćlub
wyłączyćwibracje.
Tondźwiękucentralkijestzsynchronizowanyz
sygnalizatorem, z którym jest ona sparowana.
PAROWANIESYGNALIZATORÓWZCENTRALKĄ
1. Włączwszystkiesygnalizatory,któremajązostać
sparowane.
2. Wyłączcentralkę,anastępniejednocześnie
naciśnijiprzytrzymajprzyciskzasilaniaorazprzycisk
V,ażzaświecisiędiodaLED.
3. Obróćrolkęsygnalizatora,którychceszsparować
jakopierwszy.Jeżeliparowanieprzebiegnie
pomyślnie,centralkawydajedensygnałdźwiękowy
izaświecisiękolejnadiodaLEDodbiornika.
4. Obróćrolkąkolejnegosygnalizatora,ażcentralka
wydasygnałdźwiękowyizaświecisięnastępna
dioda LED. Po sparowaniu 4 sygnalizatorów,
centralkawyłączysięautomatycznie.
5. Jeślichceszsparowaćtylko2lub3sygnalizatory
zcentralką,posparowaniutychsygnalizatorów,
naciśnijprzyciskV,ażdiodyLEDcentralkizgasną.
Przynastępnymwłączeniucentralki,będzieonanadal
sparowanazsygnalizatorami.Uwaga:zakażdym
razem, gdy centralka wejdzie w tryb parowania,
poprzednieustawieniazostanąusunięte.
USER MANUAL
RECEIVER
WWW.PROLOGICFISHING.COM
User manual for 70716_PL C-series Receiver.indd 6-10User manual for 70716_PL C-series Receiver.indd 6-10 14-06-2021 09:57:0514-06-2021 09:57:05

