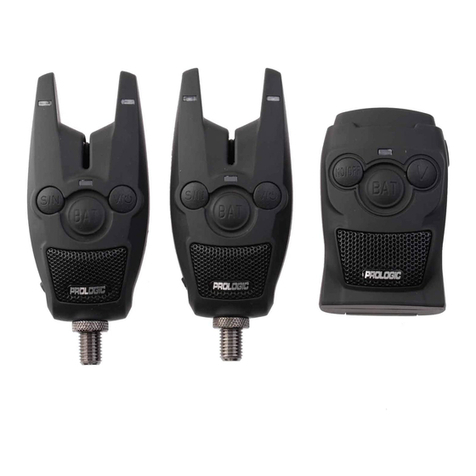
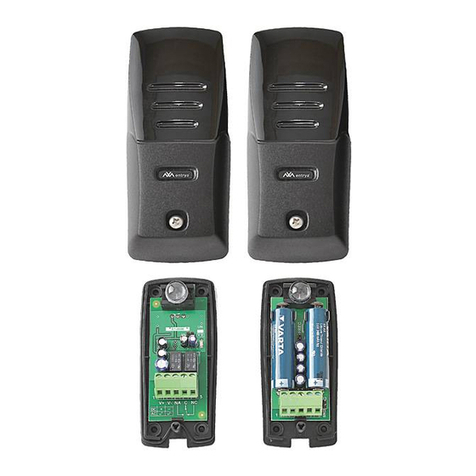
ProLogic C Series User manual

User manual for 71022-71024_PL C-series Alarm_red_green_yellow_blue.indd 1-5User manual for 71022-71024_PL C-series Alarm_red_green_yellow_blue.indd 1-5 15-06-2021 14:23:5915-06-2021 14:23:59

UK | PROLOGIC C-SERIES
ALARM / RECEIVER / BIVVY LIGHT WIRELESS SET
Battery type(s)
* Alarm: 9V battery
* Receiver: 3 1.5V AAA batteries
* Bivvy light: 3.7V battery, 2.600mAh LiOn
Transmitter power output in mW: less than 10mW
Operating Voltage:
* Alarm: 9V
* Receiver: 4.5V
* Bivvy light: 3.7V
Standby current in uA:
* Alarm: 6uA
* Receiver: 2mA
* Bivvy light: 35uA
Working current in mA:
* Alarm: 10mA
* Receiver: 20mA
* Bivvy light: 30mA
Transmission/transmitter: FM
Operating frequency: 433.92MHz
Effective working distance of transmission: 100M
ALARM
OPERATING INSTRUCTIONS:
1. Press and hold button V to switch the alarm ON or OFF.
2. Press button V to adjust the volume (including silent).
3. Press button T to adjust the tone.
4. Press button S to adjust the sensitivity,
5. Press button L to turn ON or OFF the night light.
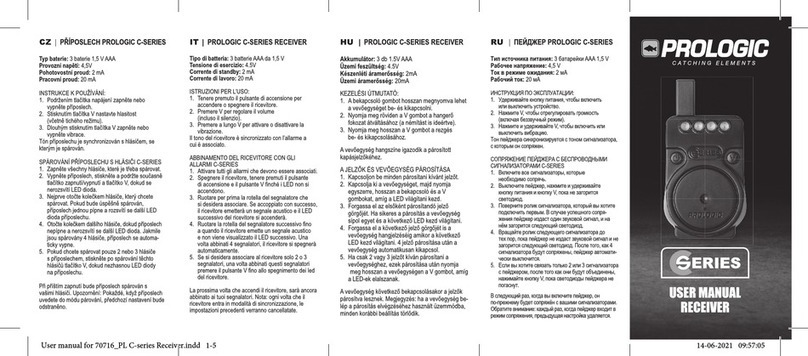
RECEIVER
OPERATING INSTRUCTIONS:
1. Hold power button to switch the receiver ON or OFF.
2. Press V to adjust volume (including silent).
3. Long press V to turn vibration ON or OFF.
The tone of the receiver is synchronized with the alarm it is paired with.
PAIRING UP THE ALARMS AND RECEIVER
1. Turn on all the alarms that need to be paired.
2. Turn off the receiver, press and hold power button and button V
until the LED lights up.
3. Rotatetherollerofthealarmyouwishtopairrst.Ifsuccessfully
paired, the receiver will beep once and the next LED of the
receiver will lights up.
4. Rotate the roller of the next alarm until the receiver beeps and the
next LED shows. Once 4 alarms are paired, the receiver will turn off
automatically.
5. If you only want to pair 2 or 3 alarms to the receiver, once these
alarms are paired, press the button V until the LEDs of the receiver
go out.
The next time you switch on the receiver, it will still be paired with your
alarms. Please note: every time the receiver enters pairing situation, the
previous setting will be deleted.
BIVVY LIGHT
OPERATING INSTRUCTIONS:
1. Press and hold the ON/OFF button for one second to turn ON or
OFF the bivvy light.
2. Turn on the bivvy light, then short press the ON/OFF button to control
the delay times: 5, 10 or 20 seconds.
3. When the bivvy light is ON, short press the brightness control button
to change the brightness (4 levels). Press and hold the brightness
control button for one second and all the white LEDs will enter into
sleep mode. They will light up immediately when receiving the signals
from a paired C-SERIES alarm.
Battery charging: the red led will light when charging. When full charged,
the blue LED will light.
PAIRING UP THE ALARMS AND BIVVY LIGHT
1. Turn on all the alarms that need to be paired.
2. Turn off the bivvy light, press and hold the ON/OFF button and
brightness control button until the red LED lights up.
3. Rotatetherollerofthealarmyouwishtopairrst.Ifsuccessfully
paired, the green led of the bivvy light will light up.
4. Rotate the roller of the next alarm until the next LED shows.
Once 4 alarms are paired, the bivvy light will turn off automatically.
5. If you only want to pair 2 or 3 alarms to the bivvy light, once these
alarms are paired, press the ON/OFF button until the LEDs of the
bivvy light go out.
The next time you switch on the bivvy light, it will still be paired with your
alarms. Please note: every time the bivvy light enters pairing situation,
the previous setting will be deleted.
DE | PROLOGIC C-SERIES
ALARM / RECEIVER / BIVVY LIGHT WIRELESS SET
Batterietyp(en)
* Bissanzeiger: 9V-Batterie
* Receiver: 3 1,5V AAA-Batterien
* Bivvy light: 3.7V battery, 2.600mAh LiOn
Ausgangsleistung des Senders in mW: weniger als 10mW
Betriebsspannung:
* Bissanzeiger: 9V
* Receiver: 4.5V
* Bivvy light: 3.7V
Standby-Strom in uA:
* Bissanzeiger: 6uA
* Receiver: 2mA
* Bivvy light: 35uA
Arbeitsstrom in mA:
* Bissanzeiger: 10mA
* Receiver: 20mA
* Bivvy light: 30mA
Übertragung/Sender: FM
Betriebsfrequenz: 433.92MHz
Effektive Übertragungsdistanz: 100M
BISSANZEIGER
BETRIEBSANLEITUNG:
1. Halten Sie die Taste V gedrückt, um den Bissanzeiger ein- oder
auszuschalten.
2. Drücken Sie die Taste V, um die Lautstärke einzustellen
(auch lautlos).
3. Drücken Sie die Taste T, um den Ton einzustellen.
4. DrückenSiedieTasteS,umdieEmpndlichkeiteinzustellen,
5. Drücken Sie die Taste L, um das Nachtlicht ein- oder auszuschalten.
RECEIVER
BETRIEBSANLEITUNG:
1. Halten Sie die Power-Taste gedrückt, um den Receiver ein- oder
auszuschalten.
2. V-Taste drücken, um die Lautstärke einzustellen (auch lautlos).
3. Langes Drücken von V-Taste schaltet die Vibration EIN oder AUS.
Der Ton des Receivers wird mit dem Bissanzeiger synchronisiert, mit
dem er gekoppelt ist.
KOPPLUNG DER BISSANZEIGER UND DES RECEIVERS
1. Schalten Sie alle Bissanzeiger ein, die gepaart werden müssen.
2. Schalten Sie den Receiver aus, halten Sie die Einschalttaste und die
TasteVgedrückt,bisdieLEDaueuchtet.
3. Drehen Sie das Rollrad des Bissanzeigers, den Sie zuerst koppeln
möchten. Wenn die Kopplung erfolgreich war, piept der Receiver
einmal und die nächste LED des Receivers leuchtet auf.
4. Drehen Sie das Rollrad des nächsten Bissanzeigers, bis der
ReceiverpieptunddienächsteLEDaueuchtet.Sobald4Bissanzei-
ger gepaart sind, schaltet sich der Receiver automatisch aus.
5. Wenn Sie nur 2 oder 3 Bissanzeiger mit dem Empfänger koppeln
möchten, drücken Sie, sobald die Bissanzeiger gekoppelt sind, die
Taste V, bis die LEDs des Receivers erlöschen.
Wenn Sie den Receiver das nächste Mal einschalten, ist er immer
noch mit Ihren Bissanzeigern gepaart. Bitte beachten Sie: Jedes Mal,
wenn der Receiver in den Kopplungsvorgang geht, wird die vorherige
Einstellung gelöscht.
BIVVY LIGHT
BETRIEBSANLEITUNG:
1. Halten Sie die EIN/AUS-Taste eine Sekunde lang gedrückt, um das
Bivvy Light ein- oder auszuschalten.
2. Schalten Sie das Bivvy Light ein und drücken Sie dann kurz die
ON/OFF-Taste, um die Verzögerungszeiten einzustellen: 5, 10
oder 20 Sekunden.
3. Wenn das Bivvy Light eingeschaltet ist, drücken Sie kurz die
Helligkeitstaste, um die Helligkeit zu ändern (4 Stufen). Halten Sie
die Helligkeitstaste eine Sekunde lang gedrückt, um alle weißen
LEDs in den Ruhemodus zu versetzen. Sie leuchten sofort auf, wenn
sie die Signale eines gekoppelten C-SERIES-Bissanzeigers empfangen.
Akkuladung: Die rote LED leuchtet während des Ladevorgangs. Wenn
der Akku voll geladen ist, leuchtet die blaue LED.
KOPPLUNG BISSANZEIGER UND BIVVY LIGHT
1. Schalten Sie alle Bissanzeiger ein, die gepaart werden müssen.
2. Schalten Sie das Bivvy Light aus, drücken und halten Sie die
EIN/AUS-TasteunddieHelligkeitstaste,bisdieroteLEDaueuchtet.
3. Drehen Sie das Rollrad des Bissanzeigers, den Sie zuerst koppeln
möchten. Bei erfolgreichem Pairing leuchtet die grüne LED des Bivvy
Lights auf.
4. Drehen Sie das Rollrad des nächsten Bissanzeigers, bis die nächste
LEDaueuchtet.Sobald4Bissanzeigergepaartsind,schaltetsich
das Bivvy Light automatisch aus.
5. Wenn Sie nur 2 oder 3 Bissanzeiger mit dem Bivvy Light koppeln
möchten, drücken Sie, sobald diese Bissanzeiger gekoppelt sind, die
ON/OFF-Taste, bis die LEDs des Bivvy Light erlöschen.
Wenn Sie das Bivvy Light das nächste Mal einschalten, ist es immer
noch mit Ihren Bissanzeigern gepaart. Bitte beachten Sie: Jedes Mal,
wenn das Bivvy Light in die Kopplungssituation geht, wird die vorherige
Einstellung gelöscht.
FR | ENSEMBLE DETECTEUR/CENTRALE/LAMPE DE
BIVVY SANS FIL PROLOGIC C-SERIE
Type de pile(s)
* Détecteur : Pile 9V
* Centrale : 3 piles AAA 1,5V
* Lampe de bivvy: Pile 3.7V, 2.600mAh LiOn
Puissance de sortie de l’émetteur en mW : moins de 10mW
Tension de fonctionnement :
* Détecteur : 9V
* Centrale : 4.5V
* Lampe de bivvy: 3.7V
Tension veille en uA :
* Détecteur : 6uA
* Centrale : 2mA
* Lampe de bivvy: 35uA
Tension en fonctionnement en mA :
* Détecteur : 10mA
* Centrale : 20mA
* Lampe de bivvy: 30mA
Transmission/émetteur : FM
Fréquence de fonctionnement : 433.92MHz
Portée : 100M
DÉTECTEUR
INSTRUCTIONS D’UTILISATION :
1. Appuyez sur le bouton V et maintenez-le enfoncé pour activer ou
désactiver l’détecteur.
2. Appuyez sur le bouton V pour régler le volume (y compris le silence).
3. Appuyez sur le bouton T pour régler la tonalité.
4. Appuyez sur le bouton S pour régler la sensibilité,
5. Appuyez sur le bouton L pour allumer ou éteindre la veilleuse.
CENTRALE
INSTRUCTIONS D’UTILISATION :
1. Maintenez le bouton d’alimentation enfoncé pour allumer ou éteindre
la centrale.
2. Appuyez sur V pour régler le volume (y compris le silence).
3. Appuyez longuement sur V pour activer ou désactiver la vibration.
La tonalité de la centrale est synchronisée avec l’détecteur à laquelle il
est associé.
COUPLAGE DES DÉTECTEURS ET DU CENTRALE
1. Allumez toutes les détecteurs qui doivent être jumelées.
2. Eteignez la centrale, appuyez et maintenez le bouton d’alimentation
et le bouton V jusqu’à ce que la LED s’allume.
3. Tournez la roulette de l’détecteur que vous souhaitez appairer en
premier. Si le jumelage est réussi, la centrale émet un bip et la LED
suivante due lacentrale s’allume.
4. Tournez la roulette de l’détecteur suivante jusqu’à ce que la centrale
émette un bip et que la LED suivante s’allume. Une fois que 4
détecteurs sont appariés, la centrale s’éteint automatiquement.
5. Si vous ne voulez appairer que 2 ou 3 détecteurs à la centrale, une
fois ces détecteurs appairées, appuyez sur le bouton V jusqu’à ce
que les LED de la centrale s’éteignent.
La prochaine fois que vous allumerez la centrale, il sera toujours appa-
rié avec vos détecteurs. Attention : chaque fois que la centrale entre en
situation d’appairage, le réglage précédent est effacé.
LAMPE DE BIVVY
INSTRUCTIONS D’UTILISATION :
1. Appuyez et maintenez le bouton ON/OFF pendant une seconde pour
allumer ou éteindre la lampe de bivvy.
2. Allumez la lampe de bivvy, puis appuyez brièvement sur le bouton
ON/OFF pour contrôler les délais : 5, 10 ou 20 secondes.
3. Lorsque la lampe de bivvyest allumée, appuyez brièvement sur
leboutonderéglagedelaluminositépourmodierlaluminosité
(4 niveaux). Appuyez sur le bouton de réglage de la luminosité et
maintenez-le enfoncé pendant une seconde pour que toutes les
DEL blanches passent en mode veille. Elles s’allument immédiate-
ment lorsqu’elles reçoivent les signaux d’un détecteur couplé.
Chargement de la batterie : le voyant rouge s’allume pendant le
chargement. Lorsque la batterie est complètement chargée, la LED
bleue s’allume.
COUPLAGE DES DÉTECTEURS ET DE LA LAMPE DE BIVVY
1. Allumez toutes les détecteurs qui doivent être appariées.
2. Éteignez la lampe de bivvy, appuyez et maintenez le bouton ON/OFF
et le bouton de réglage de la luminosité jusqu’à ce que la LED rouge
s’allume.
3. Tournez la roulette de l’détecteur que vous souhaitez appairer en
premier. Si l’appariement est réussi, le voyant vert de la lampe de
bivouac s’allume.
4. Tournez la roulette de l’détecteur suivante jusqu’à ce que la LED
suivante s’allume. Une fois que 4 détecteurs sont appariées, la
lumière bivvy s’éteint automatiquement.
5. Si vous ne souhaitez jumeler que 2 ou 3 détecteurs au bivvy light,
une fois ces détecteurs jumelés, appuyez sur le bouton ON/OFF
jusqu’à ce que les LED du bivvy light s’éteignent.
La prochaine fois que vous allumerez le bivvy light, il sera toujours
couplé à vos détecteurs. Remarque : chaque fois que le bivvy light entre
en situation d’appairage, le réglage précédent est supprimé.
USER MANUAL
ALARM SETS
PL | PROLOGIC C-SERIES ZESTAW BEZPRZEWODOWY
SYGNALIZATORY/CENTRALKA/LAMPKA NAMIOTOWA
Typ baterii
* Sygnalizator: 1 bateria 9V
* Centralka: 3 baterie 1,5V AAA
* Lampka Namiotowa: 1 bateria 3.7V, 2.600mAh LiOn
Moc wyjściowa nadajnika: poniżej10mW
Napięcie robocze:
* Sygnalizator: 9V
* Centralka: 4.5V
* Lampka Namiotowa: 3.7V
Prąd czuwania:
*Sygnalizator:6μA
* Centralka: 2mA
* Lampka Namiotowa: 35uA
Prąd roboczy:
* Sygnalizator: 10mA
* Centralka: 20mA.
* Lampka Namiotowa: 30mA
Rodzaj transmisji/nadajnik: FM
Częstotliwość robocza: 433,92MHz
Efektywna zasięg roboczy nadajnika: 100m
SYGNALIZATOR
INSTRUKCJAOBSŁUGI:
1. NaciśnijiprzytrzymajprzyciskV,abywłączyćlubwyłączyć
sygnalizator.
2. NaciśnijprzyciskV,abywybraćżądanypoziomgłośności
(w tym tryb cichy).
3. NaciśnijprzyciskT,abywybraćżądanyton.
4. NaciśnijprzyciskS,abywwybraćżądanypoziomczułości.
5. NaciśnijprzyciskLabywłączyćlubwyłączyćlampkęnocną.
CENTRALKA
INSTRUKCJAOBSŁUGI:
1. Naciśnijiprzytrzymajprzyciskzasilania,abywłączyćlubwyłączyć
centralkę.
2. NaciśnijprzyciskV,abywybraćżądanypoziomgłośności
(w tym tryb cichy).
3. NaciśnijiprzytrzymajprzyciskV,abywłączyćlubwyłączyćwibracje.
Tondźwiękucentralkijestzsynchronizowanyzsygnalizatorem,zktórym
jest ona sparowana.
PAROWANIESYGNALIZATORÓWZCENTRALKĄ
1. Włączwszystkiesygnalizatory,któremajązostaćsparowane.
2. Wyłączcentralkę,anastępniejednocześnienaciśnijiprzytrzymaj
przyciskzasilaniaorazprzyciskV,ażzaświecisiędiodaLED.
3. Obróćrolkęsygnalizatora,którychceszsparowaćjakopierwszy.
Jeżeliparowanieprzebiegniepomyślnie,centralkawydajeden
sygnałdźwiękowyizaświecisiękolejnadiodaLEDodbiornika.
4. Obróćrolkąkolejnegosygnalizatora,ażcentralkawydasygnał
dźwiękowyizaświecisięnastępnadiodaLED.Posparowaniu4
sygnalizatorów,centralkawyłączysięautomatycznie.
5. Jeślichceszsparowaćtylko2lub3sygnalizatoryzcentralką,po
sparowaniutychsygnalizatorów,naciśnijprzyciskV,ażdiodyLED
centralkizgasną.
Przynastępnymwłączeniucentralki,będzieonanadalsparowanaz
sygnalizatorami.Uwaga:zakażdymrazem,gdycentralkawejdziewtryb
parowania,poprzednieustawieniazostanąusunięte.
LAMPKA NAMIOTOWA
INSTRUKCJAOBSŁUGI:
1. NaciśnijiprzytrzymajprzyciskON/OFFprzezjednąsekundę,
abywłączyćlubwyłączyćlampkęnamiotową.
2. Włączlampkęnamiotową,anastępnienaciskajkolejnoprzycisk
ON/OFF,abywybraćczasopóźnienia:5,10lub20sekund.
3. Gdyświatłojestwłączonenaciskajkolejnoprzyciskregulacji
jasności,abyzmienićjasność(4poziomy).Wciśnijiprzytrzymaj
przyciskregulacjijasnościprzezjednąsekundę,awszystkiebiałe
diodyLEDprzejdąwtrybuśpienia.Zaświecąsięonenatychmiast
pootrzymaniusygnałuodsparowanegozlampkąsygnalizatora
C-SERIES.
Ładowanieakumulatora:czerwonadiodaświecisiępodczasładowania.
PopełnymnaładowaniuzaświecisięniebieskadiodaLED.
PAROWANIESYGNALIZATORÓWZLAMPKĄNAMIOTOWĄ
1. Włączwszystkiesygnalizatory,któremajązostaćsparowane.
2. Wyłączlampkęnamiotową,anastępniejednocześnienaciśnij
iprzytrzymajprzyciskON/OFForazprzyciskregulacjijasności,
ażzapalisięczerwonadiodaLED.
3. Obróćrolkęsygnalizatora,którychceszsparowaćjakopierwszy.
Jeśliparowanieprzebiegniepomyślnie,zaświecisięzielonadioda
na lampce namiotowej.
4. Obróćrolkękolejnegosygnalizatora,ażzapalisięnastępnadioda
LED.Gdy4sygnalizatoryzostanąsparowane,lampkanamiotowa
wyłączysięautomatycznie.
5. Jeślichceszsparowaćtylko2lub3sygnalizatoryzlampąnamioto-
wą,posparowaniutychsygnalizatorównaciśnijprzyciskON/OFF,
ażdiodyLEDlampkizgasną.
Przynastępnymwłączeniulampkinamiotowejbędzieonanadal
sparowanazsygnalizatorami.Uwaga:zakażdymrazem,gdylampka
namiotowawejdziewtrybparowania,poprzednieustawieniazostaną
usunięte.
WWW.PROLOGICFISHING.COM
User manual for 71022-71024_PL C-series Alarm_red_green_yellow_blue.indd 6-10User manual for 71022-71024_PL C-series Alarm_red_green_yellow_blue.indd 6-10 15-06-2021 14:23:5915-06-2021 14:23:59
Other manuals for C Series
2
Table of contents
Other ProLogic Security System manuals
