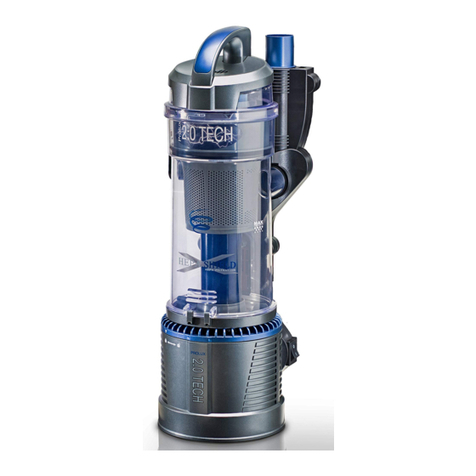
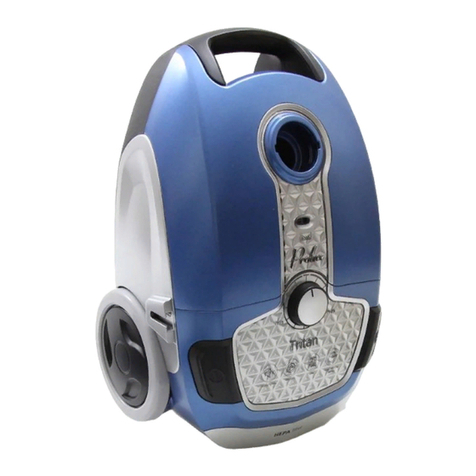
Prolux AllVac User manual

1
Prolux AllVac Floor Cleaner
Owners Manual
For your safety please read the Owners Manual in its entirety

2
Congratulations on your purchase of your new Prolux AllVac! With the Prolux AllVac you can
quickly clean any floor surface in your home. From vacuuming carpets to scrubbing tile to polishing
floors the Prolux Allvac is designed to do it all. With 2 year warranty, on board tools, powerful 9.5
amp suction motor and bagless cyclonic cleaning the Prolux AllVac is designed to do all your cleaning.
Index Page

3
Product Specifications …...................................................................................................3
Parts Description.........…...................................................................................................4
Safety Instructions.......…...................................................................................................8
Assembling the Unit ...…...................................................................................................10
Using the Unit in Vacuuming Mode…..............................................................................14
Using the Unit in Waxing/Polishing/Scrubbing Mode......................................................15
Using the Unit in Tool Cleaning Mode..............................................................................23
Cleaning Of Pads & Discs..................................................................................................28
Emptying the Dust Bin......….............................................................................................28
Cleaning the Filter..............................................................................................................30
Cleaning the Vacuum Brushroll..........…...........................................................................32
Troubleshooting.........….....................................................................................................32
Storing the Unit After Use.........….....................................................................................33
Warranty Information….....................................................................................................33
Specifications:
•12 amps of powerful cleaning.
•Can be used to clean any floor surface from carpet to hardwood to tile.
•On Polishing Mode can buff, scrub, polish and also spray.
•Powerful 9.5 AMP motor for deep down cleaning.
•Lightweight and only 12 weights pounds!
•On board tools with telescoping wand
•Telescoping Wand for different height of users.
•Holds .8 liters of dirt in the bagless dirt container.
•2 Year Factory Warranty.
•Over 6 Separate cleaning functions allows you to clean nearly every job.

4
The Prolux AllVac is designed to clean any floor surface. The Waxing/Polishing/Scrubbing Floor
Brush Component is designed for cleaning tile, tile grout, hardwood floors and any floor surface. Not
only can is scrub and polish but it can spray cleaner or wax on the floor as you work. The Electric
Floor Brush Component is designed for vacuuming hard floors and carpet.

5

6
Accessories:

7
Rough Polishing Disc

8
Safety Instructions:
The Prolux AllVac cleaner is only used for household and light commercial cleaning but not
for outdoor purposes.
·Please carefully read the Operating Instruction before using this vacuum cleaner to ensure
operation safety and correctness.
·To prevent electric leakage or electric shock, this Prolux AllVac cleaner can’t be placed in the
water or cleaned with water directly.
·This vacuum cleaner is not a toy, no children can operate this polisher or vacuum cleaner
without permission or get close to the operating floor waxing/polishing vacuum cleaner.
·Before starting this Prolux AllVac cleaner, please make the handle is vertical first and then
insert the power plug into the wall outlet.
·During operation of the Prolux AllVac cleaner, don’t tilt the waxing head or touch spinning
pads, brushrolls, or moving parts with users fingers or body parts.
·When changing tools or vacuums heads first make sure the vacuum cleaner is powered off
and the cord is unplugged from the wall unit.
·When using this appliance, don’t crush or run the appliance over the electric power cord.
·Don’t use the floor waxing/polishing/buffer or vacuum cleaner on wet surfaces or any ground
containing liquid, lit cigarette, burning ash or other high temperature items.
·Wet cloth with water should be used for cleaning, otherwise it will cause crack or color fading
of the shell.
·When any part of this Prolux AllVac cleaner has problems, please stop using the Prolux
AllVac right away and contact your authorized dealer or service center.
-If the flexible power wire is damaged, it shall be replaced by authorized service center in

9
order to avoid danger.
Do not use the vacuum cleaner to vacuum articles such as drywall dust, cement powder,
detergent, gasoline, glass, needle, soot, wet dust, sewage, matchsticks and so on.
Do not forcibly bend, step on, or drag the hose. If the hose becomes damaged do not use it
with the vacuum cleaner. Contact your authorized dealer you bought the unit from for a
replacement instead.
During use of vacuuming do not block the suction inlet of the vacuum or it may burn up the
motor and void your warranty.
Cleaning the unit should only be done by a water dampened cloth rag.
Before using make sure the dust cup and filters are properly installed.
Before polishing, please check if there are granular hard objects under the floor waxing/polishing machine or
adhesive foreign matters on the polishing disc; otherwise, the floor waxing machine will be damaged and your
floors will be scratched. Once the floor is scratched, it can’t be recovered.
If it is necessary to install or replace the polishing piece before or during polishing, please power the unit off and
remove the power plug before doing so.
During use, if it feels like the machine has to much resistance during use, please stop the machine immediately
to check it and ensure that the fine polishing pad is dry. If the buffer/polisher/waxer turns off during use this
means the motor is working to high. Please check pads or remove or change pads to correct surface tension so
unit does not overwork and shut down during use.
For carpet cleaning us the vacuum nozzle with spinning brushroll. If you are using the
waxing/polishing/scrubbing head on carpet read the section in this manual on how to do that first or you may
void your warranty.
The unit cannot be operated on a damp or wet floors.
In order to get better polishing effect, please uniformly polish every square yard of floor space for more than one
minute.
It is strictly prohibited to clean the fine polishing seat with water to avoid degumming.
When using this floor waxing head for polishing, please constantly move on the floor surface.
Do not press heavily upon the machine during polishing or only polish in one place. Otherwise floor scratching
can occur which is permanent.
Keep these Instructions in a safe place
Assembling the Unit
1. On the main handle insert the metal slotted end into the hole on the main vacuum body. Push
the extension button downward to adjust the hight of the handle to the proper height of the user.

10
2. Snap hose down into elbow section and attach hose to hose holder as shown in the image below.
If user wants to remove hose end pull hose from hose holder first then press on the 2 release
clips pull up and the hose may be pulled back out.

11
3. Snap in the dirt chamber to the main vacuum body (see image below) .
4. Make sure the on board multi-functional tool is attached to the tool holder on the back of the
vacuum.

12
5. Make sure handle is adjusted to the height of the user (see image below).
6. Make sure hose tube valve is changed to the cleaning mode the user wants. FLOOR
CLEANING or TOOL CLEANING mode(s). (see images below)
7. Find retractable power cord end on the vacuum as shown in the image below.

13
8. Pull out cord to right length for the user and plug into a standard 120 volt outlet.
9. To begin cleaning turn the power switch of the vacuum on. As shown in the images below one

14
there 3 positions. POWER ON/OFF, FLOOR POLISHING MODE (no suction from vacuum but
power to floor nozzle & polisher), VACUUM MODE ( suction from vacuum plus power to floor
nozzles).
Using Unit in Vacuuming Mode
1. After unit is powered on release the handle. The power brush (floor cleaning nozzle with
spinning brushroll) will not turn on until handle is released as shown in the image below.

15
2. On vacuum mode it can be used to clean both carpet and hard floor surfaces. The unit is
equipped with a soft brushroll designed to be used on ALL surfaces but always test first on a
small section of floor first.
3. You are now ready to vacuum all of your floor surfaces.
Using the Unit in Floor Polishing/Scrubbing/ Waxing Mode
1. The first step is to identify the different pads.
2. Cleaning Pads used in combination: The two combinations below can be used for hard
scrubbing cleaning jobs or fine polishing cleaning jobs.

16
NOTE – Cleaning Carpet. Use of the Prolux AllVac with waxing/polishing/scrubbing nozzle for
carpet cleaning is not intended for prolonged use. It can only be used for small jobs and spot cleaning.
To do so one pad and fine polishing seat must be totally removed and the Floor Polishing/Lint pad
must be added to the one remaining. In this manner it may be used for spot cleaning carpet and rugs.
If the unit powers off during use that means the motor has over worked and turned off to protect itself
and carpet cleaning must be stopped immediately or the warranty will become void.
Connecting the “Fine Polishing Seat” and the “Rough Polishing Nylon Brush” to the Unit.
Hold the above mentioned discs and make them align with the special section hole of the gear of the
waxing head. After being lined up, as shown in the image below press the discs until you hear a
clicking sound. If you need to remove the discs you just need to pry discs off in backwards order that
you put them on.

17
With the pads attached to the waxing/polishing/scrubbing nozzle it is now time to attach the nozzle to
the vacuum cleaner as shown in the image below. To do this align the elbow of the
waxing/polishing/scrubbing nozzle to the installation hole to the main body and insert down until you
hear a “click”. If you need to take off the waxing/polishing/scrubbing nozzle press on the locking
block release button and pull off.

18
Even with the cord plugged into the wall outlet and the power turned ON the
waxing/polishing/scrubbing nozzle will not start spinning until the handle has been released and angle
shown below is achieved. When user is at the step to plug cord into wall outlet always make sure unit
is in upright locked position.
With the waxing/polishing/scrubbing nozzle there are 2 cleaning states. Waxing/polishing/scrubbing
only and waxing/polishing/scrubbing PLUS vacuuming. When the ON/OFF switch is turned to the
first position it will only be waxing/polishing/scrubbing with no vacuum suction. When the ON/OFF
switch is turned to the second position it will be waxing/polishing/scrubbing AND vacuum suction
through the 2 suction holes as shown in the image below.
Next adjust the height of the handle wand to fit the user for waxing/polishing/scrubbing as shown
below. Lightly stepping on the waxing/polishing/scrubbing nozzle with the users foot may be helpful
when lengthening the wand.

19
To being waxing/polishing/scrubbing pull the handle back and lightly press the nozzle with the users
foot to get the pivot assembly to release so waxing/polishing/scrubbing nozzle is flat on the floor (see
image below).

20
Next make sure there is no debris or foreign matter on the floor or in the pads as shown below.
On vacuuming mode if you want to vacuum up dirt and dust from your floor make sure the suction is
turned from tool use to vacuum use as the image below shows.
NOTE – The Prolux AllVac in waxing/polishing/scrubbing mode is not designed to suck or
vacuum up water or liquids but only dry suction. When using the spraying application make
sure the suction of the vacuum is not turned on.
Table of contents
Other Prolux Vacuum Cleaner manuals
Prolux
Prolux QX-90 User manual

Prolux
Prolux TerraVac User manual
Prolux
Prolux Lite User manual
Prolux
Prolux Flight -C Technical manual
Prolux
Prolux CTX User manual
Prolux
Prolux 2.0 Technical manual

Prolux
Prolux iFORCE User manual

Prolux
Prolux 2.0-PRO Technical manual
Prolux
Prolux Stealth User manual
Prolux
Prolux RS7 User manual
