Propex HS2000 User manual

Page
7
Fault Finding Table for Heaters post 2016
Number
of Flashes Fault Remedy
1 Flame failure
Check gas
supply making sure there is gas in the bottle
and no blockage in the gas line. Ensure propane is used
at temperatures below +5°C. Clear lockout as
described.
2 Overheat
fault
Hot air temperature is too high. Check the air ducts and
vents are not blocked or restricted. We recommend
you wait at least 5 to 10 minutes to allow the heater to
cool before clearing lockout as described. Check
ducting for blockages.
3 Low/high
voltage
Minimum operating voltage is 10v and max operating
voltage is 15v (for 12v heaters) when measured at the
heater. Check battery voltage. If above 10v, check
connections between heater and battery. Check
alternator or external battery charging. Clear lockout as
described.
4 Combustion
air fault
Check combustion air
flue and exhaust flue for
blockages. Possible blockage in combustion air
inlet/outlet duct. Inspect duct for blockage/damage.
Inspect inlet pipe on the heater (closest to the back) for
signs of damage.
5, 10
Other /
internal fault
Attempt to clear
lockout
as described
. If this fails,
contact Propex.
Solid General
Two faults have occurred at the same time OR at least
five or more lockout clearing attempts have been
unsuccessful. Clear lockout as described.
No
flashing
PCB not
powered up
Check
the supply to the heater as above. Check fuse
(F1) on main PCB. Otherwise contact Propex
H or C
Too Hot
/
Too cold
Temperature inside the
vehicle is either above 30
°
C
or
below -21°C.
Propex Heating and Leisure Ltd. Unit 10 Carvers Trading Estate, Ringwood, Hants. BH24 1JS
Installation and
operating
Instructions
Digital Thermostat

Page
1
OVERVIEW
Thank you for purchasing this digital thermostat, designed to complement and
enhance the operation of your Propex or Whale space heater.
This thermostat is designed to control the operation of your blown air heater whilst
maintaining the desired cabin temperature. Air temperature is measured at the
thermostat and when the ambient air temperature meets the set temperature will
switch the heating function off. Should the ambient air temperature drop by approx. 2
degrees, as measured at the digital thermostat, so the heating function will be
restarted. The thermostat will maintain this cycle until switched off.
For models for use with Gas only heaters a countdown timer function is available.
COMPATIBILITY
Program 1 (Gas only Heaters) Program 2 (Gas or Electric Heaters)
HS2000 HS2000e
HS2800 HS2202
HS2211 HS2212
WHATS INCLUDED
Panel mounted Digistat, removable bezel, mounting template, instructions.
The digistat is designed to accept the decorative bezel manufactured by CBE in Italy,
this is widely available in a variety of colours and finishes.
Page
6
For heaters manufactured from 2016 and prior to April 2018 – ensure the set
temperature is above ambient. Press the gas control button ON – then
switch it OFF – then switch back ON. Within 2.5 seconds.
For heaters manufactured from April 2018 – Switch the unit off. In the bottom
right hand corner near the display is a small hole containing a concealed
button. Using a paper clip or similar, carefully insert into the hole and gently
press the button twice leaving 1 second between each press.
Scan the QR code for the You tube 2018 reset video
FAULT FINDING
Fault
Reason
Solution
No response from
thermostat
Heater is not powered
up
Check heater has
power
Not responding to key
Presses
Keys being pressed to
o
quickly
Use a more positive key
action
Thermostat does not
immediately bring on
green led.
Built in delay
W
ait
2 seconds after
desired temperature
position is reached
Cannot reset fault on
heater
Wrong reset sequence
for heater being used
Check manual for
heater.
Cannot reset fault on
heater
Reset sequence being
carried out too fast
Allow 1 second
between ON activation
For further assistance please contact your supplying dealer.

Page
5
Once the set temperature is greater than the ambient (room)
temperature so the green LED will come on and the thermostat will
call to the heater for heat.
The heater will start its ignition cycle and when a flame is successfully
established the red LED will illuminate.
To turn off the heater press the Gas Control button.
To operate on Mains Electric
Press and hold the Power Level Button
The screen will illuminate and display the last set power level
As you hold the button, so the screen will toggle through the available
power settings
o E1 = 500W
o E2 = 1kW
o E3 = 2kW
When the power level required is reached then release the button
and heater will start to operate at that setting.
The display will alternate between ambient temperature and selected
power level.
If the heater does not operate check to ensure the set temperature is
above ambient by increasing the ‘set’ temperature using the up and
down arrows.
HEATER FAULT RESET
A heater fault will be displayed as a red flashing LED on the thermostat.
It is important you refer to the instruction manual that came with your heater
to identify the cause of the fault.
Once the fault has been identified and the cause addressed then the heater
can be reset using the following method.
Page
2
INSTALLATION
Ensure the appliance is isolated from electrical power sources before
attempting any work with the heater.
Select a suitable flat vertical location to mount the digistat, ideally at shoulder
height whilst seated and away from sources of heat, like a fridge or hob, or cold
draughts such as below windows or near door seals.
Once the desired location is identified ensure you can get the harness from the
heater to access the back of your panel.
Using the guide below mark the centres for the two mounting holes plus the
one for the thermostat loom.
Drill two pilot holes to suit fixing screws being used. Drill a pilot hole for the
digistat harness and check the back of the panel for clearance, once satisfied
open-up to 22mm diameter.
Push the connector(s) on the rear of the thermostat through the hole and fix
the thermostat into position using the relevant screw positions.
Take the 6 core loom (+3core for ‘e’ models) from the heater and connect to
the plug on the rear of the thermostat ensuring that the latches are mating
correctly.
Clip the decorative frame into position.

Page
3
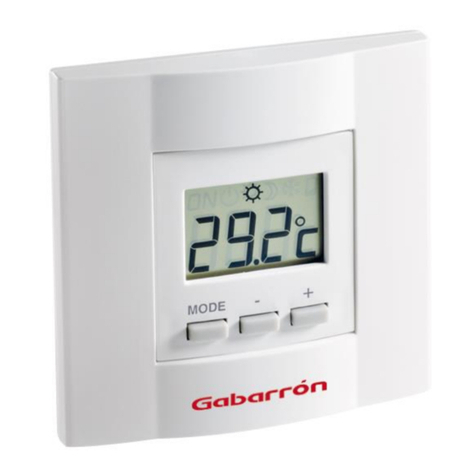
OPERATION – GAS ONLY HEATER
Pressing the ‘Gas Control’ button will power on the thermostat;
the screen will illuminate and display the current ambient
temperature.
Using the up and down arrows on the left-hand side will enable
the desired room temperature to be set. As soon as an arrow is
pressed the current ‘set’ temperature will be displayed.
Once the set temperature is greater than the ambient (room)
temperature the green LED will come on and the thermostat will call
to the heater for heat.
The heater will start its ignition cycle and when a flame is successfully
established the red LED will illuminate.
To turn off the heater press the Gas Control button.
Countdown Timer
Pressing the countdown timer button will bring onto the display the
number of hours to countdown from, before the heater will start to operate.
Increase
temperature
Increase
temperature
Decrease
temperature
Temperature
sensor
Reset button
Gas Control
On/Off
Thermostat call
to action LED
Timer select
Burner lit LED
Page
4
Repeated pressing of the button will allow you to toggle through 1 –
16 hours until the desired time is met.
5 seconds after the button has stopped being pressed then the timer
will start counting down and the display will alternate between the
hours and minutes remaining.
Once the timer has reached zero the heater will start and operate.
You do not need to switch on the Gas control button
To cancel the timer operation, wait until the countdown has started
and press the timer button again.
OPERATION – GAS AND ELECTRIC HEATERS
To operate on Gas
Pressing the ‘Gas Control’ button will power on the thermostat;
the screen will light up and display the current ambient temperature.
Using the up and down arrows on the left-hand side will enable
the desired room temperature to be set. As soon as an arrow is
pressed the current ‘set’ temperature will be displayed.
Increase
temperature
Decrease
temperature
Temperature
sensor
Reset button
Gas Control
On/Off
Thermostat call
to action LED
Power setting
Burner lit LED
This manual suits for next models
5
Table of contents
