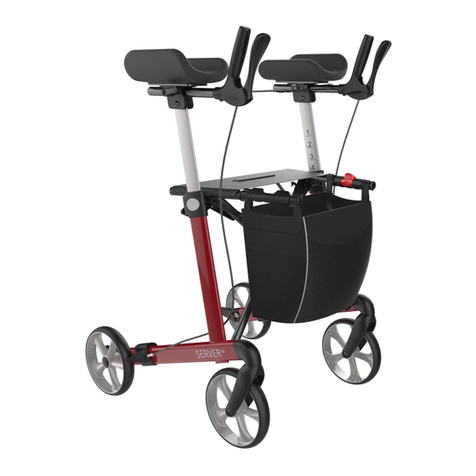
ProtoStar UpWalker CardioAccelerator H300 User manual

Designed by LifeWalker Mobility Products
San Diego, California
User Guide For H300


Safety Warnings
Set-Up Instructions
Product Features
Opening the UPWalker
Attaching Resistance Dampers
Use of CardioAccelerator
Use as a Traditional Upright Rollator
Setting Desired Armrest Height
Securing Handgrips
How to Use Parking Brakes
How to Adjust Brakes
Positioning the Seat
Using Sit-to-Stand Assist Handles
Locking and Unlocking the Wheels
Closing the UPWalker
UPWalker Maintenance
Accessories
Warranty Information
Customer Support
TABLE OF CONTENTS
Page
4
5
6
7
8
9
9
10
11
12
12
14
14
15
15
16
16
22
23
3

SAFETY WARNINGS
TO ENSURE YOUR SAFETY IN USING THE UPWALKER , THE FOLLOWING
SAFETY INFORMATION AND ALL INSTRUCTIONS MUST BE FOLLOWED.
• DO NOT use this product without rst reading and understanding the instructions
contained in this booklet.
• For H300–R DO NOT exceed 300Ib (136kg) weight limit.
• User assistance is recommended for customers with fall risk.
• DO NOT use the UPWalker if there is apparent damage or if any parts (other than
accessories) are missing.
• Care should be taken to ensure that all height adjustment locks, dampers, handles, brakes
or any other functional or moving parts are in good working order before operation.
• Periodically check engagement of seat rail in frame and armrest height adjustments to
make sure they are secure.
• Periodically check all screws and fasteners, and re-tighten if necessary.
• DO NOT use with rear wheels in unlocked position.
• DO NOT ride the CardioAccelerator when seated or when standing with all your weight on
the armrests; do not lean disproportionately on one of the armrests.
• DO NOT use on stairs, escalators, moving sidewalks, or uneven surfaces.
• DO NOT go up or down inclines greater than 15% or diagonally across inclines greater than
5% when using as a traditional upright rollator with armrests locked in horizontal position.
• DO NOT go up and down inclines or hills when using the reciprocating arm movement on
your CardioAccelerator.
• Be careful to avoid pinching your ngers while raising and lowering the armrests and
opening and closing the UPWalker frame.
• ALL WHEELS must be in contact with the oor at ALL TIMES. This will ensure that the
UPWalker is properly balanced.
FAILURE TO FOLLOW THESE INSTRUCTIONS CAN LEAD TO SERIOUS INJURY OR DEATH.
FOR SAFETY AND WARRANTY COMPLIANCE, THE UPWALKER IS ONLY TO BE USED BY
A CONSUMER IN A MANNER AS DEMONSTRATED FOR INTENDED USE AS A MOBILITY
ASSISTANCE DEVICE. MISUSE OF THE UPWALKER MAY VOID WARRANTY.
4
®

SET-UP INSTRUCTIONS
Unbox the UPWalker on a level oor. Carefully remove the UPWalker from the box and
remove protective plastic and all cardboard pieces. Retain shipping materials in the event
of customer return of product.
Stand the UPWalker up on all four wheels (see Fig A1a on page 6).
Push the front wheel gray lock tabs down to release the front wheels from locked position
(see "Locking and Unlocking Wheels" on page 14).
The rear wheels will automatically lock in place when turned backward (see "Locking and
Unlocking Wheels" on page 14).
Open the UPWalker (refer to "Opening the UPWalker" on page 6).
Adjust armrest height to your desired user height (refer to "Setting Desired Armrest Height"
on page 9).
Set hand-grip orientation to your desired angle (refer to "Securing Hand-grips on page 10).
Check the brakes for normal function, including the parking brake function (refer to "How
to use and Adjust Brakes" on page 11).
With parking brakes off (see "How to Use Parking Brakes" on page 11), ensure that all four
wheels spin freely.
Follow instructions on page 6 for securing seat in and stability of unit by pushing seat rails
rmly inside support brackets on frame, before using the UPWalker.
Examine all other parts for shipping damage. DO NOT use the UPWalker if there is apparent
damage or if any parts (other than accessories) are missing. If there are missing or damaged
parts, please contact LifeWalker Customer Service at 866-588-1845 or
customerservice@lifewalkermobility.com.
5
1.
2.
3.
4.
5.
6.
7.
8.
9.
10.
11.

UPWalker® CardioAccelerator™
Product Features
6
Parking /
Hand Brake
Personal Item Bag
Backrest Support
Moveable Seat
Seat Rail
Front Wheel
Locks
Adjustable Rubber
Handgrip
Armrest Pad
Armrest Locking Pin
Resistance Damper
Sit–to–Stand
Assist Handles
Height Adjustment
Memory Stop
Beverage Holder
Height Adjustment
Tube
Sturdy Metal
Frame
Eight Inch Rubber
Wheels
(For indoor and outdoor use)
Safety Reectors (4)
Motion–Activated
Light

To open the UPWalker, begin by standing the
UPWalker on all four wheels on a level oor (Fig A1a) .
Carefully remove all packaging materials. Allow
resistance dampers to sit on the armrest (Fig. A1b).
Open the buckle strap retaining front legs of the
frame to enable opening of the UPWalker (Fig A2).
Standing behind the UPWalker, lift up slightly on the
sit-to-stand assist handles while pulling outward in
opposite directions to open frame (Fig A3).
Continue opening the UPWalker by pushing slightly
inward simultaneously on the sit-to-stand assist
handles to align and connect seat rails within the
frame (Fig A4 & A6).
To complete opening of the UPWalker, move seat to
most forward position (Fig H1, pg.13) and push
downward on the seat where marked “Push Down To
Secure” until seat rails sit securely inside the support
brackets on frame (Fig A5).
CAUTION: THE UPWALKER IS NOT SECURE FOR USE
IF SEAT RAILS ARE NOT PUSHED FIRMLY INTO THE
FRAME BRACKETS AS DEMONSTRATED IN FIG A6.
DO NOT USE THE UPWALKER IF SEAT RAILS ARE
OUT OF FRAME BRACKETS (FIG A7).
A. Opening the UPWalker CardioAccelerator
7
Fig A1a Fig A1b
Fig A2
Fig A3
Fig A4
Fig A5 Fig A6 Fig A7
1.
2.
3.
4.
5.
6.

Rotate handgrips into a vertical position with
resistance dampers hanging under handles with
dampers on outside of handles (Fig B1).
Remove retaining nut and bolt on end of pivot arm
under each armrest using enclosed tools (Fig B2).
Remove armrest locking pin (Fig B3) and lift up
slightly on handle. At the same time rotate
resistance damper until it slides into “U” channel
on pivot arm where retaining bolt was removed
(Fig B4). Insert bolt with nut on outside and
tighten (Fig B5). Tighten cam lever (Fig B6) to
prevent handle from rotating.
To install beverage holder when using UPWalker
as CardioAccelerator, select either the left or the
right side for installation. Insert beverage holder
bolt in place of retaining bolt described above to
retain both the resistance damper and beverage
holder. Attach nut on inside of unit where
beverage holder bolt extends through (Fig B7).
Attaching Resistance Dampers and Beverage Holder to
UPWalker CardioAccelerator
8
Fig B1
Fig B2
Fig B3
Fig B5
Fig B4
Fig B6 Fig B7
1.
2.
3.
3a.
B.

Your CardioAccelerator is now ready to be used. With armrest locking pin removed, place
forearms on armrests (see section “D”, pg.9 for correct armrest height before using)
applying pressure on forearms. Alternating between your left and right arms, move hands up
and down in a reciprocating motion pivoting at your elbows. This is a motion similar to doing
curls with weights in your hands. Once handgrips are lifted until they stop, push handgrips back
down until they stop (still rotating around the pivot point of elbows applying downward force
on forearms).
CARE SHOULD BE TAKEN TO USE THE RECIPROCATING ARM MOTION EXERCISE ONLY ON
LEVEL WALKING SURFACES.
C. Use of CardioAccelerator
9
Note: Use of the dual motion reciprocating resistance arm exercise on your CardioAccelerator,
while walking, can raise your heart rate by an additional 10–30 beats per minute for a more
robust cardio workout. The dual motion arm resistance workout activates many muscle
groups including, but not limited to, biceps, triceps, forearm, shoulder, and many back
muscles. Since muscle loss of up to 3% a year can occur as one advances over the age of 50,
resistance exercise is an important element of maintaining muscles for a healthier life. In
addition, the National Institues of Health suggests improved health through regular walking.
We encourage you to use mobility as medicine.
Health Benets
If you desire to use your UPWalker CardioAccelerator
as a traditional mobility assist device, without arm
exercises, insert the armrest locking pin in hole
indicated with white circle (Fig C1) which secures
your armrest in a ergonomically comfortable 14
degree angle. See pg. 9 “Reinserting the armrest
locking pin”.
Fig C1
Use of CardioAccelerator as a Traditional Upright Rollator
Once standing in the UPWalker, move forward so your body is between the armrest pads,
standing in an upright position with good posture. Put equal arm pressure on the left and
right armrest pads. Put hands on handgrips with ngers around the brake handles. Take
full-stride steps with constant gait. Pull on brake handles while going down hills to control
speed. Walk regularly for exercise to maintain good health.

The armrests on the UPWalker are raised and lowered independently of each other. It is
recommended that the armrests be set at the same height. Should the user have a physical
condition that requires offsetting the height of the armrests, the armrests can be set
accordingly for comfort.
D. Setting Desired Armrest Height
10
Fig D1
Fig D2
To raise and lower the armrests, rst push in the
Iight gray height adjustment tab (Fig D1) and, while
keeping the tab depressed with one hand, use your
other hand centered over armrest pad to raise or
lower the armrest to the desired height (Fig D2).
When the armrest is at the desired height, release
the height adjustment tab to automatically engage
the tab's pin in the tube hole. You will hear a "click"
when the tab is engaged. Avoid pinching your
ngers between the armrest and the top of the
height adjustment tube while raising or lowering
the armrests.
CHECK THAT THE HEIGHT ADJUSTMENT TABS
ARE SECURELY IN PLACE BEFORE PLACING
WEIGHT ON THE ARMRESTS AND WALKING IN
THE UPWALKER.
2.
1.
Reinserting the Armrest Locking Pin
A two–stage approach to fully inserting the locking pin makes it easier. First, move the
handgrip up and down slightly while inserting the locking pin with light pressure into in the
outer hinge body hole (Fig C1). When the hinge holes line up, the pin will pop through the
midsection of the hinge. It may then seem to hesitate rather than pass all the way through to
the far side of the hinge. At that point, continue to maintain light inward pressure on the pin,
but move the upper handgrip left and right lightly, without applying any more up or down
force. This should enable the pin to line up with the next hole, then pop all the way through
the hinge. There is a vertical white line which should be inline with height adjustment tube to
assist in aligning holes.
If you are still having trouble with reinserting the locking pin, unlock the cam (Fig B6) that
secures the upper handle angle. Pivot the upper handle outwards to a slightly less inwardly
slanted angle (towards a slightly more vertical position). Lock the cam. Then repeat the
procedure explained in the above paragraph.
DO NOT USE THE WALKER UNLESS THE LOCKING PIN IS ALL THE WAY THROUGH THE HINGE;
OR ALL THE WAY OUT.

Handgrips are designed to be turned in slightly
from a vertical position for ergonomic comfort. To
secure handgrips from moving or to set and secure
handgrip at the appropriate angle, open the
chrome cam lever under the armrest pad (Fig E1).
Once the preferred angle is established, close the
chrome cam lever rmly to secure the handgrip
in place (Fig E2). The tightness of the cam lever
can be adjusted by turning the cam lever nut on
the outer side of the armrest.
E. Securing Handgrips
The UPWalker includes a convenient height
adjustment memory stop on the bottom of each
height adjustment tube (Fig D3). After you have
established your preferred height setting, unlock
the height adjustment memory stop using the gray
knob, turning it in a counterclockwise
direction. Slide the memory stop up to the frame
and relock in place by turning the gray knob in a
clockwise direction until tight. Once set you may
raise an armrest from a lowered position until the
memory stop is reached. The memory stop does not
need to be moved again unless a different
armrest height is required.
Fig D3
11
Fig E1
Fig E2
5.
2.
1.
The armrest should be set at a height that is high enough that you feel support under your
forearms when standing upright inside the UPWalker but not so high as to cause your
shoulders to "hunch." Put equal weight on each forearm while using the UPWalker. You may
nd it benecial to displace some of your body weight on your forearms while walking.
Each setting is marked with a number on the height adjustment tube for future reference.
Note and remember the setting you prefer.
3.
4.

To set parking brake, push the brake handle
forward until it clicks in locked position. Some
users may want to hold the hand-grip with one
hand while using the other hand to push the brake
handle forward. (Fig F1).
To unlock brakes, simply pull brake handles back
toward you.
The following information is intended to assist
you with the adjustment of your brakes.
Note: The brakes on your new UPWalker have been
preset from the factory. Due to normal use over time
you may need to make adjustment to maintain this
setting. You can adjust the brakes by making the
following adjustments at either the brake handle
position (Fig G1 ) or above the rear wheel (Fig G2 ).
Before attempting to adjust the brakes, ensure that
the parking brake is disengaged (see “How to Use
Parking Brakes” above).
F. How to Use Parking Brakes
G. How to Adjust Brakes
12
Fig F1
Fig G1
Fig G2
It is strongly recommended that the parking brakes be set in the locked position when the
user is sitting down in the UPWalker or standing from a seated position and when the user is
making adjustments to the UPWalker's settings.
When using brakes while walking, both brakes should be applied with equal pressure.
2.
1.
3.
4.

Brake is Too Loose
Use ngers or pliers to turn the barrel adjuster nut
counterclockwise a half rotation (Fig G3). Try the
brake. If this does not correct the problem, repeat
turning the barrel adjuster nut a half rotation at a
time until the brake functions as expected. Then
turn the larger locking nut clockwise using ngers
or a 10 mm or 13/32 wrench until it presses tightly
against the housing to prevent the barrel adjuster
nut from loosening.
Resetting the Brakes
NOTE: DO NOT ATTEMPT TO PERFORM THIS TASK IF YOU ARE NOT
MECHANICALLY INCLINED.
If you cannot achieve the desired adjustment by
means of the above, you may use a 4 mm or 5/32"
Allen wrench to reset the brake using the brake
cable nut attached to the brake pad at each rear
wheel (Fig G4). First loosen the nut by turning Allen
wrench counterclockwise. Once loosened, you may
pull the brake cable out of the nut to tighten the
brake, or push the brake cable into the nut to
loosen the brake. After achieving desired cable
length, tighten the nut by turning clockwise. You
may have to repeat adjustment a few times to get
it right.
Fig G3
Fig G4
Brake is Too Tight
Use ngers or a 10 mm or 13/32 wrench to turn the larger locking nut counterclockwise
until loosened. Then use ngers or pliers to turn barrel adjuster nut clockwise a half rotation
(Fig G3) and try the brake. If this does not correct the problem, repeat turning the barrel
adjuster nut a half rotation at a time until the brake functions as expected. Then turn the
locking nut clockwise until it presses tightly against the housing to prevent the barrel
adjuster nut from loosening.
If you are not comfortable with adjusting your brakes please consult a local Durable Medical
Equipment dealer or contact LifeWalker Customer Service at 866-588-1845 or
customerservice@lifewalkermobility.com. Please note, LifeWalker does not reimburse
customers for maintenance charges on the UPWalker, including brake adjustments.
13

To walk in the UPWalker, pull the seat to the most forward position by lifting up and pulling
forward the tab on the front of the seat (Fig H1).
To sit on the seat, set the parking brake, pull the seat fully backward using the rear pull tab
(Fig H2), and sit with legs facing the rear. Sitting on the seat with the armrests in their raised
position is often preferred.
Use the sit-to-stand assist handles as needed when sitting and standing (Fig H3).
H. Positioning the Seat
I. Using Sit-to-Stand Assist Handles
Move rear wheels of the UPWalker under the chair in
which you are seated, aligned with your feet.
Set parking brakes (see "How to Use Parking Brakes"
on page 11).
Place hands on left and right sit-to-stand assist handles.
Bend over to where your nose is over your toes and
push down on the sit-to-stand assist handles to stand
up into the UPWalker (Fig I 1).
Release parking brake (see "How to Use Parking
Brakes" on page 11).
14
Fig H1 Fig H2 Fig H3
Fig I 1
2.
1.
3.
2.
1.
3.
4.
5.

For most users the front wheels should be set to
pivot freely and allow the UPWalker to turn left and
right. This is achieved by placing the light gray tab
above each front wheel in the down position (Fig J1).
However, the front wheels can be locked to roll only
in a straight line by ipping the gray wheel lock tabs
to the up position (Fig J2).
The rear wheels should be kept in the locked
position when using the UPWalker. If you need to
unlock the rear wheels to reduce the size of the
unit for shipping, storage or transport, lift up the
black wheel lock tabs above the rear wheels (Fig J3)
and pivot the wheels inward. Push wheel lock tabs
down to closed position after turning wheels under
the UPWalker.
K. Closing the UPWalker
Lower the armrests to the lowest setting (see
"Setting Desired Armrest Height" on page 9). Lift
the seat up by seat lift handle (Fig Kl) and allow
UPWalker to fold in (Fig K2). Stand the UPWalker on
all four wheels to roll or stow. Use the buckle strap
on front of the UPWalker to secure folded unit for
storage or transport.
Luxury Personal Item Bag must be removed to
avoid damage to bag.
J. Locking and Unlocking the Wheels
15
Fig J1
Fig J2
Fig J3
Fig K1
2.
1.
2.
1.
Fig K2

Check your UPWalker periodically to make sure that the brakes are working correctly
and that all of the nuts and bolts are secure. Do not use the UPWalker if the brakes are
not working correctly.
If hand-grips are loose, do not use the UPWalker.
Periodically inspect the wheels for tightness, wear and damage. Before use, make sure
that the wheels are free of hair, lint, dirt and other debris.
Regular inspection of parts including hardware, brackets and plastics for deformation,
corrosion, breakage, wear, dents, or compression is highly recommended.
Regular cleaning of the UPWalker is recommended. Wipe all surfaces with a damp cloth
and allow the surfaces to dry before use.
UPWalker rubber handles and pads are made of closed cell material so they can be
sanitized with antiseptic cleansers.
Teon or silicone lubricant may be applied to a rag and run over the armrest height
adjustment tubes and seat rail slide, resistance dampers, after cleaning, to assure
smooth operation.
The UPWalker is shipped to customers with the
following standard accessories:
Beverage Holder installation instructions for the
standard cup holder included with your
CardioAccelerator can be found in section B3a
on page 7 of this user manual.
Backrest Support (Fig Ml) is attached by sliding
each end over the sit-to-stand assist handles
(Fig M2) with mesh material facing the rear end of
the UPWalker. Backrest may be left permanently
on the UPWalker or removed when not in use.
L. Maintenance
M. Accessories
2.
1.
3.
4.
5.
6.
7.
16
Fig M1
Fig M2

17
Motion Activated Light The CardioAccelerator comes with a unique motion–activated LED
light used for your safety when dark. The light attaches with a magnet to the UPWalker
beneath the seat in the middle of the X-frame (Figure M5). It can easily be removed by sliding
off the magnet to charge the battery.
Lithium–Ion battery inside light periodically needs to be recharged when light stops working:
Pull magnetic light off from within metal retainer on your UPWalker.
Push the enclosed micro connector (smaller end of USB–C connecting cable) into light as
shown in (Figure M6). Please note connector only slides in with narrow end facing away from
front of light.
Push the larger end of USB–C connecting cable (Figure M7) into any USB–C wall charger for 2
hours to achieve full charge (very commonly used with phones and computers).
Fig M5 Fig M6
3.
2.
1.
Fig M7
Personal Item Bag has Velcro straps which should be wrapped around the lower arms of the X
frame located below the seat. (Fig M3 & M4). The UPWalker logo is designed to be on the front
side of the bag facing away from you when using the UPWalker.
Fig M3 Fig M4

18
Fig M8
Fig M10
Fig M9
Fig M11
Optional Accessories Available From LifeWalker's Website
Shopping Bag (Fig M8) sits on the seat when seat is placed in the forward position under
hand-grips. Support straps should be placed in the bend in the hand-grip tubes at the base of
each hand-grip. Secure support straps using the Velcro material at the ends of the straps (Fig
M9). Note that the shopping bag has convenient handles to transport your purchases by hand.
Luxury Personal Item Bag (Fig M9) is constructed with premium materials and includes a
secure zipper top and side pockets to hold additional personal items. With the UPWalker
logo facing forward, place support straps in the bend in the hand-grip tubes at the base of
each hand-grip and secure using Velcro at the ends of the straps (Fig M10 & M11). Remove bag
before folding UPWalker.

Beverage Holder, when using UPWalker as traditional upright walker, can be attached to
either one of the hand-grip tubes (Fig M12). First, unscrew the knob on U-shaped tube clamp
and remove the beverage holder from the U-clamp. Then slide "U" over hand-grip tube (Fig
M13) close to armrest pad with hole on bottom and at side of "U" facing inward. Make sure
rubber sleeve remains inside the "U". Slide the bolt on beverage holder through the hole on
"U" with beverage holder positioned on the inside and the knob on the outside of the
UPWalker (Fig M14). Note that the “U” and holder have a matching positioning key to rotate
and lock the holder at the desired angle. Additional adjustments can be made to the
positioning of the beverage holder by moving the “U” on the hand-grip tube. Please note this
optional cup holder could not retain a beverage while utilizing reciprocating arm movement.
See page 7 for instructions on installing standard beverage holder when using UPWalker as
CardioAccelerator.
Fig M12 Fig M13 Fig M14
Smartphone Holder (Fig M15) supports different sizes of phones for hands free operation
when you are on the go. To attach the holder, rst unscrew the cam lever nut under the right
armrest pad opposite the chrome cam lever which secures the hand-grip tube. Mate the hole
in the end of the exible phone holder arm with the cam lever bolt and the plastic base
holding that bolt. Reattach and tighten the nut (Fig M16). Close cam lever to secure both
hand-grip arm and smart phone holder. It may be necessary to adjust the cam lever tension
by turning the cam lever nut clockwise or counterclockwise.
Two round adjuster knobs are located on the back of the smart phone holder (Fig M17). Use
the larger knob to adjust the size of the holder to accommodate different sizes of phones.
Turn large knob counterclockwise to open and insert phone, then turn knob clockwise to
close holder. Secure the phone in place by turning the small knob clockwise. The phone
holder is attached to a exible arm which can be bent to turn phone to desired position (hold
arm rmly where it attaches under armrest while bending phone end, so as not to break the
attachment mechanism on the UPWalker).
19

Cane/Umbrella Holder (Fig M18) attaches to the side of the UPWalker for the convenience of
holding a cane or umbrella hands free. The cup attaches to the lower horizontal frame tube
facing outward near front wheels (Fig M19). To attach the cup, rst turn the cup to remove
from the cup attachment clamp. Then remove the bolt with light gray knob from the clamp.
Spread the "U" clamp over the lower horizontal tube with the knob on the outside and the
retaining nut on the inside. Slide bolt with knob back through the holes on clamp and turn
the knob clockwise to seat the bolt in the retaining nut and tighten clamp against frame.
Re-attach the cup and turn to desired position.
The upper retaining clamp attaches to the curved front leg tube of frame, with clamp and
gray knob on the outside of the frame (Fig M20). To attach the clamp, remove bolt with knob
from the clamp. Spread the “U” clamp over the frame with the knob on outside of F frame.
Slide bolt with knob back through the holes on clamp turning knob clockwise to tighten
clamp against frame. After attachment, turn retaining clamp to desired position to secure
cane or umbrella.
20 Fig M18 Fig M19 Fig M20
The phone holder can be pivoted on the exible arm to optimize viewing of the phone.
Untighten/tighten the adjuster knob at the end of the arm to pivot the phone holder. DO
NOT insert phone into smartphone holder while utilizing the reciprocating arm movement
on your CardioAccelerator.
Fig M15 Fig M16
Fig M17
This manual suits for next models
1
Popular Mobility Aid manuals by other brands
Invacare
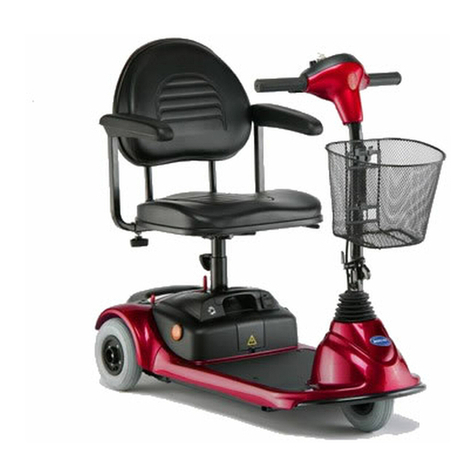
Invacare Lynx L-3 Brochure & specs
Invacare
Invacare OCMK01 Assembly, installation and operating instructions
ADAPT SOLUTIONS
ADAPT SOLUTIONS Power-Pull user manual

NRS Healthcare
NRS Healthcare S23472 User instructions
Quantum Rehab
Quantum Rehab Synergy Solution 1 INFMANU3281 Installation and care guide

liftup
liftup AssiStep installation manual
