Provibrations ProVibe Elite User manual

ProVibe Elite
Exercise Manual

1|
The first time you use your ProVibe Elite
This may be a new sensation for you that you are unfamiliar with. To become accustomed to
the machine, how it works and how your body will feel, let’s do a little trial program.
Basic positioning
Stand in front of the machine a little to the left of center facing the display panel. Do not stand
on the plate just yet.
Press the Start/Stop button
Press both the Oscillating (Left Side) and the Spiral (Right Side) speed buttons down once.
The machine has now stopped vibrating.
Oscillating Vibration
Press the Up Button on the left side once. The machine is now on speed 1 for just the oscillating
vibration. Place one foot in the middle of the plate. Slowly move your foot to the side of the
plate and you will notice that the vibration intensity increases. This is because the plate is
moving a greater distance on the side than it is in the middle.
Press the Up button on the left side again. The machine is now on speed 2 for just the
oscillating vibration. You will notice that the plate is now moving faster. There are 60 speeds for
both vibration types and you are only on number two.
Press the Oscillating (Left Side) speed button down twice so that the machine is stopped again.
Switch feet and repeat the above steps.
Press the left speed button twice so the machine stops again.
Spiral Vibration
Press the Spiral Vibration (Right Side) speed button up once so that the machine is now on
speed one for just the Spiral Vibration.
Place one foot in the middle of the plate. You will notice that this is a completely different type
of vibration that produces a different kind of sensation.
Slowly move your foot to the side of the plate and you will notice that the vibration intensity
stays the same with this vibration type.
Press the Up button, on the right side, again several times. You will notice that the plate is now
moving faster.
Switch feet to experience the spiral vibration with the other foot.
Press the Start/Stop button so the machine stops.
Dual Vibration
Press the Start/Stop button so the machine starts again. This time both vibration types are
running.
Place one foot in the middle of the plate. Slowly move your foot to the side of the plate and you
will notice that the vibration intensity increases. You will now notice the difference in the
vibration from the two previous vibrating types.
Switch feet.

2|
Press the Dual-Vibe speed control button on the lower left of the display panel. You will
notice that both vibration speeds increased at the same time. The down arrow will slow down
both vibration types at the same time.
Press the Start/Stop button so the machine stops.
Now put both feet on the plate and press the Start/Stop button again.
Play with all of these buttons to see how you can control the machine in the Manual Mode
Press the Start/Stop button so the machine stops. You will notice that the machine will gradually
slow down when you are on higher speeds so you do not come to an abrupt stop.
Your body sensation after stopping
Now that the machine has stopped, and you are off the machine, walk around for a few moments
and shake your legs. You most likely will feel a little tingling or even itchiness on your skin. You may
notice that your feet are a bit red. That is because the circulation has increased dramatically in your
legs. Sometimes this may occur later in your legs or your arms and hands. Again it is the increased
circulation.
Headaches
While it is not common with the ProVibe Elite, some people may get headaches the first few days.
The reason is that there are a lot of muscles in the neck that are inhibited. They are very tight and
have not been working. After you have started using the ProVibe Elite all of your muscles are going
to start contracting and relaxing, not just the muscles in your legs. The oscillating vibration is
mimicking the natural walking motion and causes your body to react in order to maintain your
balance which is going to cause all of your muscles to start working. This can then inadvertently be
registering in your head and cause the headache. Those muscles that have not been working for a
while are now being forced to work. If you do get a headache don’t panic. The next time, just make
sure that you are not in a position that will cause the vibration to reach your head. It is also wise for
you to put your feet closer together this will lessen the intensity of the Vibration.
Soreness
Even though vibration training is an easy exercise, in that it is easy to do and has low impact on the
joints. The next day you might actually be sore.
Some people become sore after the first few times of using the ProVibe Elite. Don’t be overly
concerned. While that may actually be true, the soreness is due to a new sensation. Your body is
just reacting to that new sensation and it will go away as you become used to using the machine.
When to use the Manual Settings
Most of the exercises that follow should be done using the manual settings. You will be able to control
the vibration(s) for a specific exercise that works best just for you. It is going to take some time for
you to discover what works best for you.
When to use the Internal Programs
The internal programs are designed for overall usage, mostly while just standing on the platform.
Many users think that all they need to do is use the built-in programs. They are a good way to get
started but don’t let these be the only things you do. If you want to get fit, lose weight, firm up, etc.
just standing on the platform and using only these programs alone won’t do it. Read about all of these
exercises, stretches & massages to see what will work best for you. You will need to experiment to
find the right exercises, speed and intensity that will challenge your body to improve.

3|
When to use the USB Flash Drive on the
ProVibe Elite and the Modifiable
programs on the ProVibe Elite
This is one feature that sets ProVibe Elite apart from other machines on the market.
When you look at the massages that follow you will notice that, with most of them, you are laying on
the ground with a body part on the platform or sitting on the machine. Just how do you control the
vibration when you can’t reach the display panel? You use the flash drive. For example, with most of
the massages you will want to be using just the Spiral vibration. You would then set one of the six
programs on the flash drive for massages. The first step might be after you press the start button to
be stopped for 10 seconds while you get into position. You then might want the Spiral vibration to
run for 5 minutes at speed 30. Then stop again for 5 seconds while you change positions and start
again at a different speed and run for 7 minutes. Then stop again for 5 seconds while you change
positions and start again at a different speed and run for 3 minutes. You can then loop this program
meaning that it will start over and run for however long you want, up to 20 minutes.
As your exercise program progresses, you will want to make changes to the program. These changes
are really very easy to make.
Many customers ask why we just don’t have those already in the programs. The answer is really very
simple. Are you 25 or 85? Are you sedentary or athletic? Are you 100# or 300#? Each body is different
in regards to your age, condition, weight and suffering from physical ailments. There is no one
program that is correct for everyone. In addition, your body is going to change; you are going to
become more fit and you want to be changing your routine with different exercises, different speeds
and different times.
Many clients will make one of the programs for Massages, another program for Stretches. This may
include another for Exercises done on Monday, targeting the lower part of the body, and another on
Tuesday for targeting the upper torso. There is a lot of flexibility here and you have six programs that
you can modify just for your needs and body. If you need more than 6 programs, simply copy the
contents from this flash drive to another. Now you have an unlimited number of programs.
Please refer to the manual that came with your machine on how to set these programs.

4|
Basic Exercise Suggestions
Basic Exercise
Description
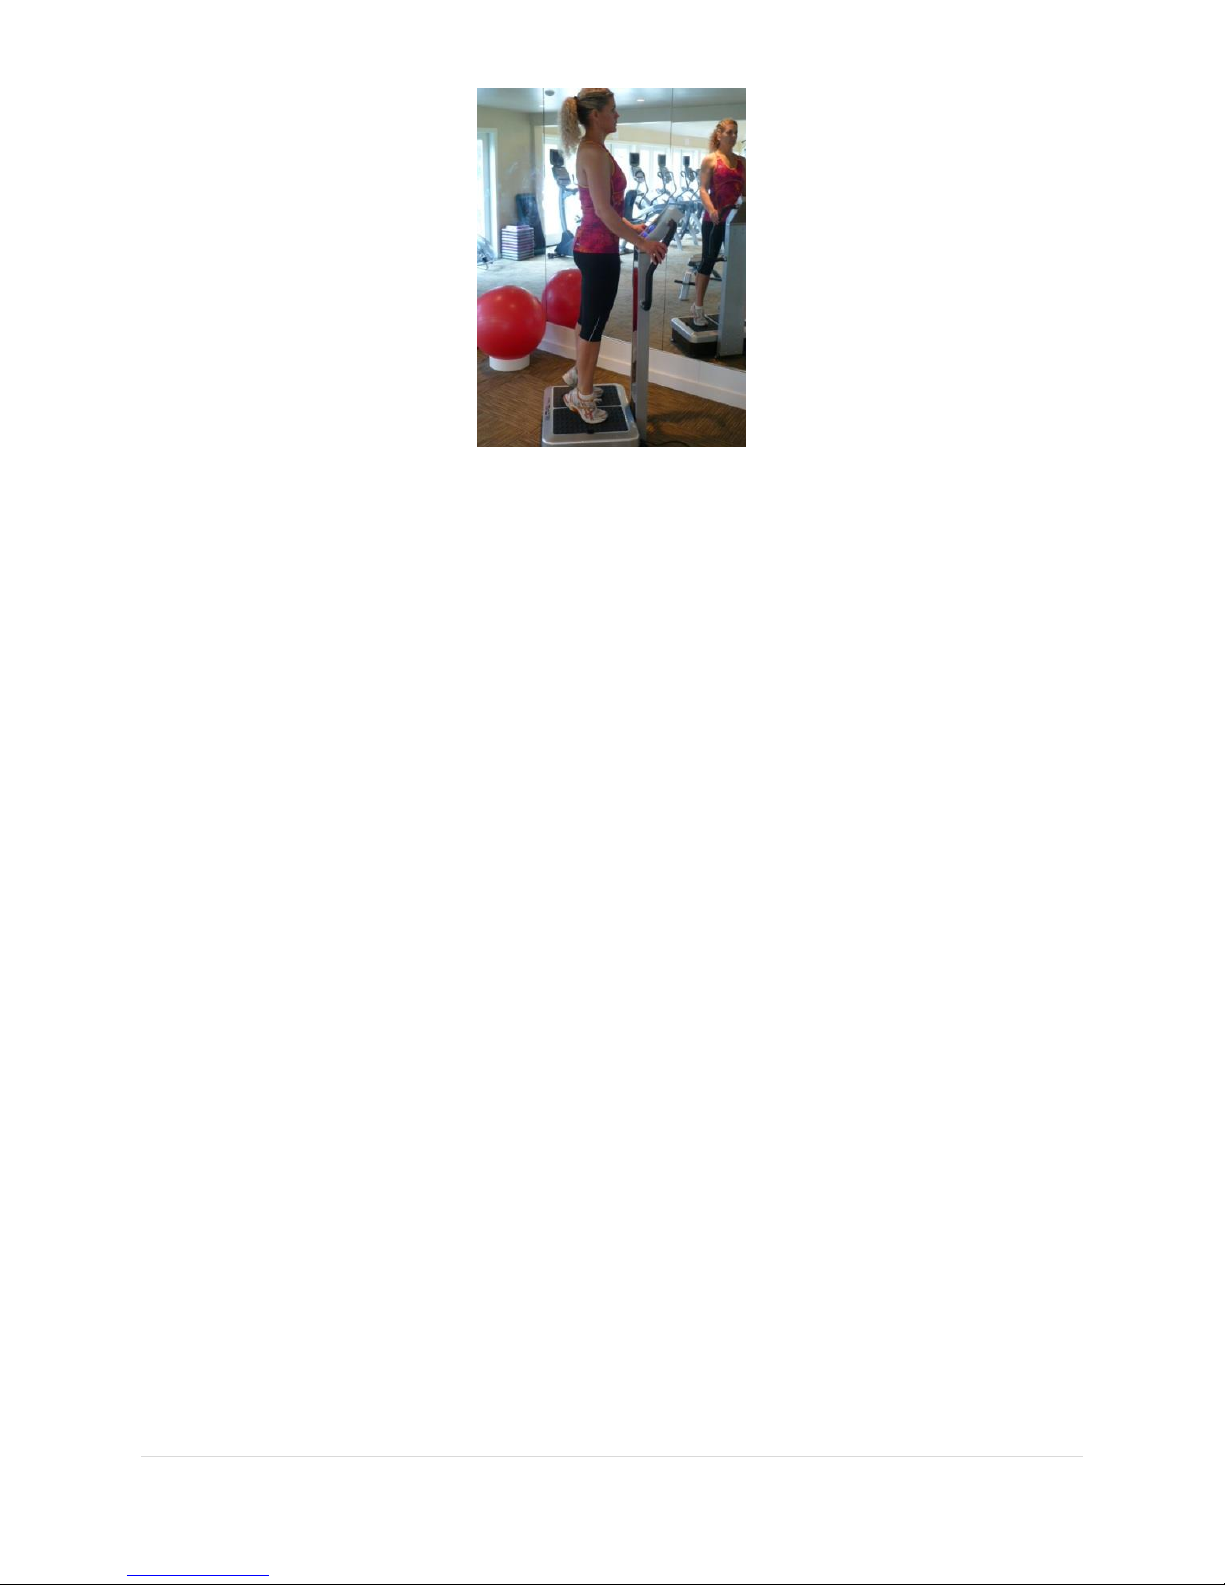
This is the starting position for many exercises in addition to just standing on the platform.
Preparation for the rest of the exercises.
Position of the feet
Begin with your feet even on the plate and about 6” apart with your toes pointed slightly to the
outside - “Low Intensity Position”
Stand with your feet flat on the plate and your weight distributed evenly.
Low Intensity Medium Intensity High Intensity Toes outward Toes Inward
Position of the body
•Standing upright, facing the display panel.
•Knees slightly bent (The stiffer you make your knees, the more the vibration will travel up your
body.)
•Hold on to the ProVibe Elite's handles for balance.
•Start with your feet in the “Low Intensity Position”.
•Spread your feet further apart to find the right position for you. You are adjusting the intensity
of the vibration.
•This is the “Basic” position that will be referred to in the rest of the exercises.
Exercise description, length & frequency
•Remain in this position with only slight posture changes.
•Beginner - 2 minutes at a low frequency (Oscillating 1-5, Spiral 1-5), then 5 minutes at a higher
frequency (Oscillating 25-40, Spiral 25-40), then again 2 minutes at a low frequency (Oscillating
1-5, Spiral 1-5). This is an excellent exercise for you to define a program on the flash drive.
•Intermediate - 3 minutes at a low frequency (Oscillating 1-5, Spiral 1-5), then 10 minutes at a
higher frequency (Oscillating 25-40, Spiral 25-40), then again 2 minute at a low frequency
(Oscillating 1-5, Spiral 1-5).
•Advanced - 3 minutes at a low frequency (Oscillating 1-5, Spiral 1-5), then 15 minutes at a higher
frequency (Oscillating 25-40, Spiral 25-40), then again 2 minutes at a low frequency (Oscillating
1-5, Spiral 1-5).

5|
•Depending on your physical condition, and body mass, the frequency of the vibration and the
amplitude (how far apart you spread your feet) can be tailored to your needs.
•If this position is comfortable for you and you would like to experience more vibration, spread
your feet a little further apart to increase the intensity of the vibration.
Desired result
Getting adjusted to the vibration sensation
Improving the neuromuscular conditioning safely with correct posture control.
Improving your circulation and body awareness.
Learning how the vibrations are affecting and controlled with your body.
Comments
These exercises will be learning experiences for you. You will soon recognize how minimal changes in
your posture, vibration speed and amplitude affect different parts of the body. Self-awareness comes
from both experience of voluntary control and guided movements.
•The Basic exercise in nothing more than standing on the Vibration Plate. Standing straight with
a slight arch in the back and holding your core as tight and for as long as you can.
•Do not let this be the only exercise you will do unless physically you can’t do anything else.
•With any and all of the exercises most people can use the machine several times a day without a
problem.
•We do caution you to not use the machine longer than 20 minutes in any one session.
•Longer than 20 minutes will stimulate too much lymphatic drainage causing too many toxins to
overwhelm your system.
•It is also a good idea to also drink plenty of water to eliminate these toxins.
6|
Intermediate Exercise - Weight shifted to your toes in the basic position
Description
Start from the basic position, moving the critical point of the body mass over the forefoot, with heels
raised at the same time.
Position of the body
•Assume the “Basic” starting position,
•Lift your heels by shifting your weight on to your toes.
Exercise description, length & frequency
•Lift your heels alternately and to different heights.
•Bend your hips to different degrees.
•Learn how the vibrations can be controlled in different parts of the body. Your foot & calf
muscles will be especially stimulated in the toe position. By decreasing the support area, your
point of balance will be affected and your balance will increase.
•Hold on to the ProVibe Elite's handles for balance.
Desired result
Learn how the vibrations can be controlled in different parts of the body. Your foot & calf muscles will
be especially stimulated in the toe position. By decreasing the support area, your point of balance will
be affected and your balance will increase.
Comments
Learning how the position of your feet can change your balance is more difficult than the basic position.
Use caution in being too aggressive. When you increase the demand of this exercise you will learn how
your foot position stimulates other body parts.

7|
Intermediate Exercise - Weight shifted to your heels in the basic position
Position of the body
•Assume the “Basic” starting position.
•Move your weight very slowly to your heels while simultaneously lifting your toes.
Exercise description, length & frequency
•Lift your toes on one foot, then the other. Vary the height you lift your toes with each repetition.
•Hold on to the ProVibe Elite's handles for balance. You will find that balancing on your heels is
very difficult to control.
•Lift the toes of both feet together.
•Start with one minute at a low frequency (Oscillating 1-5, Spiral 1-5), gradually increase the
time, intensity & speed.
•You probably will only be able stand without support for only a few seconds. Do not be too
aggressive with this position.
•You will learn how your foot position will stimulate other parts of your body.
Desired result
Learn how the vibrations can be directed to different parts of the body: vibrations are directed
to the muscle structure along the sides of the spinal column. The support base and major
elimination of the sideways rotation through rotating the foot inward and upward makes this
experience more difficult and challenging your balance.
Reduce the risk of falling.
Comments
The control of this position is much more demanding and challenging than the basic position or the toe
positions. You probably will only be able stand without support for only a few seconds. Do not be too
aggressive with this position. If you have balance issues do not try this without holding on. When you
increase the demand of this exercise you will learn how your foot position stimulates other body parts.
Learning how the position of your feet changes your balance and by directing vibration into the torso,
and especially into the back. When you are on the edge of your heels the center of gravity is placed on
the hip joints.

8|
Squats
Basic Squat
One Leg Squat
Squat holding ball between the
knees
Squat while trying to force
knees apart held by stretch
bands
Muscle Groups effected by these
exercises
One leg squat with stretch
bands
Description
Spread feet apart-standing in a bent position.
Stimulates the hip, pelvis-and back muscles. With the use of weights, you will also stimulate
your shoulder and arm muscles.
Position of the body
•Assume the “Basic” starting position.
•In a bent position - the knees are to be bent, chest bent forward with a slightly arched straight
back.
•Do not let your knees go past your toes.
Exercise description, length & frequency
Slowly move to the squat position & hold that position for 5 –10 seconds.
Slowly stand back erect & hold that position for 5 –10 seconds.
Repeat this exercise either for a number of repetitions or minutes of seconds.
Hands holding on to the handles for balance.
Intermediate - hands to the side or to your chest.
Advanced #1 –Hold light weights in both hands.

9|
Advanced #2 –Hold light weights in both hands with your arms stretched out sideways
Frequency of treatment: two or three times per week and depending on fitness level, daily may
be possible.
Variation #1 - Place a ball between your knees while standing erect and then holding the ball as
tightly as possible. Squat as far down as far as you can. Move up and down slowly.
Variation #2 - Place the elastic band around your knees while standing erect and then try to pull
them apart as much as possible. Squat as far as you can. Move up and down slowly.
Advanced Exercise - One Leg Squat
Hold on to the handles on the support column.
Lift one leg 6” off the platform so you are standing on only one leg. Squat as far as you can. Hold
15-30 seconds.
Switch legs and repeat several times.
Desired result
Improving your muscle strength in the hips, pelvis & lower-back.
Improvement in the range of motion in the hip, knees and ankles.
Stimulating of the arm and shoulder muscles.
Stimulating bone growth.
Comments
A reduction in your hip muscle strength is the second major factor, after balance, resulting in falls and
can be fatal in older people. Muscle fatigue should be reached. If you have knee problems, the exercise
difficulty should be advanced very slowly.
Bending the torso forward increases the torque in relation to the hip joint and stretching of the
buttocks.

10|
Torso bending & stretching
Holding weights in your hands
Description
With extended or slightly bent knees, bend the torso down and forward to touch your toes.
Position of the body
•Stand facing away from the display panel.
•Begin with your feet shoulder width apart on the platform.
•Lift your arms straight over your head.
Exercise description, length & frequency
•From an erect position, very slowly bend the torso forward. This should take 8 seconds. Do not
force this movement.
•Just bend as far as possible trying to touch your toes. Do not twist your body.
•Squeeze the buttocks muscles as much as possible while doing this exercise as this will take
the pressure off of the lower back.
•Hold for 5-10 seconds.
•Slowly stand erect while lifting your arms back over your head as though you were trying to
touch the ceiling.
•Bend backwards to stretch as far as you can and return to the original position.
•Hold for 5-10 seconds and repeat the exercise for a number of repetitions or minutes that is
comfortable for you.
•You need to carry out these movements with finesse and be aware of what your body is telling
you. The boundaries of balance and being pain-free must be carefully monitored.
Desired result
Stretching the calves, hamstrings and back extension. The torso and hip stretching increases the
range of motion. The greater the range of motion and the greater the force, the greater the
absorption of potential energy.
Pain relieving, muscle relaxation.
Comments
Stretching is an important part of your program. With improved range of motion, an improved sensation
of movement should follow. Improved range of motion leads to muscle relaxation, prevention of pain
and elimination or reduction of pain.
You need to carry out these movements with finesse and be aware of what your body is telling you. The
boundaries of balance and being pain-free must be carefully monitored.
** If you have back problems or balance issues you need to discuss this exercise with your doctor and
to have assistance while performing this exercise.

11|
Pelvic titling
Description
Tilt the pelvis forwards and backwards with slightly bent knees
Position of the body
•Assume the “Basic” starting position.
Exercise description, length & frequency
•With your knees bent slightly, very slowly tilt the pelvis. Keep your knees and chest in the same
position moving only the pelvis region.
•Advanced position and for better control place your hands on your hips.
•Your hands will feel and guide the pelvic tilting motion forward and backwards.
•Do this exercise for 1-3 minutes varying the frequency in the mid-range.
•Intermediate Exercise –Do the same exercise but with your hands on top of your head.
Desired result
Stretching and selective movement in the lumbar region of the spine to improve torso control.
Pain reduction and muscle relaxation
Comments
The flexibility of the hip region and control of the upper body creates a fluid gait and body control.

12|
Side Bends
Description
With one hand extended straight over your head, slide the other hand down the side of your
leg. Do not turn your body, bend only sideways.
Position of the body
•Assume the “Basic starting position.
•Knees as straight as possible.
Exercise description, length & frequency
•With your arms hanging down your sides, bend sideways sliding one hand down your leg to your
knee
•Hold this position for 5-10 seconds.
•Repeat with the other arm.
•Variation - One arm is extended upwards over your head the other arm is held on the side of
your leg.
•Slowly bend sideways as far as you can towards the hanging arm. Do not force or bounce this
movement should take 8 seconds.
•Hold this position for 5-10 seconds.
•Switch arms and repeat the exercise.
•Repeat 5-10 times.
Desired result
Stretching the side and pelvic muscles.
Increasing the stretch movement results in absorption of energy for faster movement and
increased power. This in turn leads to pain reduction and muscle relaxation.
Comments
Stretching is an important part of your program. With improved range of motion, an improved sensation
of movement should follow. Improved range of motion leads to muscle relaxation, prevention of pain
and elimination or reduction of pain.
You need to carry out these movements with finesse and be aware of what your body is telling you. The
boundaries of balance and being pain-free must be carefully monitored.

13|
Twisting
Holding Handles & not
Description
Stand erect turning your trunk to the right and then the left feet are held in position.
Position of the body
•Assume the “Basic” starting position.
•Knees as straight as possible.
Exercise description, length & frequency
•Place your left hand on the right handle.
•Slowly rotate your body the right as much as possible.
•Hold this position for 5-10 seconds.
•Slowly rotate your body back to the front.
•Place your right hand on the left handle.
•Slowly rotate your body the left as much as possible.
•Hold this position for 5-10 seconds.
•Slowly rotate your body back to the front.
•Repeat as many times or minutes that are comfortable for you.
•Intermediated Exercise –Begin with your arms will be outstretched to the sides. Start twisting
as far as you can to the right while bring your left hand to your right shoulder. This should be
one fluid motion and hold. Then reverse directions.
Do the same as above but with your hands together on your chest.
Desired result
Stretching the oblique and pelvic muscles.
Increasing the stretch movement resulting in absorption of energy for faster movement and
increased power. This, in turn, leads to pain reduction and muscle relaxation.
14|
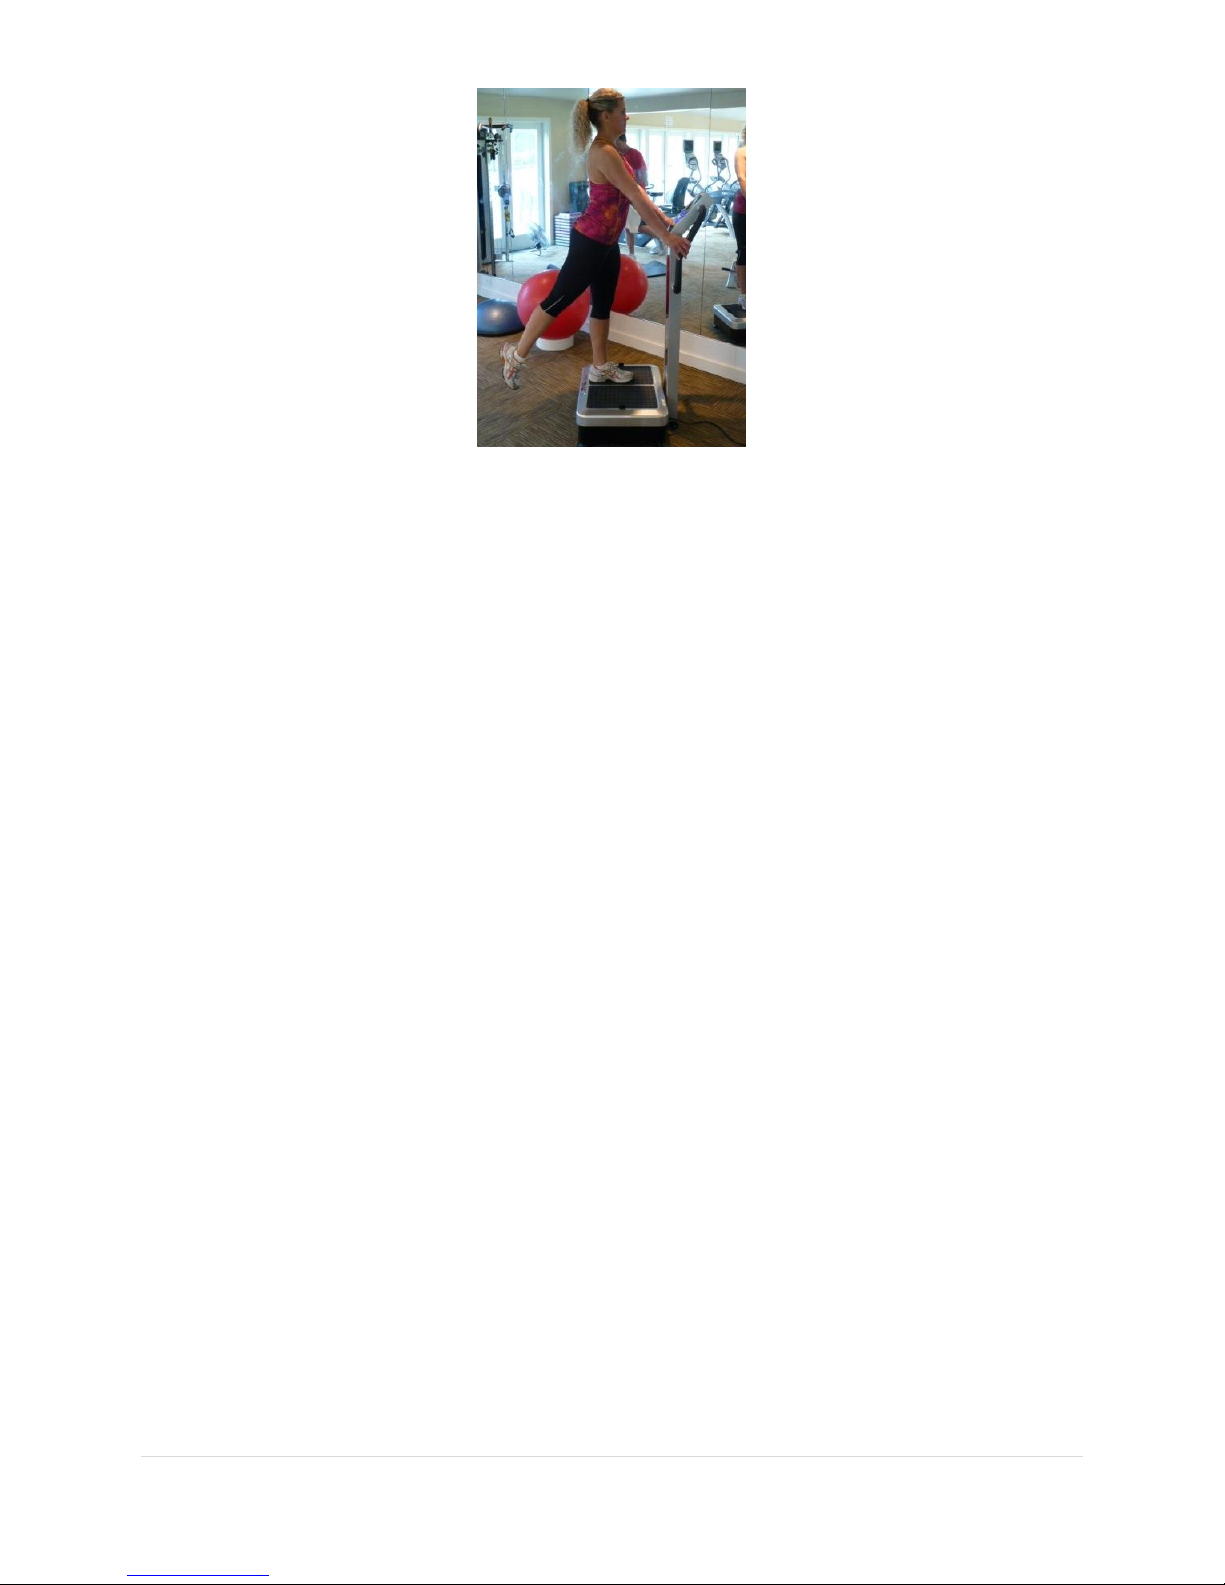
One leg standing
Position of the body
Assume the “Basic” starting position.
Keep your knees as straight as possible.
Holding on to the handles.
You will be lifting one leg at a time backwards and held up in a relaxed position.
Exercise description, length & frequency
Hold this position and try to move up and down.
Begin with 30 to 60 seconds at a low frequency (Oscillating 1-5, Spiral 1-5), then 30 to 60
seconds at a higher frequency (Oscillating 25-40, Spiral 25-40), then again 30 to 60 seconds at a
low frequency (Oscillating 1-5, Spiral 1-5). This is excellent exercise for you to define a program
on the flash drive.
Intermediate & Advanced - try to move up and down so you would be doing a one leg squat.
Desired result
Improving your balance.
Reduce the risk of falling.
Comments
When you are walking, 80% of the time you are on one leg. An important part of that movement is to
control the gravitational force on your body. That is the object of this exercise. When you are practicing
a balance exercise, you need to use different frequencies for optimal benefit.

15|
Torso 90° bend
Description
With the legs fairly straight, bend the torso down and forward until it is at a 90° angle to your
legs.
Position of the body
•Stand facing away from the display panel.
•Begin with your feet even on the plate about shoulder width apart and keep your legs fairly
straight.
•Arms are in relaxed hanging position or stretched forward for a variation.
Exercise description, length & frequency
•From an erect position, very slowly bend your torso forward. This should take about 8 seconds.
Do not force this movement. Make sure your back is straight. If you allow it to be bent like the
letter C, it will put too much strain on your lower back.
•Repeat this exercise slowly several times.
•Variation #1 - Hold a baton or light weight in both hands and stretch forward.
•Variation #2 –Go past the 90 ° but only if you are in excellent shape. Be very cautious about
keeping your back straight.
•Change the stimulation frequency, in the mid-range, progressing to a higher frequency for 1-2
minutes.
Desired result
Increase the strength of buttock, thigh and back muscles
Pain relieving, muscle relaxation.
Stimulate bone growth.
Comments
Stretching is an important part of your program. With improved range of motion, an improved sensation
of movement should follow. Improved range of motion leads to muscle relaxation, prevention of pain
and elimination or reduction of pain. In this position maximum torque is achieved in the hip joint which
is then countered by the maximum buttocks reaction. You need to carry out these movements with
finesse and be aware of what your body is telling you. The boundaries of balance and being pain-free
must be carefully monitored.
If you have back problems or balance issues you need to discuss this exercise with your doctor and to
have assistance while performing this exercise.

16|
Strength Exercises
Bicep Curl
Description
The standard exercise for increasing arm strength. Bicep curls are an ideal way to build upper
body strength, something that many women are lacking.
Position of the body
•Assume the “Basic” starting position.
•Place some light weights in your hands.
•Remain in this position with only slight posture changes
Exercise description, length & frequency
•Slowly raise your hands up to the shoulder, keeping your hands in the upright position. (Palms
are facing toward the body) Keep your elbows in and move only your forearms. The upper arm
is to remain stationary.
•If this is difficult for you, do only one arm at a time and hold on to the handles with the other.
•Hold this position for 5-10 seconds then slowly return to the starting position.
•Repeat this exercise slowly several times.
•Rotate your hand 90° so your palms are facing upward.
•Repeat this exercise slowly several times.
•Rotate your hand 180°so your palms are facing downwards.
•Repeat this exercise slowly several times.
•Gradually increase the weight in each hand.
•30 seconds at a low frequency (Oscillating 1-5, Spiral 1-5), then 30 seconds at a higher frequency
(Oscillating 25-40, Spiral 25-40), then again 30 seconds at a low frequency (Oscillating 1-5, Spiral
1-5).
Advanced Exercise
Exercise description
Do the same exercise but in a modified squat position.
Do the same exercise but in a moving modified squat position. When you are lowering your
body to the squat position your arm is coming up to the full bicep curl and when you stand up
your arm is moving down. This should be one continuous motion.
Desired result
Increase the strength of your arms and upper back.
Build bone density in your arms.
Relieve joint pain.
17 |
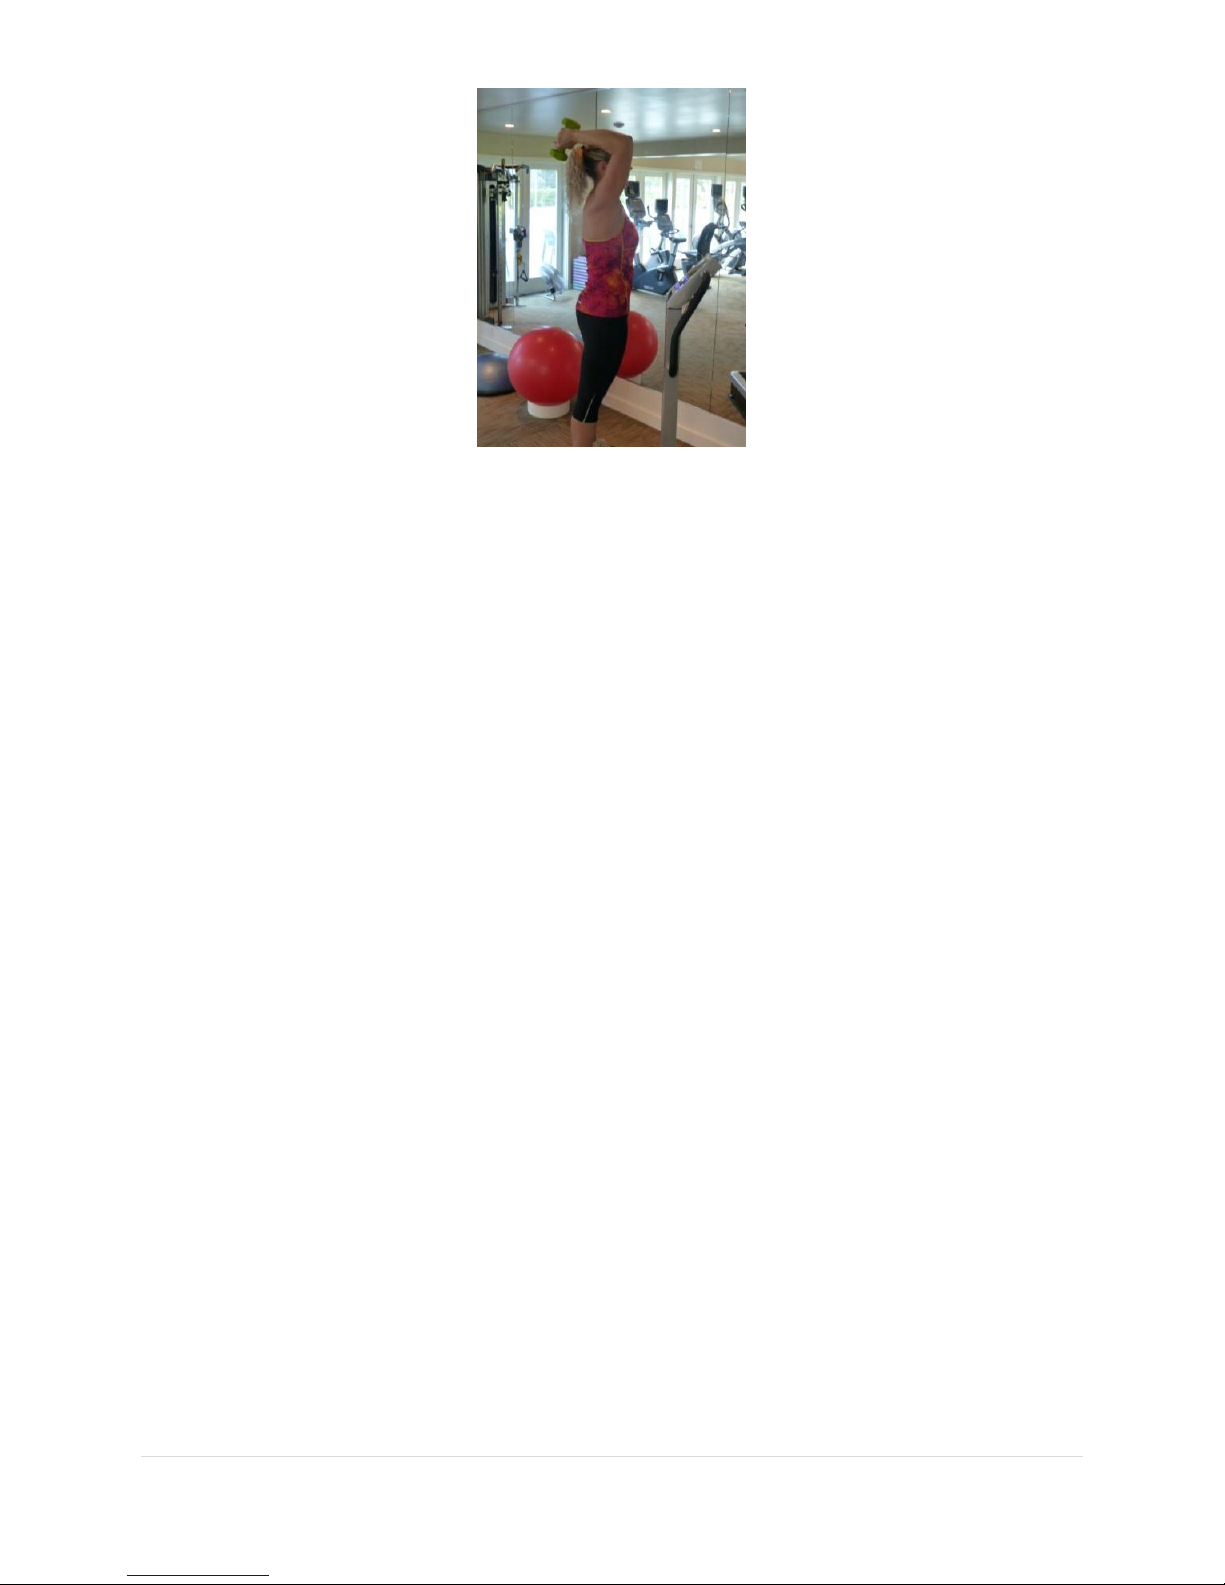
Triceps Extension
Description
The standard exercise for increasing arm strength. Triceps extensions are an ideal way to build
upper body strength, something that many women are lacking and will aid in getting rid of the
upper arm flab.
Position of the body
•Assume the “Basic” starting position.
•Knees slightly bent
Exercise description, length & frequency
Hold a light weight in one hand or both hands holding a single weight and place each hand
behind your head.
Slowly extend each arm until the weights are directly overhead, and then return to behind your
head.
Repeat this exercise slowly several times.
If this is difficult for you, use only one arm at a time and hold on to the handles with the other.
Gradually increase the weight in each hand.
30 seconds at a low frequency (Oscillating 1-5, Spiral 1-5), then 30 seconds at a higher frequency
(Oscillating 25-40, Spiral 25-40), then again 30 seconds at a low frequency (Oscillating 1-5, Spiral
1-5).
This would be an excellent exercise to be included in program for your upper body that you
designed on the flash drive.
Depending on your physical condition and body mass, the frequency of the vibration and the
amplitude (how far apart you spread your feet) can be tailored to your needs.
Desired result
Increase the strength of your arms and upper back.
Build bone density in your arms.
Relieve joint pain.

18 |
Whole Arm Extension
Description
The standard exercise for increasing arm strength. Whole arm extensions are an ideal way to
build upper body strength, something that many women are lacking and will aid in getting rid of
the upper arm flab.
Position of the body
•Assume the “Basic” starting position.
•Knees slightly bent.
Exercise description, length & frequency
Hold a light weight in both hands and place each hand next to your ears with the weight above
your shoulder.
Slowly extend each arm until your arms are outstretched forming a 90° angle with your body. .
Repeat this exercise slowly several times.
If this is difficult for you, use only one arm at a time and hold on to the handles with the other.
Gradually increase the weight in each hand.
30 seconds at a low frequency (Oscillating 1-5, Spiral 1-5), then 30 seconds at a higher frequency
(Oscillating 25-40, Spiral 25-40), then again 30 seconds at a low frequency (Oscillating 1-5, Spiral
1-5).
Advanced Exercise –Extend your arms out straight forming an Iron Cross.
.
Depending on your physical condition and body mass, the frequency of the vibration and the
amplitude (how far apart you spread your feet) can be tailored to your needs.
Desired result
Increase the strength of your arms and upper back.
Build bone density in your arms.
Relieve joint pain.

19 |
Push Up (Military)
Description
Push-ups are an ideal way to build upper body strength, something that many women are
lacking
Position of the body
Kneel down in front of the machine with enough distance so you can put your hands on the
platform and rise to a military style push up position.
Use a rubber mat on the platform, if necessary, for comfort.
The normal position of your hands is shoulder width. However, the oscillation vibration maybe
too strenuous for your head. If that is an issue, try to move your hands closer together to lessen
the amplitude. If it is still too severe use only the spiral vibration.
Exercise description, length & frequency
The correct posture while doing a push-up requires a straight spine.
The abdominal muscles should remain taut as you perform push-ups.
In the push up position, with your body straight, slowly lower your body with your arms as far
as you can.
Repeat as many times as you can comfortably.
Repeat this exercise 2 or 3 times a week.
This would be an excellent exercise to include in a program for your upper body that you design
on the flash drive.
Desired result
Increase your arm, chest, shoulder triceps and core body strength.
Increase the firmness of your arms and upper body. (Reducing the flab in the upper arm)
Increase the bone density in your upper body.
Comments
Push-ups work more than just the arms. Holding the aligned position works back muscles and can help
women avoid back weakness that leads to curvature of the spine. If done properly, pushups provide a
good abs workout leading to better posture and reducing the waistline. Chest muscles also receive a
workout during push-ups and can help to alleviate sagging breasts. Sagging skin on the upper arms are
one of the most dreaded conditions for women, as they age. A regular routine of push-ups, coupled with
a healthy diet, can help to prevent underarm flab completely. Arms and shoulders receive the greatest
workout from push-ups, providing women with toned arms to look their best in sleeveless tops and
dresses.
Table of contents
Popular Fitness Equipment manuals by other brands


G-FITNESS
G-FITNESS AIR ROWER user manual

CAPITAL SPORTS
CAPITAL SPORTS Dominate Edition 10028796 manual

Martin System
Martin System TT4FK user guide

CIRCLE FITNESS
CIRCLE FITNESS E7 owner's manual

G-FITNESS
G-FITNESS TZ-6017 user manual

Accelerated Care Plus
Accelerated Care Plus OMNISTIM FX2 CYCLE/WALK user manual


