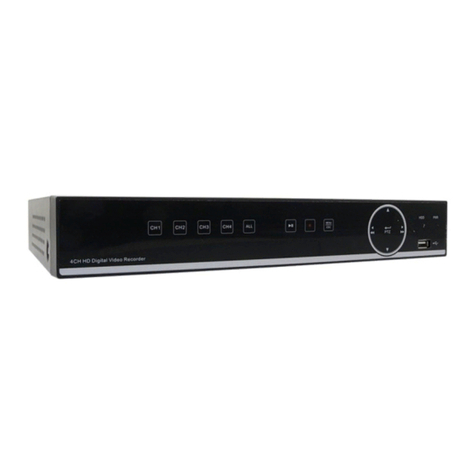
Provision ISR IP Series User manual


AHD DVR User Manual
PROVISION‐ISR
AHDDVR
UserManual
ForH.264AHDdigitalvideorecorder
Allrightsreserved

AHD DVR User Manual
CAUTION
Pleasereadthisusermanualcarefullytoensurethatyoucanusethedevicecorrectly
andsafely.
Theremaybeseveraltechnicallyincorrectplacesorprintingerrorsinthismanual.The
updateswillbeaddedintothenewversionofthismanual.Thecontentsofthismanualare
subjecttochangewithoutnotice.
Thisdeviceshouldbeoperatedonlyfromthetypeofpowersourceindicatedonthe
markinglabel.Thevoltageofthepowermustbeverifiedbeforeusing.Ifthedevicedoesn’t
workforalongtime,pullouttheplugfromthesocket.
Donotinstallthisdevicenearanyheatsourcessuchasradiators,heatregisters,stoves
orotherdevicethatproduceheat.
Donotinstallthisdevicenearwater.Cleanonlywithadrycloth.
Placethedeviceinawell‐ventilatedarea.
DonotpowerofftheDVRatnormalrecordingcondition!Thecorrectoperationtoshut
offDVRistostoprecordingfirstly,andthentoselect“shut‐down”buttonattherightofthe
menubartoexit,andfinallytocutoffthepower.
Thismachineisindoorusingequipment.Donotexposethemachineinrainormoist
environment.Incaseanysolidorliquidgetintothemachine’scase,pleasecutoffthepower
supplyimmediately,andaskforqualifiedtechnicianstocheckthemachinebeforerestart
Donottrytorepairthedevicebyyourselfwithouttechnicalaidorapproval.
Whenthisproductisinuse,therelevantcontentsofMicrosoft,AppleandGooglewillbe
involvedin.Thepicturesandscreenshotsinthismanualareonlyusedtoexplaintheusageof
ourproduct.Theownershipsoftrademarks,logosandotherintellectualpropertiesrelatedto
Microsoft,AppleandGoogleshallbelongtotheabove‐mentionedcompanies.
ThismanualissuitableforAHDdigitalvideorecorders.Allexamplesandpicturesusedin
themanualarefrom16‐channelDVR.

AHD DVR User Manual
TableofContents
1Introduction........................................................................................1
1.1DVRIntroduction....................................................................................................................1
1.2MainFeatures.........................................................................................................................1
2HardwareInstallation.........................................................................3
2.1InstallHardDrive....................................................................................................................3
2.2FrontPanelDescriptions........................................................................................................4
2.3RemoteController..................................................................................................................7
2.4ControlwithMouse................................................................................................................7
2.4.1ConnectMouse....................................................................................................7
2.4.2UseMouse............................................................................................................7
3BasicFunctionInstruction..................................................................8
3.1PowerOn/Off.........................................................................................................................8
3.1.1PowerOn..............................................................................................................8
3.1.2PowerOff..............................................................................................................9
3.2Login.......................................................................................................................................9
3.3LivePreview............................................................................................................................9
3.4LivePlayback.........................................................................................................................10
4AddingIPCameras(ApplicableonlyforHybridModels)..................11
5MainMenuSetupGuide...................................................................12
5.1BasicConfiguration...............................................................................................................14
5.1.1System.................................................................................................................14
5.1.2Date&Time........................................................................................................15
5.1.3DST......................................................................................................................15
5.2LiveConfiguration.................................................................................................................16
5.2.1Live......................................................................................................................16
5.2.2MainMonitor......................................................................................................17
5.2.3Mask....................................................................................................................17
5.3RecordConfiguration...........................................................................................................18
5.3.1Enable.................................................................................................................19
5.3.2RecordBitrate.....................................................................................................19
5.3.3Time....................................................................................................................20
5.3.4Stamp..................................................................................................................20
5.3.5RecycleRecord....................................................................................................21
5.3.6Snap....................................................................................................................21
5.4ScheduleConfiguration........................................................................................................21
5.4.1Schedule.............................................................................................................22
5.4.2MotionSchedule................................................................................................23
5.5AlarmConfiguration.............................................................................................................23

AHD DVR User Manual
5.5.1MotionAlarm......................................................................................................23
5.5.2VideoLoss...........................................................................................................25
5.5.3OtherAlarm........................................................................................................25
5.5.4AlarmOut...........................................................................................................26
5.6NetworkConfiguration.........................................................................................................27
5.6.1Network..............................................................................................................27
5.6.2SubStream..........................................................................................................28
5.6.3Email...................................................................................................................29
5.6.4Server..................................................................................................................29
5.6.5NAT......................................................................................................................30
5.6.6OtherSettings.....................................................................................................30
5.7UserManagementConfiguration.........................................................................................33
5.8P.T.ZConfiguration...............................................................................................................35
5.9Advanced..............................................................................................................................39
5.9.1Reset...................................................................................................................39
5.9.2Import/Export.....................................................................................................39
5.9.3Block/AllowList...................................................................................................39
6Search,Playback&Backup...............................................................40
6.1TimeSearch..........................................................................................................................40
6.2EventSearch.........................................................................................................................41
6.3FileManagement..................................................................................................................41
6.4SearchbyImage...................................................................................................................42
6.5Backup..................................................................................................................................42
7ManageDVR.....................................................................................44
7.1CheckSystemInformation...................................................................................................44
7.1.1SystemInformation............................................................................................44
7.1.2EventInformation...............................................................................................44
7.1.3LogInformation..................................................................................................44
7.1.4NetworkInformation..........................................................................................44
7.1.5OnlineInformation.............................................................................................44
7.1.6RecordInformation.............................................................................................44
7.1.7QRCODE..............................................................................................................44
7.2DiskManagement.................................................................................................................45
7.3Upgrade................................................................................................................................45
7.4Logoff....................................................................................................................................46
8RemoteSurveillance.........................................................................47
8.1IERemoteSurveillancebyNAT............................................................................................47
8.1.1NATSettings........................................................................................................47
8.1.2NATAccess..........................................................................................................47
8.2IERemoteSurveillanceviaLAN&WAN...............................................................................48
8.2.1ViaLAN................................................................................................................48
8.2.2ViaWAN..............................................................................................................48

AHD DVR User Manual
8.3RemoteSurveillancethroughApplePC...............................................................................49
8.3.1ViaLAN................................................................................................................49
8.3.2ViaWAN..............................................................................................................50
8.4TheRemoteLivePreview.....................................................................................................51
8.5RemotePlayback&Backup..................................................................................................53
8.5.1RemotePlayback................................................................................................53
8.5.2RemoteBackup...................................................................................................56
8.6RemoteSystemConfiguration.............................................................................................57
8.7Tools.....................................................................................................................................57
8.8RemoteManagement..........................................................................................................57
8.9ByPhoneswithiPhoneOS....................................................................................................58
8.10ByPhoneswithAndroid.....................................................................................................65
AppendixA:FAQ....................................................................................69
AppendixB:CalculateRecordingCapacity............................................73
AppendixC:CompatibleDevices...........................................................73
Notes:....................................................................................................75

AHD DVR User Manual
1
1 Introduction
1.1 DVRIntroduction
Thismodelisstandard720P/960HhighresolutionAHDDVR(AnalogHighDefinitionDigitalVideo
Recorder),whichadoptshighperformancevideoprocessingchipsandembeddedLinuxsystem.
Meanwhile,itutilizesmanymostadvancedtechnologies,suchasstandardH.264withlowbit
rate,dualstream,SATAinterface,VGAoutputmousesupported,IEbrowsersupportedwithfull
remotecontrol,mobileview(byphones),etc.,whichensureitspowerfulfunctionsandhigh
stability.Duetothesedistinctivecharacteristics,itiswidelyusedinbanks,telecommunication,
transportation,factories,warehouse,andirrigationandsoon.
1.2 MainFeatures
COMPRESSIONFORMAT
StandardH.264compressionwithlowbitrateandbetterimagequality
LIVESURVEILLANCE
SupportsHDMI/VGAoutput
SupportsAnalog/AHDvideoinput,theoddandevenchannels(suchasChannel1and
Channel2,Channel3andChannel4,etc.)mustbeconnectedtothesamevideosource(960H
orAHDsignalmaybeoptional)
Supportschannelsecuritybyhidinglivedisplay
Displaythelocalrecordstateandbasicinformation
SupportsUSBtomakefullcontrol
RECORDMEDIA
SupportsoneSATAHDDtorecordforalongertimewithoutanylimitation
BACKUP
SupportsUSB2.0devicestobackup
SupportssavingrecordedfileswithAVIstandardformattoaremotecomputerthrough
internet
RECORD&PLAYBACK
Recordmodes:Manual,ScheduleandMotiondetectionrecording
SupportsrecycleafterHDDfull
Resolution,framerateandpicturequalityareadjustable
1audiochannelsavailable
Threerecordsearchmodes:timesearch,eventsearchandimagesearch
4/8channelsplaybacksimultaneously
Supportsdeletingandlockingtherecordedfilesonebyone
SupportsremoteplaybackinNetworkClientthroughLANorinternet

AHD DVR User Manual
2
ALARM
Supportsscheduleformotiondetection
Supportspre‐recordingandpostrecording
PTZCONTROL
SupportsvariousPTZprotocols
Supports128PTZpresetsand8autocruisetracks
SupportsremotePTZcontrolthroughinternet
SECURITY
Customizeuserright:logsearch,systemsetup,twowayaudio,filemanagement,disk
management,remotelogin,liveview,manualrecord,playback,PTZcontrolandremoteliveview
Supports1administratorand63users
Supportseventlogrecordingandchecking,eventsunlimited
NETWORK
SupportsTCP/IP,DHCP,PPPoE,DDNSprotocol
SupportsNATtechnology
SupportsIEbrowsertodoremoteview
SupportsQRCODEScanningthroughmobilephoneclient
Supportssetupclientconnectionamount
Supportsdualstream.Networkstreamisadjustableindependentlytofitthenetwork
bandwidthandenvironment
Supportspicturesnapandcoloradjustmentinremotelive
Supportsremotetimeandeventsearch,andchannelplaybackwithpicturesnap
SupportsremotePTZcontrolwithpresetandautocruise
Supportsremotefullmenusetup,changingalltheDVRparametersremotely
SupportsmobilesurveillancebyMobiledeviceswithiOS/AndroidOS
SupportsCMStomanagemultidevicesoninternet

AHD DVR User Manual
3
2 HardwareInstallation
2.1 InstallHardDrive
ChecktheunitandtheaccessoriesaftergettingtheDVR.Pleasedon’tpoweruptheunittillthe
physicalinstallationiscomplete.
Notice: 1. This series support one SATA hard drive. Please use the hard drive the
manufacturersrecommendspeciallyforsecurityandsafefield.
2.PleasecalculateHDDcapacityaccordingtotherecordingsetting.Pleasereferto
“AppendixBCalculateRecordingCapacity”.
① Loosenthescrewsonthebackandside②TakeouttheHDD.
ofthedevicetoremovethecover.
③PuttheHDDontheboomofthe④TurnoverthedeviceandfixtheHDD
device.withthescrews.
⑤Connectthepoweranddatacables.⑥Installthecoverbackandfixitwiththe
screws.

AHD DVR User Manual
4
2.2 FrontPanelDescriptions
Thefrontpaneldescriptionsareonlyforreference;pleasemaketheobjectasthestandard.
Notice:Thefrontpaneldescriptionsareonlyforreference;pleasemaketheobjectasthestandard.
MiniMetalCase(MM)
ItemTypeNameDescription
1Workstate
indicator
PowerPowerindicator,whenconnection,thelightisblue
NetWhenaccesstonetwork,thelightisblue
RECWhenrecording,thelightisblue
2Compound
buttonFnChangethedisplayoutputtype(LongPress)
3IRreceiverIRForremotecontroller
4USBUSBportexternalUSBdevices(USBflash,USBHDDforbackup,updatefirmware,
USBmouse)
Small1UCase
Frontpaneldescription:
ItemTypeNameDescription
1
Workstate
indicator
PowerPowerindicator,whenconnection,thelightisblue
HDDWhenHDDiswritingandreading,thelightisblue
NetWhenaccesstonetwork,thelightisblue
BackupWhenbackupfilesanddata,thelightisblue
PlayWhenplayingvideo,thelightisblue
RECWhenrecording,thelightisblue
2
Compound
buttonMENU/+1.Entermenuinlive
2.Increasethevalueinsetup
BACKUP/‐ 1.Decreasethevalueinsetup
2.Enterbackupmodeinlive
RECORD/FOCUS1.Recordmanually
2.FOCUSfunctionenablesatPTZmode.
REW/SPEED1.Rewindkey2.SPEEDfunctionenablesatPTZmode
12
3
4

AHD DVR User Manual
5
ItemTypeNameDescription
SEARCH/ZOOM1.Entersearchmode
2.ZOOMfunctionenablesatPTZmode.
PLAY/IRIS1.Enterplayinterface
2.IRISfunctionenablesatPTZmode
FF/P.T.Z.1.Fastforward
2.EnterPTZmodeinlive
STOP/ESC1.Quitplaymode
2.Exitthecurrentinterfaceorstatus
3
InputbuttonDirectionbuttonChangedirectiontoselectitems
Multi‐screenChangescreendisplaymodelike1/4/9channel
EnterbuttonConfirmselection
4IRreceiverIRForremotecontroller
5USBUSBportexternalUSBdevices(USBflash,USBHDDforbackup,updatefirmware,
USBmouse)
6ExternalIREXT_IRExtensionfortheIRreceiver
1UCase
ItemTypeNameDescription
1
Workstate
indicator
PowerPowerindicator,whenconnection,thelightisblue
HDDWhenHDDiswritingandreading,thelightisblue
NetWhenaccesstonetwork,thelightisblue
BackupWhenbackupfilesanddata,thelightisblue
PlayWhenplayingvideo,thelightisblue
RECWhenrecording,thelightisblue
2
Compound
button
MENU/+1.Entermenuinlive
2.Increasethevalueinsetup
BACKUP/‐ 1.Decreasethevalueinsetup
2.Enterbackupmodeinlive
RECORD/FOCUS1.Recordmanually
2.FOCUSfunctionenablesatPTZmode.
REW/SPEED1.Rewindkey2.SPEEDfunctionenablesatPTZmode
SEARCH/ZOOM1.Entersearchmode
2.ZOOMfunctionenablesatPTZmode.
PLAY/IRIS1.Enterplayinterface
2.IRISfunctionenablesatPTZmode
FF/P.T.Z.1.Fastforward
2.EnterPTZmodeinlive
STOP/ESC1.Quitplaymode
2.Exitthecurrentinterfaceorstatus
3DigitalInput1‐101.Inputnumber1‐9orchoosecamera/Inputnumber0,10andtheabove
numbertogetherwithotherdigitalkeys
4
Inputbutton
DirectionbuttonChangedirectiontoselectitems
Multi‐screenChangescreendisplaymodelike1/4/9channel
EnterbuttonConfirmselection
5IRreceiverIRForremotecontroller
6
USBUSBportexternalUSBdevices(USBflash,USBHDDforbackup,updatefirmware,
USBmouse)
7ExternalIREXT_IRExtensionfortheIRreceiver

AHD DVR User Manual
6
Item
Nam
e
F
1
PowerButtonSoftswitchofftostopfirmwarerunning.Doitbeforepoweroff.
2
DVDbuttonPressthisbutton,usercanplacetheDVDtodobackup.
3
Keys
0‐9
Inputnumber1‐9orchoosecamera
4
(0/—)
1.Representschannelnumber. 2.Indicatesdigitalnumber0
5
Audio/+
1.Controlvoice2.Increasethevalueinsetup
6
P.T. Z . /
‐
1.EnterPTZmodeinlive2.Decreasethevalueinsetup
7
InputbuttonDirectionbuttonChangedirectiontoselectitems
Multi‐screenChangescreendisplaymodelike1/4/9/16channel
EnterbuttonConfirmselection
8
WorkstateindicatorRECWhenrecording, thelightisblue
HDDWhenHDDiswritingandreading,thelightisblue
BackupWhenbackupfilesanddata, thelightisblue
NetWhenaccesstonetwork,thelightisblue
PlayWhenplayingvideo, thelightisblue
PowerPowerindicator,whenconnection,thelightisblue
9
FunctionbuttonMENUEntermenuinlive
INFOCheckdata,sameas:Mainmenu=>Information
BACKUP Enter backup mode in live
SEARCH Enter search mode
REWRewind
FFFast for
w
ard
RECRecord manually
PLAYPlay
/
Pause
STOPStop
/
Esc
10
JogControlrewind/fastforward/framewhenplayingtheimage.
11
USBexternalUSBdevices(USBflash,USBHDDforbackup,updatefirmware,USBmouse)
12
IRreceiverIRRemotecontrollerreceiver
13
ExternalIREXT_IRExtensionfortheIRreceiver

AHD DVR User Manual
7
2.3 RemoteController
ItusestwoAAAsizebatteries.
①Openthebatterycoveroftheremotecontroller.
②Placebatteries.Pleasetakecarethepolarity(+and‐).
③Replacethebatterycover.
Theinterfaceofremotecontrollerisshownbelow.
2.4 ControlwithMouse
2.4.1ConnectMouse
ItsupportsUSBmousethroughtheportsontherearpanel.
Ifmouseisnotdetectedordoesn’twork,checkbelowsteps:
1.MakesurethemouseispluggedintheUSBmouseport.
2.Trywithagoodknowmouse.
2.4.2UseMouse
Duringlive:
Double‐clickonanycamerawindowtoseethefullscreen.Double‐clickagaintoreturntothe
previousscreen.
Rightclicktorevealthecontrolmenuonthescreen.Rightclickagaintohidethemenu.
InConfiguration:
Clicktoenteraparticularoption.Rightclicktocanceltheoptionortoreturntotheprevious
menu.
Inordertoinputavalueinaparticularscreen,movecursortotheinputboxandclick.Aninput
windowwillappearasbelow.Itsupportsdigits,alphabetsandsymbolsinput.Click“Shift”
buttontoinputcapitallettersandsymbols;click“Shift”buttonagaintoreturn.
ButtonFunction
RECRecordmanually.
SearchToentersearchmode.
MEUNToentermenu.
ExitToexitthecurrentinterface.
ENTERToconfirmthechoiceorsetup.
Direction
buttonTomovecursorinsetup.
ZOOMTozoomin.
PIPTosetpictureinpicture.
Tocontrolplayback.Play/Pause/Stop/Previous
Section/NextSection/Rewind/FastForward.
MultiTo choosemultiscreendisplaymode.
NextToswitchbetweensinglepictureandpicturegroup.
SEQToenterautodwellmode.
INFOGetinformationaboutDVRlikefirmwareversion,
HDDinformation.

AHD DVR User Manual
8
Itsupportsmousedrag.Takesettingupmotiondetectionareaforexample:Clickcustomized,
holddowntheleftbuttonanddragtosetmotiondetectionarea.
InPlayback:
Clicktochoosetheoptions.Rightclicktoreturntolivemode.
InBackup:
Clicktochoosetheoptions.Rightclicktoreturntopreviouspicture.
InPTZControl:
ClickleftbuttontochoosethebuttonstocontrolthePTZ.Clickrightbuttontoreturntolive.
Note:Mouseisthedefaulttoolforalloperationsunlessanexception,asindicated.
3 BasicFunctionInstruction
3.1 PowerOn/Off
Beforeyoupowerontheunit,pleasemakesurealltheconnectionisgood.
3.1.1PowerOn
① Connectwiththepower.
② ThedevicewillbootandthepowerLEDwouldturnblue.
③ AWIZARDwindowwillpopupandshowsomeinformationabouttimezone,timesetup,
networkconfiguration,recordconfigurationanddiskmanagement.Usercansetuphere
andrefertotheconcretesetupstepsfromthecorrespondingchapters.Ifusersdon’t
wanttosetupWizard,pleaseclickExitbuttontoexit.PressandholdFN/ESCkeyto
switchtheresolutionofVGAandHDMIoutput.

AHD DVR User Manual
9
3.1.2PowerOff
Youcanpoweroffthedevicebyusingremotecontroller,keyboardormouse.
① GotoMainMenuandthenselect“ShutDown”icontopopuptheShutdownwindow.
② ClickOK.Thentheunitwillpoweroffafterawhile.
③ Disconnectthepower.
3.2 Login
UsercanloginorlogofftheDVRsystem.Onceloggedofftheusercannotdoanyotheroperation
exceptchangingthemulti‐screendisplay.
Fig3‐1Login
Notice:Thedefaultusernameisadminandthedefaultpasswordis123456.
Forcompleteoperationalstepsforchangingpassword,addingordeletingusers,please
refertosection4.7UserManagementConfiguration.
3.3 LivePreview
Fig3‐2LivePreviewInterface

AHD DVR User Manual
10
3.4 LivePlayback
ClickPlaybackbuttontoplaybacktherecord.RefertoFig3‐3.Usercandocompleteoperation
byclickingthebuttonsonscreen.
Fig3‐3LivePlayback
SymbolMeaning
GreenManualrecord
YellowMotiondetectionrecord
BlueSchedulerecord

AHD DVR User Manual
11
4 AddingIPCameras(ApplicableonlyforHybridModels)
ThischaptermainlyintroduceshowtoconnectmultipleIPcamerasthroughNVR.OnceyoufinishaddingIP
cameras,youcanseetheliveimagesthroughthemonitoroftheNVR.
ToaddIPcamerasviaLAN:
Step1:PleaseenterMenuIPCameratab.RefertoFig4‐1.Click“Search”buttontosearchthedevicesin
thesamenetwork.
Fig4‐1DeviceManagement
Step2:Enterintothesearchtab.Click“Refresh”torefreshthesearcheddevices.YoucanmodifytheIP
addressofthesearcheddevicebycheckingthedeviceandclicking“Setup”button.
Fig4‐2SearchDevices
Note:IfthenetworkofIPcamerasandNVRareinLAN,theirIPaddressmustbeinthesamenetwork
segment.Forexample:IftheIPaddressofNVRis192.168.013.057,theIPaddressofIPcameramust
be192.168.013.XXX.
Step3:Choosethesearcheddevicesandclick“OK”buttontoaddthesedevices.Theaddedcameraswillbe
listedinthedevicemanagementinterface.
Step4:Choosethecameradeviceandclick“Setup”buttontoenablethecamera.RefertoFig4‐3.Check
the“enable”checkbox,selectchannelandinputtheusernameandpasswordofthisdevice.Thenclick“OK”
tosavesettings.

AHD DVR User Manual
12
Fig4‐3AddDevice
ToaddIPcamerasviaWAN:
Step1:PleaseenterMenuIPCameratab.RefertoFig4‐1.
Step2:Click“Add”buttontopopupawindowsimilartoFig4‐3.Youneedtocheck“Enable”box,select
channel,manufacturerandproductmodelandmanuallyinputIPaddress,serverport,usernameand
passwordofthisdevice.
Note:IftheNVRandtheIPcamerasyouwanttoaddarebothinWAN,theIPaddressoftheIPcamera
inputheremustbeWANIP.YoushouldforwardtheLANIPaddressandportoftheIPcamerainthe
routeranduseitsWANIPaddress,providedthattheIPcameraisinlocalareanetwork,otherwise,
theNVRcannotconnectthisIPcamera.
5 MainMenuSetupGuide
ClickrightmouseorpressFN/ESCbuttononthefrontpanelandthenthecontrolbarwilldisplay
atthebottomofthescreen.RefertoFig4‐1.
Fig4‐1MainMenuToolbar
ScreenMode:Clicktoselectscreenmode.Clicktheiconbesidethescreendisplaymode
toselectchannels.Imagescandragtoanyplacetodisplayintheliveinterface.
Dwell:Dwellmeanstodisplayliveimagesfromdifferentcamerasinasequence.Theimagesmay
bedisplayedasasinglechannelorinagridfashionfromdifferentcameras.Dwellmodeis
enabledonlywhenthechosendisplaymodeisnotabletodisplayalltheavailablecameras.
Color:Ifthisbuttonisenabled,youcanadjustthecoloroflivepictures.
E‐Zoom:Singlechannellargescreenelectronicamplification.

AHD DVR User Manual
13
Audio:Enablesound.
PTZ:ClickthePTZbuttontocontrolrotationposition,speedandautoscanofthePTZ.
Snap:Clickthisbuttontosnapthelivepictures.Thesepictureswillautomaticallybesavedinthe
SATAdisk.
Record:Clickthisbuttontostart/stoprecording.
Playback:Clickthisbuttontoplaybacktherecordfiles.Clicktheiconbesidetheplayback
icontoselectplaybacktime.Forexample,if2minutesisselectedandthenclickplaybackbutton,
itwillstarttoplayfrom2minutesago.
Usercanclickbuttonanddragitanywherewiththeleftmouse.
ClickMenubuttontopopupawindowasFig4‐2.YoucanalsopressMENUbuttonon
thefrontpaneloroperatewithremotecontrollertodisplaythemainmenu.ClickingSetupicon
willpop‐uptheconfigurationmenu:
Fig4‐2Setup
*Notice:IPCamerasetupisavailableonlyinversion3.4.3andhigherandnot
supportedbySA‐4100AHD‐1(MM)

AHD DVR User Manual
14
5.1 BasicConfiguration
Basicconfigurationincludesthreesubmenus:system,date&timeandDST.
5.1.1System
GotoMainMenuSetupBasicSysteminterface.RefertoFig4‐3.
Fig4‐3BasicConfiguration‐System
Inthisinterfaceyoucansetupthedevicename,deviceID,videoformat,maxnetworkusers,
VGAresolution,languageandsoon.Thedefinitionsforeveryparametersdisplayasbelow:
DeviceName:Thenameofthedevice.ItmaydisplayontheclientendorCMSthathelpuserto
recognizethedeviceremotely.
DeviceID:ThisIDisusedtomapthespeeddomecameras.
VideoFormat:Twomodes:PALandNTSC.Usercanselectthevideoformataccordingtothatof
camera.
PasswordCheck:Ifthisoptionisenabled,theuserwouldneedtoinputtheusernameandthe
passwordforperformingcorrespondingoperations.
ShowSystemTime:Ifselected,thecurrenttimewillbedisplayedduringlivemonitoring.
MaxOnlineUsers:TosetthemaxnumberofconcurrentuserloginsintheDVR.
VideoOutput:Theresolutionoflivedisplayinterface.
Language:Setupthemenulanguage.
Note:Afterchangingthelanguageandvideooutput,thedeviceneedstologinagain.
LogoutAfter(Minutes):Ausercansetupthescreenintervaltime(30s,60s,180s,300s).Ifthere
isnoanyoperationwithinthesettingperiod,thedevicewillautologoutandreturntologin
interface.
ShowWizard:Ifselected,theGUIwouldlaunchthestartupwizardoneveryboot,allowingthe
usertodobasicsetup.
NoImageWhenLogout:Ifselected,therewillbenoimageshowingwhenloggingout.
Other manuals for IP Series
3
Table of contents
Other Provision ISR DVR manuals
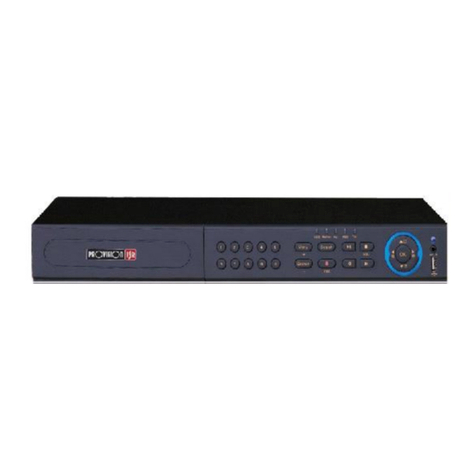
Provision ISR
Provision ISR AHD Series User manual
Provision ISR
Provision ISR N Series User manual

Provision ISR
Provision ISR NVR-4100P User manual
Provision ISR
Provision ISR NVR-4100 User manual

Provision ISR
Provision ISR Ossia NVR5 Series User manual

Provision ISR
Provision ISR NVR-8200(1U) User manual

Provision ISR
Provision ISR NVR-16400(1U) User manual

Provision ISR
Provision ISR Analogue Series User manual
Provision ISR
Provision ISR H.264 4/8/16/32-channel digital video... User manual
