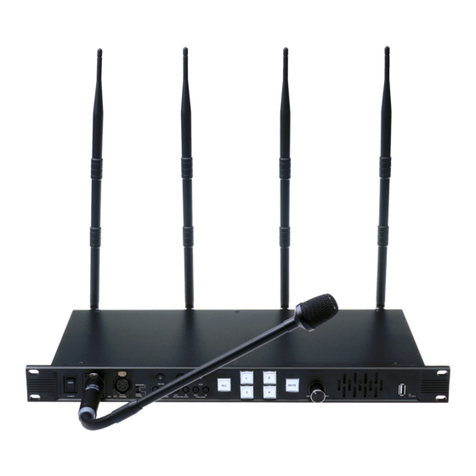
ProX XV-NE User manual

XV-NE
XV-NE
Intercom SystemIntercom System

Table of Contents
1. IMPORTANT INFORMATION .............................. 1
2. SAFETY PRECAUTIONS .................................... 1
3. INTRODUCTION ................................................. 2
4. FEATURES ......................................................... 3
5. INTERFACES...................................................... 4-6
6. OPERATION ....................................................... 6-14
7. SPECIFICATIONS............................................... 15
8. SYSTEM PARAMETER SETTING....................... 16-17
9. TROUBLE SHOOTING ........................................18
10. PACKING CONTENT ......................................... 19

Important Information
Read this user’s manual carefully before use and retain for future reference.
The XV-NE warranty may NOT apply to below cases:
■ Repairs or product modification and alterations executed by unauthorized service personnel.
■ When damages caused by accidents include but not limited to lightning, water or fire.
■ The power input voltage used is not in the specified range (110-220V AC, 12-17V DC).
■ The serial number on the product has been altered, deleted, removed or made illegible.
■ PRO-X Co.,Ltd reserves the right to make changes to the information or specifications
without prior notification.
Safety Precautions
TO AVOID RISK OF ELECTRICAL SHOCK,
DO NOT ATTEMPT TO OPEN THE UNIT
BY YOURSELF.
FOR ANY ASSIST, PLEASE CONTACT
YOUR LOCAL DISTRIBUTOR OR PRO-X.
■ Remove the power cord before cleaning. Do not clean the unit with liquid or corrosive
cleanser, user only damp cloth to clean the unit.
■ Do not use the unit in high moisture environment, which may cause electric shock
or fire. Turn off the power switch if any liquid gets inside it.
■ Do not place the unit on an uneven surface, which may cause the unit fall.
■ Turn off the power switch before connecting the unit with other equipment (e.g. switcher)
■ Before using an external power supply, always check that the voltage is within the
specified range and that the polarities of the connector are correct.
■ Avoid any heavy load on power cord and do not step on or stretch it. Keep the power
cord away from fire.
■ Do not use the set in extreme environment, especially in lightning, fire, rain or strong
corrosion.
■ In case of electric shock, do not open the outer case of the unit. Do not insert anything
into openings or ventilation holes. Keep the unit away from any liquid spilling.
■ Remove the power cord under any of the following circumstances, and turn to
PRO-X or your local dealer for help:
l
With broken plug or split power cord
l
With liquid inside the unit
l
The unit is poured with water or exposed in the rain
l
The unit falls or under compact
l
The unit presents unusual performance
WARNING
RISK OF
ELECTRICAL
SHOCK
DO NOT OPEN
1

lAdjust only according to guides in this user's manual. Unguided adjustment may
damage the unit.
lWhen the unit is left unused for a long period of time, disconnect it from power
source. Always disconnect the power cord from power outlet when not using. This
reduces the risk of electric shock or fire.
lDo not use the unit near any heat sources such as radiators, heat registers,
stoves, or other devices (including amplifiers) that produce heat. Always use the
unit in a well-ventilated area.
lIn case of damage, smoke, unusual smell or other unexpected situations, stop
using the unit immediately and consult your local dealer or PRO-X.
Read following instructions before use
Do not move or shake the unit when it is working. Avoid any deformation or inner
damage from impact during handling
lAlways use the unit in a well-ventilated area.
● Do not use the unit in high moisture environment or in somewhere with water
spray.
Introduction
XV-NE is a wireless intercom system for multiple working conditions. It supports up
to 17-party wireless intercom with 1 Base Station and 16 Submachines.
When intercom is enabled on Base Station, Base Station is able to talk to all the
selected submachines, and it receives audio messages from any submachine.
Only one submachine in the system is able to talk at any one time. Selected
submachines are able to receive audio messages from Base Station and other
submachines. Besides, submachines that are not selected cannot receive audio
messages from Base Station and other submachines, and can only talk to Base
Station.
During wireless intercom, Base Station is also able to forward the red/green TALLY
signals to the TALLY light connected to the submachine.
●
2

Features
Base station
lFull-Duplex Intercom;
lUp to 16 submachines available;
lWireless intercom working distance up to 1000m (LOS);
l433MHz frequency band with the properties of penetration and diffraction
lEuropean ISM frequency band with no need of license
lMultiple working frequency points, avoiding interference
lConnection with 2-Wire/4-Wire available
lAC and DC power inputs
lAntennas can be extended and placed in somewhere without blocking
Submachine
lFull-Duplex Belt Pack
lAntenna is downward to be better protected during shooting
lNoise level can be set according to different working scenes to optimize the
performance
lSelf-designed headset is equipped with XLR plug. It's reliable, comfortable and
good at isolating noise.
TALLY Light
lBi-color (RED and GREEN) TALLY signal LED indicator
lIndependent installation makes it more flexible to use
3

Front Panel of Base Station
4
1
2
3
4
5
6
7
8
TALK
1 2 3 4 6 7 8 9 10 11 12
5
1.HEADSET: 5-pin XLR Female Socket for Headset
2.MIC: 3-pin XLR Female Socket for Gooseneck Microphone
3.HEADSET/MIC: HEADSET/MIC Selector Switch
4.HEADSET: LED Status Indicator for Headset
5.MIC: LED Status Indicator for Microphone and Speaker
6.ALL: Enable Button of All Channels
7.CH1-CH8: Enable Button and Status Indicator of Channel 1-8
8.TALK: Base Station Talk Enable Button
9.SYS: LED Status Indicator for Base Station Transmitting &Receiving
10.Volume Control of Headset/Speaker from Minimum to Maximum
11.Built-in Speaker
12.POWER: Power Switch, when it is turned on, power LED lights up in red.
1 2
3
5 6 7 8 9 10
4
11
Back Panel of Base Station
1.AC 220V: AC IN
2.DC 12-17V: DC IN
1
2
3
4
GND
NC
NC
14V
1
23
4
3. AUX OUT/IN: Volume Control of Auxiliary Audio Output/Input
4. 2/4W OUT/IN: Volume Control of 2-Wire/4-Wire Output/Input
5. 2/4W: 2-Wire/4-Wire Selector Switch
lRemark: Keep the selector switch at 4W when you are not using 2-Wire or 4-Wire cascade

5
6. 4W: RJ45 4-Wire Intercom Port
4-Wire port connection order:
1 2 345678
GND
White&Orange
GND OUT- IN- IN+ OUT+ GND GND
Orange White&Green Blue White&Green Green White&Brown Brown
7. 2W: 3-pin XLR Female Socket
2-Wire port connection order:1
2
3
GND
NC
IN/OUT
2
3
1
8. COM: RS232 serial port for connection with a computer. Parameters like frequency
channels, signal codes and background noise suppression level can be set via
dedicated software.
9. TALLY: DB25 male dry connector TALLY signal input, an external extended circuit
board can be used for TALLY active-high signal.
Connection order:
1
PGM 1
14
PVW 1
2
PGM2
15
PVW2
3
PGM3
16
PVW3
4
PGM4
17
PVW4
5
PGM5
18
PVW5
6
PGM6
19
PVW6
7
PGM7
20
PVW7
8
PGM8
21
PVW8
9
PGM9
22
PVW9
10
PGM 10
23
PVW 10
11
PGM 11
24
PVW 11
12
PGM 12
25
PVW 12
13
GND
10. 3-pin XLR Female AUX IN and Male AUX OUT
AUX IN:
1
2
3
GND
AUX IN+
AUX IN-
2
3
1
1
3
2
1
2
3
GND
AUX OUT+
AUX OUT-
AUX OUT:
11.ANT: Antenna Connector

6
1. ON/OFF/VOL: Power Switch/Volume Control
2. TALK: Non-locking Talk Button (PTT button)
3. SYS: Connecting LED Status Indicator
4. Tally: TALLY light socket
5. SMA Antenna
6. 5-pin XLR Headset Socket
7. USB Charge Port for Built-in Lithium-ion Battery
8. Clip
Operation
Base Station
1.Install the antenna.
2.Apply 220V AC power to Base Station via AC power cord or power Base Station with a
12-17V DC power supply. AC IN will be the prior choice for power supply automatically
by inner circuit.
3.Turn on the power switch of Base Station, power LED lights up. Base Station is on with
the speaker or headset reports “beep + Channel is X (current signal channel)”.
4.When HEADSET/MIC selector switch is in upper position, HEADSET LED lights up,
headset will be used for audio input and output; When HEADSET/MIC selector switch is
in bottom position, MIC LED lights up, gooseneck microphone and speaker will be used
for audio input and output separately.
5. Press TALK button, TALK LED status indicator lights up. Base Station is able to send
audio signals to submachines; press TALK button again, TALK LED status indicator lights
out, and Base Station is only able to receive audio signal and not able to send audio signals.
Submachine
1 2 3 4 5 6
8
TALLY
7
OK 1
2
3
4
1. When the submachine is turned on, press OK and
to enter the setting menu.
2. Selection button
3. Selection button
4. Exit button. Press to return to main page.

6. Press ALL button to include all submachines into intercom system. By pressing
enable button 1-8, you can select the corresponding submachine to be included in
the intercom system. Submachines included in the system can hear from and send
messages to other submachines. Submachines excluded in the system cannot hear
from other submachines and can only send messages to Base Station.
7.Headset and speaker outputs volume can be controlled via volume control. Rotate
the knob clockwise to change the volume level from minimum to maximum.
8. When 2-Wire/4-Wire selector switch is in upper 2W position, 2-Wire cascade is
available. Other audio systems can be connected with the set via 2W port. When 2-
Wire/4-Wire Selector Switch is in bottom 4W position, 4-Wire cascade is available.
Other audio systems can be connected with the set via 4W port.
l
Wire cascade
9. Volume control of 2/4W IN is used to control the volume level of audio transmitted
from peripheral system to XV-NE. Volume control of 2/4W OUT is used to control the
volume level of audio transmitted from XV-NE to peripheral system.
10. Connect AUX IN port and AUX OUT port with auxiliary audio devices through
dedicated cables.
11. AUX IN turn button is used to control the volume level of audio transmitted from
peripheral system to XV-NE. AUX OUT turn button is used to control the volume
level of audio transmitted from XV-NE to peripheral system.
12. Connect TALLY Input with TALLY Output on your switcher through dedicated
cable to transmit TALLY signals from the switcher.
Submachine
1. Connect submachine with headset via 5-pin XLR port.
2. Install the antenna.
3. ON/OFF: Rotate Power Switch/Volume Control to “ON” to turn the submachine
on, you can hear “beep + Channel is X + remaining capacity” from the headset.
Rotate Power Switch/Volume Control to “OFF” to turn the submachine off.
4. Volume control: Rotate Power Switch/Volume Control clockwise to turn the
volume up, rotate it counterclockwise to turn the volume down.
5. Submachine sending audio messages: Press TALK button and send an audio
message, release the button to stop sending.
6. Setting: Press the light-touch setting button to manage submachine parameters
like frequency channels, background noise suppression level and PTT (TALK)
button usage pattern.
7. Charging: Connect USB charge port with the charger through USB charge cable
to charge the built-in Lithium-ion battery. CHG red LED stays on during charging
and FULL green LED stays on when it is fully charged.
NOTICE: Keep the selector switch at 4W when you are not using 2-Wire or 4-
7

8
1.
To turn the submachine on, rotate Power Switch/Volume Control knob clockwise
until there’s a “click”. To turn it off, rotate Power Switch/Volume Control knob
counterclockwise until there’s a “click”. When the submachine is on, the screen
displays its ID NO., remaining battery capacity and current channel.
Press OK, and then press to enter the setting menu according to page prompt.
2.Adjust the Volume
When the submachine is on, rotate Power Switch/Volume Control knob clockwise
to turn the volume on, and rotate the knob counterclockwise to turn the volume
down.
3.Setting
Press OK, and then press to enter the main page according to page prompt.
Use to select settings for below 8 aspects:
Channel Setting, Scene Voise Level, Sound Control Setting, Headset Type
Setting, Slave ID Setting, TALLY Setting, Noise Suppress Level and Language
Change
Turn On/Off
Operations for Submachine

9
4.
There are 35 channels from 2 to 36. Enter the channel setting page, and choose
the proper channel accordingly, then press to exit to complete setting.
5. Scene Voise Level
When the submachine is sending audio signals, it sends person voise and scene
voise together to other receiving devices. Adjust Scene Voise Level to suppress
the scene voise in some degree during audio signal transmitting. The default
setting is Level 0. You can use to select other levels. (Note: normally there’s
no need to change this setting. There may be interrupt during intercom if the
submachine is set on a high scene voise level.)
6. Sound Control Setting
There are two modes for sound control setting, press-to-talk and hold-free.
Choose the mode you want and then press to exit to complete setting.
Channel Setting

10
● Press-to-talk Mode
You need to keep PTT button pressed when you talk, and release the button when
you’ve done talking. Any submachine is able to press PTT button and talk, while
other submachines are able to receive audio messages.
● Hold-free Mode
For this mode, there’s no need to hold PTT button during the process of talking.
Pressand release PTT button, the submachine is in Button Free mode when you
hear beep from headset. The submachine starts to send audio signals when you
talk, and ceases to send audio messages in two seconds after you stop. Press and
release PTT button again, the submachine exits from Button Free mode when you
hear beep from headset.
7. Headset Type Setting
You need to choose different setting when you are using different headsets, the
default setting is Headphone Type. There are two types for headset setting,
Headphone and Earphone. Choose the type you want by pressing and then
press to exit to complete setting.

11
● Headphone Type
Headphone type is suitable for noisy places. The background sound can be
suppressed to ensure clearer communication. When you are in Button Free mode,
it is recommended to use headphones.
● Earphone Type
Earphone Type is suitable for quiet places.
8. Slave ID Setting
Slave ID can be set from 1-12. Press OK to enter setting menu. Use to select
ID number and then press to exit to complete setting.

12
9. Tally Setting
When TALLY function is on, the screen will light up in RED and GREEN with
different TALLY signals from the switcher. When TALLY function is turned off, the
screen’s in black and the submachine does support TALLY signal from the
switcher.
10.Noise Suppress Level
There are 6 levels for background sound suppression. When level 0 is selected,
there’s no suppression for background sound. For level 1-5, background sound
will be suppressed for the percentage of 1%-5% accordingly. When the
submachine is sending audio signals, it sends person voise and scene voise
together to other receiving devices. Adjust noise suppress level to suppress the
background sound in some degree during audio signal transmitting. The default
setting is Level 2. Use to select other levels.

13
11.Language Change
There are two languages, Chinese and English, for your selection to meet different
requirements.
How to Call
Press PTT button on your headset to call other submachines/ Base Station in the
same channel, release the button when you stop talking.
●Submachines less than 8 units
①Any submachines is able to call anytime, Base Station and other submachines
are able to listen.
②When a submachine is making a call, Base Station is also able to call, all
submachines are able to listen.
●Submachines more than 8 units
①8 submachines at most are allowed to call in the system, Base Station and all
other submachines are able to listen.
②When there are already 8 submachines calling, the ninth submachine needs to
wait to call until one of the calling submachines stops talking.
③When a submachine is making a call, Base Station is also able to call, all
submachines are able to listen.
●Use a Submachine to Call
When you use a submachine to call, there will be a microphone icon on the upright
corner of the screen. This icon indicates that your submachine is sending audio
signals.

14
●Receive Audio Signals
When there’s another submachine sending audio signals, the ID NO. of the talking
submachine will be displayed on your submachine screen. The speaker icon on the
upright corner indicates that your submachine is receiving audio signals.
TALLY
When the submachine receives PGM and PST signals sent from the switcher, the
screen displays different colors as indicators to remind staff about progress of
current program.
When on live, screen of the submachine is in RED.
When for precut, screen of the submachine is in GREEN.
When on standby, screen of the submachine is in BLACK.

Specifications
Base Station
l Audio frequency response 200~3.6kHz, THD (total harmonic distortion) <3%,
SNR (Signal-to-noise ratio) >50dB
lSpeaker electrical impedance 8Ω, Max. output power 2W
lDynamic microphone electrical impedance 200Ω
lHeadset with XLR port electrical impedance 16Ω, Max. output power 2W
lMicrophone for headset with XLR port electrical impedance 200Ω
l4-Wire input and output is adjustable with typical value 2Vrms, balance electrical
impedance 600Ω
l2-Wire input and output is adjustable with typical value 1Vrms, balance electrical
impedance 200Ω
lAUX input and output is adjustable with typical value 2Vrms, balance electrical
impedance 600Ω
lFrequency band 433MHz
lWireless receiving sensitivity >-110dbm
lPower consumption: regular rate <10W, peak rate ≤20W
Submachine
lAudio frequency response 200~3.6kHz, THD (total harmonic distortion) <3%,
SNR (Signal-to-noise ratio) >50dB
lHeadset with XLR port electrical impedance 16Ω, Max. output power 2W
lMicrophone for headset with XLR port electrical impedance 200Ω
lFrequency band 433MHz
lWireless receiving sensitivity >-110dbm
lBuilt-in 3.7V Lithium-ion battery with capacity 5000mA. Standby time >360h,
continuous sending message working time >8h. Max. charge current 750mA.
15

lBase Station – buttons on Base Station
Press and hold ALL button for 3s and release it, you can hear audio report for
parameter setting from Speaker/Headset.
Press ALL button, and select the item you want to set according to the audio report
from Speaker/Headset.
Press TALK button, and adjust parameter for the item you want to set according to
the audio report from Speaker/Headset.
Press ALL button or wait for 5s to exit from setting mode according to the audio
report.
lSubmachine – buttons on Beltpack
Press OK and enter setting menu according to screen prompt.
Press to check different setting pages and press OK to select one of them.
Press to select setting items.
Press to exit.
System Parameter Setting
16

Install PL2303 device driver on your
computer.
Connect Base Station with computer
through USB-to-serial -port cable.
Launch 1UBsUserCfg.exe software.
Select Prolific USB-to-Serial Comm Port
(COMX) from Serial Link, and click Open.
Turn on the power switch of Base Station,
and wait for the connection between the
software and Base Station.
Select corresponding parameter and click
Set to finish the setting.
lSubmachine – software on your computer
Install PL2303 device driver on your
computer.
Connect Submachine with computer
through USB setting cable.
Launch HdiPtUserCfg.exe software.
Select Prolific USB-to-Serial Comm
Port (COMX) from Serial Link, and
click Ooen.
Turn on the power switch of
Submachine, and wait for the
connection between the software
and Submachine.
Select corresponding parameter and
click Set to finish the setting.
l
Base Station – software on your computer
17

18
Troubleshooting
1.Check if antenna of Base Station is loose or broken and be sure
it is installed in the right way
2.Check if the battery power of Submachine is adequate
3.Check if the working distance is within 1000m LOS, and there's
no signal blocking or interference between Base Station and
Submachine
4.Make sure antennas are installed in the right way and right height.
5.Check if there's any high power intercom system within 2 meters
6.Make sure there's no large block between the set (e.g. walls)
7.Check if there are large metal objects moving between Base
Station and Submachine (e.g. trucks)
8.Check if there is any device/equipment to block or interfere
signals nearby (e.g. high power equipments, signal tower)
9.Make sure the set is not placed on a metal shelf or similar place
with metal
10.Try to restart the set
11.Try another frequency point and restart the set
Solutions
1.Make sure AC power cord is well inserted in a functional
power outlet
2.Check if the fuse under AC IN is broken
3.Try another power input on the back panel of Base Station
Fault
Base Station cannot be
turned on
The working distance
being less than 1000m
or communication quality
being bad
Malfunction of connecting
or intercom
1.
2.Check if the battery power of Submachine is adequate
3.Be sure the volume of Submachine is not at minimum
4. Check if HEADSET/MIC selector switch is in the right position
5. Check If working distance is more than 1000m LOS, if so,
shorten the distance and try again.
Check if the set work on the same frequency point
Table of contents
Other ProX Intercom System manuals
Popular Intercom System manuals by other brands
ChinaPST
ChinaPST PST-VDA-R2 user manual
PENTATRON
PENTATRON TF04: TF04T Operating and safety instructions
Viking
Viking E-70-BK product manual
AVE
AVE smart domina VILLA manual
Alpha Communications
Alpha Communications VM25WH Series Installation and use instructions
Chamberlain
Chamberlain LiftMaster ELITE EL2000 Programming manual
