8
65
7
STATUS LED MESSAGES
The meanings of the various status LED messages shown by the PRYMEBLU PTT are shown
on the following table:
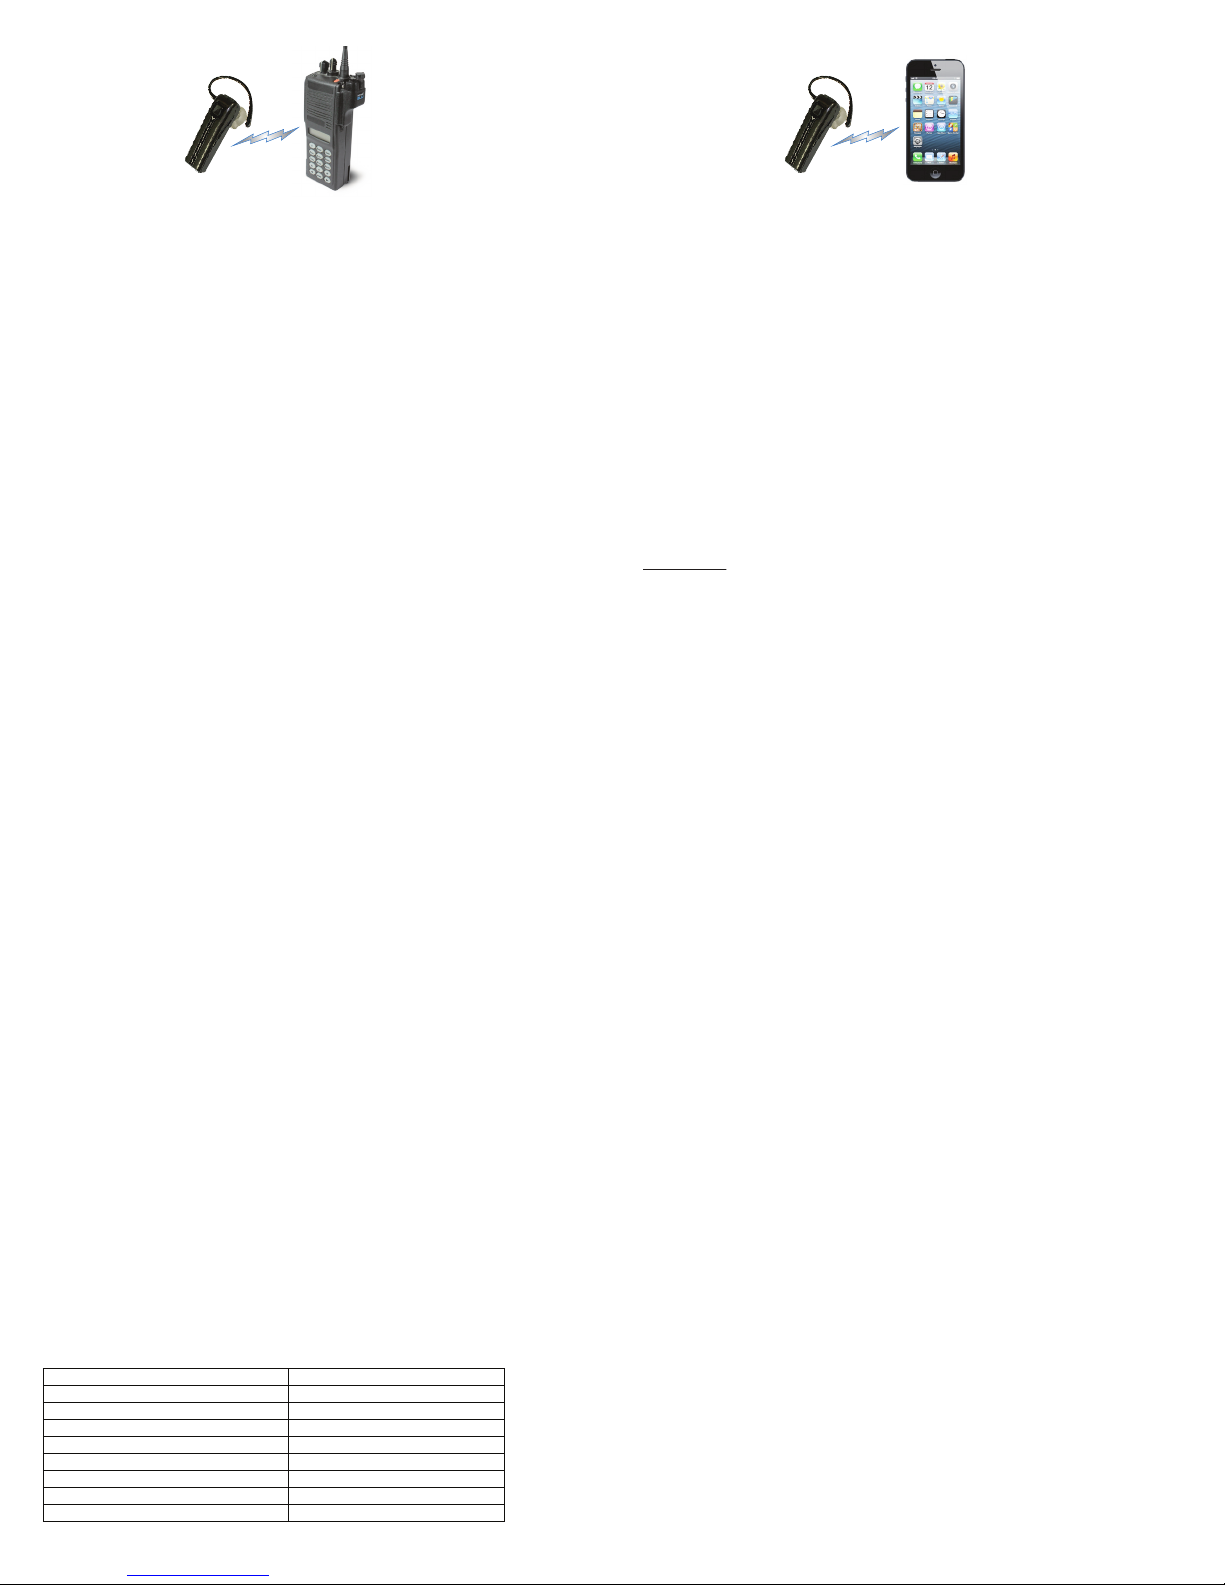
PAIRING THE HEADSET WITH A PRYMEBLU RADIO ADAPTER AND 2-WAY RADIO
STEP ONE: When pairing the PRYMEBLU BTH-200 Bluetooth Headset with a PRYMEBLU Radio Adapter,
make sure that the headset, two-way radio, and PRYMEBLU adapter are all powered o to start. To turn
the headset o hold the Multifunction Button + the Volume Down button for three to four seconds.
STEP TWO: Place the PRYMEBLU Radio adapter into pairing mode. The steps needed to do this depend
on which model PRYMEBLU adapter you are using and on what source the adapter gets power from.
For example:
If your PRYMEBLU Radio Adapter gets power directly from the two-way radio it is attached to, hold down the
Talk button on the PRYMEBLU Radio Adapter while turning the two-way radio ON.
If your PRYMEBLU Radio Adapter has its own charger/internal battery pack, turn the power switch on the
PRYMEBLU Radio Adapter to the ON position while holding down the multifunction Talk button on the
PRYMEBLU Radio Adapter.
If your PRYMEBLU Radio Adapter gets power from an external source (such as an automobile cigarette lighter
jack), hold down the Talk button on the PRYMEBLU Radio Adapter while plugging the adapter into the
external power source (cigarette lighter jack).
Continue to hold the Talk button on the adapter down for approximately three seconds. Release the
Talk button when the status LED on the PRYMEBLU Radio Adapter begins to ash two times per second.
The PRYMEBLU Radio Adapter is now in audio accessory pairing mode.
STEP THREE: Place the PRYMEBLU BTH-200 Bluetooth headset into pairing mode. To do this, hold
down the Multifunction Button on the headset for three to four seconds. Continue to hold the button
down until you see the LED Indicator on the headset begin to quickly ash RED-BLUE-RED-BLUE in
sequence. The PRYMEBLU Bluetooth headset is now in pairing mode.
STEP FOUR: wait. After a few seconds, the two devices should pair with one another. Once the
PRYMEBLU Bluetooth Headset and Radio Adapter are paired with each other, the status LED on the
adapter will show a constant blue light for three seconds. The LED on the headset will then show three
blue ashes every two seconds.
If the PRYMEBLU Radio Adapter does not detect the headset within 60 seconds of being put into pairing
mode, the adapter will exit the pairing mode and resume normal operation.
PAIRING THE HEADSET WITH A CELLULAR TELEPHONE
The PRYMEBLU BTH-200 Bluetooth Headset is capable of operation with a Bluetooth-enabled cellular phone.
STEP ONE: When pairing the Bluetooth Headset with a cellular phone, make sure that the headset and
all other nearby Bluetooth devices are powered o before beginning. To turn the headset o hold the
Multifunction Button + the Volume Down button for three to four seconds.
STEP TWO: Place the PRYMEBLU BTH-200 Bluetooth headset into pairing mode. To do this, hold down
the Multifunction Button on the headset for three to four seconds. Continue to hold the button down
until you see the LED Indicator on the headset begin to quickly ash RED-BLUE-RED-BLUE in sequence.
The PRYMEBLU Bluetooth headset is now in pairing mode.
STEP THREE: Activate the Bluetooth feature on your phone. Place the phone into pairing mode by
selecting the “scan/discover new Bluetooth devices” option. The exact steps needed to do this will vary
depending on the brand/model of phone you are using.
STEP FOUR: Select the PRYMEBLU BTH-200 Bluetooth Headset from the list of Bluetooth devices
shown on your phone. If the phone asks for a passcode, enter “0000”. The phone may also prompt you
to conrm the connection.
STEP FIVE: After a few seconds, the two devices should pair to one another. Once the PRYMEBLU
Headset and phone are paired with each other, the status LED on the headset will show three blue
ashes every two seconds.
DUAL PAIRING: Note that the PRYMEBLU BTH-200 Bluetooth Headset supports pairing to only a single
device at a time. You can use the headset with a cellular phone OR with a two-way radio adapter BUT
NOT BOTH AT THE SAME TIME.
RECONNECTING TO A PREVIOUSLY PAIRED DEVICE
Once the PRYMEBLU Bluetooth Headset and Radio Adapter or cellular phone have been successfully
paired together, both devices will remember that connection. The adapter/phone and headset will
attempt to reestablish their link whenever they are both powered on and in within range of each other.
Re-establishing this connection can take 10-60 seconds.
USING THE PRYMEBLU BLUETOOTH HEADSET
To power the headset on, press and hold the Multifunction button on the side of the headset for
two seconds.
To power the headset o, press and hold the Multifunction button plus the Volume Down button
for three seconds.
Once the PRYMEBLU Headset and PRYMEBLU Adapter or cellular phone have been paired together,
received signals will be heard over your PRYMEBLU headset’s earphone speaker. The volume of
received calls can be adjusted using the Volume Up / Volume Down buttons on the headset or
volume control on the two-way radio/phone.
When transmitting or on a phone call, the operator’s voice is picked-up by the microphone in the
PRYMEBLU headset.
When used with a PRYMEBLU radio adapter, Push-to-Talk can be activated one of several dierent ways:
• By pressing and holding the Multifunction button on the side of the PRYMEBLU Bluetooth Headset.
• By pressing and holding the Talk button on the PRYMEBLU Adapter.
• Using an optional wired PTT that is plugged into the PRYMEBLU Adapter.
• Using an optional PRYMEBLU Wireless Bluetooth PTT (model BT-PTT, sold separately). Note that if
you are using a PRYMEBLU BT-PTT, you will rst need to pair the adapter with the PTT using the
instructions located in the PRYMEBLU PTT User’s Guide.
When using the headset with a cellular phone, you can answer an incoming call or hang up a cell by
pressing the Multifunction button on the side of the PRYMEBLU Headset.
SUPPORT AND WARRANTY
PRYME Radio Products warrants this product against defects in materials or workmanship
for a period of 90 days from the date of retail purchase. PRYME will repair or replace a
defective unit, at our option, without charge for parts or labor. The limited warranty is
extended only to the original purchaser and is valid only to consumers in the United States
and Canada. It does not cover damage or failure caused by or attributable to Acts of God,
abuse, misuse, improper or abnormal usage, faulty installation, improper maintenance,
lightning, or other incidences of excessive voltage, or any tampering or repairs by other
than a PRYME authorized repair facility. It does not cover replacement of consumable parts,
transportation costs, or damage in transit.
Repair or replacement under the terms of this warranty does not extend the terms of this
warranty. This warranty can only be modied by an ocer of PRYME Radio Products, and
then only in writing. Should this product prove defective in workmanship or material, the
consumer’s sole remedies shall be such repair or replacement as provided by the terms of
this warranty. Under no circumstances shall PRYME Radio Products be liable for any loss or
damage, direct, consequential, or incidental, arising out of the use of or inability to use this
product. Some states do not allow limitations on how long an implied warranty lasts or the
exclusions or limitations of incidental or consequential damages, so the above limitations
or exclusions may not apply to you. This warranty gives you specic legal rights. You may
also have other rights, which may vary, from state to state.
For support or warranty service on your PRYME product, contact us at 1-800-666-2654 or
visit us on the web at www.PRYME.com/support/ › RMA Request
COPYRIGHT AND TRADEMARK INFO
© 2014 PRYME Radio Products, Brea CA. All rights reserved.
PRYME® and PRYMEBLU® are trademarks owned by PRYME Radio Products. All other
product or service names are the property of their respective owners.
DISCLAIMER: The Bluetooth wireless link used by PRYMEBLU products is an open standard,
unsecured technology. As such, it is not recommended for rst-responder or other mission
critical users.
MEANING
Charge mode
Charging is nished
Pairing mode
Headset is powered on but not paired
Headset is powered and paired
PTT is active
Battery is low
Device is powered o
LED INDICATION
Constant Red (while plugged into charger)
No indication (while plugged into charger
Flashes red-blue-red-blue repeatedly
Two blue ashes every two seconds
Three blue ashes every two seconds
Constant red (while Multifunction is pressed)
Repeated red ashes
No indication


