manuals.online logo
Brands
  1. Home
  2. •
  3. Brands
  4. •
  5. PSG
  6. •
  7. Water Pump
  8. •
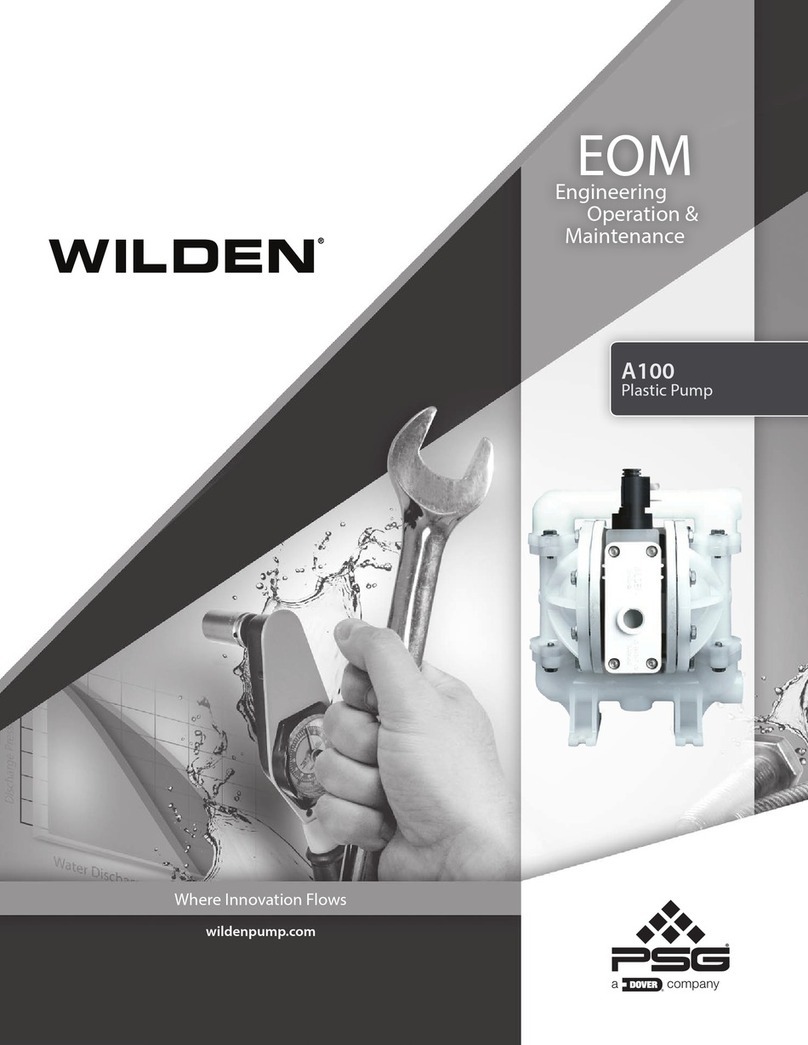
  9. PSG Wilden V150 Series Instruction Manual

PSG Wilden V150 Series Instruction Manual

PUMP DESIGNATION SYSTEM
CAUTIONS & WARNINGSBASIC TROUBLESHOOTINGSUGGESTED INSTALLATION
VELOCITY PLASTIC PUMP
PUMPTEMPERATURELIMITS:
PVDF and Polypropylene 4°C – 79°C (40°F - 175°F)
CAUTION: Maximum temperature limits are based upon mechanical
stress only. Certain chemicals will significantly reduce maximum
safe operating temperatures. Consult Chemical Resistance Guide for
chemical compatibility and temperature limits.
CAUTION: Do not exceed 6.9 bar (100 psig) air supply pressure.
CAUTION: Verify the chemical compatibility of the process and
cleaning fluid to the pump’s component materials in the Chemical
Resistance Guide.
CAUTION: Plastic series pumps are made from plastic that is not UV
stabilized. Direct sunlight exposure for prolonged periods can cause
deterioration of plastic.
CAUTION: V150 pumps are not submersible.
CAUTION: Always wear safety glasses when operating pump. If
diaphragm rupture occurs, fluid being pumped may be forced out
air exhaust
CAUTION: Before any maintenance or repair is attempted, the
compressed air line to the pump should be disconnected and all air
pressure allowed to bleed from the pump.
CAUTION: Ensure that the air supply line is clear of debris. Use of a
5μ (micron) in-line air filter is recommended.
LEGEND
V150 / XXX X X / XXX/XX/XXX/XXXX
O-RINGS
VALVE SEAT
MODEL
VALVE BALLS
DIAPHRAGMS
WETTED PARTS &
OUTER PISTON
AIR VALVE
CENTER SECTION
SPECIALTY
CODE
(if applicable)
V150 TPE-FITTED PERFORMANCE CURVE V150 PTFE-FITTED PERFORMANCE CURVE
V150 DRY SUCTION-LIFT CURVE
A150V 70/30 OPERATING CONDITIONA150V PERFORMANCE CURVE
Engineering
Operation &
Maintenance
Pump will not run or runs slowly:
1. Ensure the air inlet pressure is 0.3 bar (5 psig) above the start-up pressure of
the pump.
2. Ensure the differential pressure (difference between the air inlet pressure and
fluid discharge pressure) is not less than 0.7 bar (10 psig).
3. Check air line/filter for blockage/debris. Check for obstruction in the air
passageways of the pump.
4. Check for objects in the pump that would obstruct the movement of internal parts.
5. Check for severe air leakage (blow-by) coming from the air exhaust. This could
indicate a failed O-ring seal or worn air valve assembly.
6. Inspect for check valve failure. A worn check ball can get stuck in the seat. A check
ball can swell and become stuck if not compatible with fluid pumped. Replace if
necessary.
Pump runs but little or no product flows:
1. Check for cavitation. Confirm vacuum required to lift the fluid is not greater than
the vapor pressure of the fluid being pumped. Slow pump speed to allow viscous
fluids to flow into liquid chambers.
2. Ensure that the suction lift requirement is within the pump model’s capability.
3. Inspect for check valve failure. A worn check ball can get stuck in the seat. A check
ball can swell and become stuck if not compatible with fluid pumped. Replace if
necessary.
Air bubbles in pump discharge:
1. Check for ruptured diaphragm.
2. Check tightness of outer piston to shaft.
3. Check integrity of O-ring seals, especially intake side of manifold.
4. Ensure pipe connections are airtight.
Product comes out of air exhaust:
1. Check for ruptured diaphragm.
2. Check tightness of outer piston to shaft.
PUMP SELECTION: Ensure that pump materials of construction are compatible with the
pumping media and the immediate surroundings the pump will be subjected to. Refer to the
Wilden Chemical Resistance Guide. For optimum life and performance, the pump size should be
specified so that daily operation parameters are not near the pump’s maximum rated performance
capabilities.
INSTALLATION: The pump has two foot mount configurations and can be mounted in any
orientation. The pump can be mounted in place or left free standing for use in multiple locations.
If the pump is to be mounted in place, it is suggested to attach the foot to the desired surface
using 4 screws (not supplied) and then attach the pump to the foot using the 4 supplied #12 screws.
PIPING: The suction and discharge piping diameter should be equivalent or larger than the
diameter of pump connection, the length and complexity of the suction and discharge piping
should be minimized, unnecessary elbows, bends and fittings should be avoided, all in an effort
to reduce friction losses.
The suction hose must be non-collapsible. If rigid piping is used, it should be supported
independently of the pump. In addition, the piping should be aligned to avoid placing stress on
the pump fittings.
When used in self-priming applications, it is critical that all fittings and connections are airtight or
a reduction or loss of pump suction capability will result. Ensure that the suction lift requirement
is within the pump model’s capability.
AIR SUPPLY: Every pump should have an airline large enough to supply the volume of air
necessary to achieve the desired pumping rate. Air pressure to the pump should not exceed a
maximum of 6.9 bar (100 psig). For best results, the pumps should use a 5μ (micron) air filter to
eliminate air-line contaminants, a needle valve and pressure regulator.
SOLENOID CONTROL: When start-stop operation of a standard air valve equipped pump is
controlled by a solenoid valve in the air line, a three-way (3/2) solenoid valve should be used to
vent pressurized air between the solenoid and pump when the pump is stopped.
REMOTE SOLENOID OPERATION: When the remote solenoid option is being used, a five-
way (5/2) solenoid valve must be used to control the operation of the pump. Minimize the length of
tubing between the solenoid and the two pump inlets to improve pump performance.
PUMP OPERATION: Tighten all hardware to suggested torque specifications prior to initial
start-up. Once installation is complete, pump operation can be started by opening the air shut-off
valve (do not exceed the pump’s maximum rated pressure). The pressure regulator and needle
valve are used to adjust the speed of the pump.
Ship Weight ..........PVDF 3.7 kg (10 lb)
Polypropylene 3 kg (8 lb)
Air Inlet .......................... 13 mm (1/2”)
Inlet ................................ 13 mm (1/2”)
Outlet ............................. 13 mm (1/2”)
Suction Lift ...............5.1 m Dry (16.9’)
7.9 m Wet (26’)
Disp. per Stroke1....... 0.11 L (0.03 gal)
Max. Flow Rate ........64 lpm (17 gpm)
Max. Size Solids..........1.6 mm (1/16”)
1Displacement per stroke was
calculated at 4.8 bar (70 psig) air inlet
pressure against a 2.1 bar (30 psig)
head pressure.
Example: To pump 5.7 lpm (11.5 gpm)
against a discharge head of 2.8 bar
(40 psig) requires 5.5 bar (80 psig) and
23.8 Nm3/h (14 scfm) air consumption.
Caution: Do not exceed 6.9 bar (100
psig)air supplypressure.
Suction lift curves are created using pumps operating at 305 m (1000’) above sea level. This chart is meant to
be a guide only. There are many variables which can affect the pump’s operating characteristics. Suction lift
can be affected by the number of intake/discharge elbow, viscosity of pumping fluid, elevation (atmospheric
pressure), pipe friction losses and other factors.
Caution: Do not exceed 6.9 bar (100 psig) air supply pressure.
Flow rates indicated on chart were determined by pumping water.
For optimum life and performance, pumps should be specified so that daily operation
parameters will fall in the center of the pump’s performance curve.
Flow rates indicated on chart were determined by pumping water.
For optimum life and performance, pumps should be specified so that daily operation
parameters will fall in the center of the pump’s performance curve.
Flow rates indicated on chart were determined by pumping water.
For optimum life and performance, pumps should be specified so that daily operation
parameters will fall in the center of the pump’s performance curve.
DIAPHRAGMS
TSS = FULL-STROKE PTFE W/ SANIFLEX
BACK-UP O-RING
ZWS = WIL-FLEX™ [Santoprene®
(Three Black Dots)]
VALVE BALLS
TF = PTFE (White)
WF = WIL-FLEX™ [Santoprene®
(Three Black Dots)]
VALVE SEAT
K = KYNAR
P = POLYPROPYLENE
VALVE SEAT O-RING
TV = PTFE-ENCAP. FKM
WF = WIL-FLEX (Santoprene®)
SPECIALTY CODES
0150 Accu-Flo, 24V DC Coil
0151 Accu-Flo, 24V AC/12V Coil
0155 Accu-Flo, 110V AC Coil
MODEL
V150 = 13 mm (1/2”) VELOCITY
A150V = 13 mm (1/2”) ACCU-FLO™
WETTED PARTS & OUTER PISTON
KK = PVDF / PVDF
PP = POLYPROPYLENE / POLYPROPYLENE
AIR CHAMBER / CENTER BLOCK
PP = POLYPROPYLENE
AIR VALVE
A = ALUMINUM (ACCU-FLO Only)
E = PET
MATERIAL CODES
This curve demonstrates the flow created when the stroke rate is varied under static air and fluid pressure conditions.
This curve can be applied to different pressure conditions to estimate the change in flow due to stroke rate.
Ship Weight ..........PVDF 3.7 kg (10 lb)
Polypropylene 3 kg (8 lb)
Air Inlet .......................... 13 mm (1/2”)
Inlet ................................ 13 mm (1/2”)
Outlet ............................. 13 mm (1/2”)
Suction Lift ...............5.1 m Dry (16.9’)
7.9 m Wet (26’)
Disp. per Stroke1....... 0.11 L (0.03 gal)
Max. Flow Rate .....39 lpm (10.5 gpm)
Max. Size Solids..........1.6 mm (1/16”)
1Displacement per stroke was
calculated at 4.8 bar (70 psig) air inlet
pressure against a 2.1 bar (30 psig)
head pressure.
Example: To pump 18.9 lpm (5 gpm)
against a discharge head of 2.1 bar (30
psig) requires 4.1 bar (60 psig) and 8.4
Nm3/h (5 scfm) air consumption.
Caution: Do not exceed 6.9 bar (100
psig)air supplypressure.
Ship Weight ..........PVDF 3.7 kg (10 lb)
Polypropylene 3 kg (8 lb)
Air Inlet .......................... 13 mm (1/2”)
Inlet ................................ 13 mm (1/2”)
Outlet ............................. 13 mm (1/2”)
Suction Lift ..................4.8 m Dry (16’)
7.9 m Wet (26’)
Disp. per Stroke1....... 0.11 L (0.03 gal)
Max. Flow Rate ........64 lpm (17 gpm)
Max. Size Solids..........1.6 mm (1/16”)
1Displacement per stroke was
calculated at 4.8 bar (70 psig) air inlet
pressure against a 2.1 bar (30 psig)
head pressure.
Example: To pump 34 lpm (5.9 gpm)
against a discharge head of 4.8 bar
(70 psig) requires 5.5 bar (80 psig) and
15.3 Nm3/h (9 scfm) air consumption.
Caution: Do not exceed 6.9 bar (100
psig)air supplypressure.
WIL-41010-E-01 WIL-41010-E-01
WIL-41010-E-01WIL-41010-E-01WIL-41010-E-01
WIL-41010-E-01
WIL-41010-E-01WIL-41010-E-01
V150 PLASTIC - HORIZONTALV150 PLASTIC
A150V PL AST I C
MATERIAL
DIAPHRAGMS
(2)
DIAPHRAGM
BACK-UP
SEAL
(2)
POLY BALL
CHECK
CARTRIDGE
(4)
PVDF BALL
CHECK
CARTRIDGE
(4)
MANIFOLD
O-RINGS
(4)
PTFE
01-1044-55 01-9189-55 01-9188-55
Saniflex™
01-1074-56
Wil-Flex™
01-1044-58 01-9189-58 01-9188-58 02-1200-58-500
PTFE-Encapsulated FKM
02-1200-60-500
LW0481 Rev. D
PARTS LISTINGEXPLODED VIEW
DISASSEMBLY / REASSEMBLY ELASTOMER OPTIONS
DIMENSIONAL DRAWING
DIMENSIONAL DRAWING
DIMENSIONAL DRAWING
MAXIMUM TORQUE SPECIFICATIONS
ACCU-FLO™
ADAPTOR BLOCK
WARRANTY
22069 VAN BUREN STREET • GRANDTERRACE, CA 92313-5607
(909) 422-1700 • FAX (909) 783-3440
www.wildenpump.com
Item
Description Qty. V150
/PPPPE/…/P/N
A150V
/PPPPA/…/P/N
A150B
/PPPPP/…/P/N
V150
/KKPPE/…/P/N
A150V
/KKPPA/…/P/N
A150B
/KKPPP/…/P/N
AIR DISTRIBUTION COMPONENTS
1
Air Valve Assembly
1
1
01-2044-99 01-2044-99
Air Valve Assembly, Solenoid
2
1
01-2014-99 01-2014-99
Adapter Block
1
01-2154-20 01-2154-20
2
Gasket, Solenoid Valve
1
01-2640-56 01-2640-56
3
O-Ring, Shaft ((-208, Ø.609” x Ø.139”)
2
01-3214-50
4
Screw, Pan Head Torx, (#6-19 PLST x 1 1/4")
4
01-6134-03 01-6134-03
5
Center Section Assembly, Air Valve
3
1
01-3171-20 01-3171-20
Center Section Assembly, Accu-Flo
™4,5
1
01-3169-20 01-3169-20
6
Retaining Ring
1
01-2644-09 01-2644-09
7
Coil, 24V DC
1
00-2110-99-150 00-2110-99-150
Coil, 24V AC / 12V DC
1
00-2110-99-151 00-2110-99-151
Coil, 110V AC
1
00-2110-99-155 00-2110-99-155
8
Connector, Solenoid
1
00-2130-99 00-2130-99
9
Fitting, Push-in 1/4" Air
2
00-2170-20 00-2170-20
10
Muffler Element
1
01-3244-26 01-3244-26
11
Muffler Frame
1
01-3184-20 01-3184-20
12
Screw, Hex Washer Head Tri-Lobe (#12-11 x 7/8")
4
01-6114-03 01-6114-03
13
Bushing, Reducer (1/2” NPT to 1/4” NPT)
1
01-6950-20 01-6950-20
14
Muffler, 3/8" MNPT
2
95-3240-07 95-3240-07
WETTED PATH COMPONENTS
15
Liquid Chamber
2
01-5014-20 01-5014-21
16
Manifold, Four Port, 1/2" (NPT)
1
01-5164-20 01-5164-21
17
Manifold Pipe Plug 1/2" (NPT)
2
01-7010-20 01-7010-21
18
T-Nut, 1/4"-20
22
01-6544-03
19
Screw, Hex Washer Head (1/4"-20 x 1-3/4")
22
01-6185-03
BALL CHECK CARTRIDGE /MANIFOLD O-RINGS
20
Ball Check Cartridge
4
* *
21
Manifold O-Ring, TPE Fitted (Ø1.421 x Ø.139")
4
* *
Manifold O-Ring, PTFE Fitted (-221, Ø1.424 x Ø.139")
4
* *
FULL-STROKE RUBBER / TPE / PTFE COMPONENTS
22
Shaft
1
01-3849-03
23
Shaft Stud, 5/16"-18 X 1-1/2"
2
01-6154-03
24
Piston, Inner
2
01-3740-20
25
Diaphragm, Back-Up Seal PTFE only
2
*
26
Diaphragm, Primary
2
*
27
Piston, Outer
2
01-4640-20 01-4640-21
REMOVABLE FOOT COMPONENTS
28
Base, Removable Assembly6
1
00-5540-99
12
Screw, Hex Washer Head Tri-Lobe (#12-11 x 7/8")
4
00-6124-03
* See Elastomer Chart - Section 9
1Air Valve Assembly includes item
6 and 10.
2
Accu-Flo™ Air Valve Assembly
includes items 2 and 14.
3Air Valve Center Section Assembly
includes items 1, 6, 10, 11, 12 and 13.
4Accu-Flo™ Center Section Assembly
includes items 1, 2, 3, 4 and 14.
5Adapter Block Center Section Assembly
includes items 1, 2, 3, 4 and 9.
6Removable Base Assembly
includes item 12.
All boldface items are
primary wear parts.
ALL CIRCLED PART IDENTIFIERS ARE INCLUDED IN REPAIR KITS
DIMENSIONS
ITEM METRIC
(mm) STANDARD
(inch)
A 178 7.0
B 45 1.8
C 181 7.1
D 243 9.6
E 83 3.3
F 71 2.8
G 71 2.8
H 190 7.5
J 146 5.8
K 79 3.1
L 114 4.5
M 127 5.0
N 152 6.0
P 8 0.3
R 8 0.3
LW0477 REV. B
DIMENSIONS
ITEM METRIC
(mm) STANDARD
(inch)
A178 7.0
B 36 1.4
C 79 3.1
D 135 5.3
E 178 7.0
F 202 8.0
G 190 7.5
H 103 4.0
J 33 1.3
K 145 5.7
L 240 9.4
M 146 5.8
N 79 3.1
P 114 4.5
R 127 5.0
S 152 6.0
T 8 0.3
U 8 0.3
LW0478 REV. B
VELOCITY MAXIMUM TORQUE SPECIFICATIONS
Description of Part Torque
Liquid Chamber – Center Section 6.8 N•m (60 in-lb)
Outer Piston 12.4 N•m (110 in-lb)
Solenoid - Air Valve Assembly (#6) 2.3 N•m (20 in-lb)
Tools Required:
• 5/16” Socket Wrench
• 3/8” Socket Wrench
• Snap-Ring Pliers
CAUTION: Before any maintenance or repair is attempted, the
compressed air line to the pump should be disconnected and all air
pressure allowed to bleed from the pump.
1. Insert air valve assembly (item 1) into
center section (item 5) until fully seated.
Install retaining ring (item 6) in groove in
center section air valve bore.
2. For PTFE fitted pumps, install back-up
seals (item 24) on to surfaces of center
section (item 5).
3. Slide inner pistons (item 23) on to ends
of shaft.
4. Slide diaphragms (item 25) on to ends
of shaft.
5. Install outer pistons on to ends of
shaft (item 26). Tighten to specified
torque (110 lb-in). Over-tightening
could damage outer piston. Use of
removable, thread-locking compound is
recommended.
6. IInstall four (4) ball check cartridges
(item 19) into manifold (item 15).
NOTE: cartridges must be installed in correct orientation. Align grooves on cartridge with ribs in
manifold. Cartridge will be flush with end of the manifold if installed correctly.
7. Install four (4) manifold O-rings (item 20) on to ends of manifold (item 15).
8. Place upper screw boss in manifold (item 15) in between the flanges at the bottom of the center section
(item 5). Ensure t-nuts (item 17) are properly inserted into manifold screw bosses.
9. Place center section-manifold assembly between two liquid chambers (item 14), taking care to align the
large bore on liquid chamber over the diaphragm and the two small bores over the manifold.
10. Place in vise and carefully press assembly together. Take care not to pinch or damage sealing O-rings.
If a large enough vise is not available, the pump fasteners can be used to join the assembly together. A
“cross-pattern” tightening procedure must be used to gradually bring the assembly together.
11. Fasten liquid chambers (item 14) to center section (item 5) and manifold (item 15) using 22 ¼-20 screws
(item 10). Tighten fasteners to specified torque (60 lb-in). Over-tightening fasteners could damage
center section or manifold.
12. Press muffler element (item 9) into muffler frame (item 10) and install the assembly into the muffler
cavity (opposite the air inlet) of center section (item 5). Fasten with 4 #12 screws (item 11).
13. There are two mounting options for the base assembly (item 27). Install 4 #12 screws (item 12) into the
locations shown in the graphic on both sides of the pump.
14. Install one (1) pipe plug (item 16) into one (1) inlet port of the manifold (item 15). Install one (1) pipe plug
into one (1) discharge port on manifold.
LW0480 REV. B LW0481 REV. D
ITEM METRIC
(mm) STANDARD
(inch)
A178 7.0
B 45 1.8
C 148 5.8
D 199 7.8
E 256 10.1
F 3 0.1
G 127 5.0
H 89 3.5
J 71 2.8
K 71 2.8
ITEM METRIC
(mm) STANDARD
(inch)
L 113 4.5
M 146 5.8
N 241 9.5
P 146 5.8
R 79 3.1
S 114 4.5
T 127 5.0
U 152 6.0
V 8 0.3
W 8 0.3
LW0479 REV. B
DIMENSIONS
Each and every product manufactured by Wilden Pump & Engineering, LLC is built
to meet the highest standards of quality. Every pump is functionally tested to insure
integrity of operation. Wilden Pump & Engineering, LLC warrants that pumps,
accessories and parts manufactured or supplied by it to be free from defects in
material and workmanship for a period of five (5) years from date of installation or
six (6) years from date of manufacture, whichever comes first. Failure due to normal
wear, misapplication, or abuse is, of course, excluded from this warranty. Since
the use of Wilden pumps and parts is beyond our control, we cannot guarantee
the suitability of any pump or part for a particular application and Wilden Pump
& Engineering, LLC shall not be liable for any consequential damage or expense
arising from the use or misuse of its products on any application. Responsibility
is limited solely to replacement or repair of defective Wilden Pump & Engineering,
LLC. All decisions as to the cause of failure are the sole determination of Wilden
Pump & Engineering, LLC. Prior approval must be obtained from Wilden for
return of any items for warranty consideration and must be accompanied by the
appropriate MSDS for the product(s) involved. A Return Goods Tag, obtained from
an authorized Wilden distributor, must be included with the items which must be
shipped freight prepaid. The foregoing warranty is exclusive and in lieu of all other
warranties expressed or implied (whether written or oral) including all implied
warranties of merchantability and fitness for any particular purpose. No distributor
or other person is authorized to assume any liability or obligation for Wilden Pump
& Engineering, LLC other than expressly provided herein.
WIL-41010-E-01 WIL-41010-E-01
WIL-41010-E-01
WIL-41010-E-01
WIL-41010-E-01WIL-41010-E-01
WIL-41010-E-01
WIL-41010-E-01
This manual suits for next models

1
Other PSG Water Pump manuals

PSG Wilden PS220 Series Instruction Manual

PSG

PSG Wilden PS220 Series Instruction Manual

PSG Wilden P1500 Series Instruction Manual

PSG

PSG Wilden P1500 Series Instruction Manual

PSG WILDEN GPS1 Instruction Manual

PSG

PSG WILDEN GPS1 Instruction Manual

PSG Wilden PS Stallion Series Instruction Manual

PSG

PSG Wilden PS Stallion Series Instruction Manual

PSG Wilden P8 Series Instruction Manual

PSG

PSG Wilden P8 Series Instruction Manual

PSG Wilden PS4 Saniflo Hygienic Series Instruction Manual

PSG

PSG Wilden PS4 Saniflo Hygienic Series Instruction Manual

PSG Wilden P1 Series Instruction Manual

PSG

PSG Wilden P1 Series Instruction Manual

PSG Wilden H1500 Saniflo HS Series Instruction Manual

PSG

PSG Wilden H1500 Saniflo HS Series Instruction Manual

PSG Mouvex CC20 General instructions

PSG

PSG Mouvex CC20 General instructions

PSG MOUVEX S6C Owner's manual

PSG

PSG MOUVEX S6C Owner's manual

PSG Wilden HS430S Series Instruction Manual

PSG

PSG Wilden HS430S Series Instruction Manual

PSG Wilden Original T20 Series Instruction Manual

PSG

PSG Wilden Original T20 Series Instruction Manual

PSG Wilden PS Brahma Series Instruction Manual

PSG

PSG Wilden PS Brahma Series Instruction Manual

PSG Wilden V2550 Series Instruction Manual

PSG

PSG Wilden V2550 Series Instruction Manual

PSG Wilden PS1500 Series Instruction Manual

PSG

PSG Wilden PS1500 Series Instruction Manual

PSG Wilden P220 Series Instruction Manual

PSG

PSG Wilden P220 Series Instruction Manual

PSG Wilden P4 Series Instruction Manual

PSG

PSG Wilden P4 Series Instruction Manual

PSG Wilden P200 Instruction Manual

PSG

PSG Wilden P200 Instruction Manual

PSG Wilden A100 Series Instruction Manual

PSG

PSG Wilden A100 Series Instruction Manual

PSG Wilden P420 Series Instruction Manual

PSG

PSG Wilden P420 Series Instruction Manual

Popular Water Pump manuals by other brands

DRENO Compatta PRO Series User and maintenance manual

DRENO

DRENO Compatta PRO Series User and maintenance manual

T-MAG AMX Series Engineering, operation & maintenance

T-MAG

T-MAG AMX Series Engineering, operation & maintenance

T.I.P. EXTREMA 600/14 CX Translation of original operating instructions

T.I.P.

T.I.P. EXTREMA 600/14 CX Translation of original operating instructions

Rose electronics AIRIK DF owner's manual

Rose electronics

Rose electronics AIRIK DF owner's manual

KSB Amarex Installation & operating manual

KSB

KSB Amarex Installation & operating manual

Neptun NCTP-E 25 Original operating instructions

Neptun

Neptun NCTP-E 25 Original operating instructions

Grundfos UPS 25 Assembly instructions

Grundfos

Grundfos UPS 25 Assembly instructions

Clean Water J-PRO-22 Installation & start?up guide

Clean Water

Clean Water J-PRO-22 Installation & start?up guide

JABSCO 59510-Series manual

JABSCO

JABSCO 59510-Series manual

Siccom mini FLOWATCH 1 EVO manual

Siccom

Siccom mini FLOWATCH 1 EVO manual

EBARA DML instruction manual

EBARA

EBARA DML instruction manual

Polygroup SUMMER WAVES CP2000-C owner's manual

Polygroup

Polygroup SUMMER WAVES CP2000-C owner's manual

ProMinent mikro delta operating instructions

ProMinent

ProMinent mikro delta operating instructions

Salvatore Robuschi RN operating instructions

Salvatore Robuschi

Salvatore Robuschi RN operating instructions

RODEX RDX871 instruction manual

RODEX

RODEX RDX871 instruction manual

JBM 53645 instruction manual

JBM

JBM 53645 instruction manual

Advance acoustic 4000 Installation and service manual

Advance acoustic

Advance acoustic 4000 Installation and service manual

Becker U 4.190 operating instructions

Becker

Becker U 4.190 operating instructions

manuals.online logo
manuals.online logoBrands
  • About & Mission
  • Contact us
  • Privacy Policy
  • Terms and Conditions

Copyright 2025 Manuals.Online. All Rights Reserved.